French
  English
  German
  Spanish
  Italian
  Danish
  Portuguese
  Swedish
  Polish
  Korean
  Japanese
 Comment créer une page d'archive WooCommerce avec ShopEngine #
Pages d'archives WooCommerce sont amenés à organiser une liste de produits sous un prix spécifique, une couleur de catégorie, une étiquette, etc. Vous en obtiendrez ici quelques-uns spécifiés Archives du moteur de boutique Widgets incluant la catégorie, Titre de l'archive, Nombre d'archives, Produits d'archives., Filtres de produits, etc.. À l'aide de ces widgets, vous pouvez facilement organiser votre page d'archives comme vous le souhaitez.
Suivez simplement le processus étape par étape pour créer et embellir votre page d'archives :
Étape 1 : Créer un modèle d'archive #
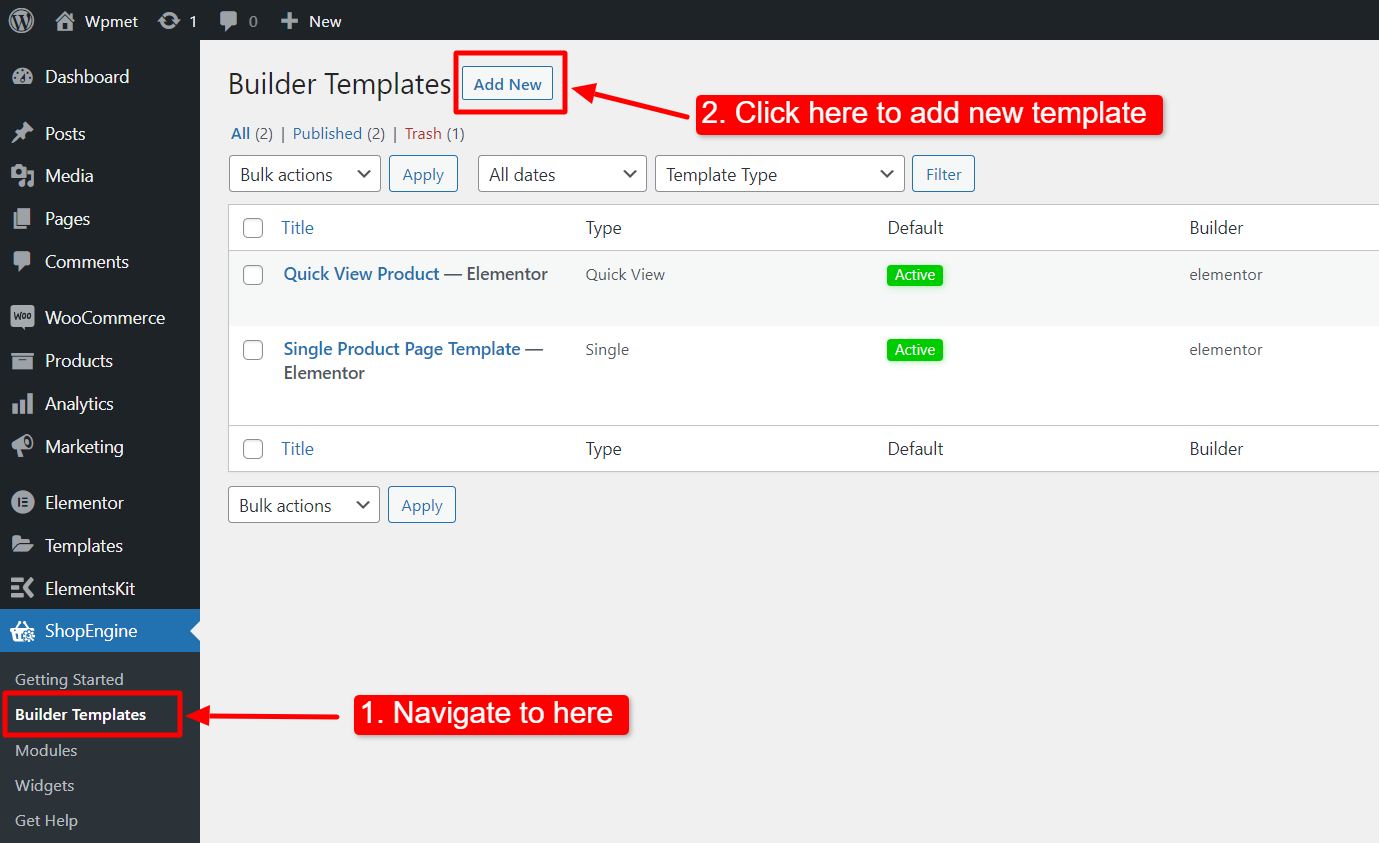
- Aller vers Moteur de boutique-> Modèles depuis votre tableau de bord WordPress.
- Clique sur le Ajouter un nouveau bouton pour créer un nouveau modèle.
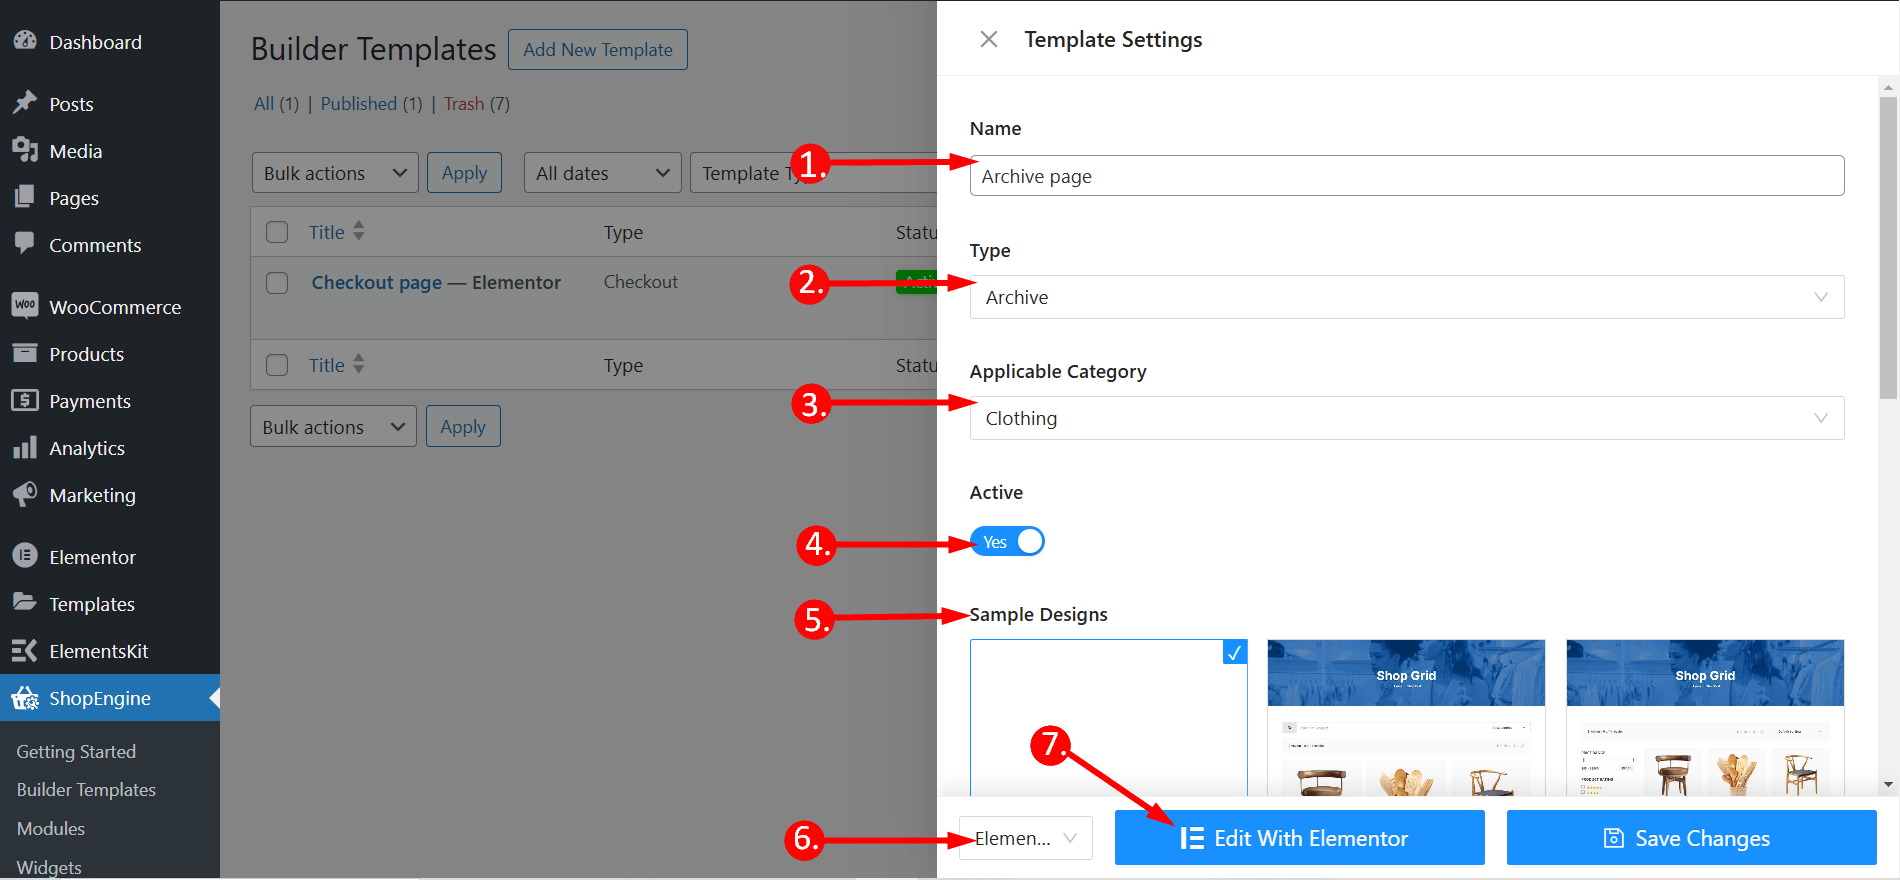
Après cela, une fenêtre hors canevas apparaîtra pour les paramètres du modèle. Dans les paramètres du modèle,
- Entrez un Nom du modèle.
- Définissez le type de modèle : Archive.
- Sélectionnez un Catégorie applicable pour les produits. (Facultatif. Cependant, si vous choisissez une catégorie, vous devez créer un autre modèle pour les produits généraux ainsi que pour les produits d'autres catégories).
- Activer Définir par defaut pour définir le modèle comme Défaut.
- Sélectionnez un motif dans modèles disponibles ou créer un dessin par vous-même à l'aide de widgets de page produit unique. Nous montrerons le modèle créé à partir de zéro.
- Choisissez l'éditeur que vous souhaitez utiliser pour modifier le modèle parmi les options proposées : Élémentor et Gutenberg.
- Cliquez maintenant sur Edit with Elementor/Gutenberg or Save changes.
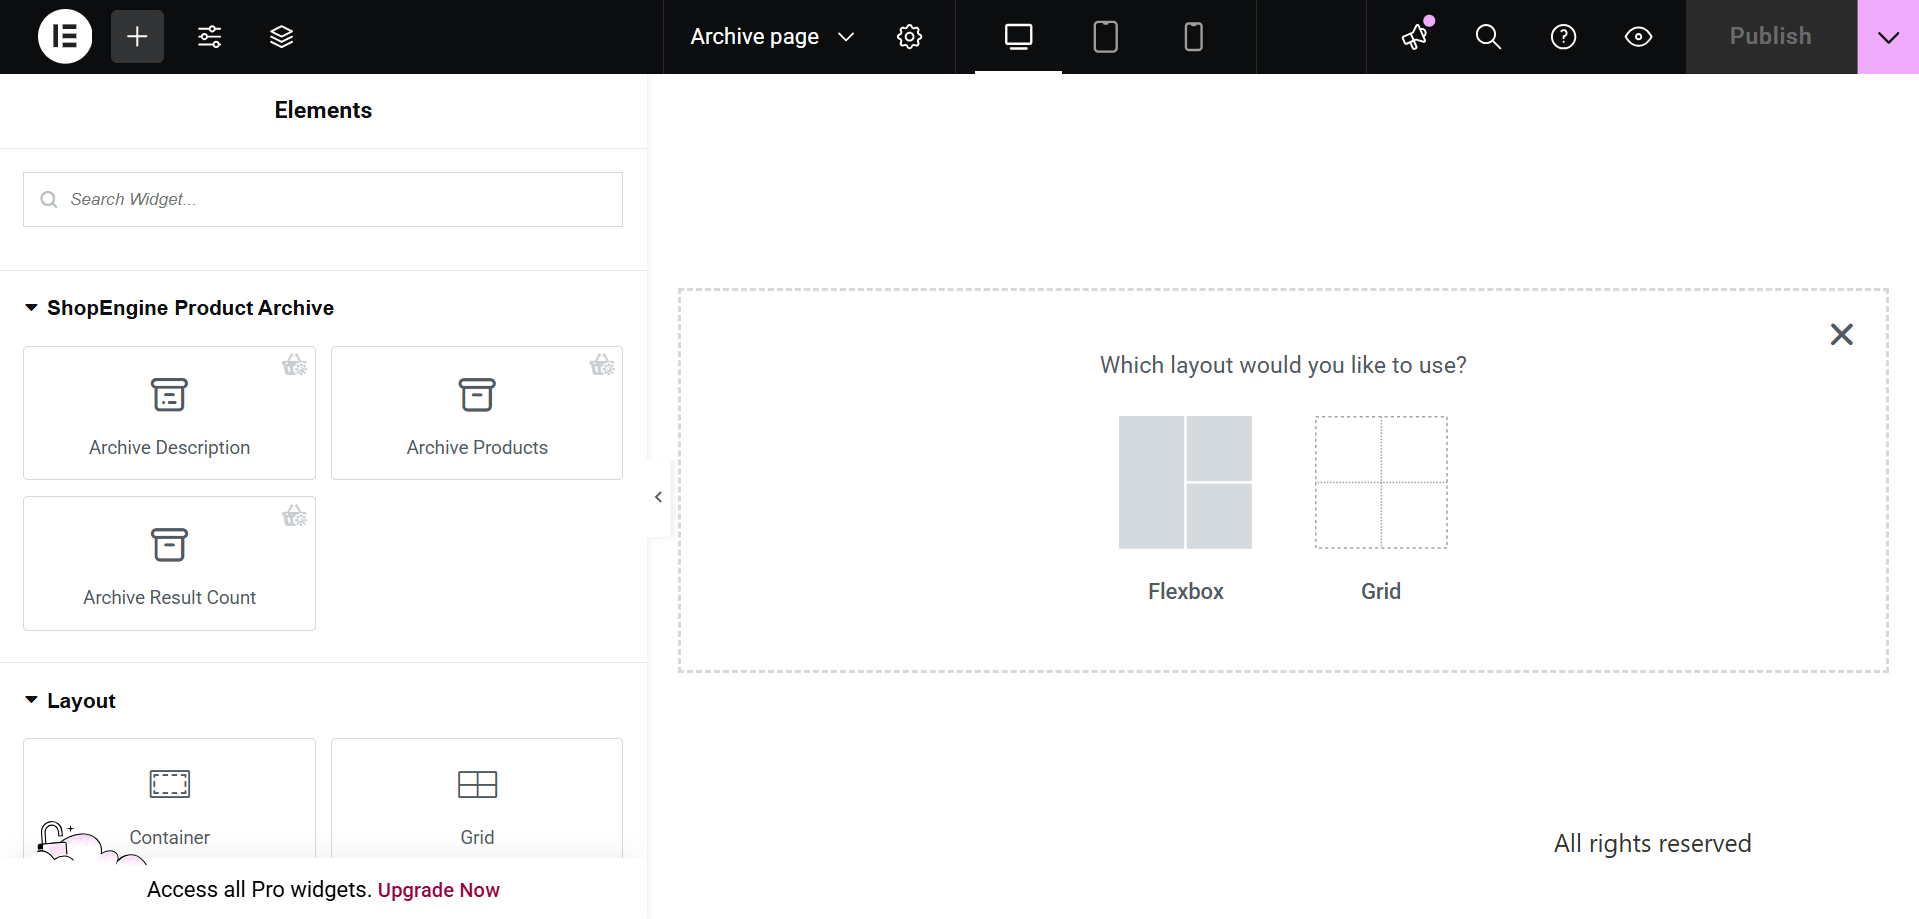
Étape 2 : Choisissez une structure #
- Choisissez votre structure dans la zone sélectionnée.
Étape 3 : Concevez votre page d'archive WooCommerce avec les widgets d'archive ShopEngine #
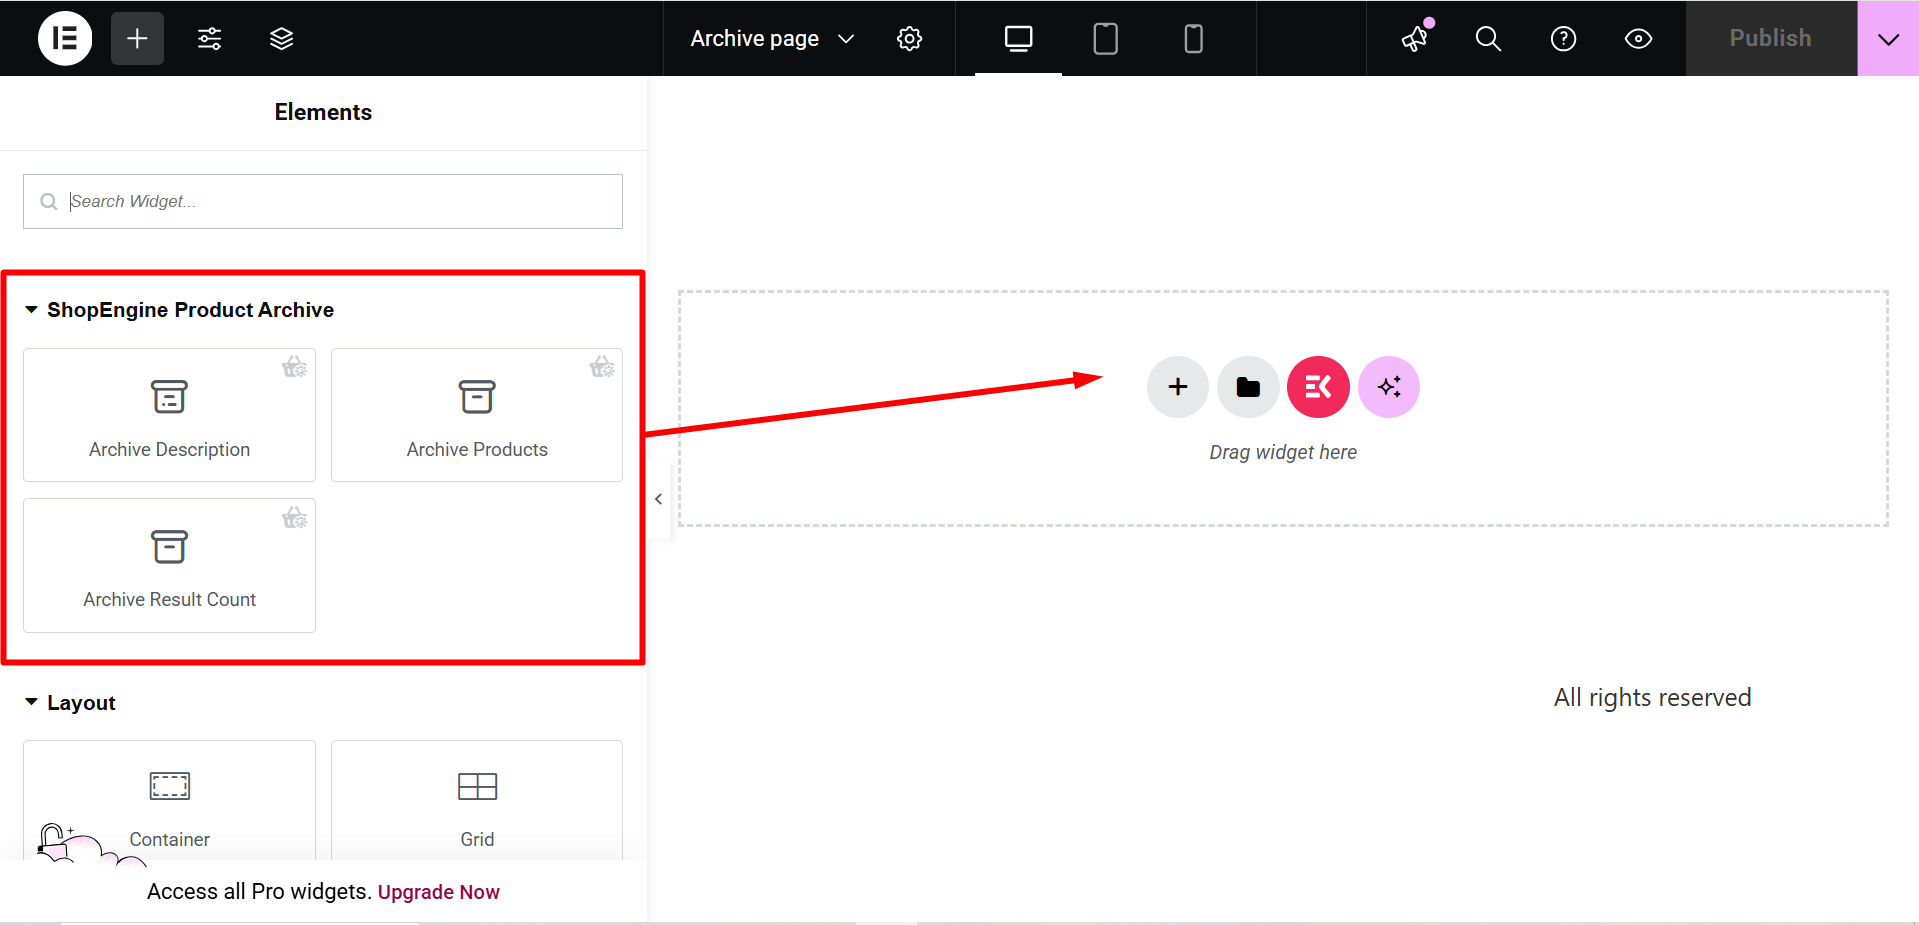
Accédez à un bloc ShopEngine et vous pourrez concevoir le vôtre. Ici, vous en obtiendrez quelques-uns spécifiés Archives du moteur de boutique Widgets incluant la catégorie, Titre de l'archive, Nombre d'archives, Produits d'archives, etc.. Voyons comment les personnaliser :
Maintenant, faites simplement glisser les widgets suivants et déposez-les sur la zone sélectionnée.
- Catégorie.
- Titre des archives.
- Nombre d'archives.
- Produits d'archives.
Étape 4 : Publiez votre page d'archives #
- Une fois la conception terminée, cliquez sur Mise à jour.
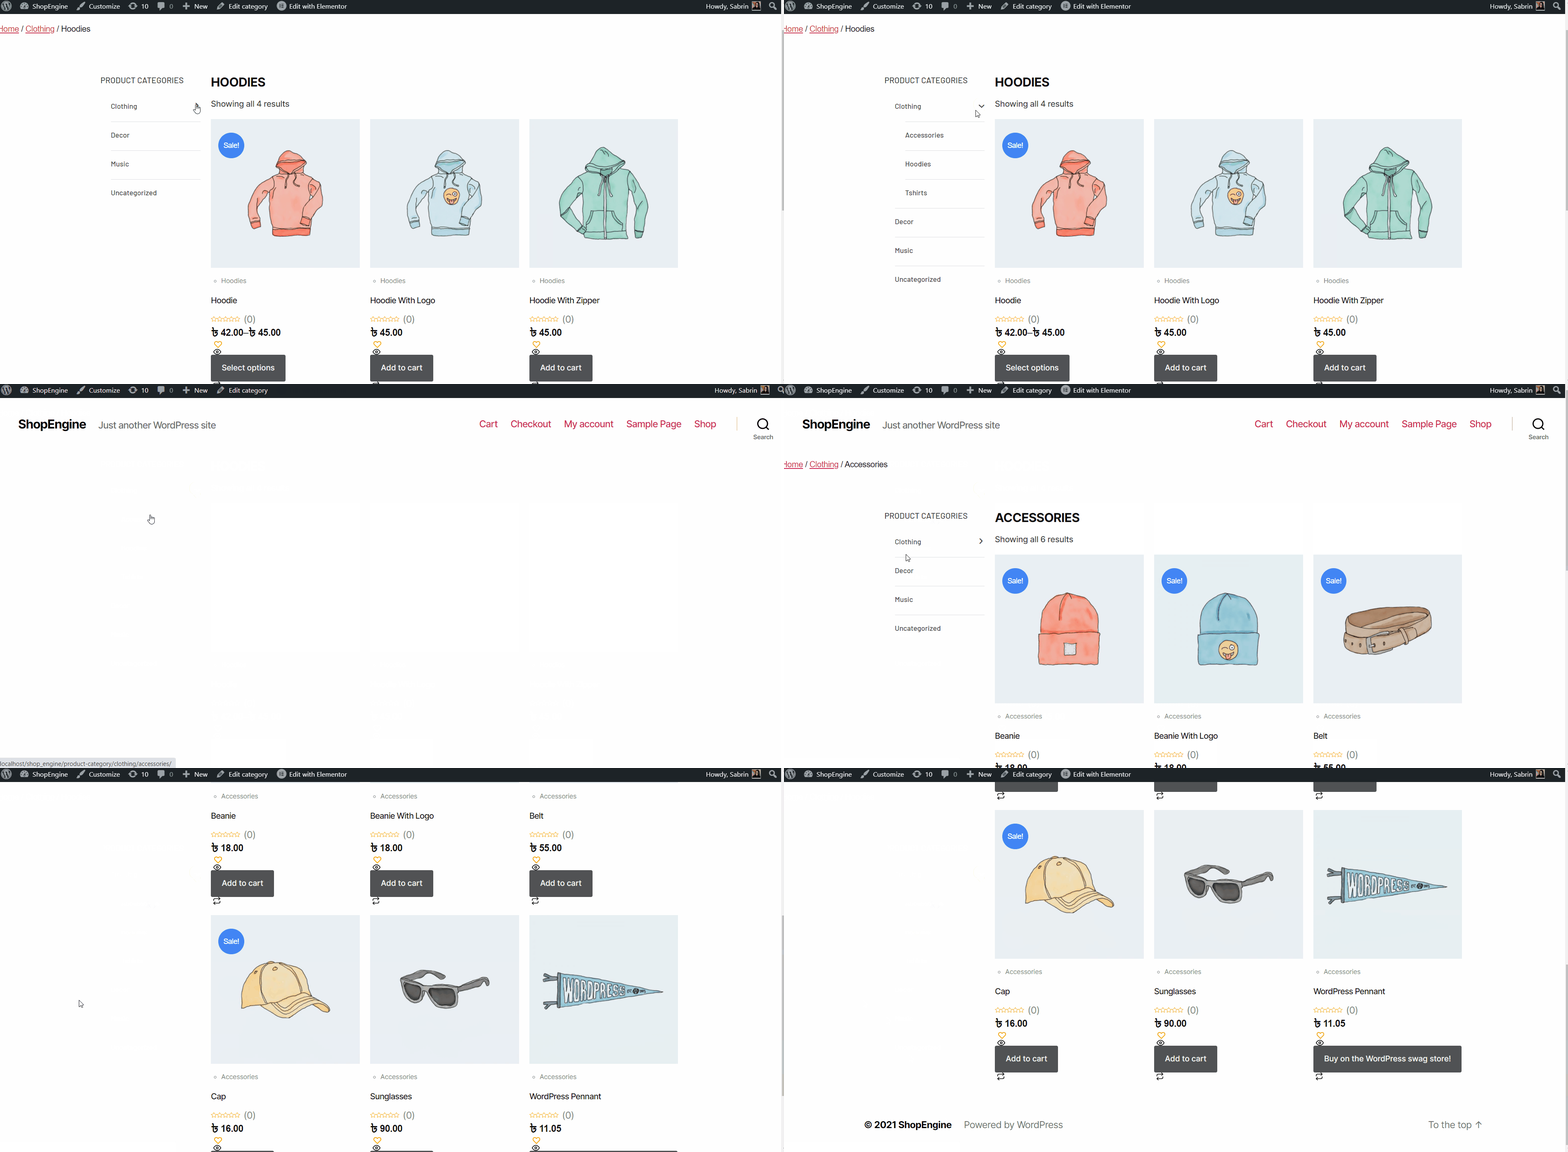
Visualisez maintenant le Page d'archives depuis l'avant. Là, vous pouvez voir la page d'archives que vous avez conçue et vérifier que toutes les fonctionnalités de la page fonctionnent parfaitement.