


ShopEngine’s WooCommerce multistep checkout module makes it easy to split the checkout steps. As a result, your customers will find it convenient to complete the checkout process. It is highly modifiable that you can give the very best experience to your customers.
Quick Overview
This documentation will guide you to add WooCommerce multistep checkout with a template. ShopEngine allows you to create multi-step checkout with its dedicated module and templates. It’s a premium feature so you will need both ShopEngine free and pro plans.
Needed solutions: Elementor (free), WooCommerce (free), & ShopEngine (free & pro)
Besides, you will need two more free solutions mentioned above. After setting up those plugins on your WordPress dashboard, take the following attempts:
✅ Enable multi-step checkout module.
✅ Select multi-step checkout template.
✅ Customize the template
Also, you can create multi-step checkout page from scratch by selecting the blank template.
How to Integrate WooCommerce Multistep Checkout with ShopEngine? #
Follow the following steps to integrate the multistep checkout for WooCommerce.
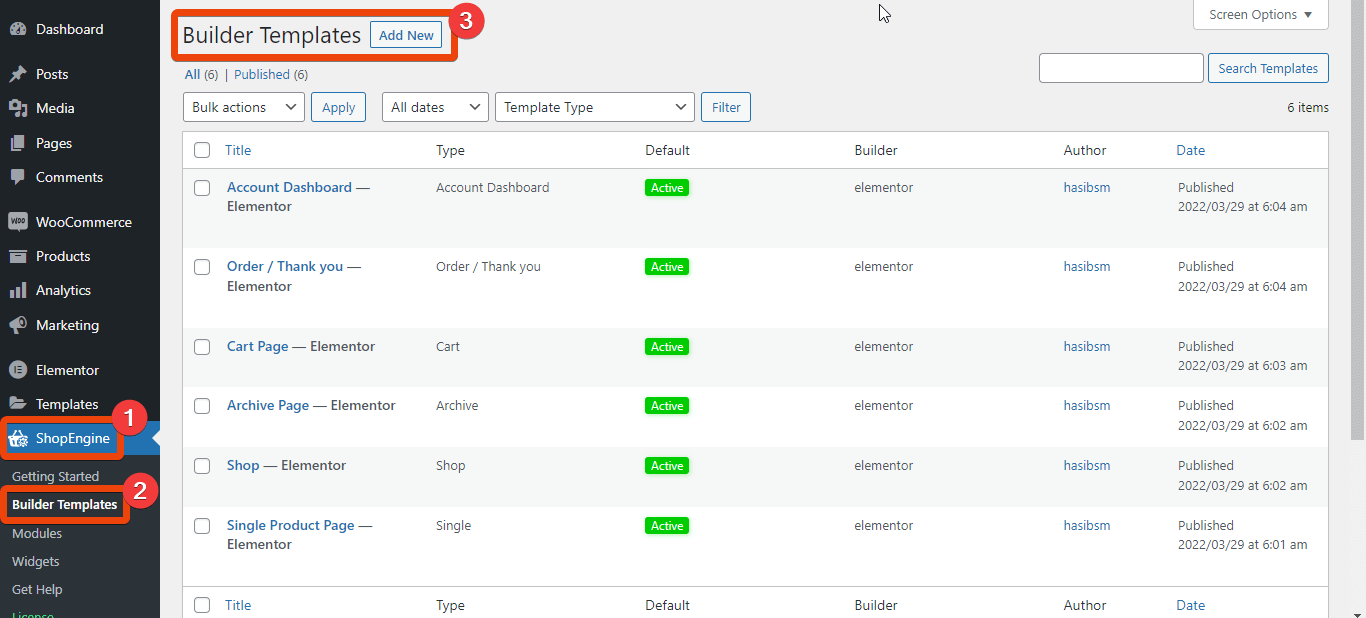
Step 1: Go to WordPress Dashboard > ShopEngine > Modules
From the module list, turn on the ‘Multistep Checkout’ module.
Now go to ShopEngine > Builder Templates. Now choose ‘Add New’.
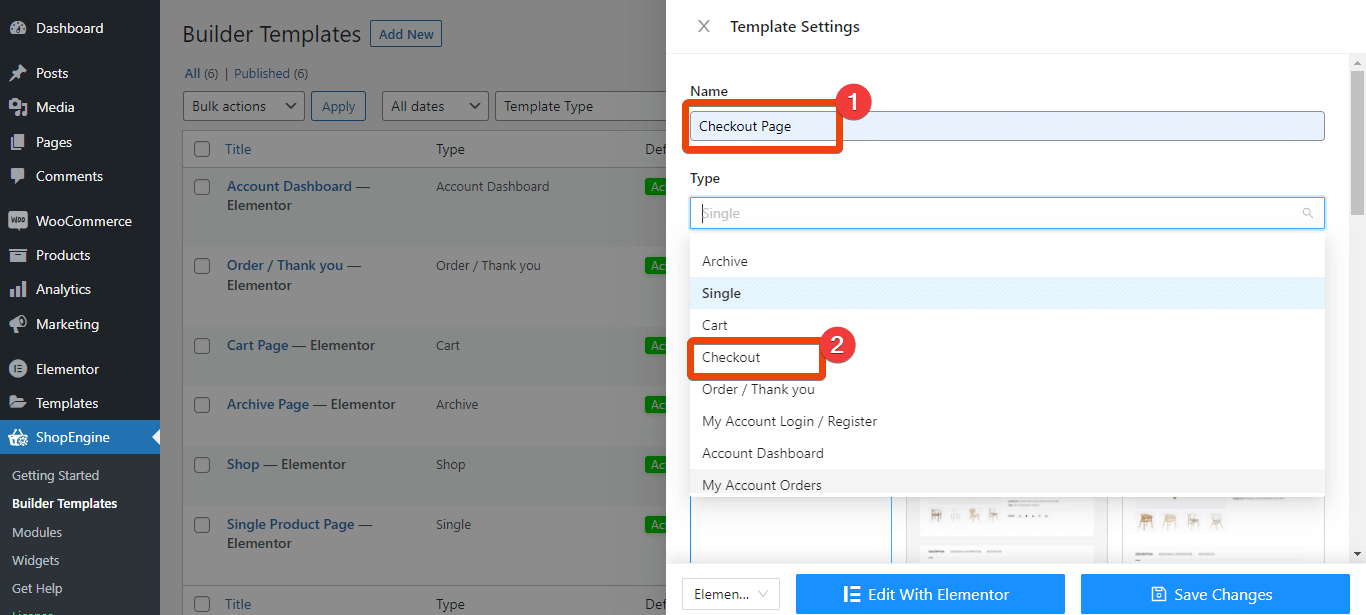
You will see all the ready templates of ShopEngine. Now select ‘Checkout’ from the list and give the template page a name.
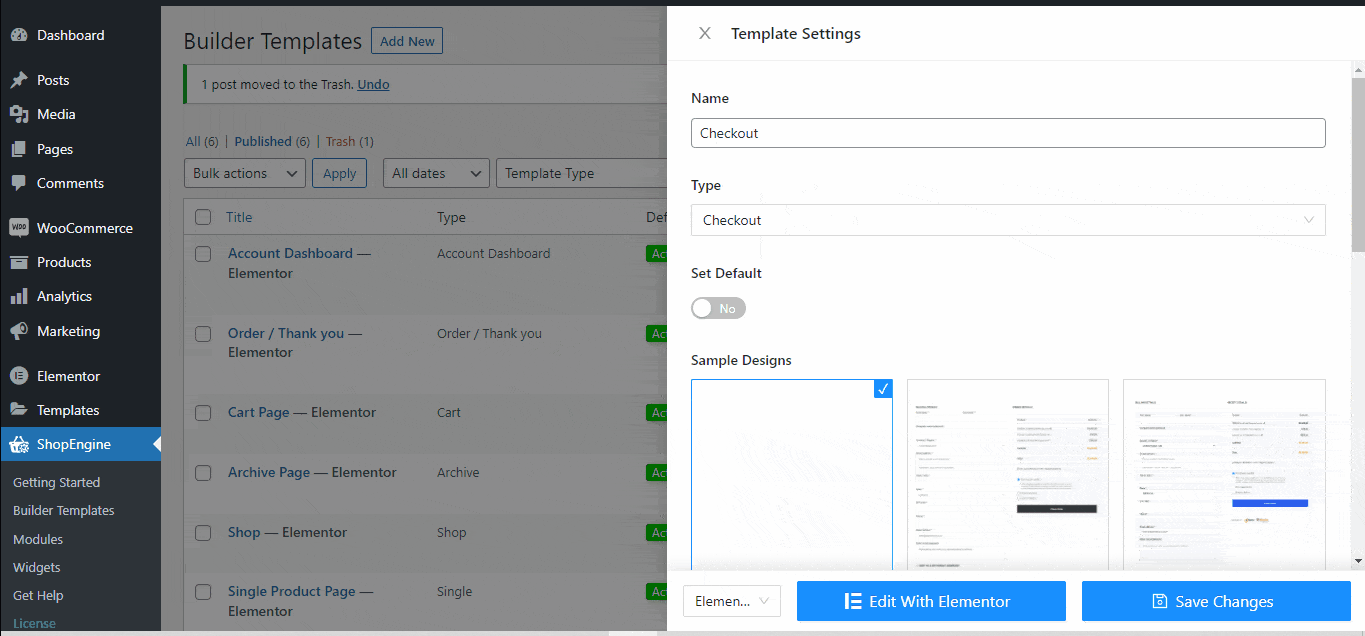
You will see multiple layouts for the checkout. As your goal is setting the multistep checkout so choose the multistep ready template layout from the list. Select the template as default to activate it.
Now, if your customer adds products to the cart and goes to checkout, he will see multiple steps to complete the checkout.
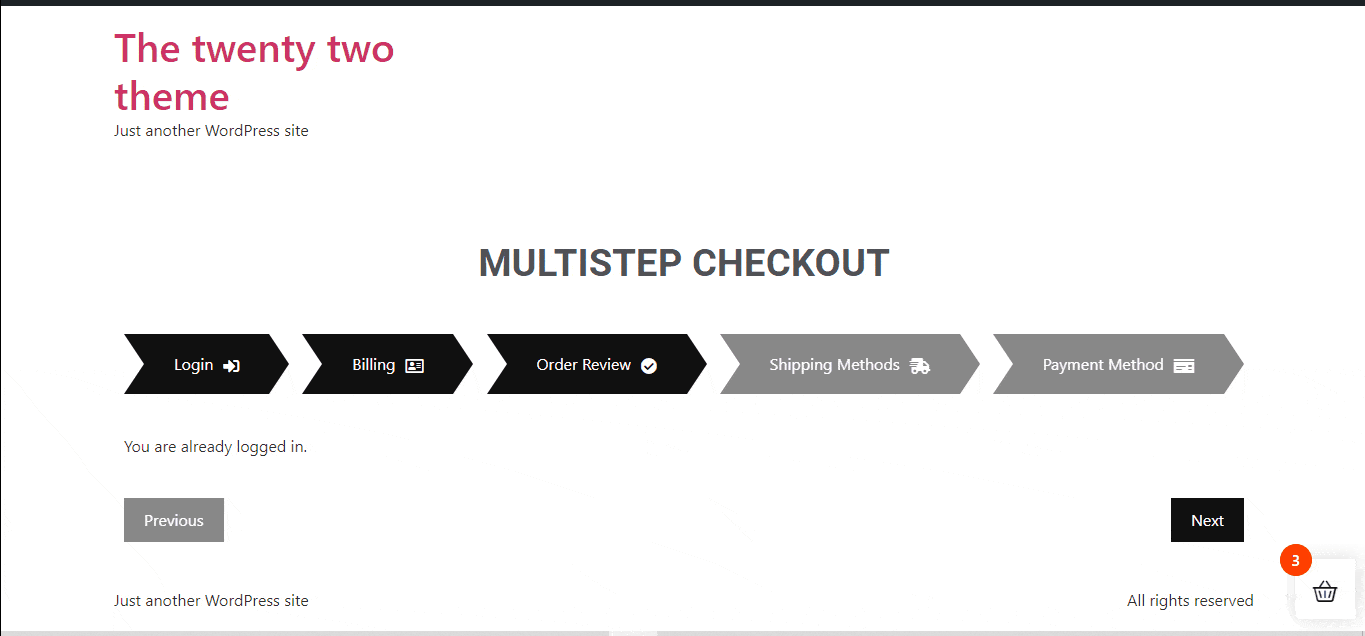
You can customize each of the sections of this ready template.
However, you can create the multistep checkout from scratch as well.
For custom multistep checkout, choose an empty template instead of the ready one from the template list of checkout. Save the changes.

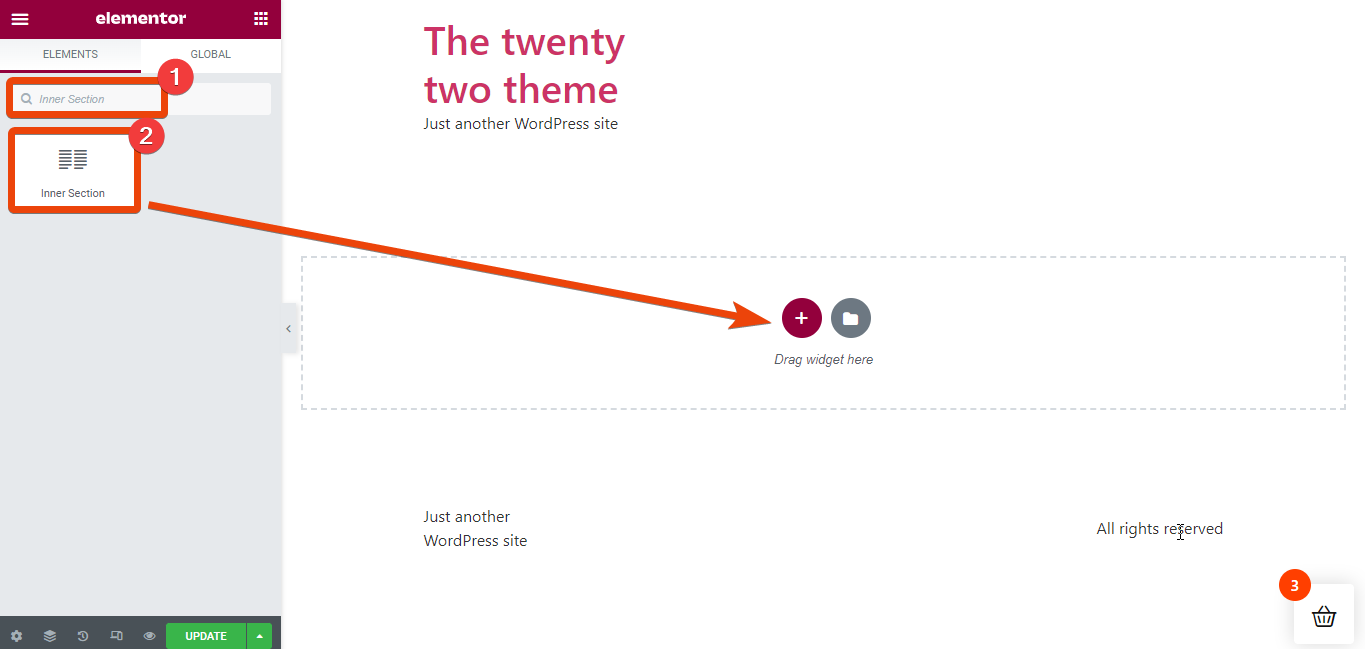
Now choose ‘Edit with Elementor’. Create a new section on the page.
Go to the widget library and search for ‘Inner section’. Drag and drop the inner section on the page. You can then add any step in the inner section area.
Suppose you want to add billing, order review, and payment option steps for the WooCommerce multistep checkout page. In the widget library, search for ‘Checkout Form Billing’ widget and it will appear.
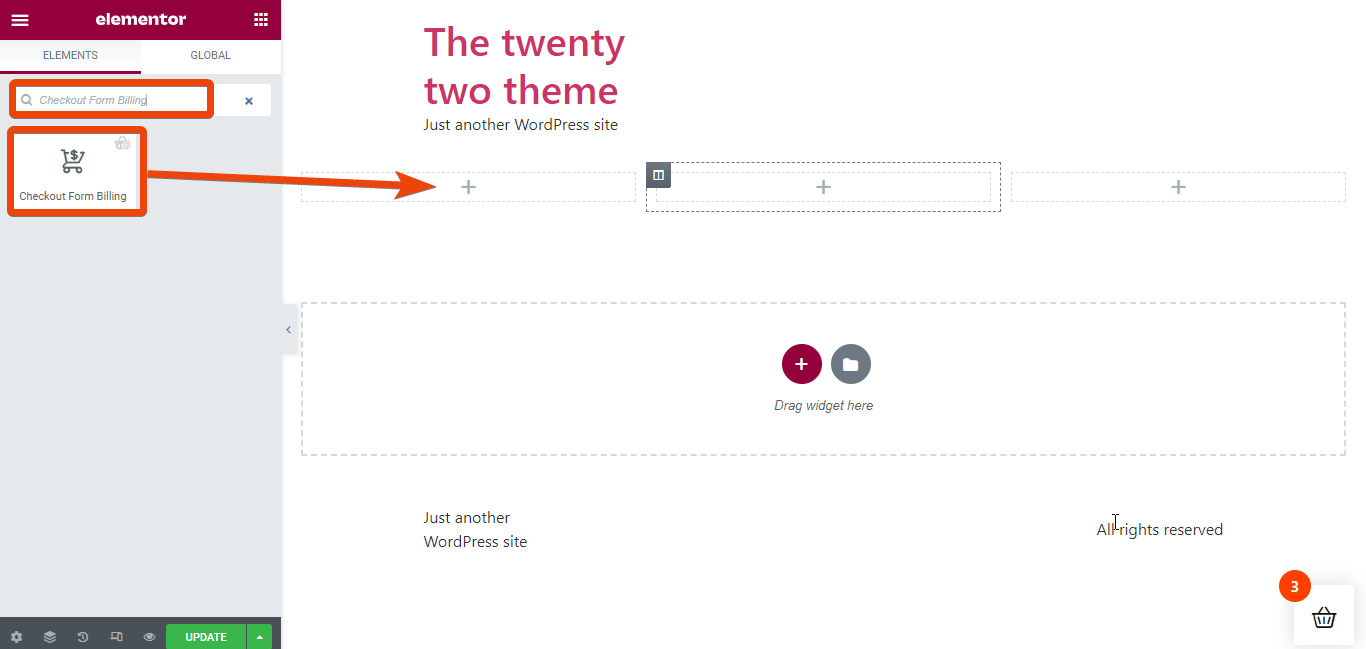
Drag and drop the widget inside the inner section.
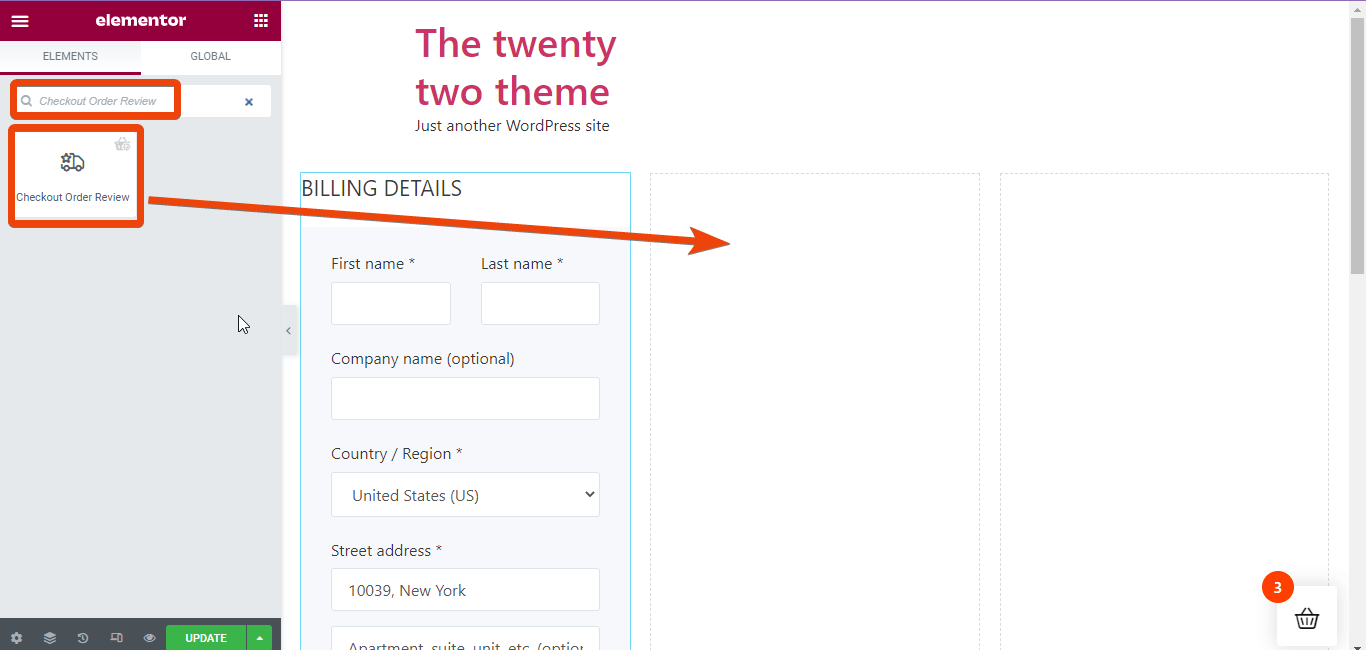
Similarly, add the ‘Checkout Order Review’. Search for the widget and drag and drop the widget.
Again, search for ‘Checkout Payment’ widgets on the page.
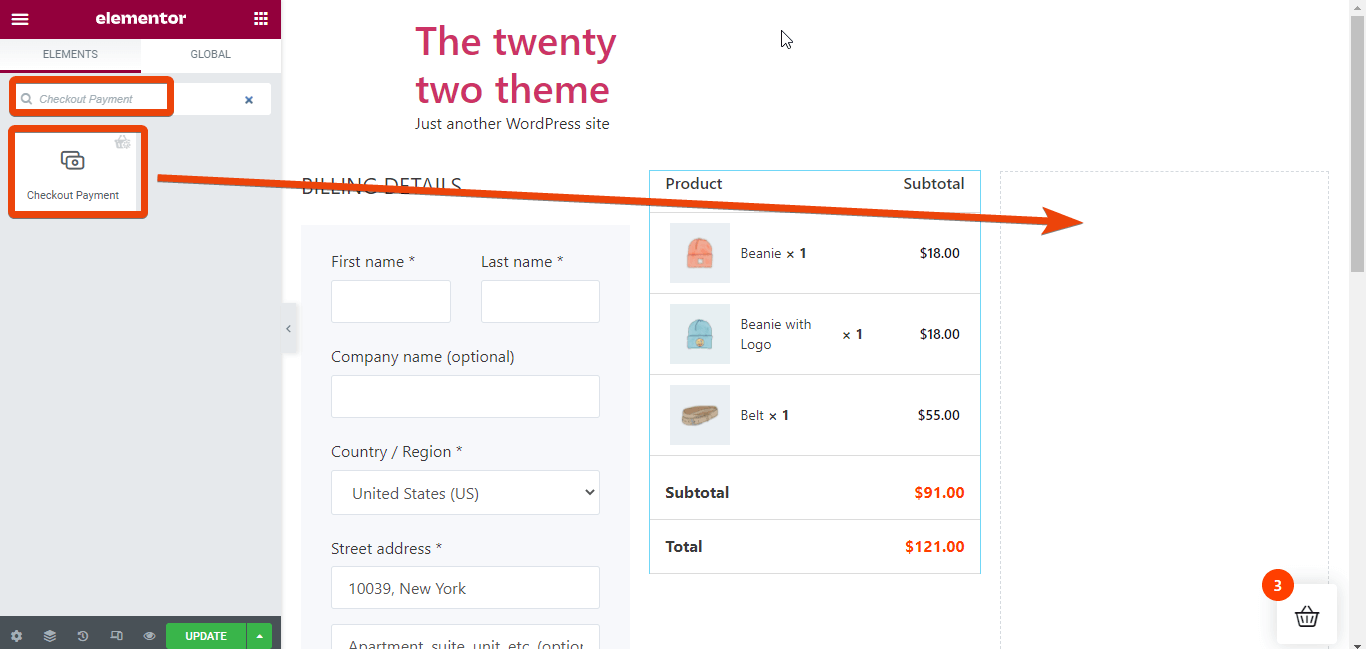
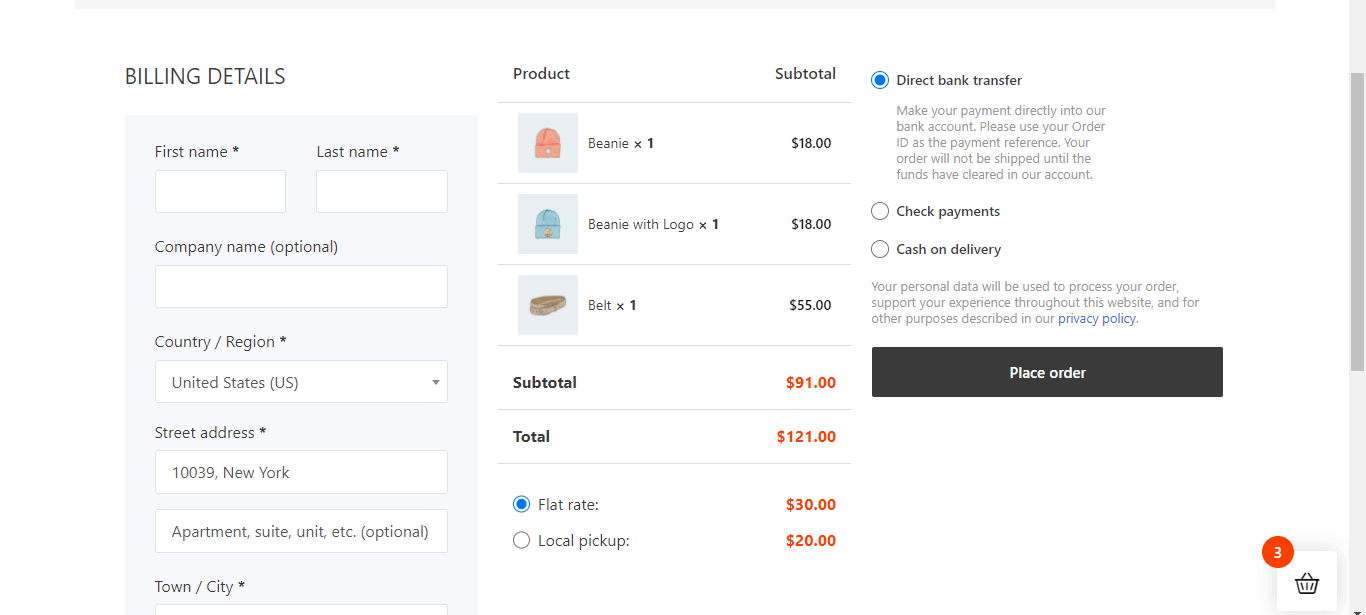
Check the preview of the page to see how it will appear for the customers.
Finally, update the WooCommerce multi-step checkout page. You can add any other option as well.


