


Instead of disclosing the price, give an option to the customers to call and ask for the price. This way, you can offer best possible price with a special discount to the specific customers.
Pre-requisite #
- WooCommerce: Download Plugin
- Elementor: Download Plugin
- ShopEngine: Get the Plugin
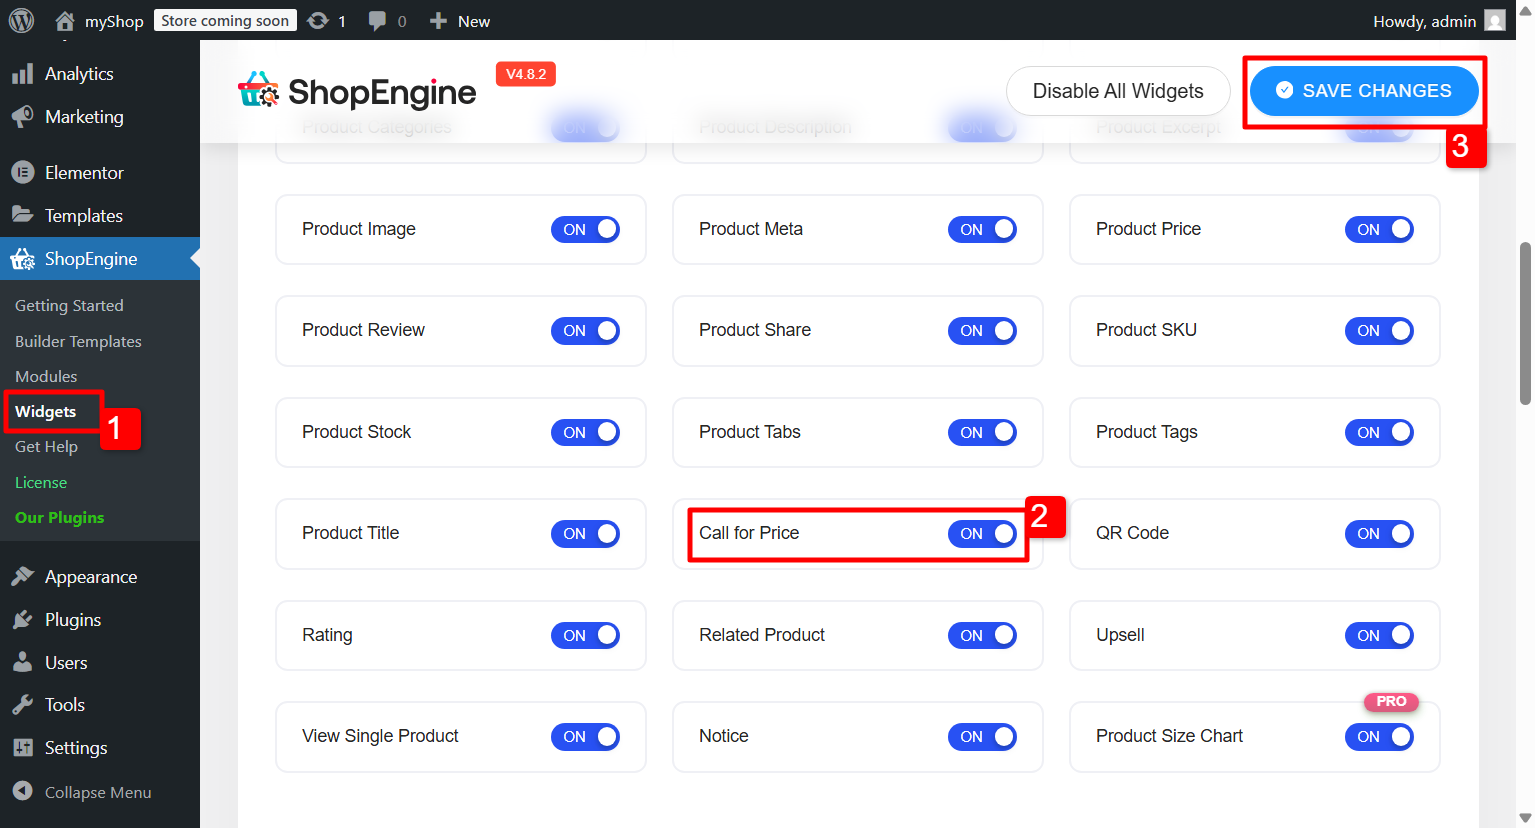
Step 1: Activate WooCommerce Call for Price Widget #
Once your plugins are good to go, the first thing to do is activate the Call for Price widget in ShopEngine.
Here’s how:
- Navigate to ShopEngine → Widgets from the WordPress dashboard.
- Scroll through the widget list to find the Call for Price widget and flip the toggle to turn it ON.
- Finally, click on the SAVE CHANGES button.
Now that the widget is active, you’re all set to add it to your product pages.
Step 2: Add a ‘Call for Price’ button To Single Product Page #
To display the Call for Price option on your product page, you’ll need to edit the single product template with Elementor. To edit the template:
- Go to ShopEngine → Builder Template from your WordPress dashboard.
- Locate the single product template and click Edit with Elementor.
- In the Elementor editor, search for Call for Price in the widget panel.
- Drag and drop it onto the page wherever you’d like the button to appear.
The “Call for Price” widget is now added to the single product page.
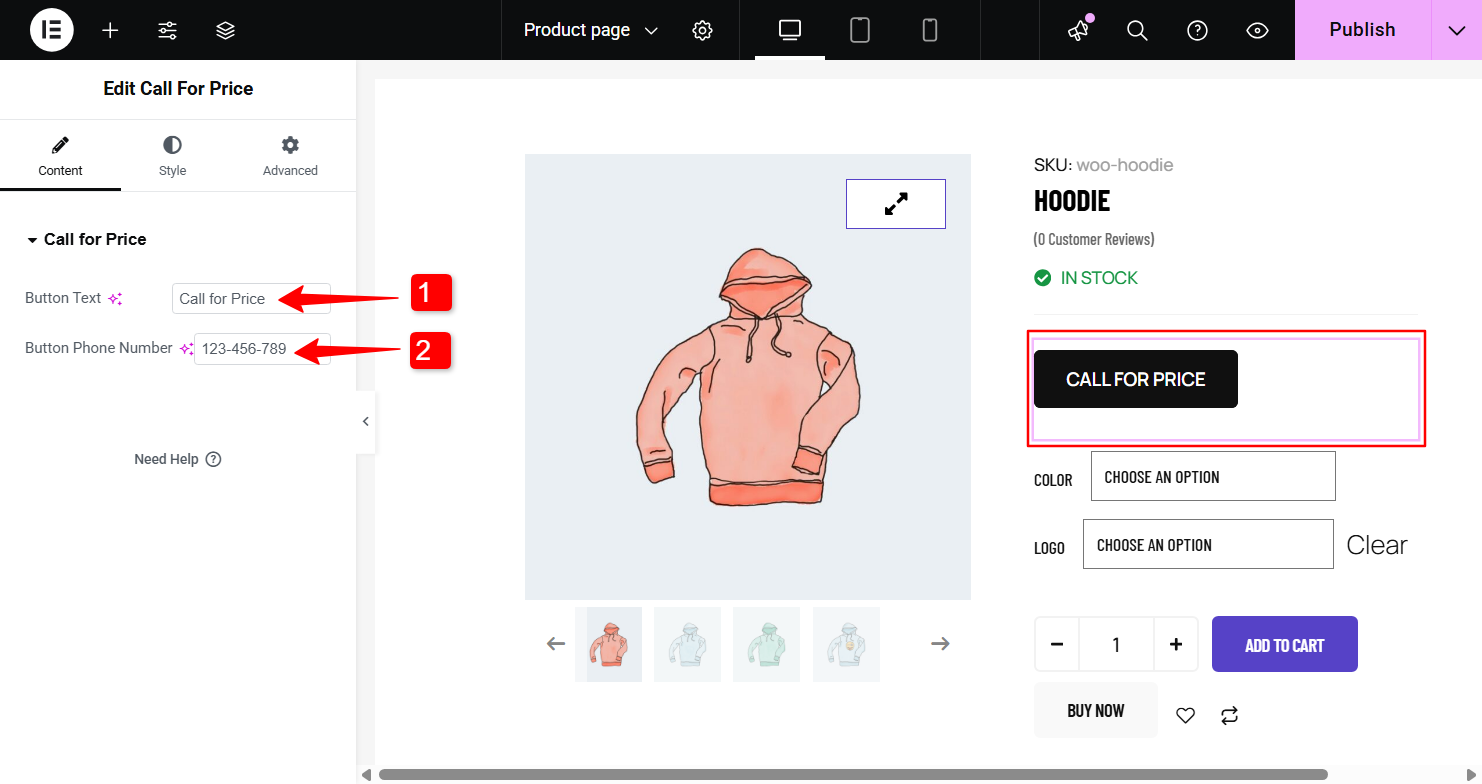
Step 3: Configure Call for Price Button for WooCommerce Product #
You have the following settings to configure the Call for Price widget for the WooCommerce product:
- Button Text: Enter the button text you want to show to the customer. For example, you can set the button text to “Call for Best Price” to attrack the customer.
- Button Phone Number: Provide the phone number where the call will be made.
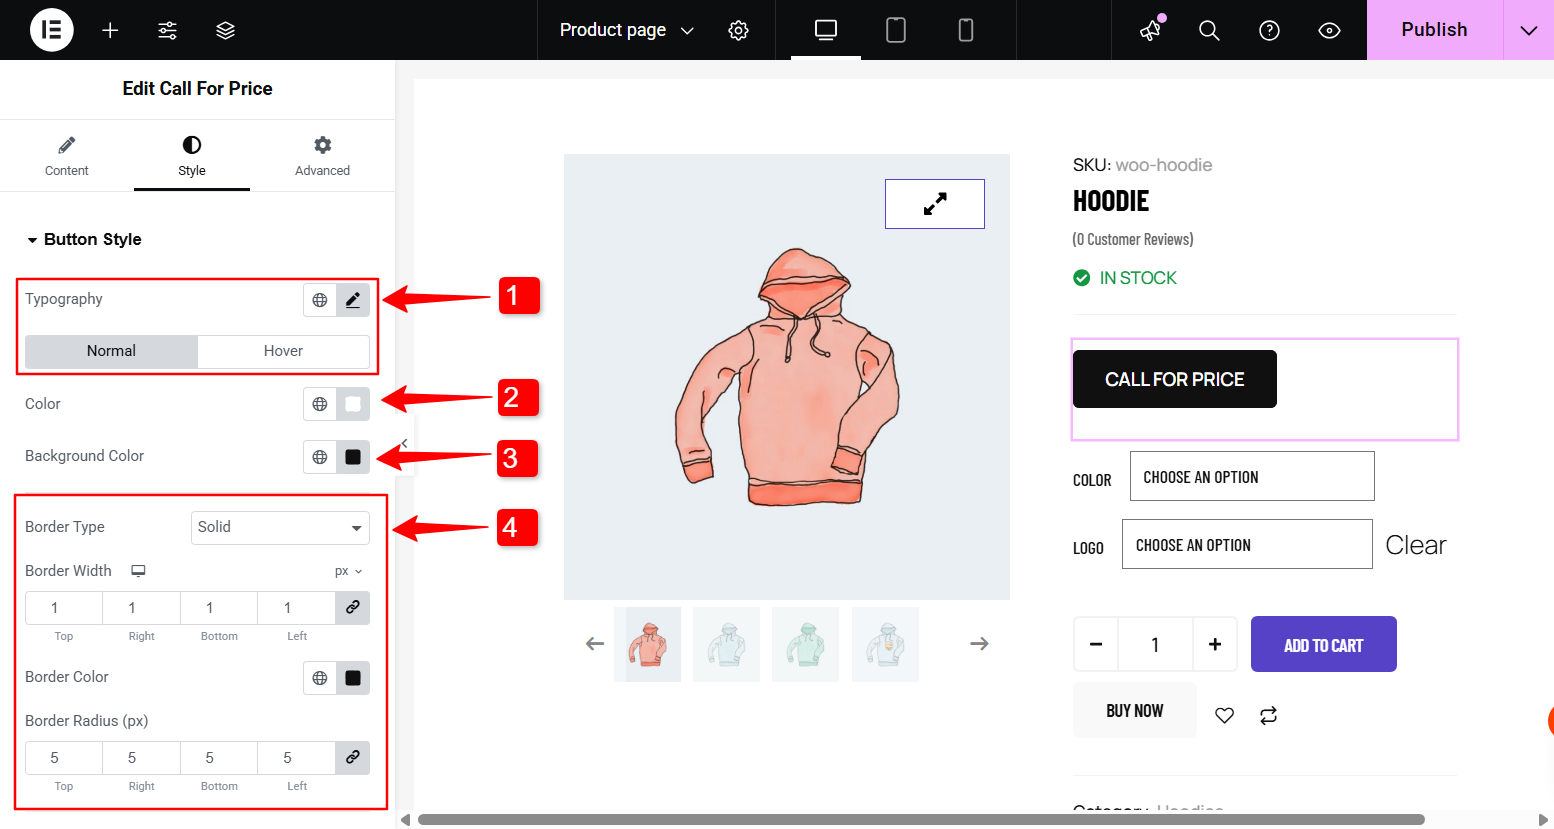
Step 4: Customize the Button Styles #
You can also customize the “Call for Price” button styles with ShopEngine.
1. Typography: Choose the typography (font family, font size, line height, line spacing, etc.) of the button text.
2. Color: Set individual colors for the normal and hover state of the button.
3. Background Color: Select individual background colors for the normal and hover state of the button.
4. Border Styles: You can choose the border type, border width, border color, and border radius.
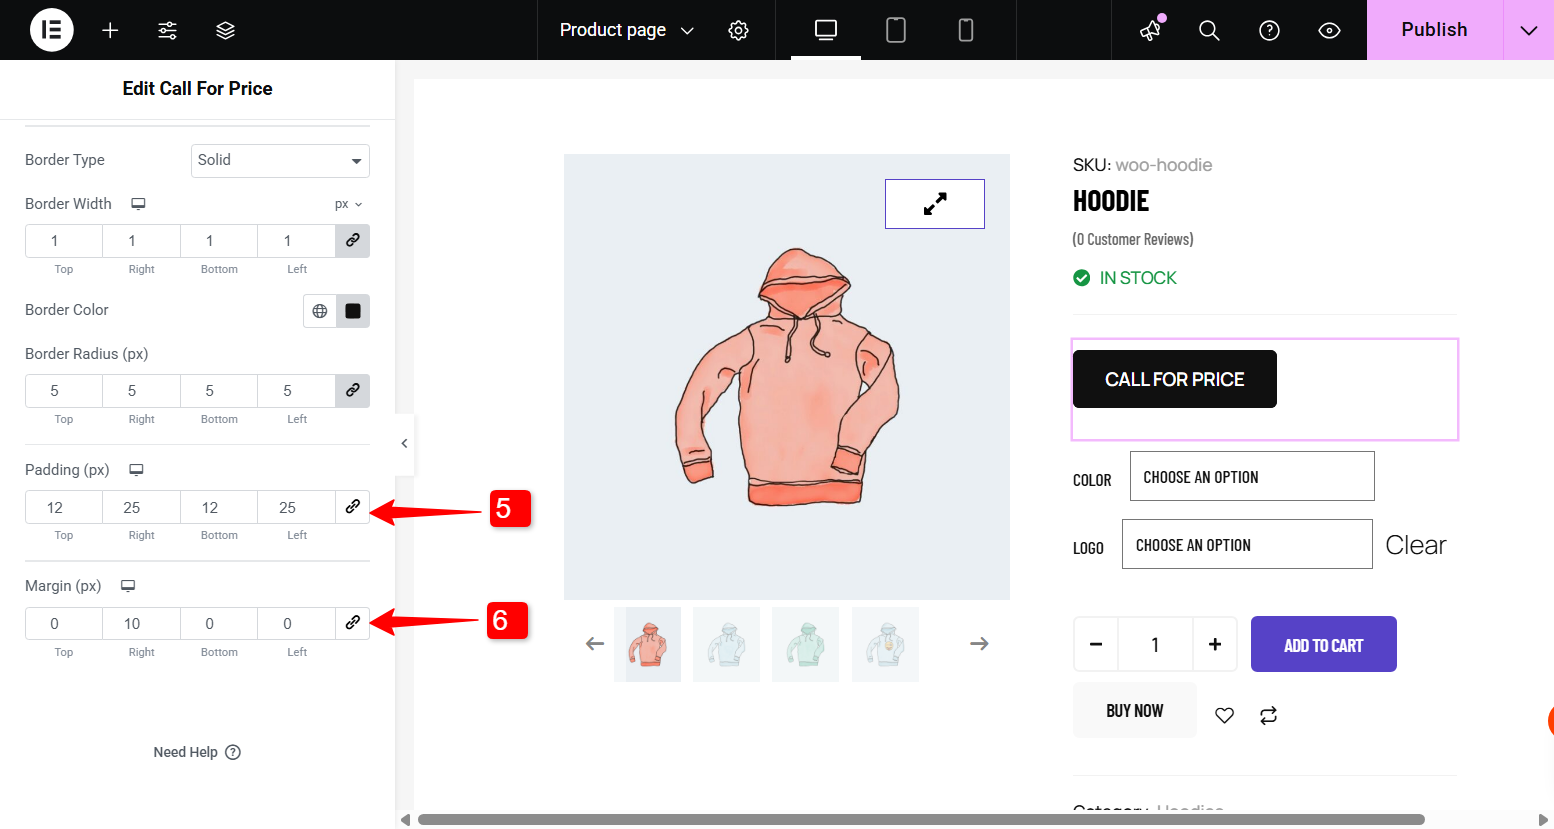
5. Padding: Adjust the padding of the button.
6. Margin: Adjust the margin of the button.
Like the Call for Price widget, ShopEngine comes with 70+ widgets, 20+ modules, and 40+ pre-designed templates for WooCommerce. Get ShopEngine Pro now and enjoy the complete WooCommerce experience in Elementor.


