Getting Started With ShopEngine Vacation Module #
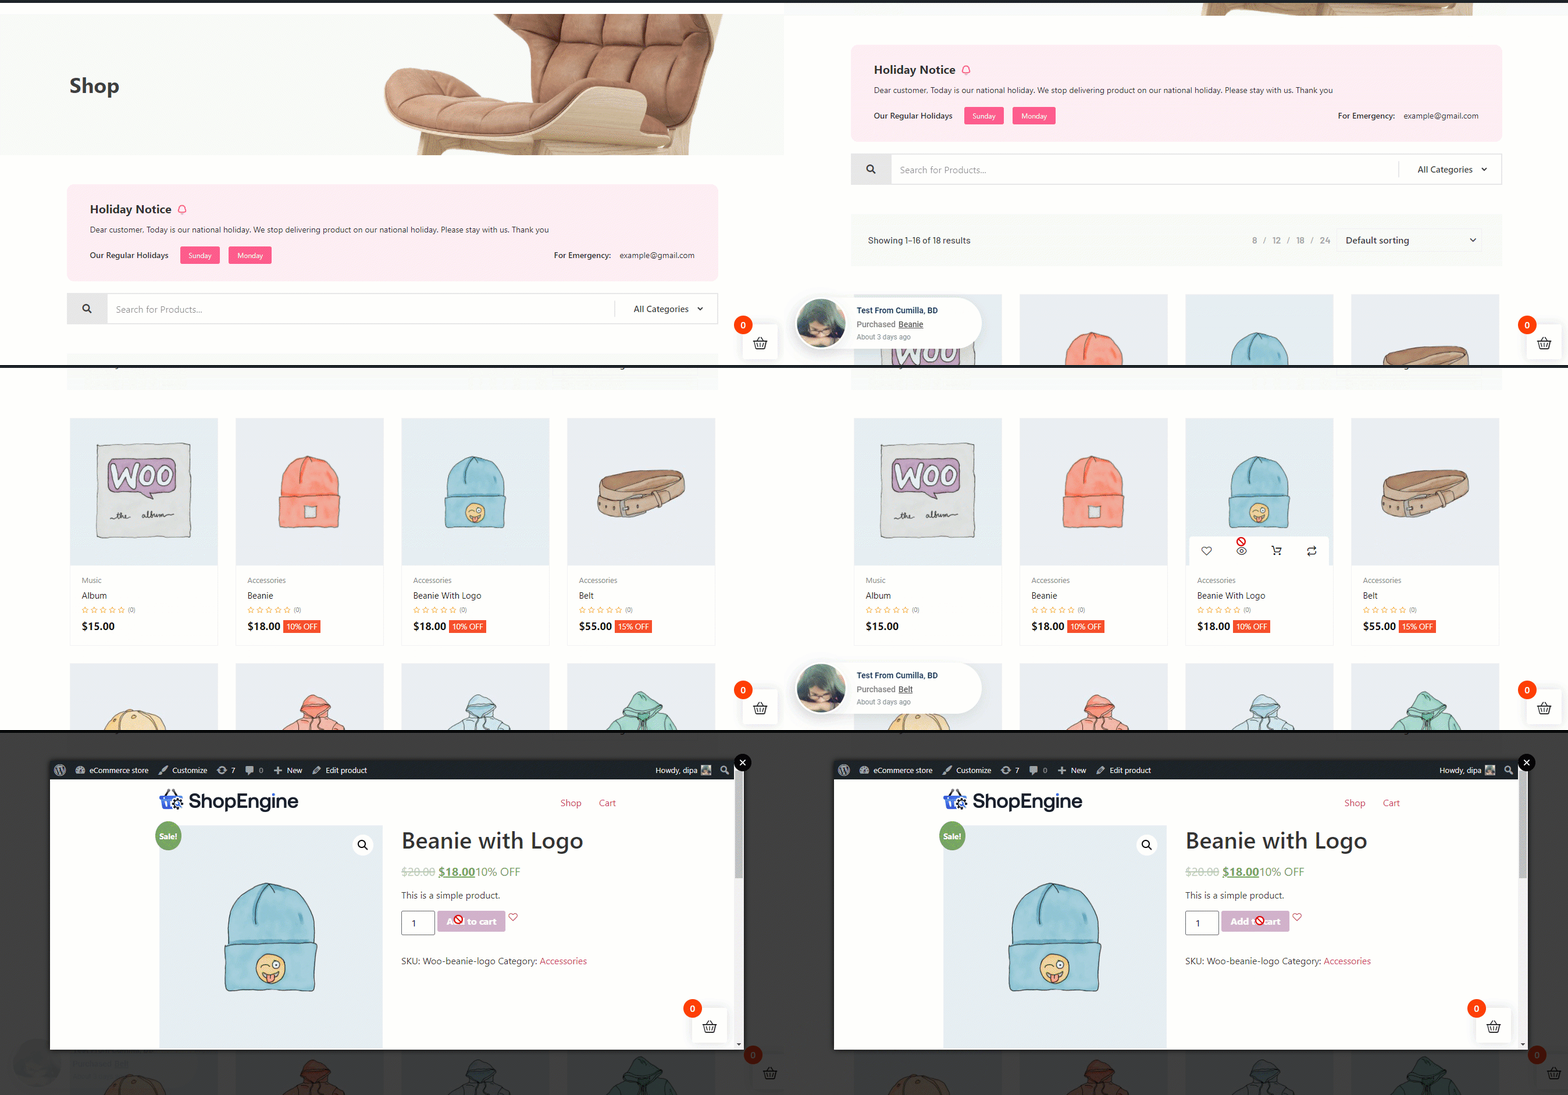
With the ShopEngine Vacation Module, you can put up a notice (i.e not open for orders) for your Weekly Off days as well as any Off days due to vacation or personal reasons. Online shopping options will be unavailable for the visitors during the off days time period you set using the module.
While consumers can browse your website and see all the products, they can not add products to the cart and thus can not place an order during the vacation period.
And this weekly off-day function is a recursive function meaning it will apply for every single week until you turn this option off.
Quick Overview
This documentation includes adding a vacation notice to your WooCommerce site using ShopEngine. ShopEngine offers a Vacation module and widget that facilitates displaying vacation notices without coding. Just enable the features and let your customers be aware of your vacation days ahead.
Here are the plugins you need to install and activate for this process:
Tools Used: WooCommerce (free), Elementor (free), ShopEngine (free & pro)
Next, follow the steps below to showcase vacation notice on WooCommerce:
✅ Activate Vacation module.
✅ Configure Vacation module.
✅ Enable Vacation module.
✅ Add Vacation widget and customize notice.
How to use ShopEngine Vacation Module #
Learn how how to use ShopEngine’s WooCommerce store Vacation Module. Using this module, you can add custom vacation notices in your WooCommerce site in just 8 steps.
Step 1:Enable ShopEngine Vacation Module #
First, you need to turn on the module of ShopEngine, a WooCommerce vacation mode plugin. To do so,
- go to ShopEngine ⇒ Modules ⇒ Vacation.
- Click on the Settings Icon.
- Once the settings popup opens, turn on the toggle button of the Enable the module option.
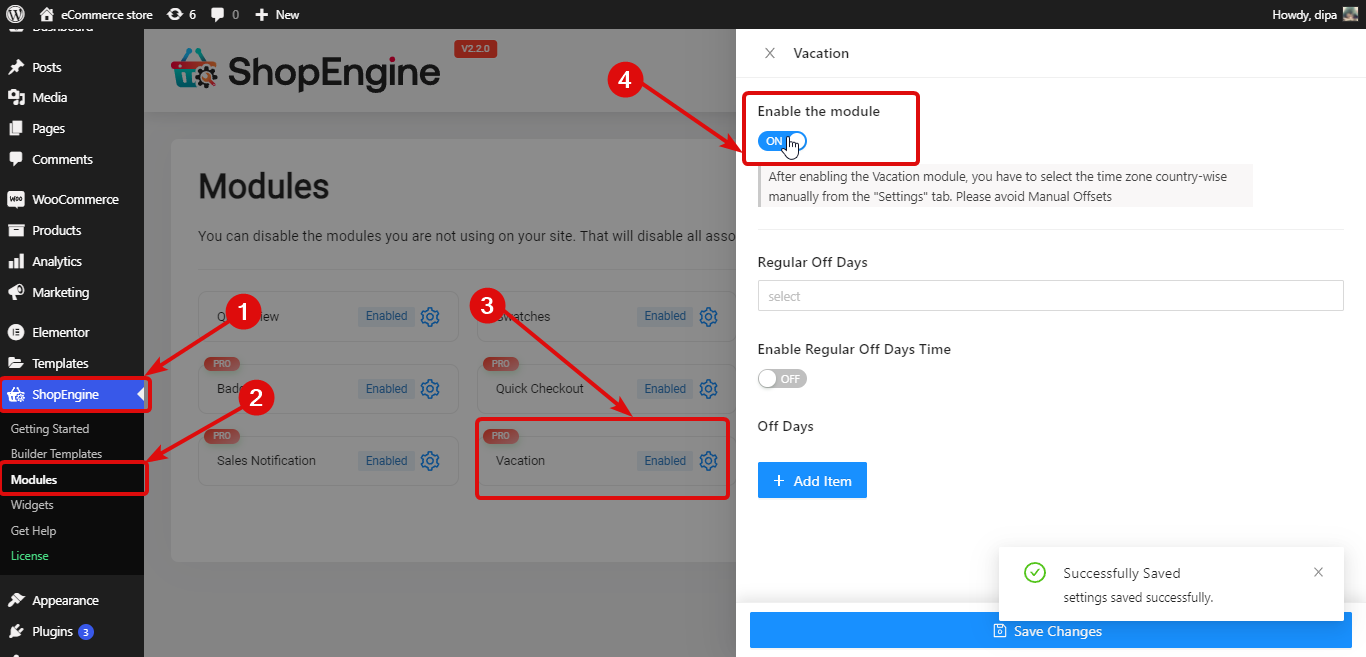
Note: You need to select the time zone country-wise manually from the “Settings” tab. Avoid Manual Offsets as the vacation module will work with the Manual Offset options.
Step 2: Set up Regular Off Days #
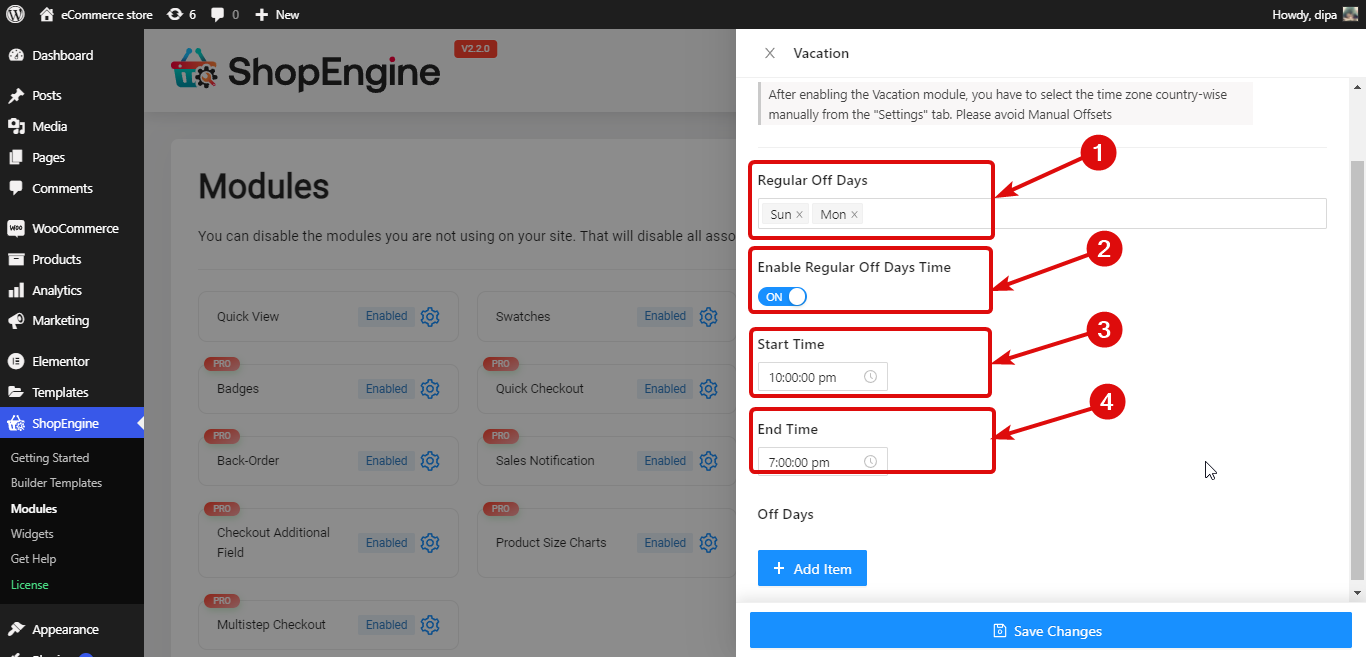
To set up weekly Regular Off Days. you need to set up the following settings:
- Regular Off Days: Choose the days from the Regular Off Days dropdown. You can select multiple off days.
- Enable Regular Off Days Time: Turn this to the option to activate the regular weekdays. Once you turn on this option, you will see the following two options.
- Start Time: Set the start time for regular weekdays.
- End Time: Set the end time for regular weekdays.
Step 3: Set up Casual Off Days / Vacation Days #
Along with weekly off days, you can add vocational off days as well. For that,
- Click on the + Add New button
- Provide a Title
- Choose the Start And End Date
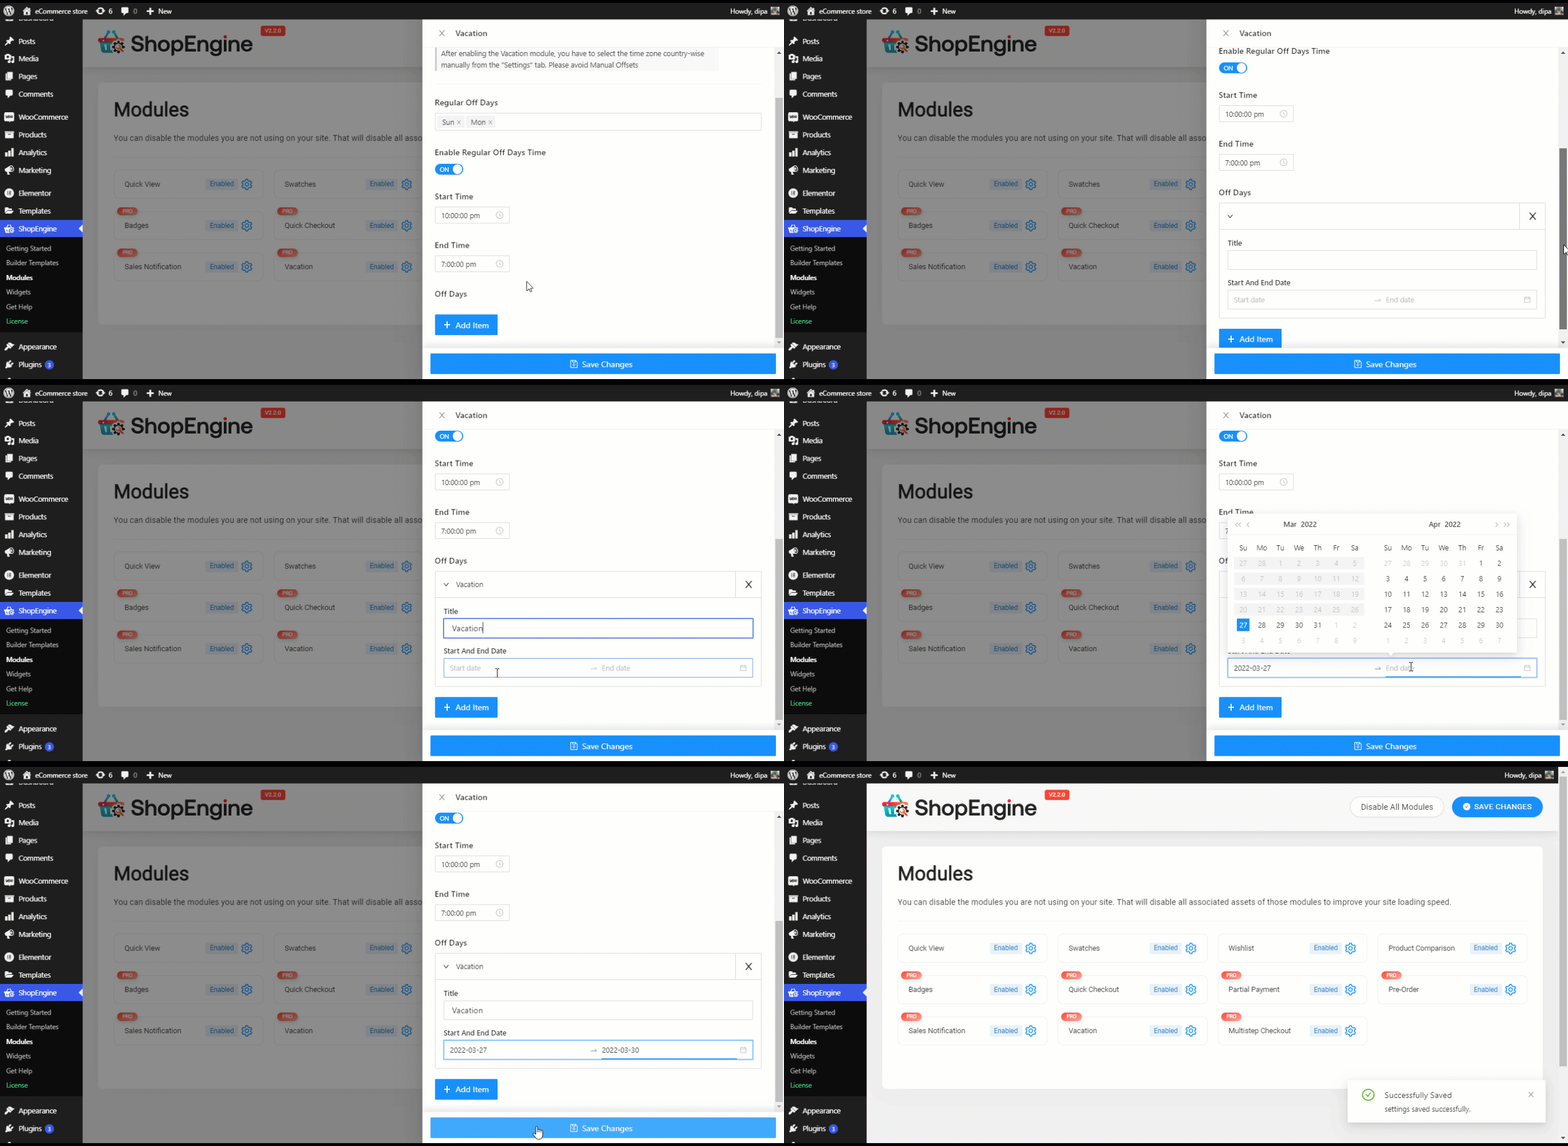
Finally, click on Save changes to update.
Note: You can add either weekly off days or casual off days or both depending on your needs.
Step 4: Enable Vacation Widget #
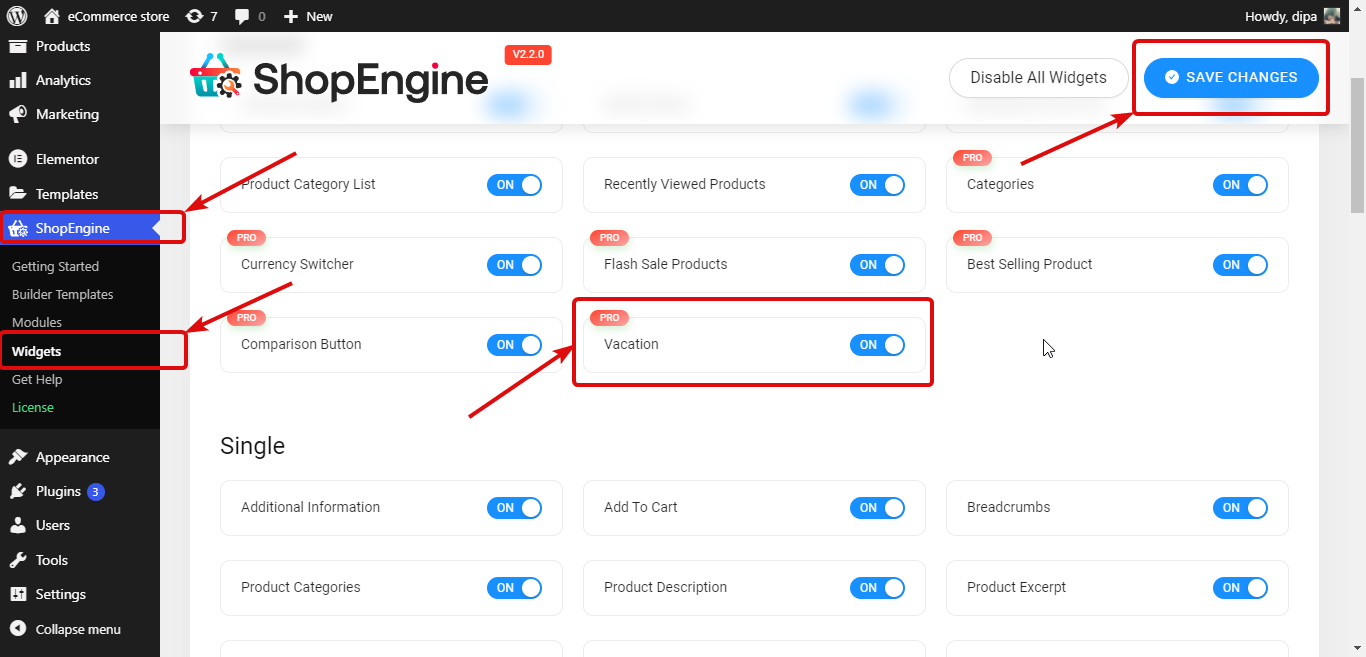
Go to ShopEngine ⇒ Widgets, turn on the Vacation widget and finally click on Save changes to update.
Step 5: Add Vacation widget to ShopEngine template #
To make the vacation notice visible on the front end, you need to add it to the Shop Template.
For this, Edit ShopEngine Shop Template with Edit with Elementor option. Once you are in the editor mode, search for Vacation Notice. Then drag and drop the widget on the template.
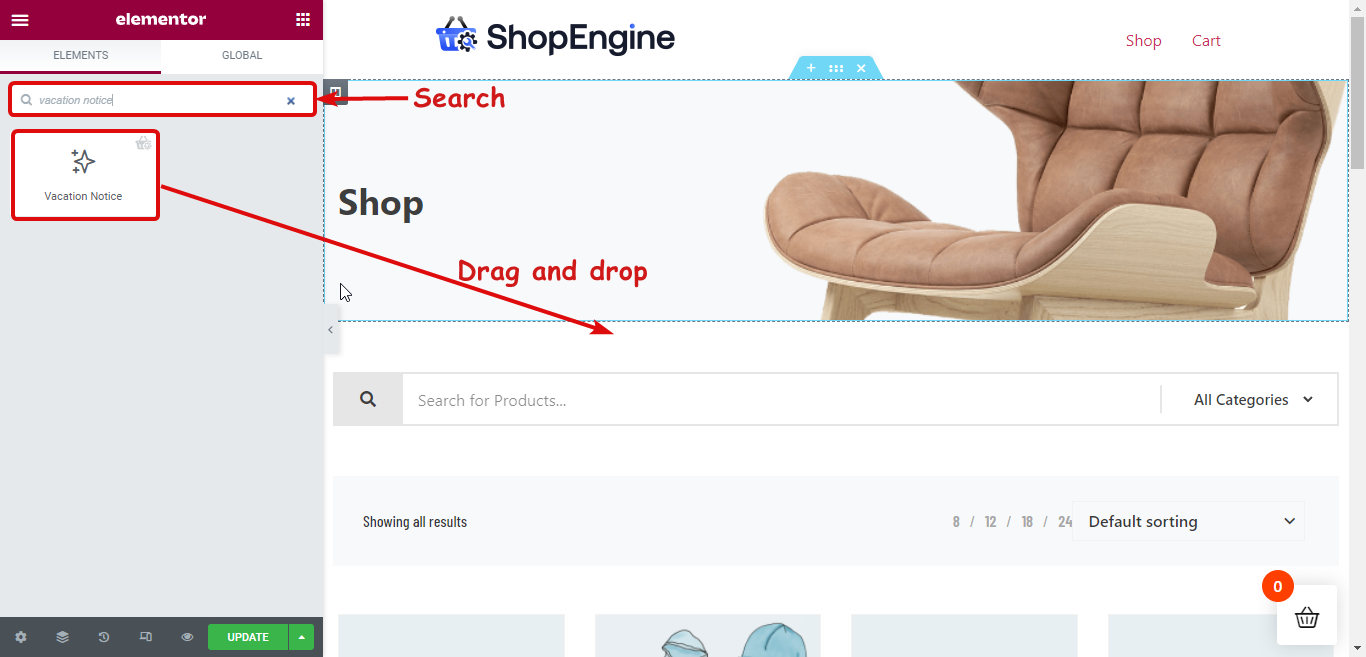
Note. You can also add a new section and then drag and drop the vacation widget.
Step 6: Customize content settings of the Vacation Notice widget #
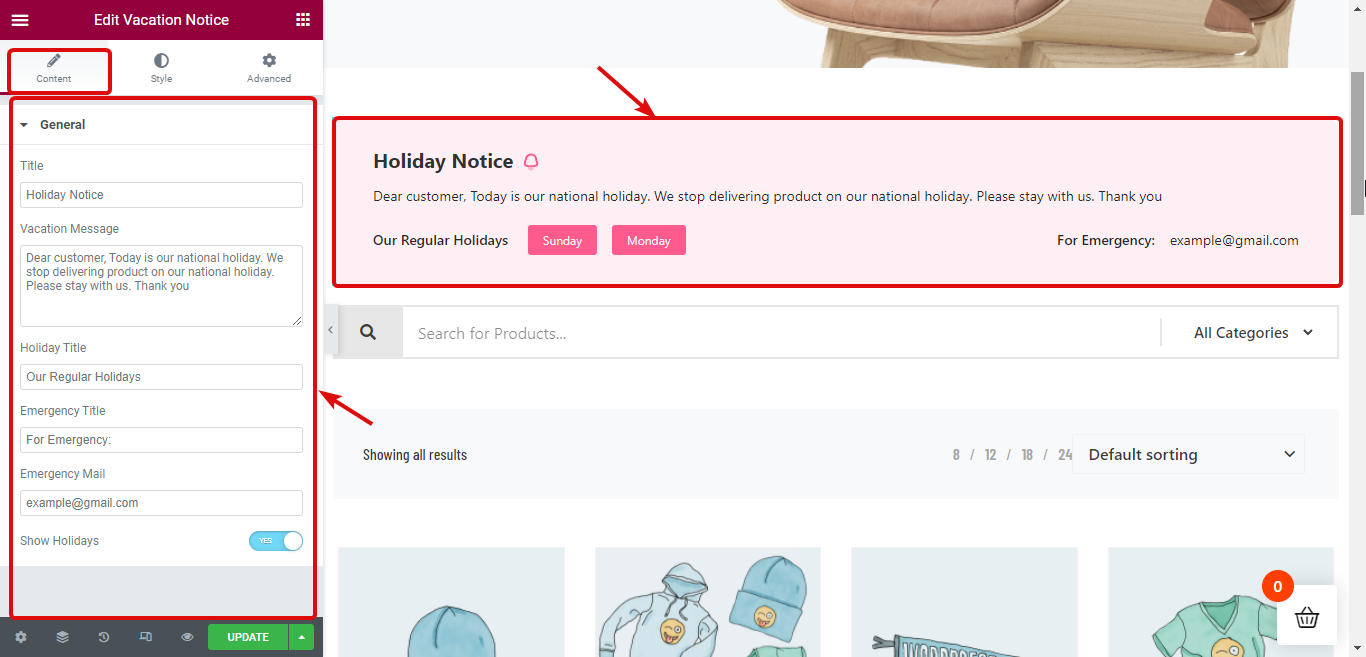
You can customize the following options of vacation notice that will be visible to your website visitors.
- Title: Provide a title for the vacation notice.
- Vacation Message: Here you can customize the message you want your visitors to know.
- Holiday Title: Here you can customize the title that will indicate the regular weekly off-days.
- Emergency Title: You can customize emergency titles as well.
- Emergency Mail: The emergency email your customers can use to contact you.
- Show Holidays: You can turn on/off this option to display/hide the regular weekly off-days details.
Step 7: Customize style settings of the Vacation Notice widget #
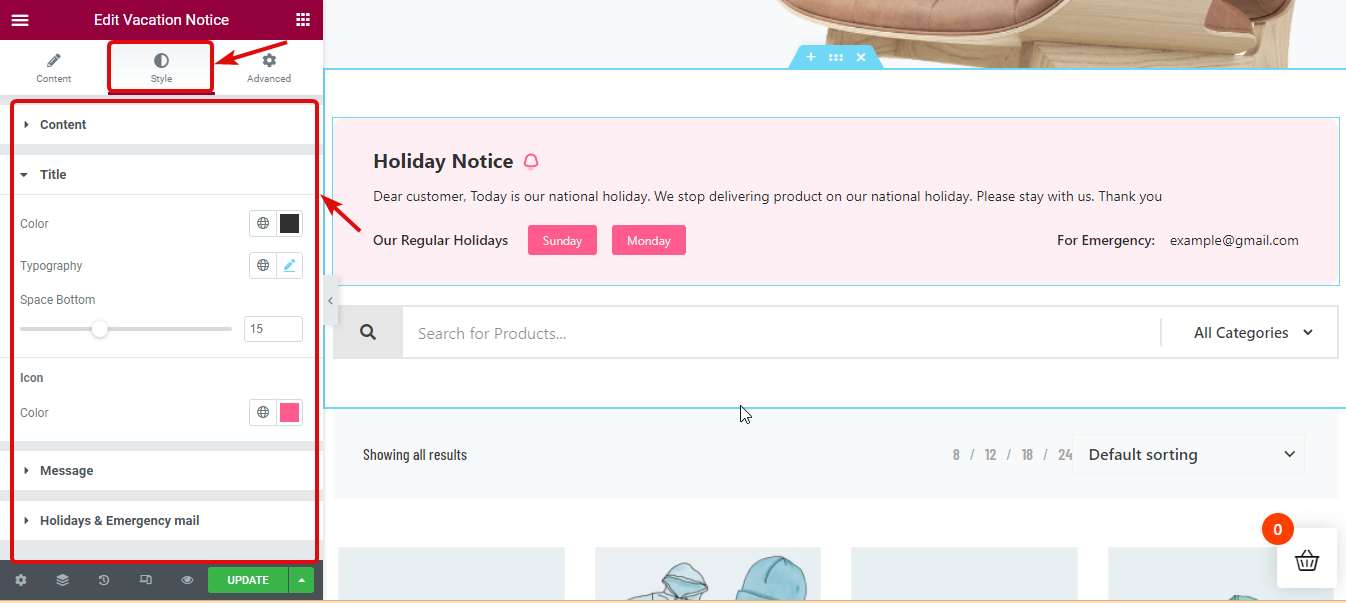
Move to the Style tab to customize style-related settings of Content, Title, Message, Holidays, and Emergency Email.
Step 8: Update and See the preview #
Now click on Update to save. Now vacation notice should be visible on the front end like the preview below:
