


ShopEngine allows you to design a fully customized single product page for your WooCommerce store using Elementor. By creating a Single template from the Builder Templates section, you can control the layout and apply it to all product pages automatically.
Watch the video:
Quick Steps to Create #
- Install & Activate – Ensure ShopEngine and Elementor are installed and active on your WordPress site.
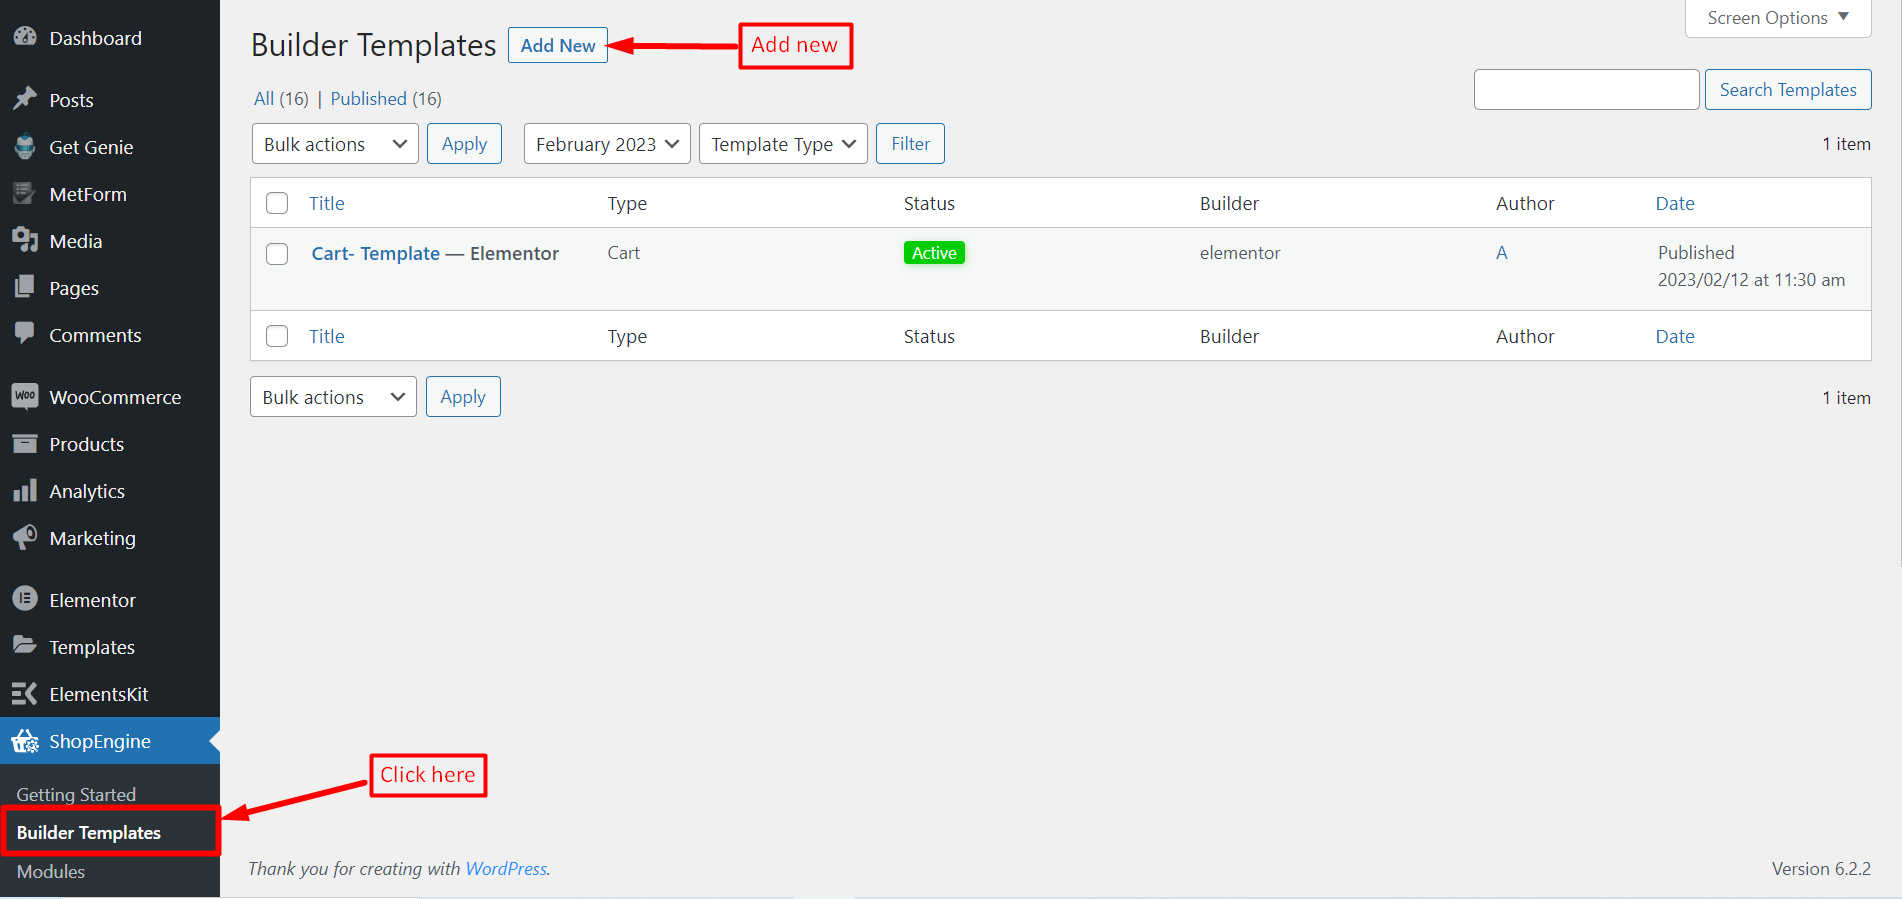
- Create a Template – Go to ShopEngine → Builder Templates, click Add New, enter a name, and select Single as the template type.
- Set as Default – Enable the Default option if you want the template applied to all single product pages.
- Edit with Elementor – Click Edit with Elementor to open the visual builder.
- Add ShopEngine Widgets – Drag and drop widgets like Product Image, Title, Price, Description, Add to Cart, and Additional Information to build your layout.
- Save & Apply – Publish the template to activate the custom design across your store.
For detailed guide, check the steps below.
How to Create a Single Product Page Template with ShopEngine #
ShopEngine offers Single Product Widgets including Product Title, Product Image, Product Price, Product Description, Add to Cart, Product SKU, etc. Using these widgets, you can easily set up your single product page template in your desired way. Just follow the step-by-step process to create & beautify your single product page template:
Step 1: Create a Single Product Template #
- Go to ShopEngine-> Builder Templates > Add New.
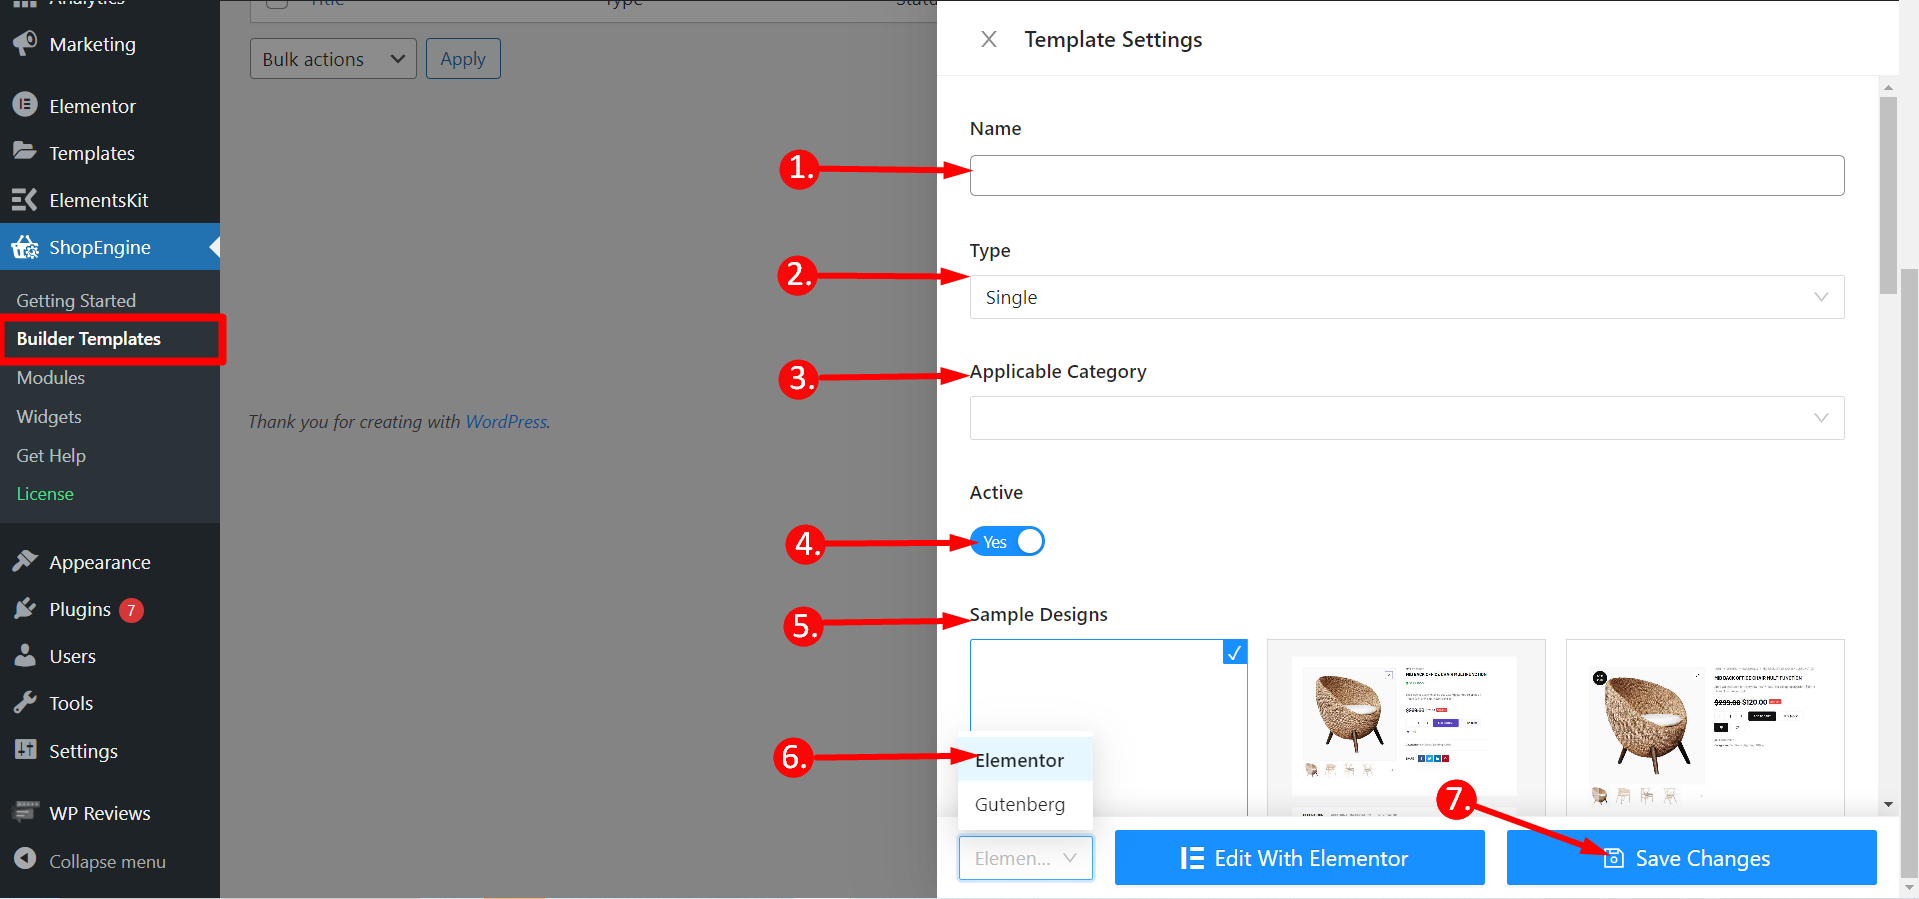
- Enter a Name for the template.
- Choose the page Type as “Single”.
- Choose Applicable Category.
- Enable Active to Yes.
- Select a design from the available template or create your design using single product page widgets. We will show the template creation from scratch.
- Choose which editor you want to use for editing the template from the given options: Elementor and Gutenberg.
- Now Click on Save Changes.
Step 2:Edit template with Editors (Elementor or Gutenberg) #
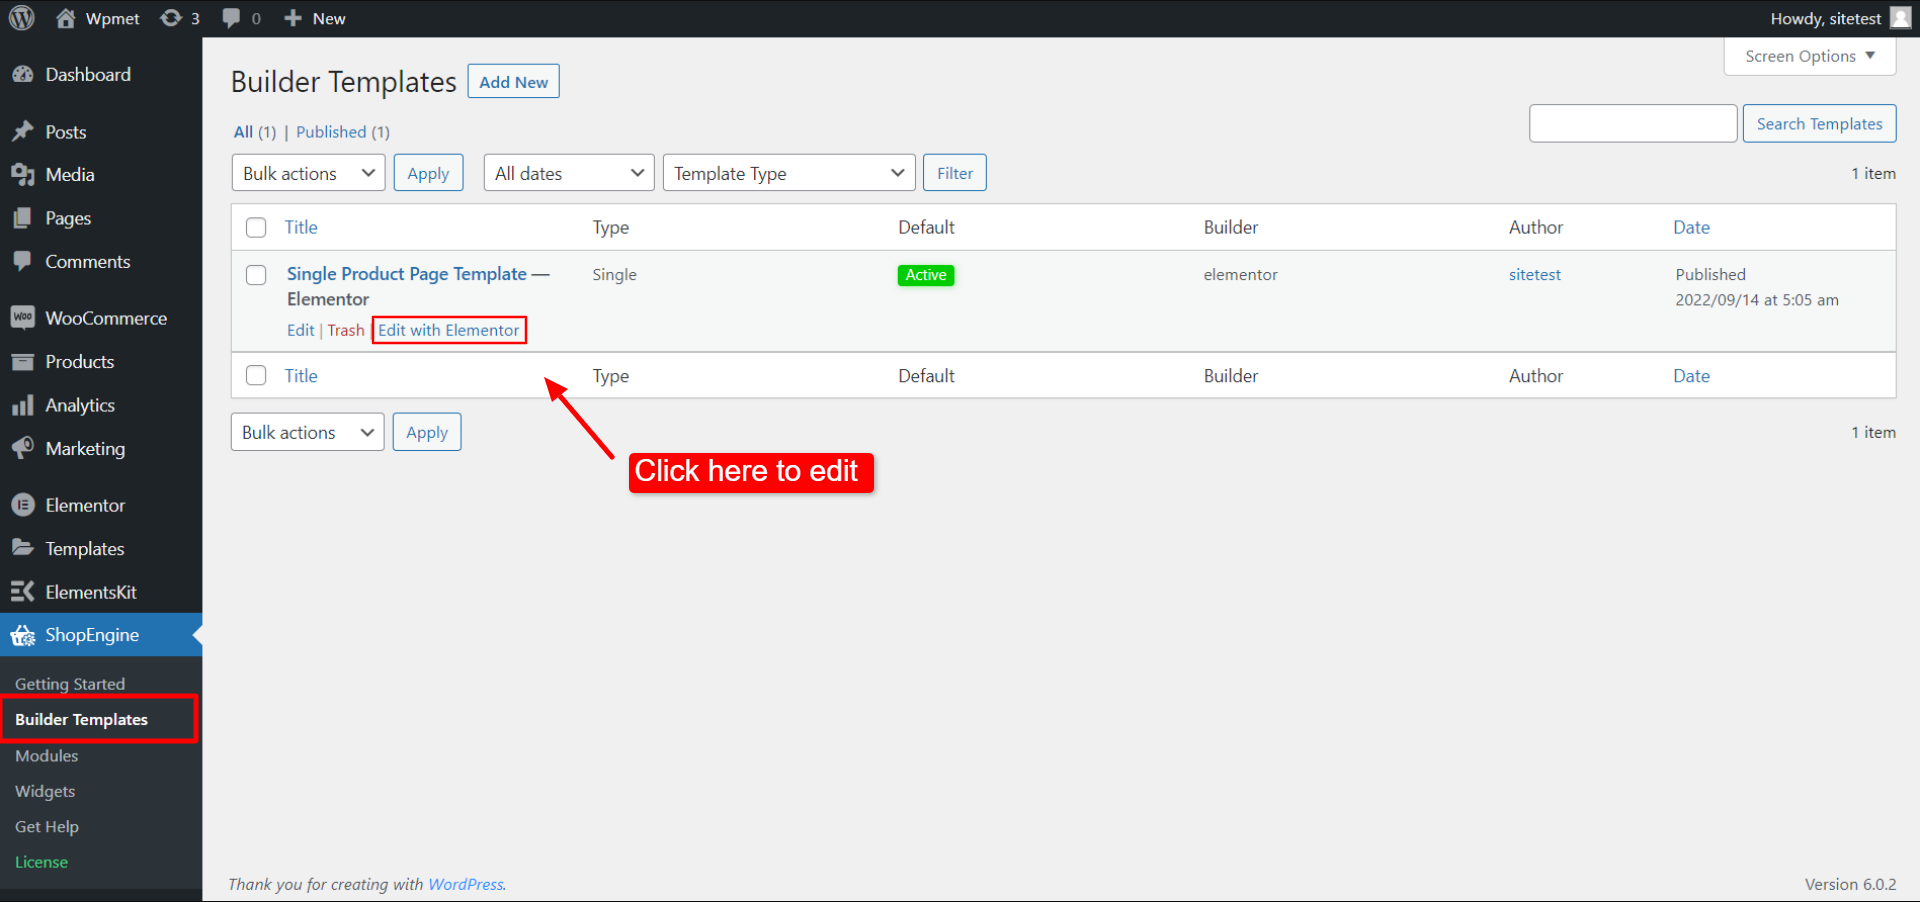
Shortly after that, you can see the template is created and visible on top of the templates list. To edit the template, you will see the edit option with the editor you choose. For say, if you choose Elementor, you will see an option to Edit with Elementor. If you choose Gutenberg, you will see an option to Edit with Gutenberg. Here we have chosen Elementor editor.
Step-3: Edit Template By Selected Product #
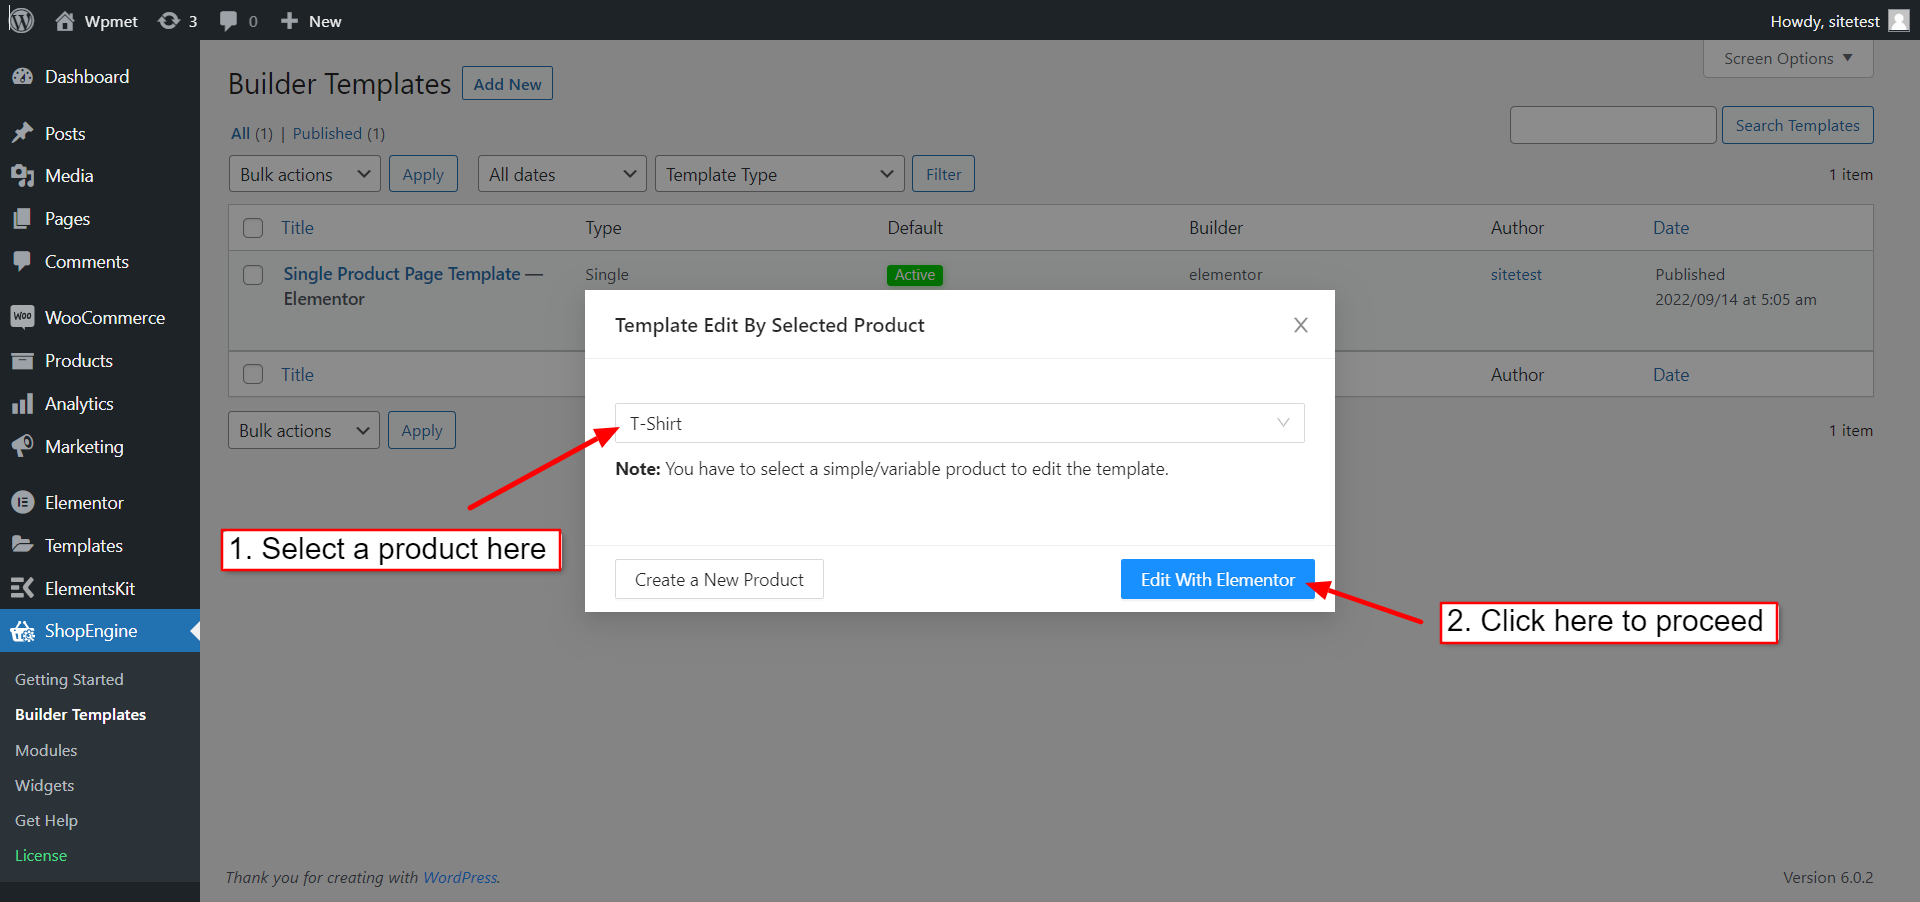
This is ShopEngine’s special feature for WooCommerce. Now you can choose a specific product to customize the Single Product page template. When you click on “Edit with Elementor” (or Edit with Gutenberg), a popup will appear where you can Template Edit By Selected Product. On the popup,
- Select a Product from the drop-down list.
- Click on Edit With Elementor to start editing the template.
- Also, you can Create a New Product to edit the template.
You can also use this option from the product view page. Go to the admin bar at the top of the page. Then click on the Edit with Elementor > Single Product Page Template. You will be able to edit the template with this product.
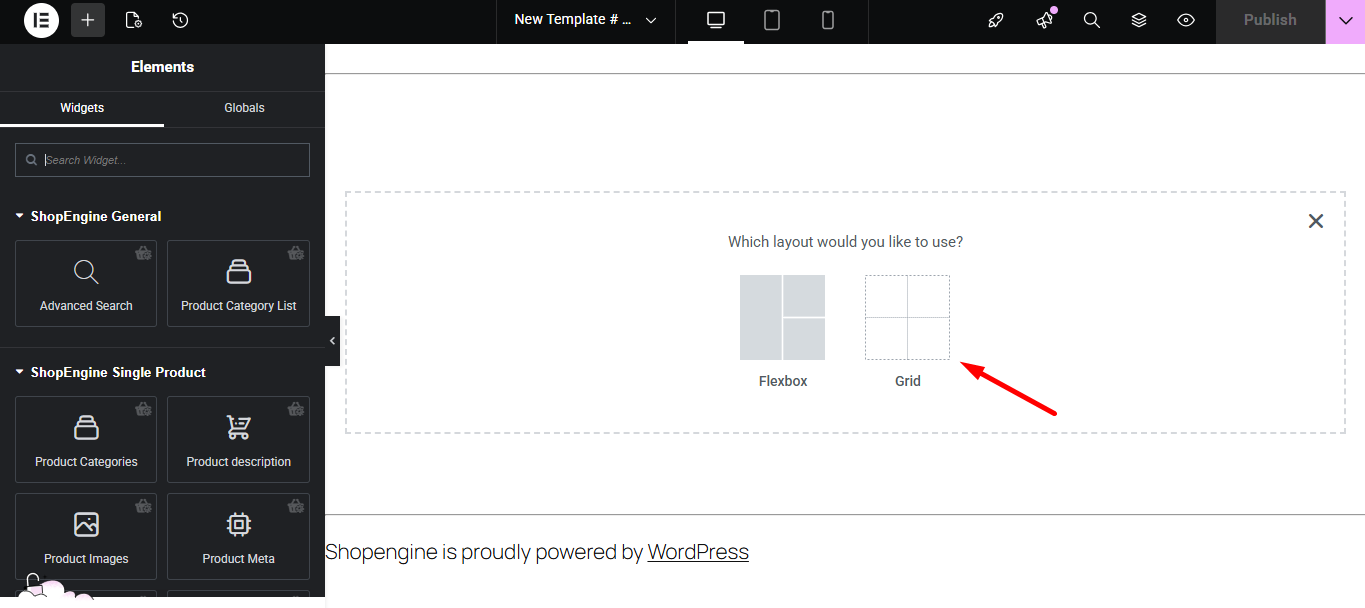
Step 4: Choose Structure #
- Choose your structure from the selected area.
Step 5: Beautify Your Single Product Page Template with Single Product Widgets #
Go to a ShopEngine Single Product Block and you can design your own. Here you will get some specified ShopEngine Single Widgets including Product Title, Product Image, Product Price, Product Description, Add to Cart, Product SKU, etc. Let’s see how to customize them:
Now just drag the following widgets and drop them on the selected area.
- Product Title.
- Product Price.
- Product Description.
- Add to Cart.

- Additional Information.
- Product SKU.
- Product Category.
- Product Stock.
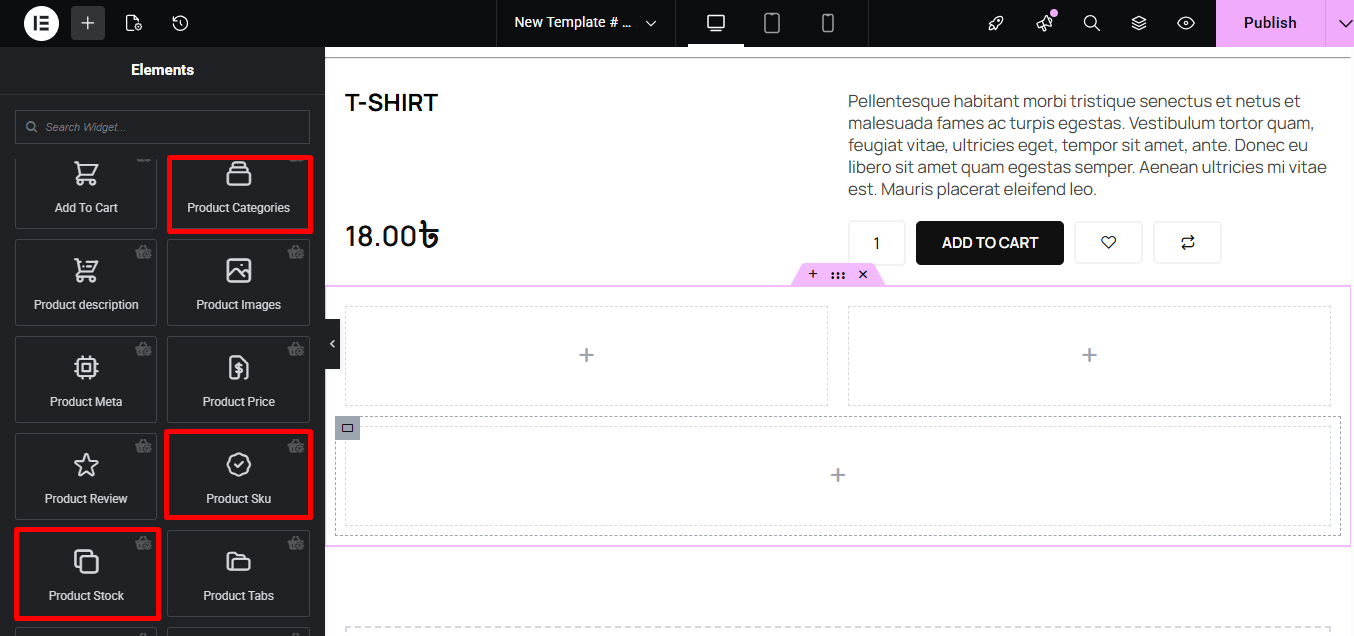
- Product Images.
- Product Tab.
- Related Products.
Step 6: Publish Your Single Product Page Template #
- After you’ve finished designing, click Update.
- Now click on any Single Product-> You can see your desired Single Product page is showing up accordingly.
That’s it with the creation of a single product page template. It’s pretty simple and straightforward. ShopEngine offers everything that you need to build a single product page template for your WooCommerce site.


