


A Checkout page allows your visitor to enter payment details and complete their order. This page contains payment and shipping/billing details on your Woocommerce store. Here you will get some specified ShopEngine Checkout Widgets including Checkout Form Billing, Coupon Form, Checkout Review Order, Checkout Payment, etc. Using these widgets, you can easily arrange your WooCommerce checkout page template in your desired way. And your created template will be more unique than Shopify checkout or any other template.
Quick Overview
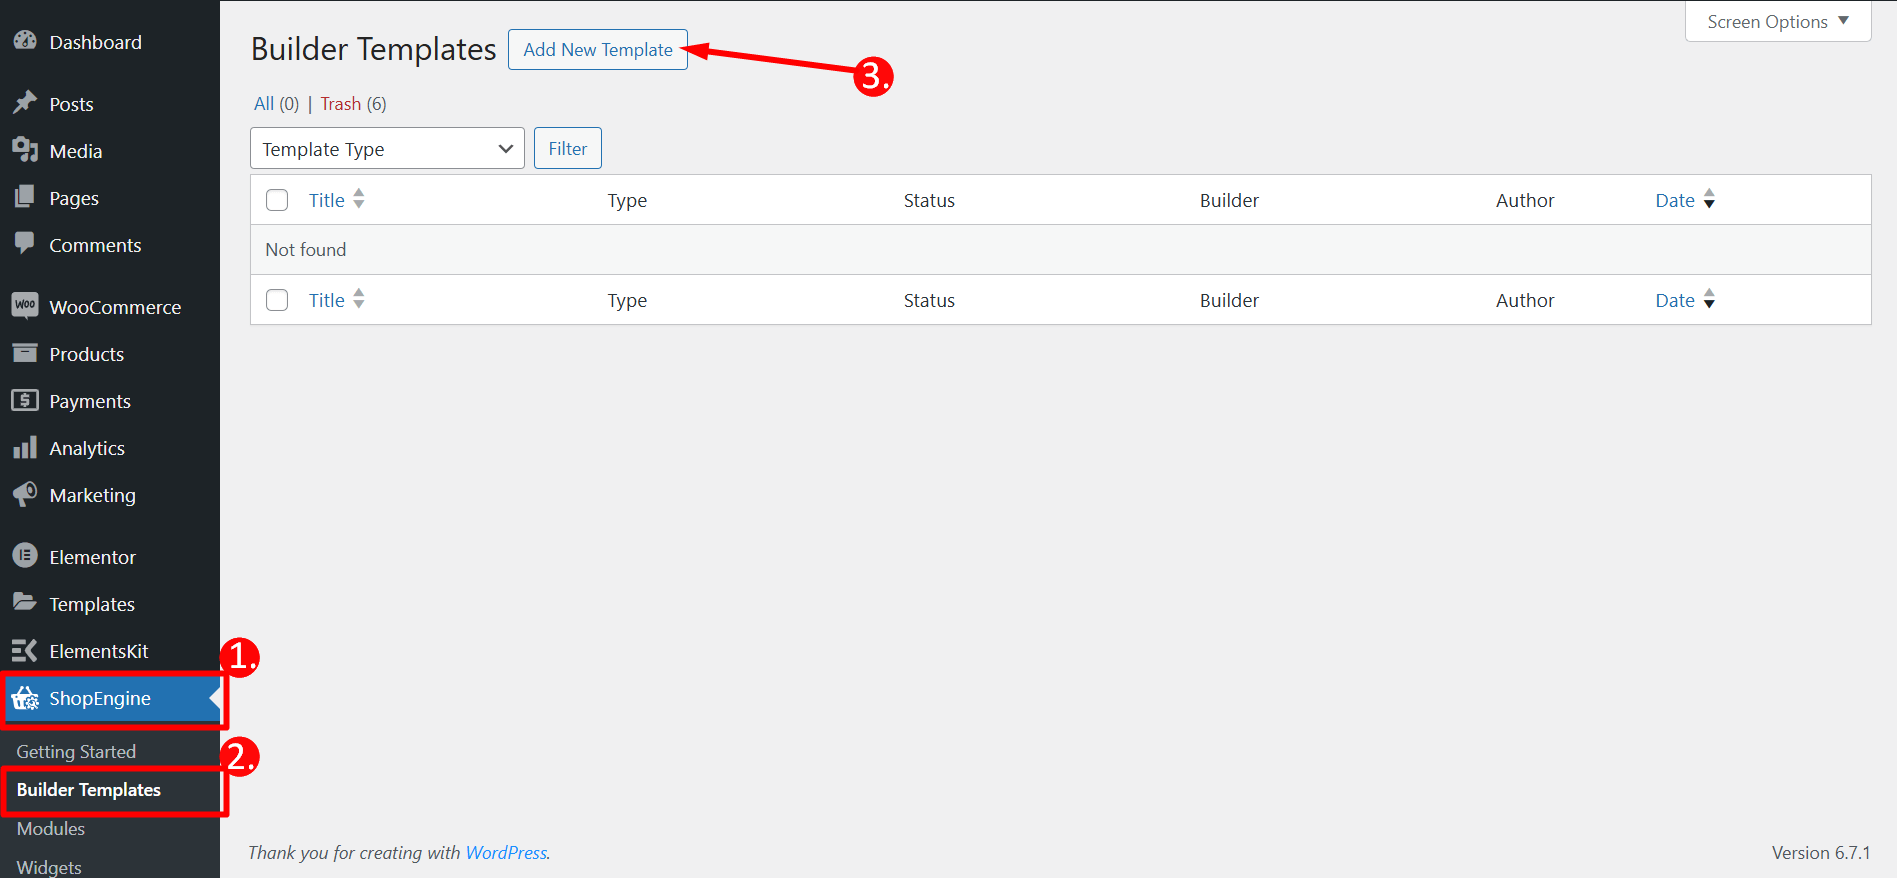
To create a checkout page with ShopEngine, WooCommerce page builder, log in to your WordPress dashbaord, go to ShopEngine > Builder template > Add New Template.
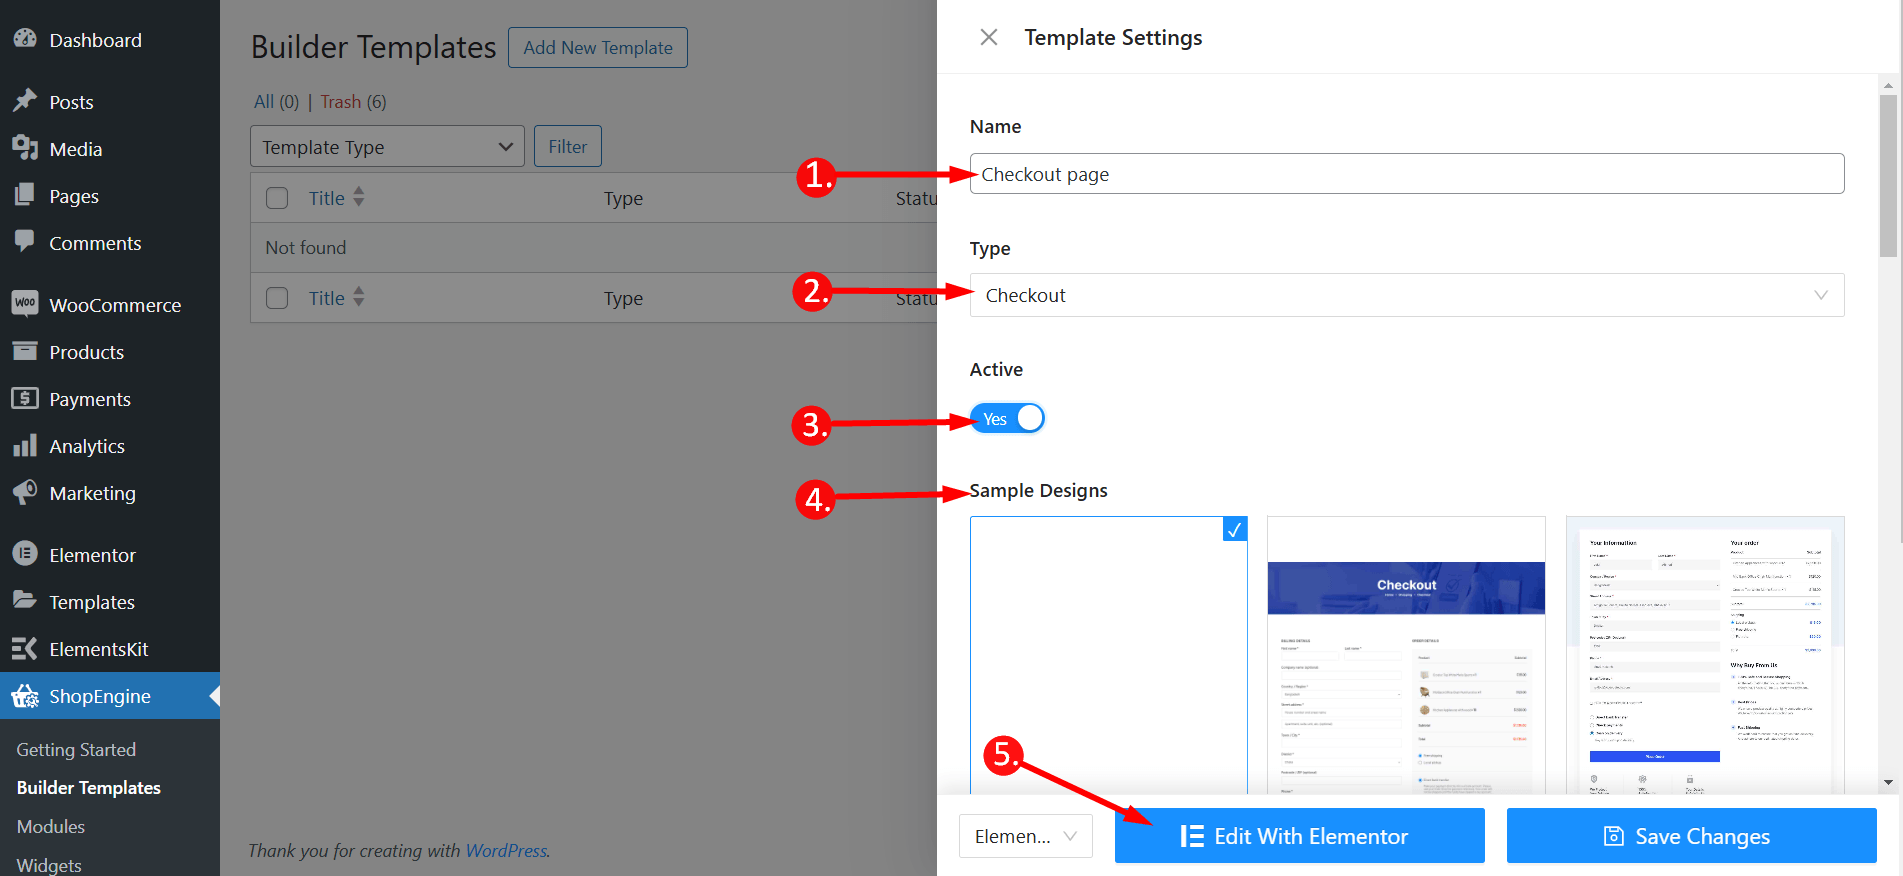
Then set the following: 1. Template name, 2. Template type: Checkout, 3. Activate the template, 4. Choose a template (blank or pre-designed), and 5. Click Edit with Elementor to start customizing the template.
Tools Used: WooCommerce, Elementor, and ShopEngine.
How to Create a WooCommerce Checkout Page Template with ShopEngine #
Just follow the step-by-step process to create & beautify your WordPress Checkout page template:
Step 1: Create a checkout page template #
- Go to ShopEngine > 2. Builder Templates > 3. Add New Template
Template Settings
- Name – Type a name of the template
- Type – Select ‘Checkout’ as template type
- Active – Toggle the button to active the template
- Template – Choose any checkout page template or take a blank template
- Edit with Elementor – Click on the button to edit
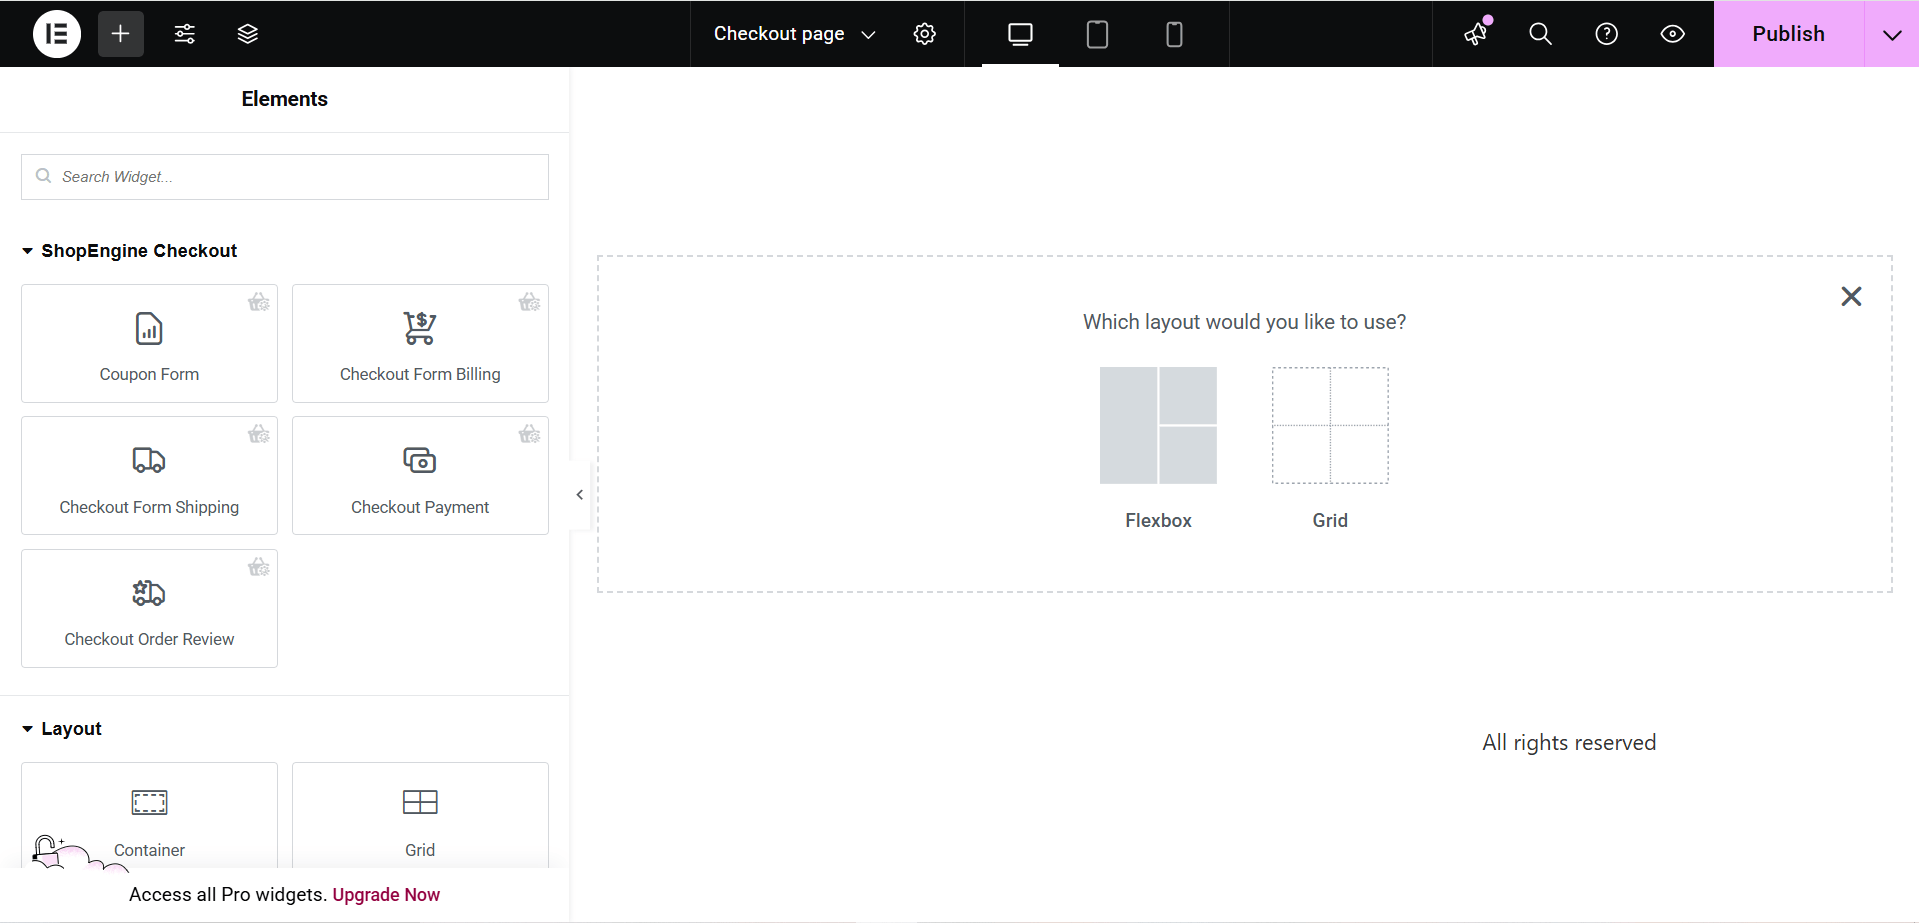
Step 2: Choose a layout for checkout page template #
Choose your layout style from Flexbox or Grid styles.
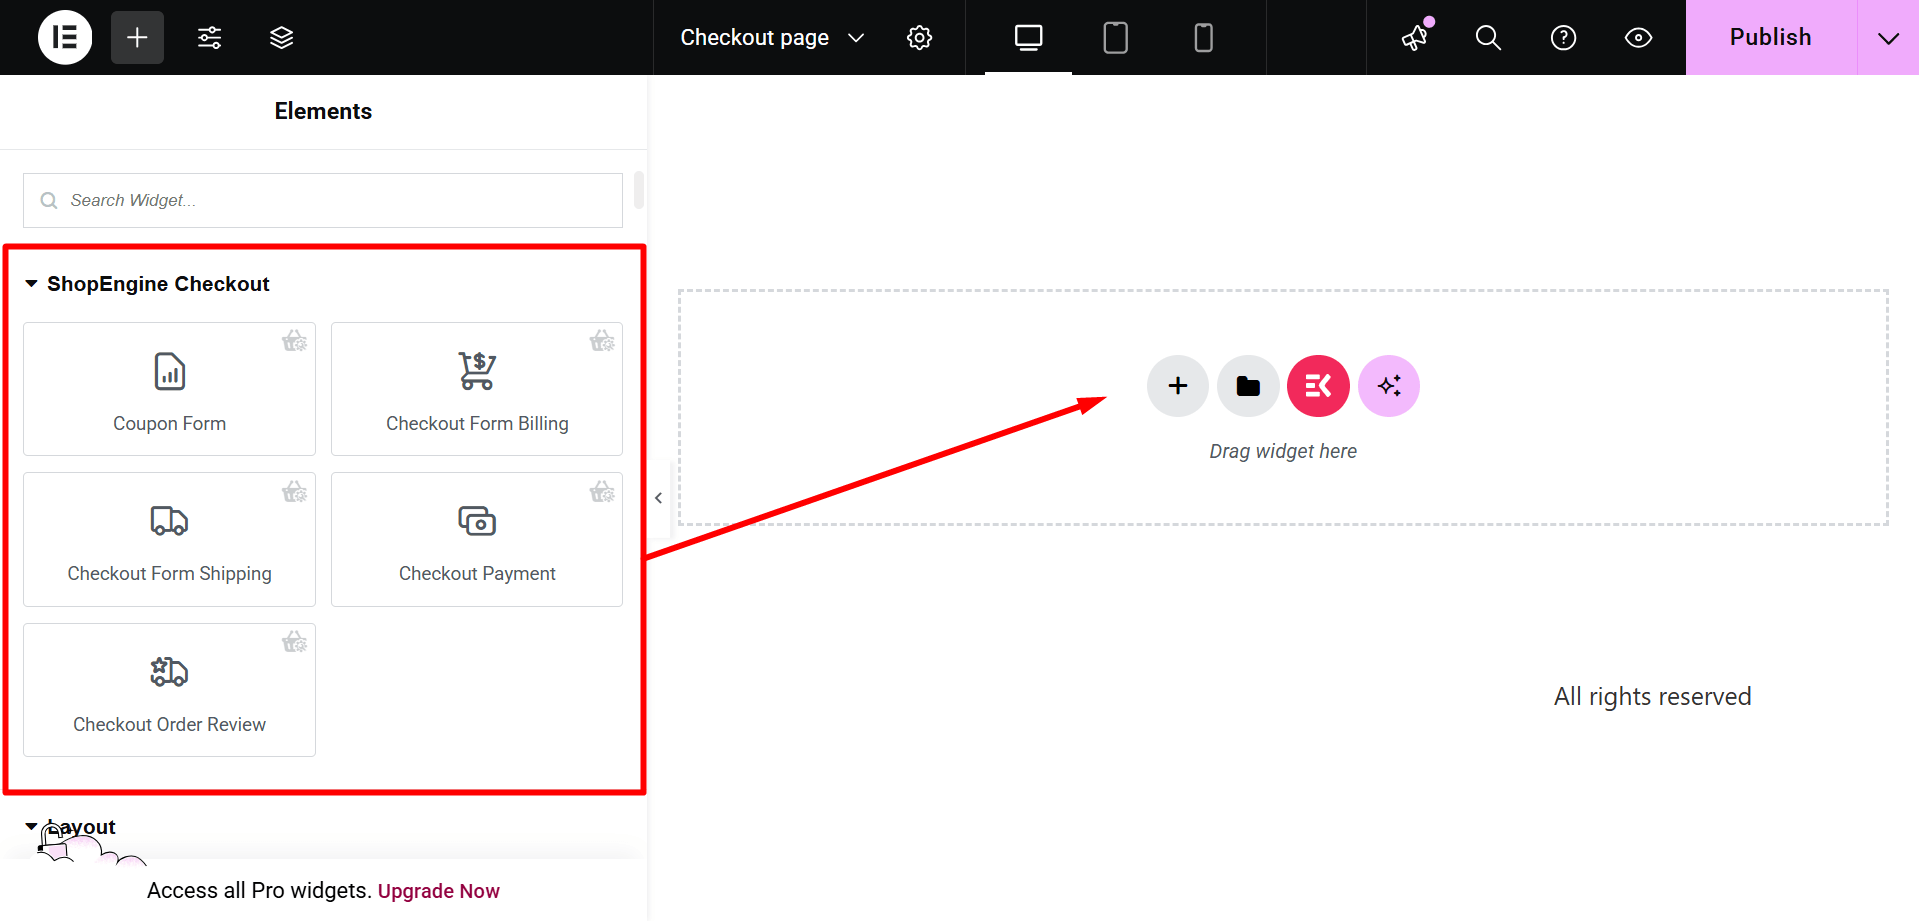
Step 3: Customize your WordPress checkout page template with Checkout widgets #
Go to a ShopEngine Checkout Block and you can design your own. Here you will get some specified ShopEngine Checkout Widgets including Checkout Form Billing, Coupon Form, Checkout Review Order, Checkout Payment, etc. These widgets also provide the advanced customization options than the Shopify or any other checkout page template. Let’s see how to customize them with ShopEngine, a WooCommerce checkout page builder:
Now just drag the following widgets and drop them on the selected area or just click on them, and they will be added to the editor.
- Coupon Form
- Checkout Form Billing
- Checkout Form Shipping
- Checkout Payment
- Checkout Order Review
Step 4: Publish your checkout page template #
- After designing, click Publish/Update to make your Elementor checkout page template live.
- Now go to your Checkout Page-> You can see your desired Checkout page is showing accordingly.
Like the checkout page template, you can also create a WooCommerce cart page template, shop page template, thankyou page template, product page template, and etc.


