


The WooCommerce checkout order pay system is a feature that allows customers to complete their purchase by entering their partial payment information and confirming their order.
ShopEngine has brought a Checkout order pay widget for you. With the widget, your customers can use various payment gateways. It ensures a secure and seamless checkout experience for customers.
📌 Checkout order pay widget is powered by ShopEngine Pro!
Let’s learn the Checkout order pay widget..
WooCommerce Checkout order pay – ShopEngine Widget #
The main procedure is divided into two parts-
- Enabling Partial Payment
- Enabling Checkout order pay Widget
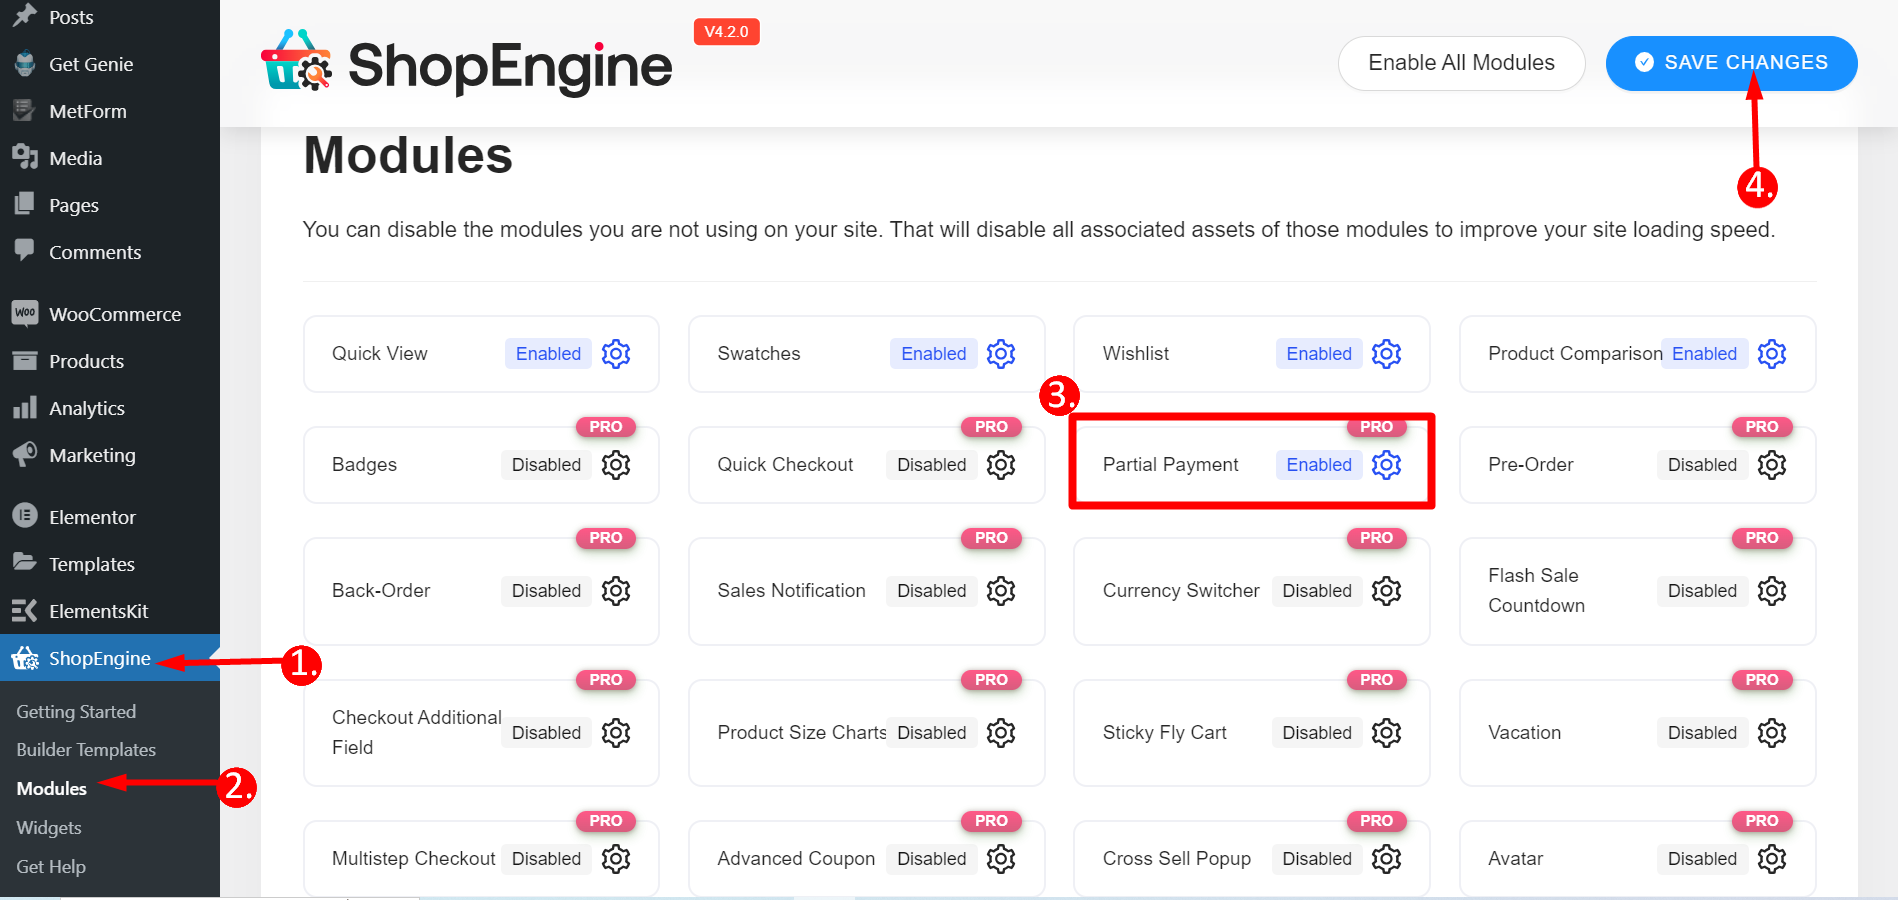
1. Enabling Partial Payment #
Access to WordPress Dashboard => 1. ShopEngine => 2. Modules => 3. Find Partial Payment and enable it => 4. Click Save Changes
Now, you have to edit a product page to enable partial payment for the product.
Here are the details for you 👉 Partial Payment documentation.
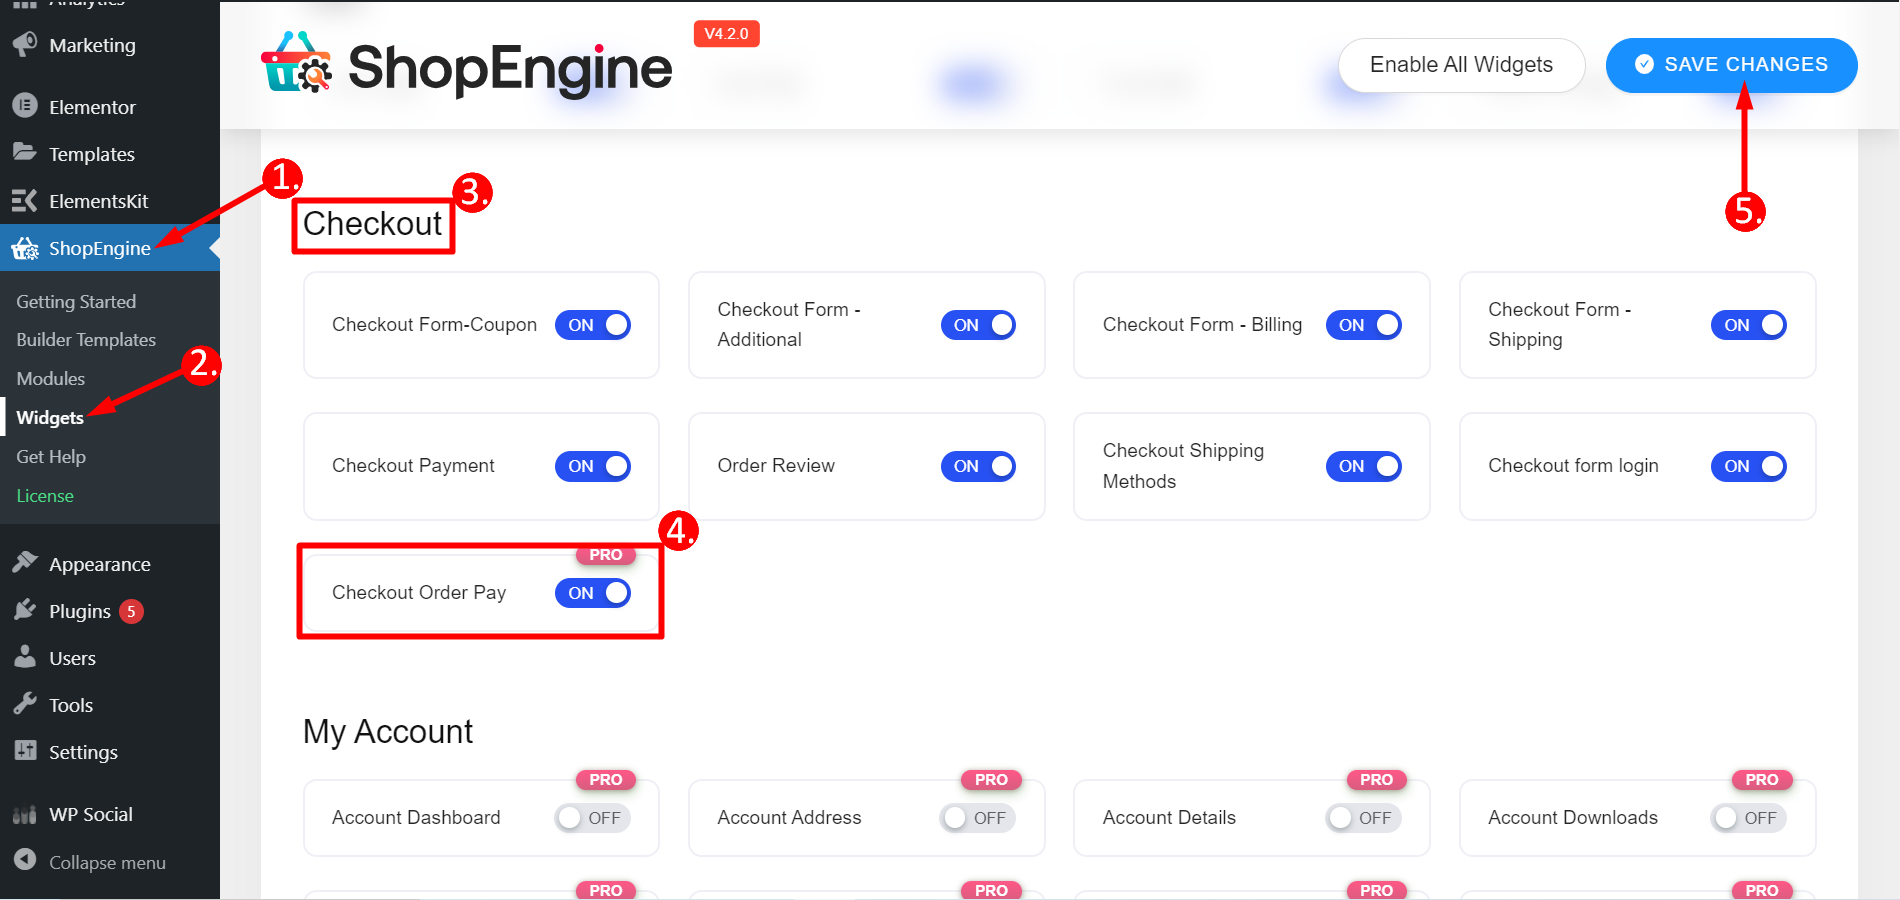
2. Enabling Checkout order pay Widget #
From your WordPress Dashboard => 1. ShopEngine => 2. Widgets => 3. Go to the Checkout section => 4. Find Checkout Order Pay and turn it ON => 5. Click Save Changes
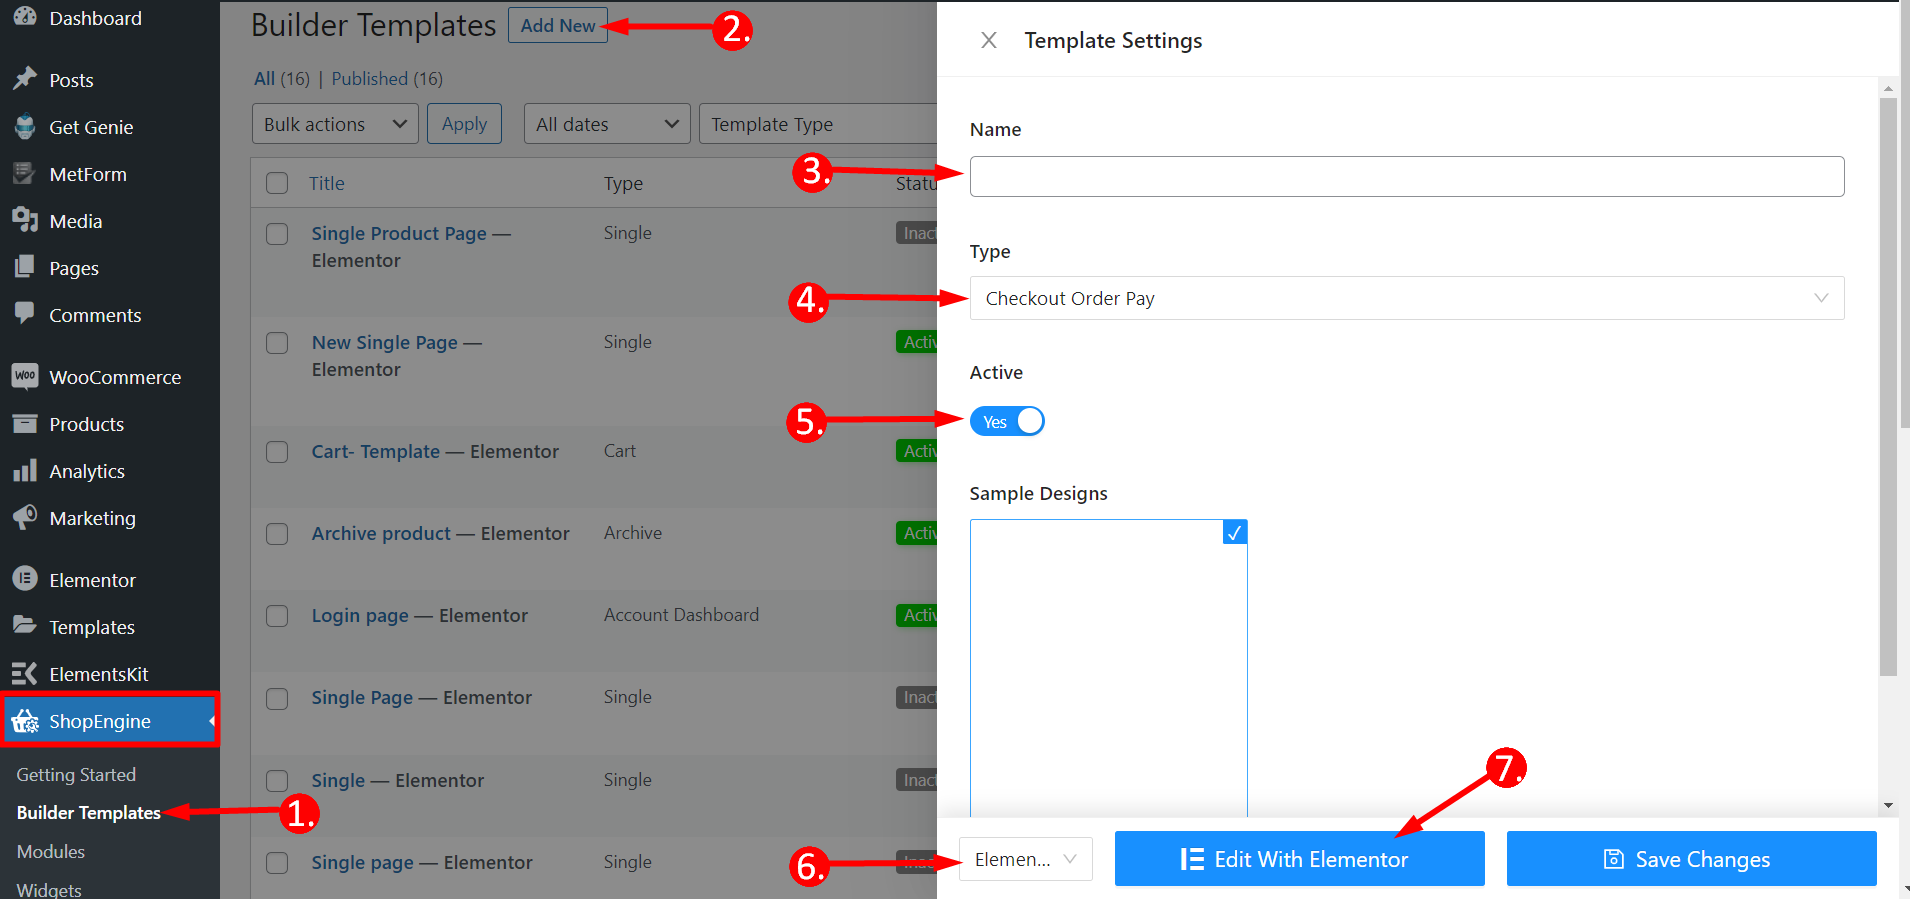
Creating Checkout Order Pay template #
To get the Checkout order pay Widget you need to create a template for the due payment.
So, navigate to ShopEngine –
- Click Builder Templates
- Click on the “Add New” button in the top left corner.
- Name: Enter a template name.
- Type: Checkout Order Pay.
- Activate the template.
- Select the editor (Elementor in this case).
- Click on the Edit with Elementor.
Using the Widget #
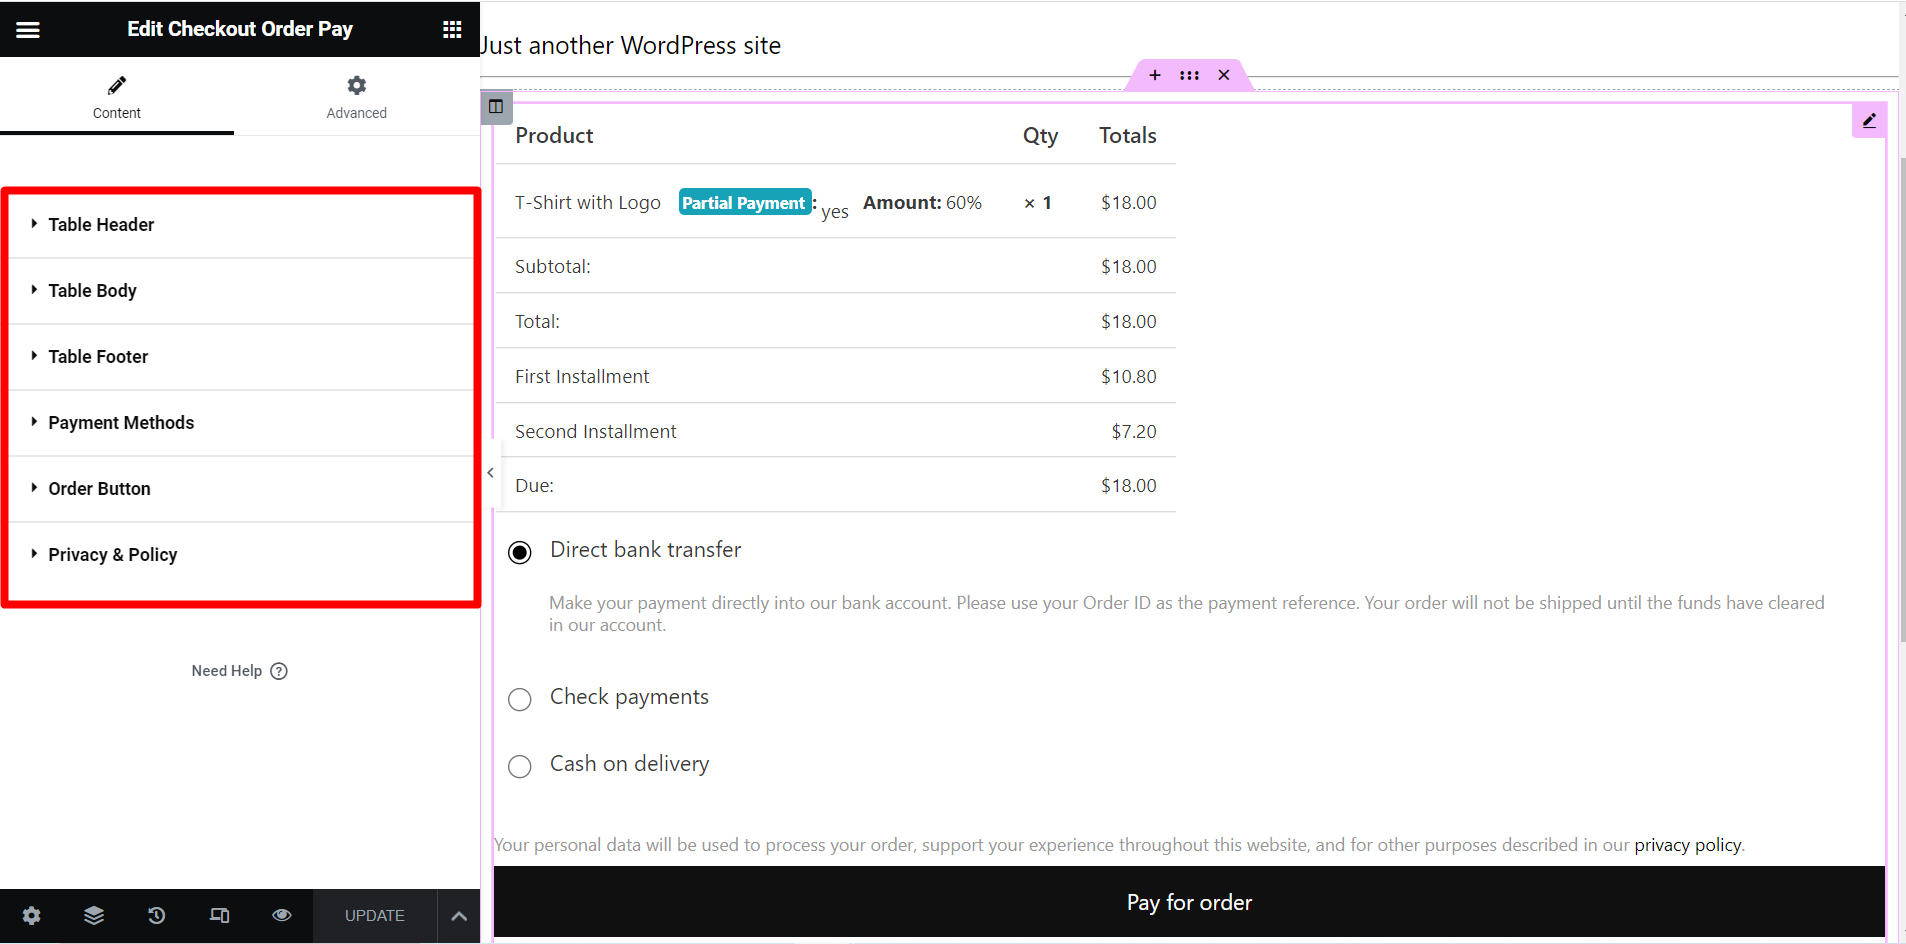
Now, you have to search the Checkout Order Pay widget and drag and drop it into the design area. Here you can see the due payment details of your order.
The customization options you will get here are –
✓ Table Header – You can change text color, background color, border bottom color, typography, and padding to the table.
✓ Table Body – Here you’ll get the same options as the table header to change the table body look.
✓ Table Footer – Options are all the same here, use them to make the table footer attractive.
✓ Payment Methods – It provides label, checkbox, and description designing options like color, label gap, padding, etc.
✓ Order Button – This field also gives the same options as the table header with a margin adjusting feature.
✓ Privacy & Policy – You can adjust color, link color, typography, and padding
Final Output #
This is how the ShopEngine widget works for partial payment as a WooCommerce checkout order pay-
Hope the documentation is helpful for you. Access more premium additions of ShopeEngine 👇 👇


