


Categories widgets let you display categories so your customers can easily navigate. This is a general widget of ShopEngine so you can use it on any of the templates.
Let’s check out the steps of how you can use the Categories widget:
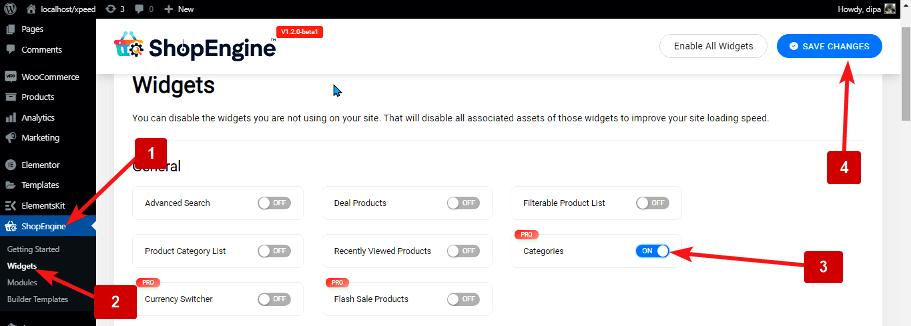
Step 1: Enable the Categories Widget #
To enable the widget,
- Go to ShopEngine > Widgets > Categories
- Turn on Categories Widget under General section
- Save changes
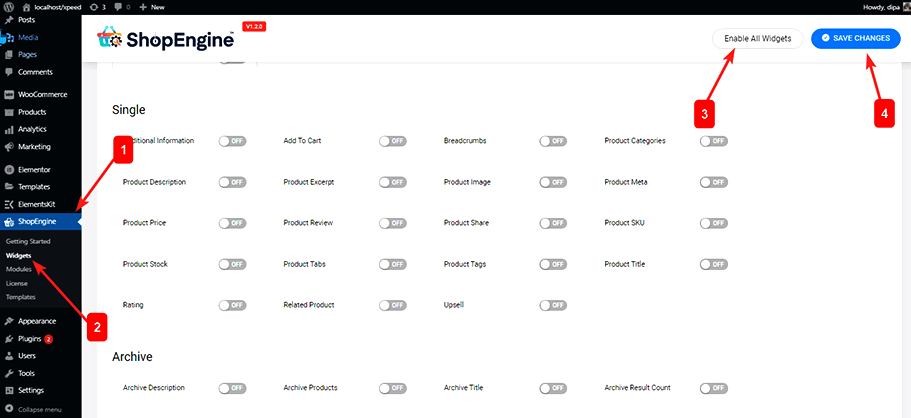
Note: You can also turn on the Categories Widget with a global setting that turns on all the widgets of ShopEngine. To turn on all the widgets
- Go to ShopEngine > Widgets
- Click on Enable All Widgets
- Save changes
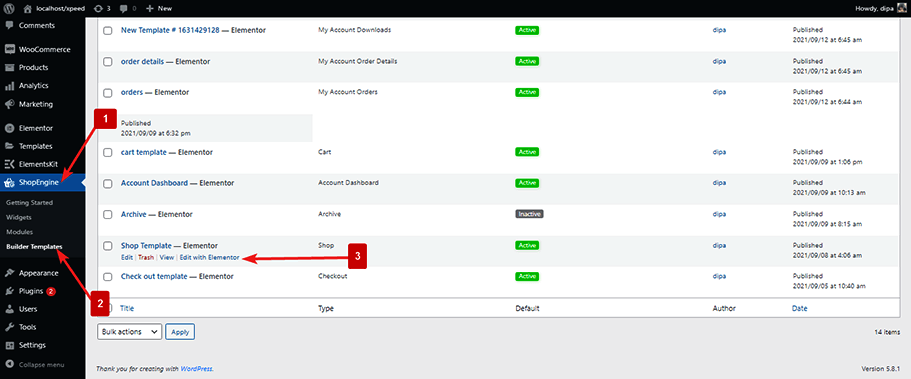
Step 2: Add Categories Widget #
To add Categories:
- Go to ShopEngine > Templates > Any ShopEngine Template
- Click on Edit with Elementor
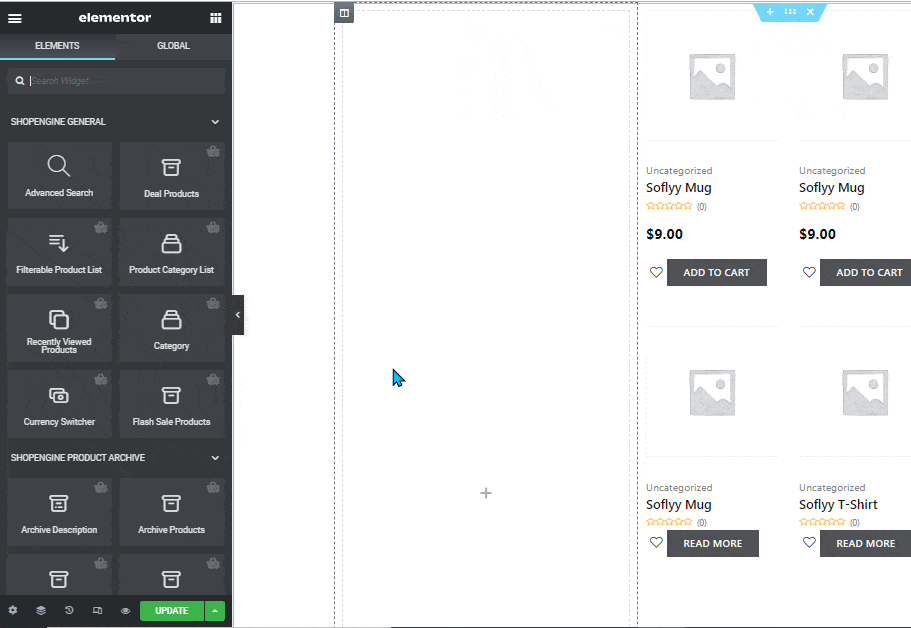
- Search for Categories on Elements Search option
- Drag and drop the widget
- Click on Update to save changes
Step 3: Configure Settings #
Go to: Content > Content to change the following options:
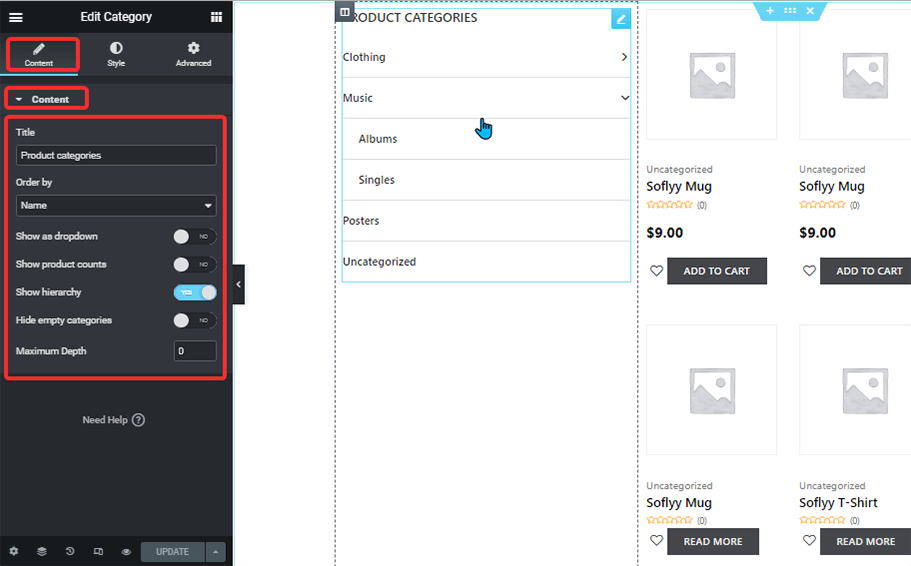
- Title: Change the title of the widgets.
- Order By: You can set the order list by category or name.
- Show as Dropdown: Turn this option on to show all the categories as one drop-down menu.
- Show Product Counts: You can show the total product count for each category by turning this option on;
- Show Hierarchy: This option shows the category in the hierarchy. If you turn this option off, then all the categories will show up in one list without any hierarchy.
- Hide Empty Categories: Turn this option on to hide the categories with no product.
- Maximum Depth: Enter the number of category levels you want to show. The default value is 0 and it will show all the labels.
Step 4: Style Settings #
Go to the Style tab to change the following style settings:
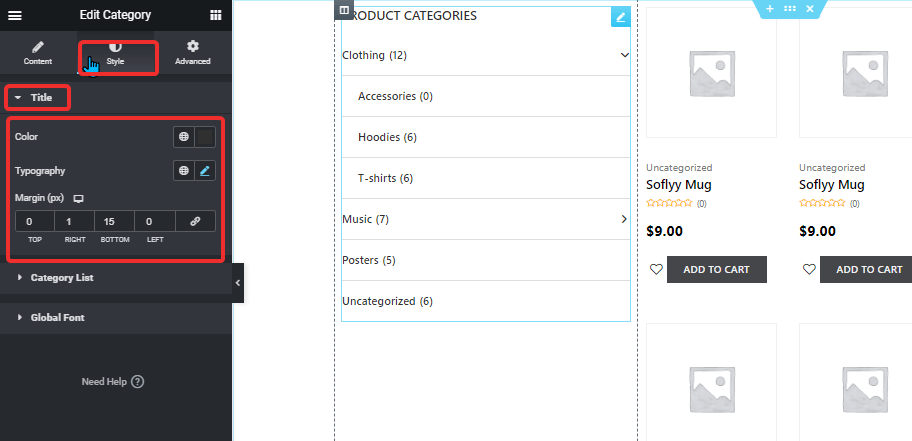
Title: #
- Color: Change the color of the title text
- Typography: Click on the typography edit icon to change the font size.
- Margin (px): Adjust the top, right, bottom, and left margin around the title.
Category List: #
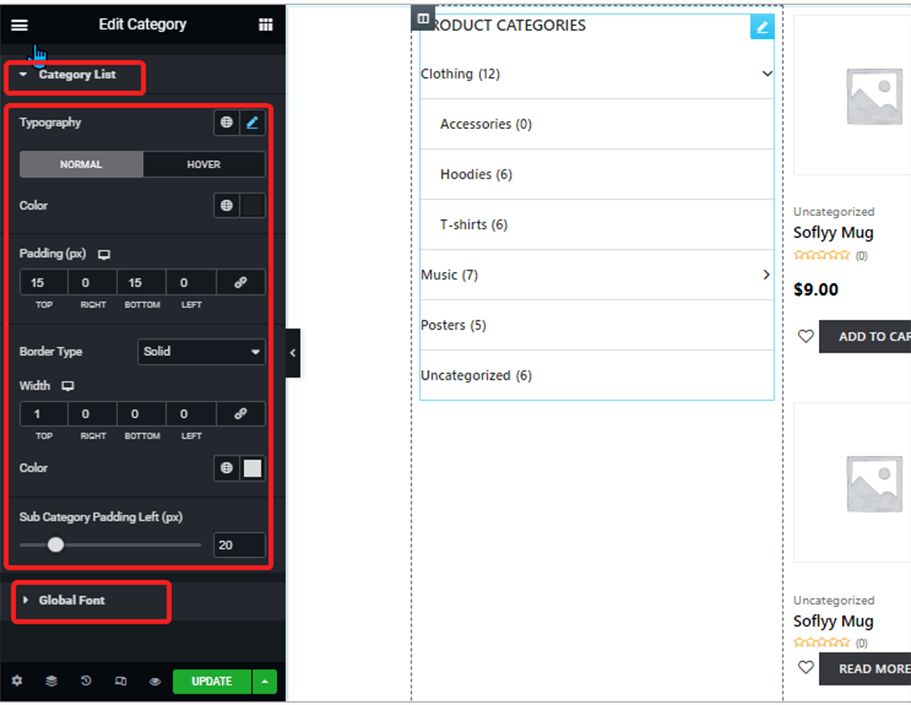
- Typography: Click on the typography edit icon to change the font size.
- Color: Choose a color for both the normal and hover view.
- Padding(px): Adjust the top, right, bottom, and left margin around the title.
- Border Type: Choose a border type for the category list. You can go for solid, double, dotted, dashed, and groove. If you don’t want any border to choose none.
- Width: Select the top, right, bottom, and left width for the border.
- Color: Pick a color for the border type.
- Sub Category Padding Left (px): Choose how much left padding you want for the subcategory.
Global Font: #
- Font family: Here you can change the font family for the whole widget.
After making all the changes, click Update to save.


