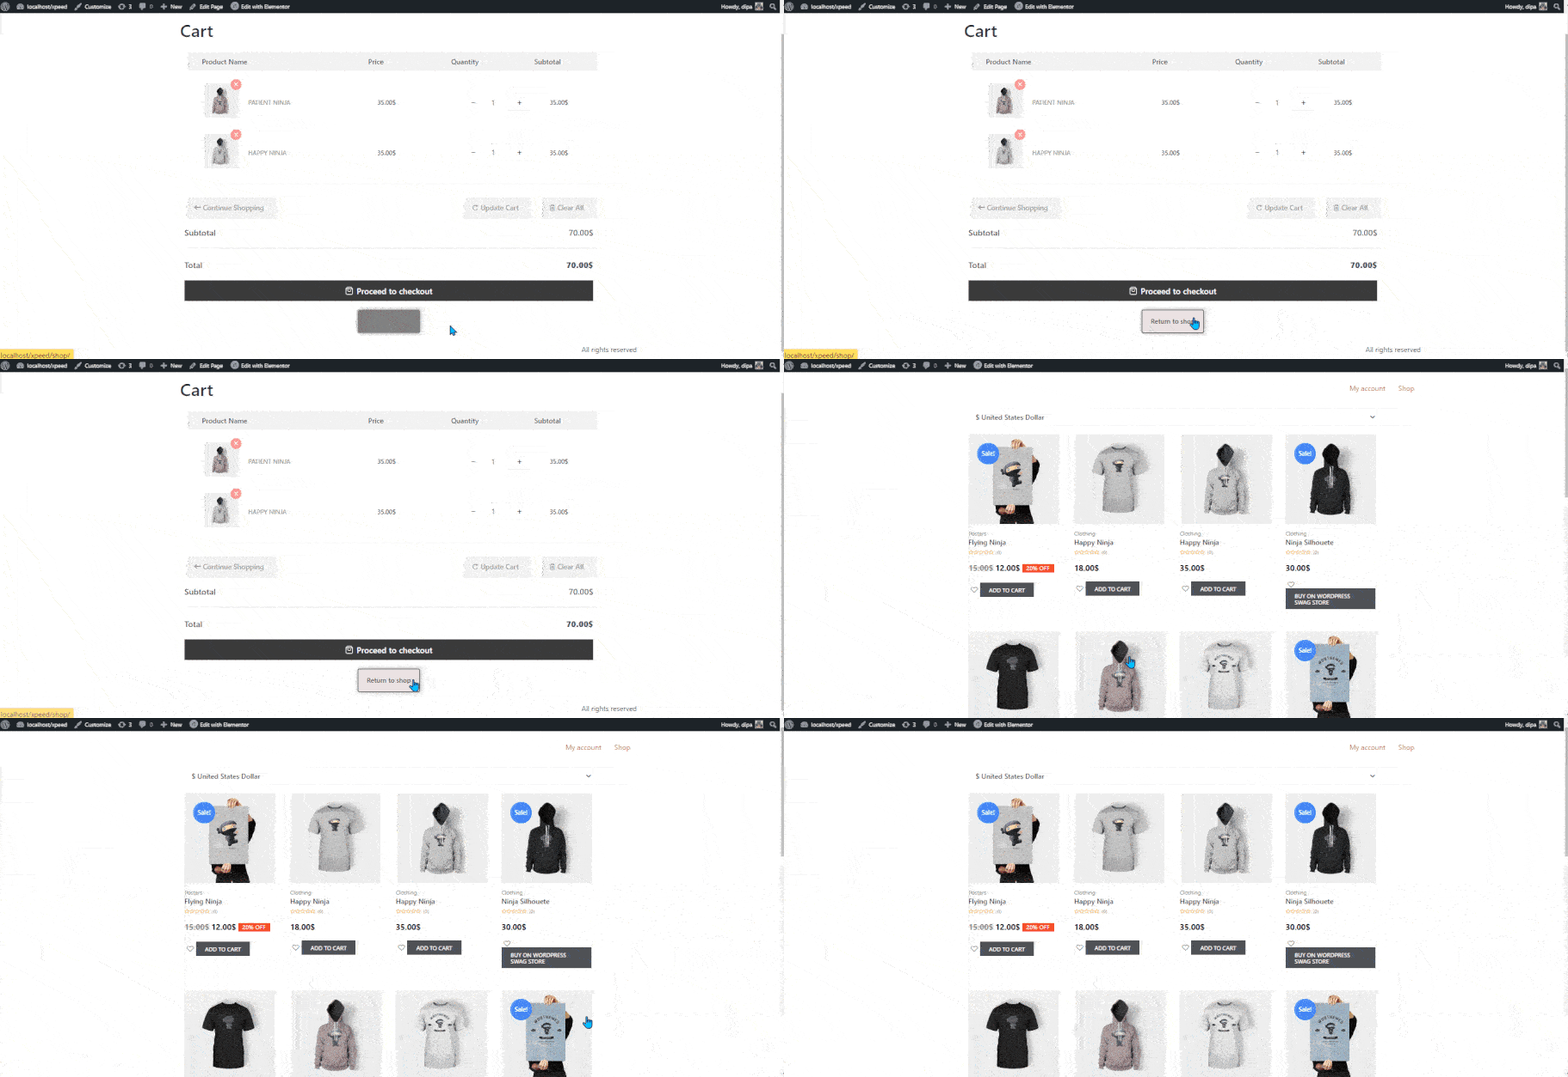
Return To Shop widget takes the customer to the Shop page from the cart page. This is a great option so customers can go back to the shop page with one click and buy more products.
Let’s learn how you can use Return To Shop Widgets on your wooCommerce site:
Step 1: Enable the Return To Shop Widget #
To enable the widget,
- Go to ShopEngine > Widgets > Return To Shop
- Turn on
- Save changes
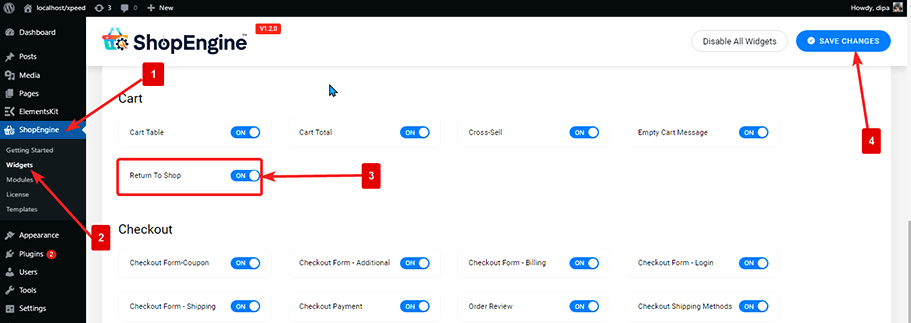

Note: You can also turn on Product Tabs with a global setting that turns on all the widgets of ShopEngine
Step 2: Add Return To Shop #
Before you can add the widget you need to create a Cart Template first. Check out the documentation on how to create a Cart Template.
To add Return to Shop Widget:
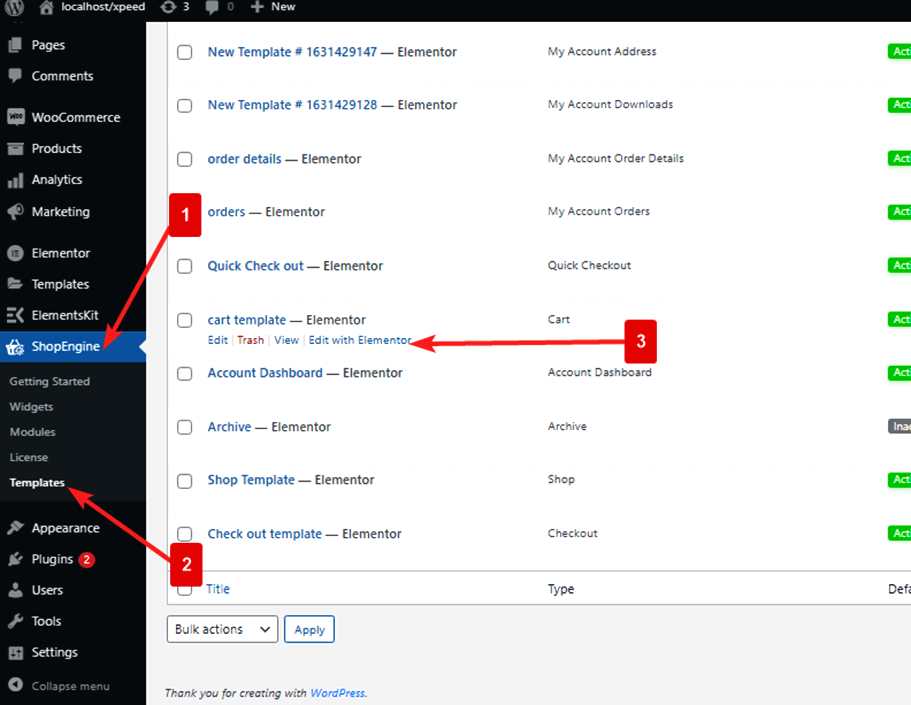
- Go to ShopEngine > Templates > Cart Page Template
- Click on Edit with Elementor

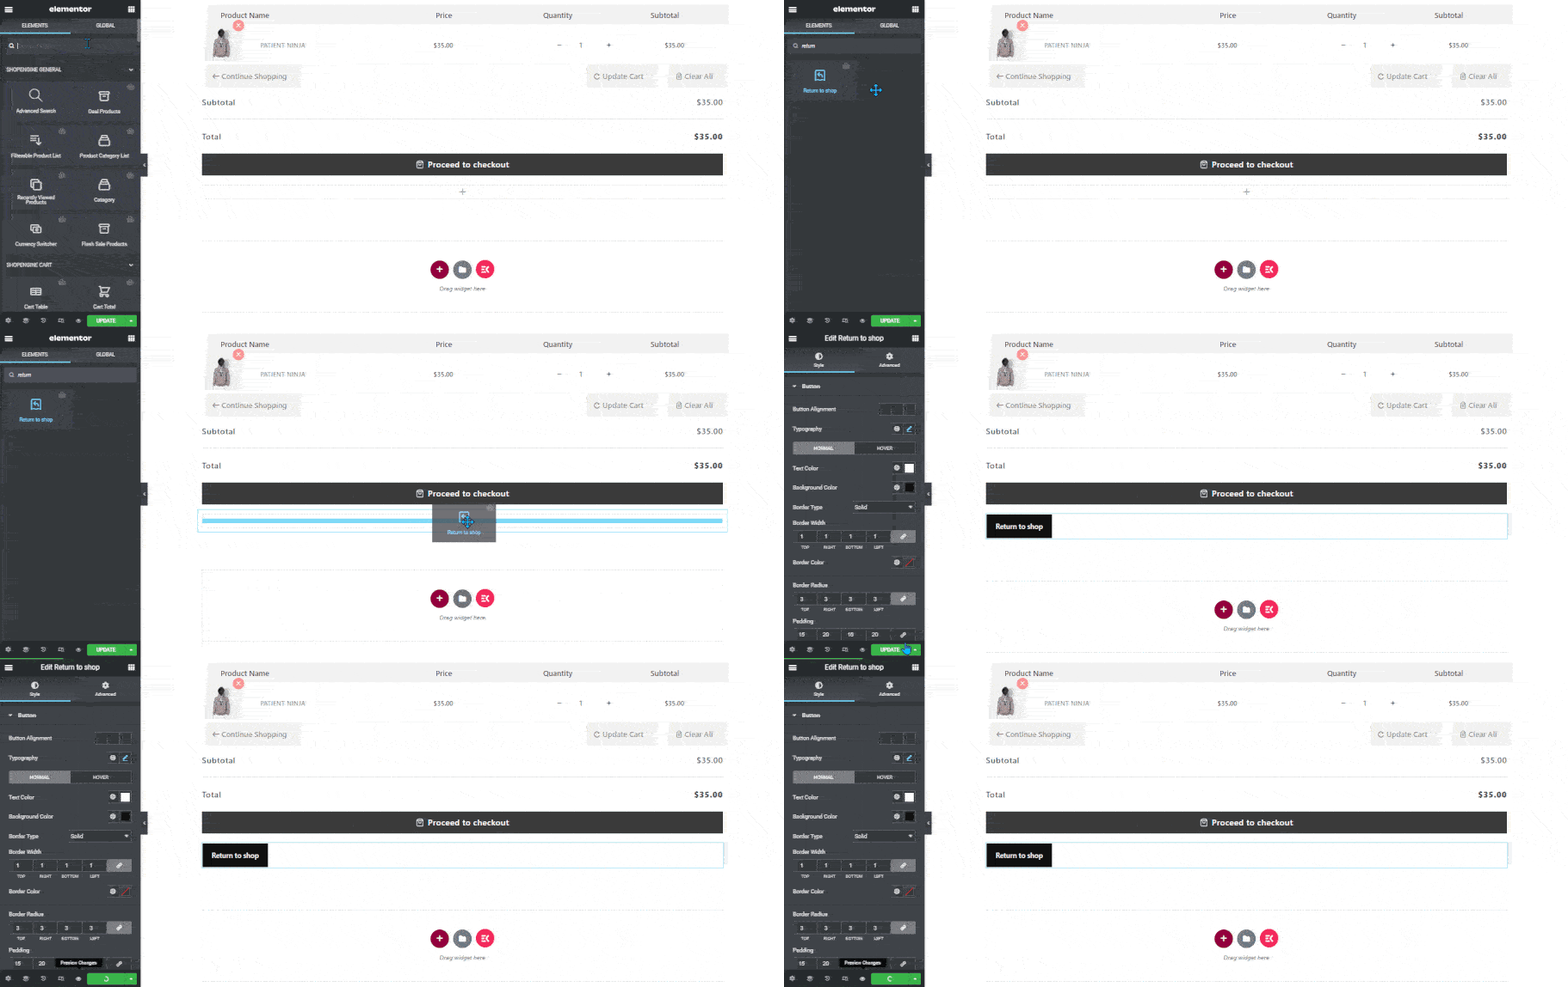
- Search for Return To Shop on Elements Search option
- Drag and drop the widget
- Click on Update to save changes.

Step 3: Style Settings of Return To Shop Widget #
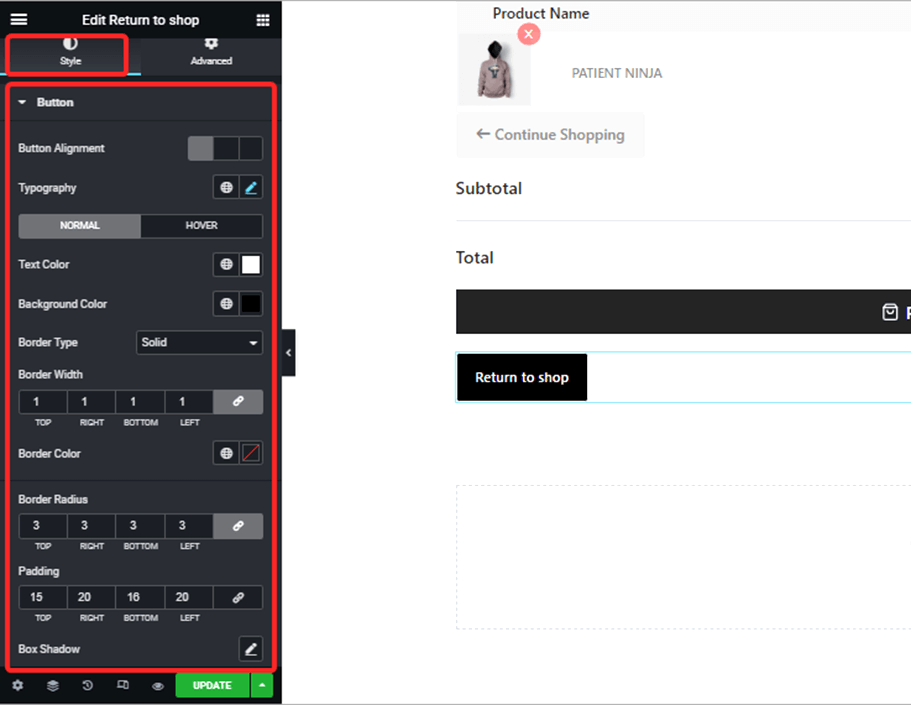

Go to Style > Button to customize the following style settings:
- Button Alignment: You can set the button alignment to be left, right or center.
- Typography: You can change the font family, font size, font weight, transform, and line height for Return To Shop Button here.
- Normal/ Hover: Switch to normal and hover tab to change text color and background color for both normal and hover view.
- Border type: you can choose the border type to be solid, dotted, doubled dashed, or none.
- Border Width: Select the top, left, right, and bottom width of the border.
- Border Color: Pick a color for the border.
- Border-radius: Put the top, right, bottom, and left values for the radius.
- Padding: Adjust the top, left, right, and bottom padding.
- Box Shadow: You can choose the shadow color, horizontal, vertical, blur and spread value. You can also set the position as inset or outline.
Finally, click Update to save all the changes.
Here is how the Return to Shop should work on your cart page.
