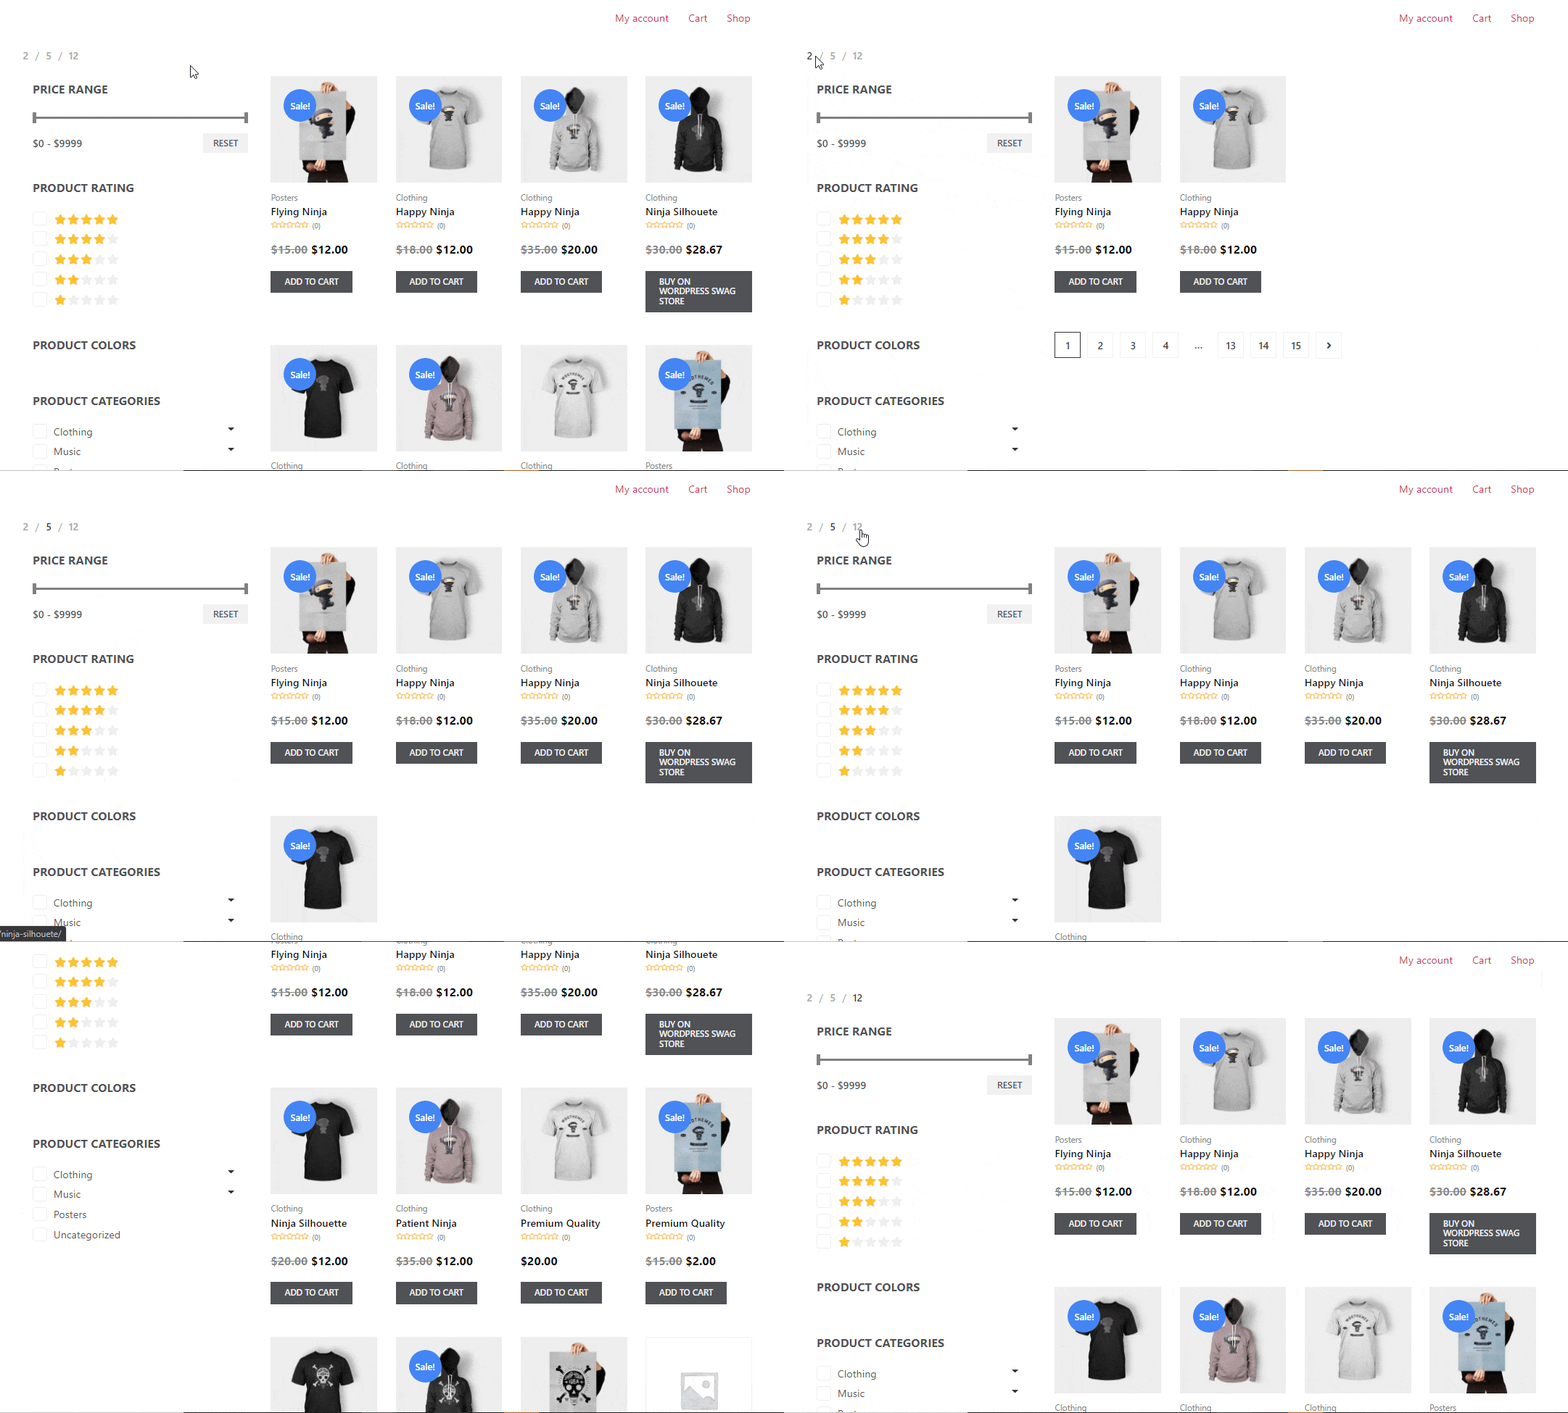
Products Per Page Filter is an Archive/ Shop Template widget of ShopEngine. You can use this widget to give shoppers multiple options to choose from regarding how many products they want to see per page. You can set the options and also customize the style.
Let’s learn how you can use Products Per Page Filter Widgets on your wooCommerce site:
Step 1: Enable the Products Per Page Filter Widget #
To enable the widget,
- Go to ShopEngine > Widgets > Products Per Page Filter
- Turn on Products Per Page Filter under General section
- Save changes
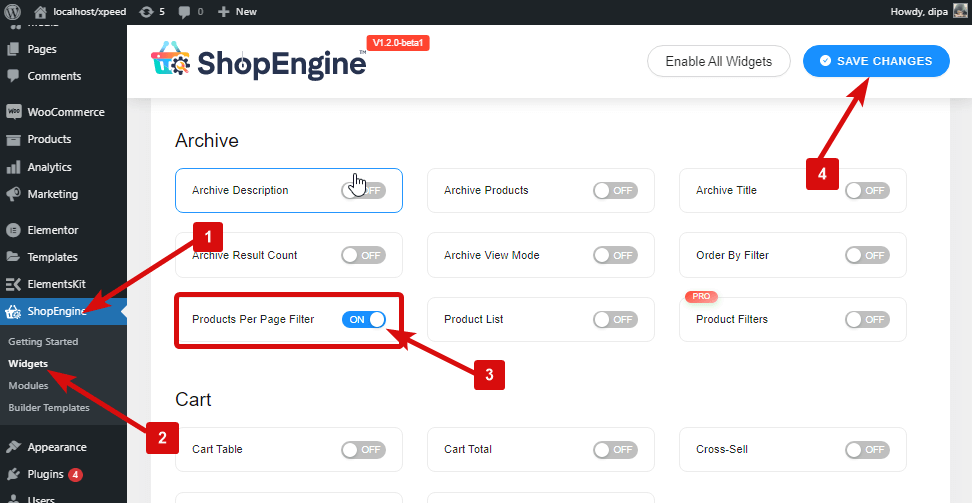
Note: You can also turn on Products Per Page Filter with a global setting that turns on all the widgets of ShopEngine.
Step 2: Add Products Per Page Filter #
Before you can add the widget you need to create ShopEngine Shop/ Archive Template first. Check out the documentation on how to create a Shop Template.
To add Products Per Page Filter:
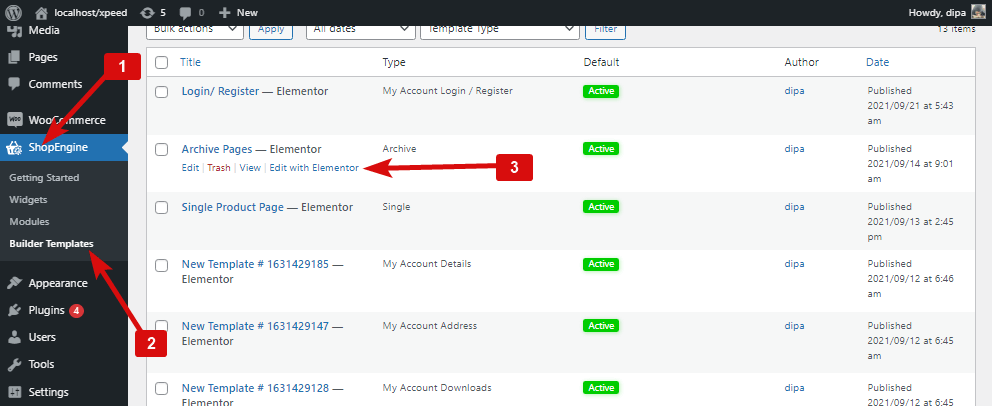
- Go to ShopEngine > Templates > Archice Template
- Click on Edit with Elementor
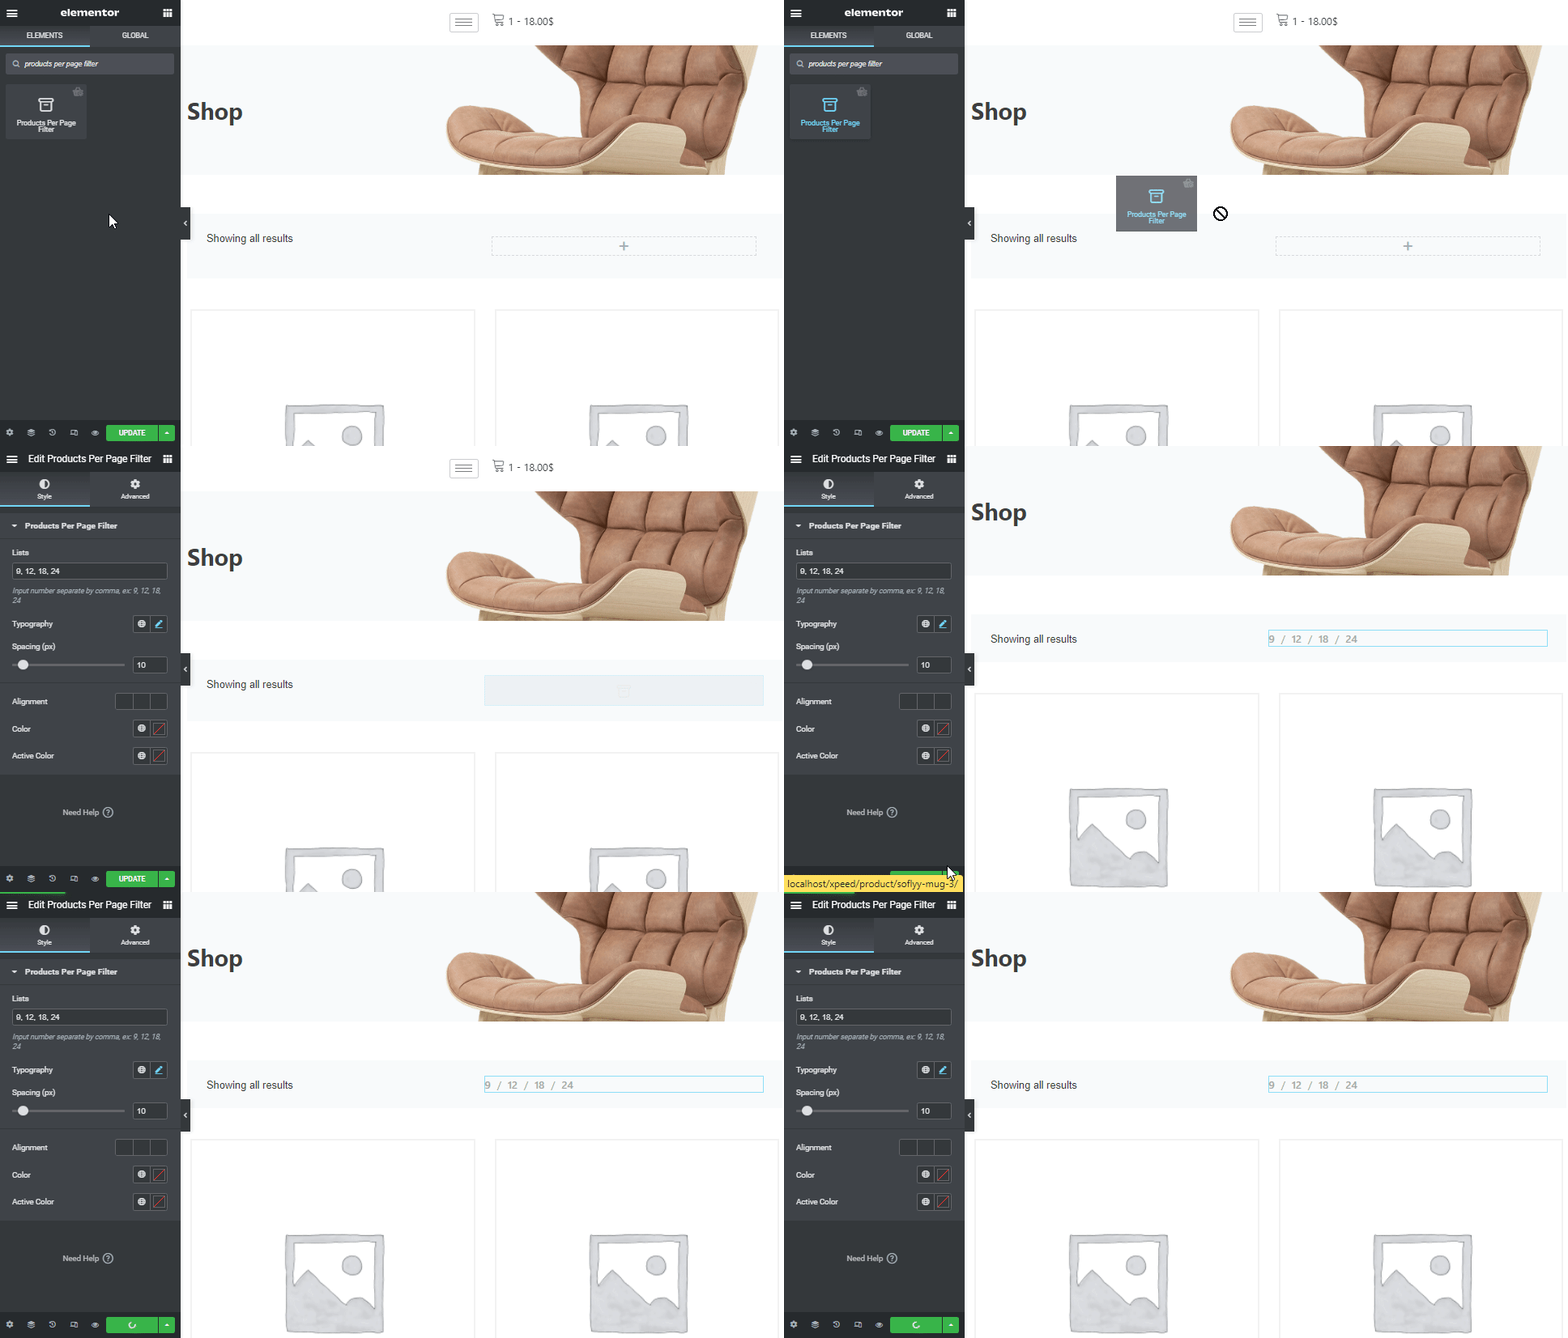
- Search for Products Per Page Filter on Elements Search option
- Drag and drop the widget
- Click on Update to save changes
Step 3: Settings of Products Per Page Filter #
Go to Style > Products Per Page Filter to customize the following settings:
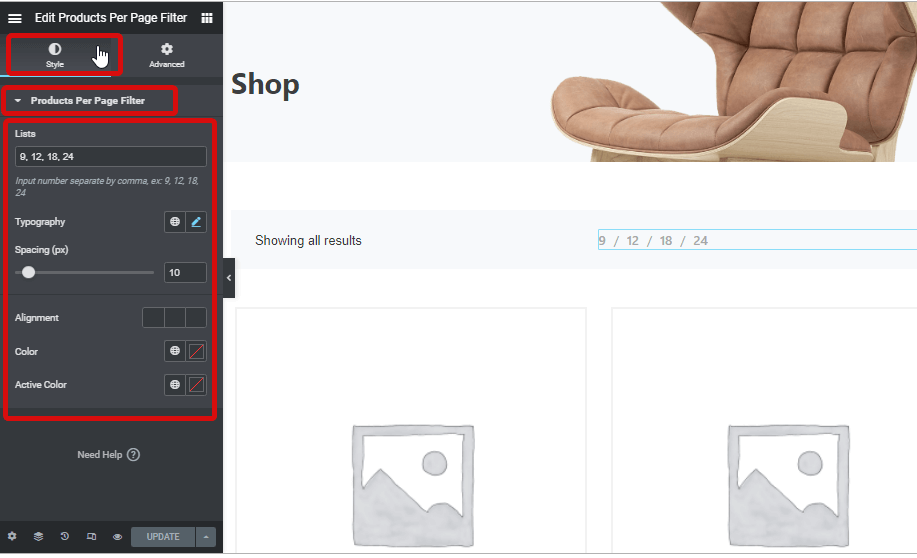
- Lists: Here you can set products per page options for the shoppers to choose from. Provide the number seperated by comma.
- Typography: Choose the font family,size, weight and line height for the texts of the widget.
- Spacing (px): Select how much space you want between two options.
- Alignment: Chose the alignment for the Products Per Page Filter. You can chose either left, right or center alignment.
- Color: Choose a color for the widget.
- Active Color: Here you can chose the color for the option that is active.
After making all the changes click update to save. Now Products Per Page Filter should be visible on the storefront with all the customization and styling.
Here is a preview of Products Per Page Filter
