Getting started with ShopEngine Gutenberg Template #
ShopEngine Gutenberg allows you to create a Single Page, Archive, Shop, Cart, Checkout, and Quick View template from scratch using the Gutenberg editor. You will get multiple widgets for different templates that you can add and edit to create your custom WooCommerce template.
Note: The pro template, widget, and modules are only available in ShopEngine for Elementor.
How to create a custom WooCommerce template using ShopEngine Gutenberg #
Learn how to create a custom WooCommerce template using ShopEngine Gutenberg in just 4 steps:
Step 1: Enable necessary widgets #
ShopEngine provides the necessary widgets for all the templates. You can find all the widgets under the widget section of ShopEngine, organized under different template names.
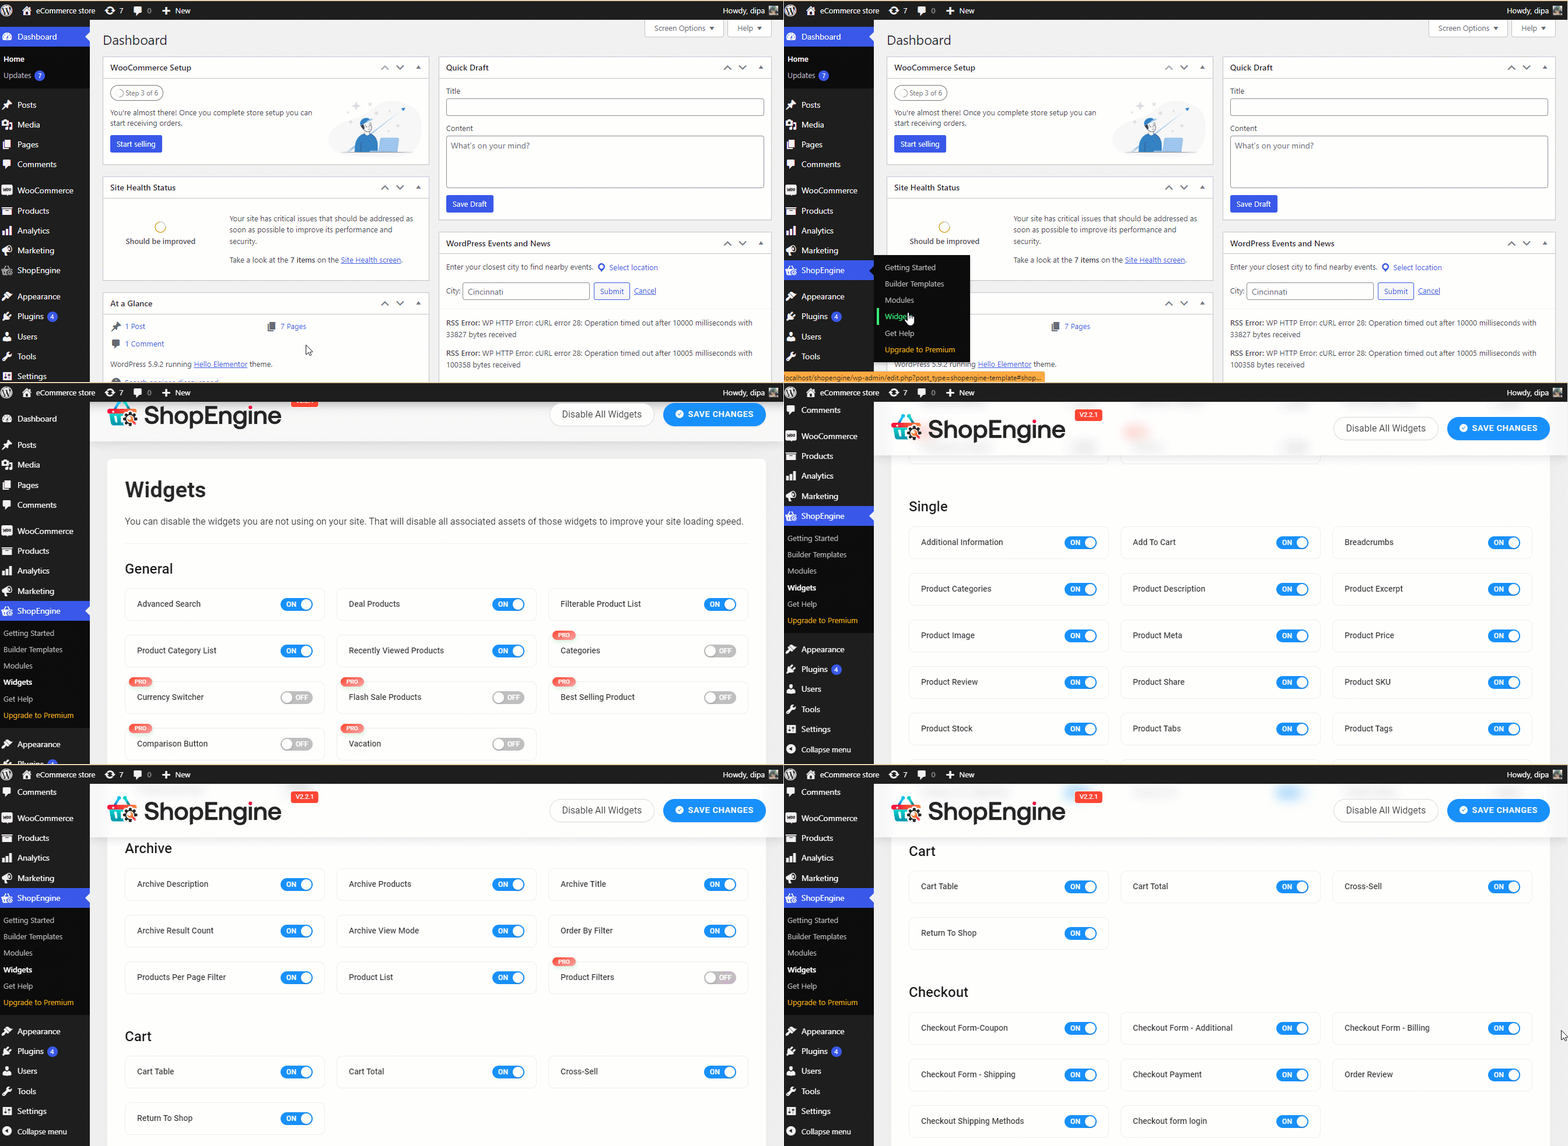
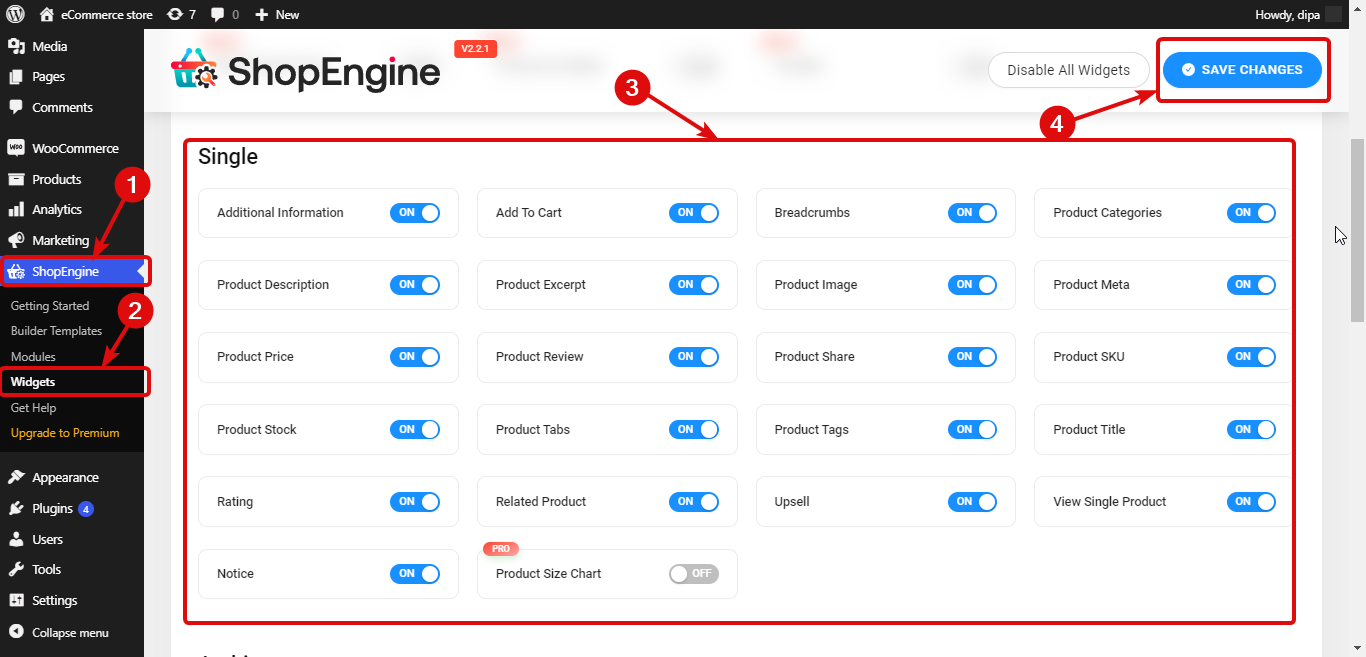
You must turn on all the widgets you are going to use. To turn on the widget go to ShopEngine ⇒ Widgets. For example, if you want to create a custom single product page, then turn on all the widgets under Single then click on Save changes.
Step 2: Create a template #
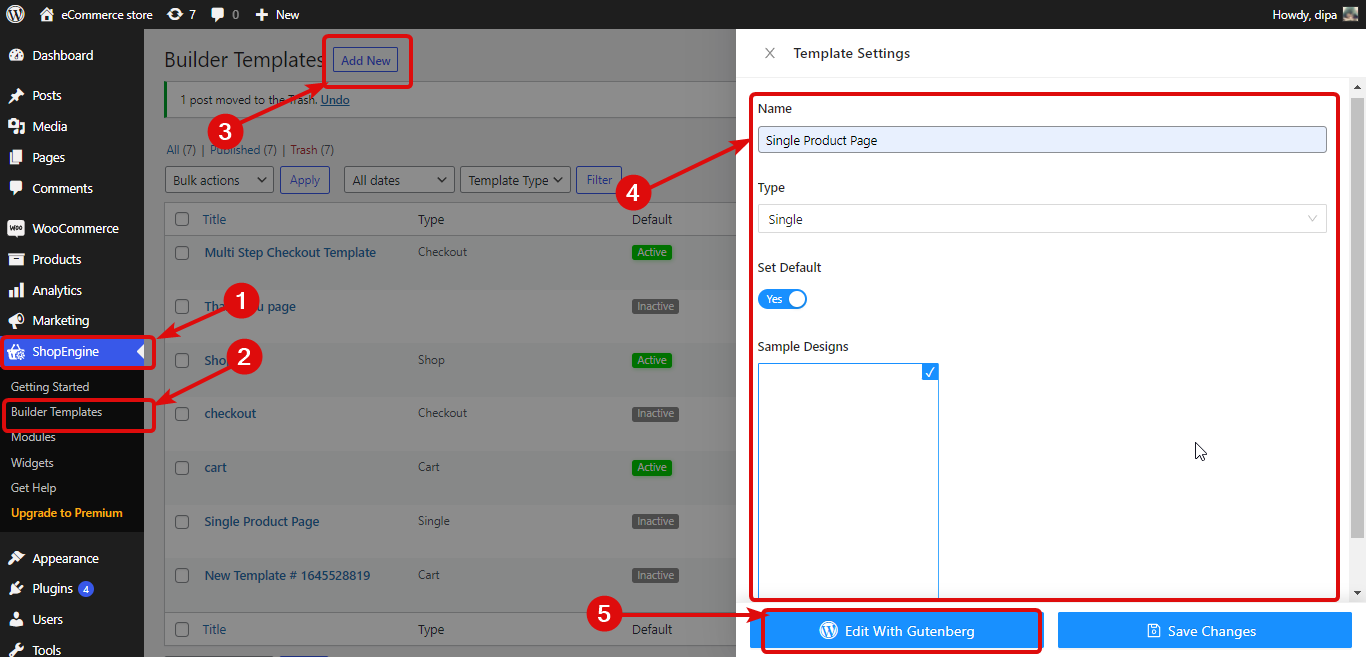
To create a new template go to ShopEngine ⇒ Builder’s template and click on Add New. Then provide the following options:
- Name: Provide a suitable name.
- Type: Choose the type of template you want to create from the drop-down.
- Set Default: Must turn this option on to make this your default template.
- Sample Design: Choose the blank template
Finally, click on Edit With Gutenberg to start editing/building your template.
Step 3: Edit the template #
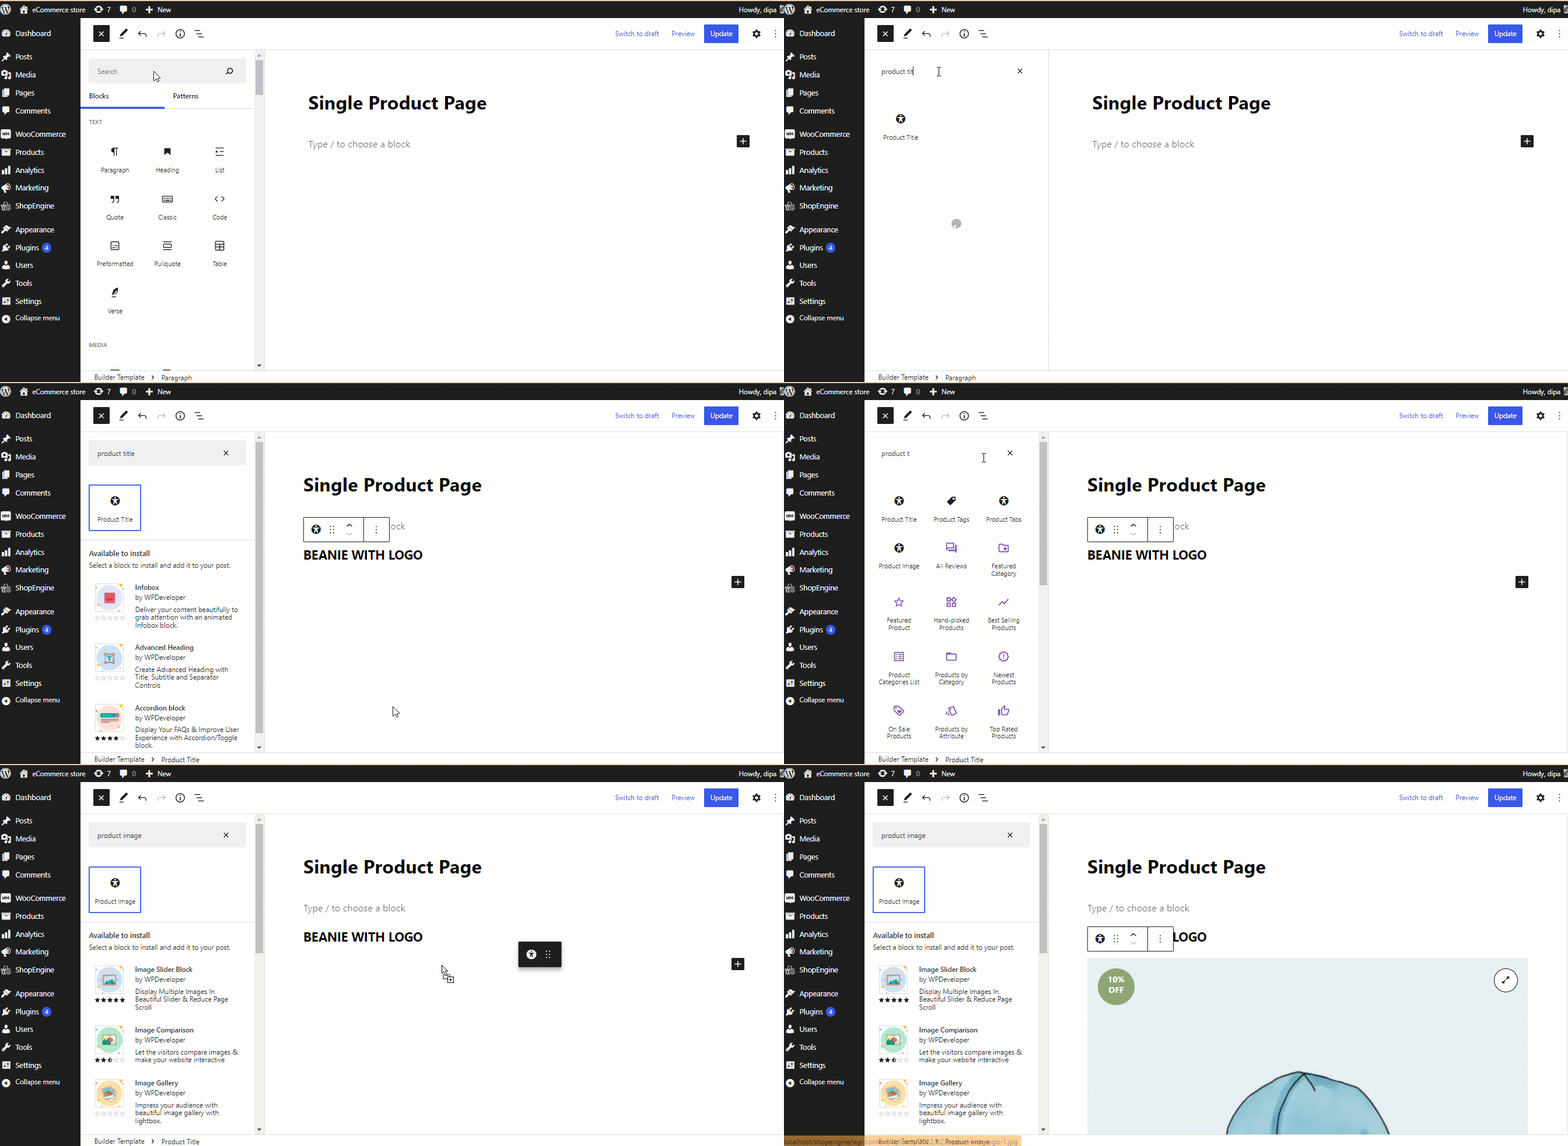
Now to custom design your template, search by widget name one by one, then simply drag and drop on the editor.
Step 4: Update and preview #
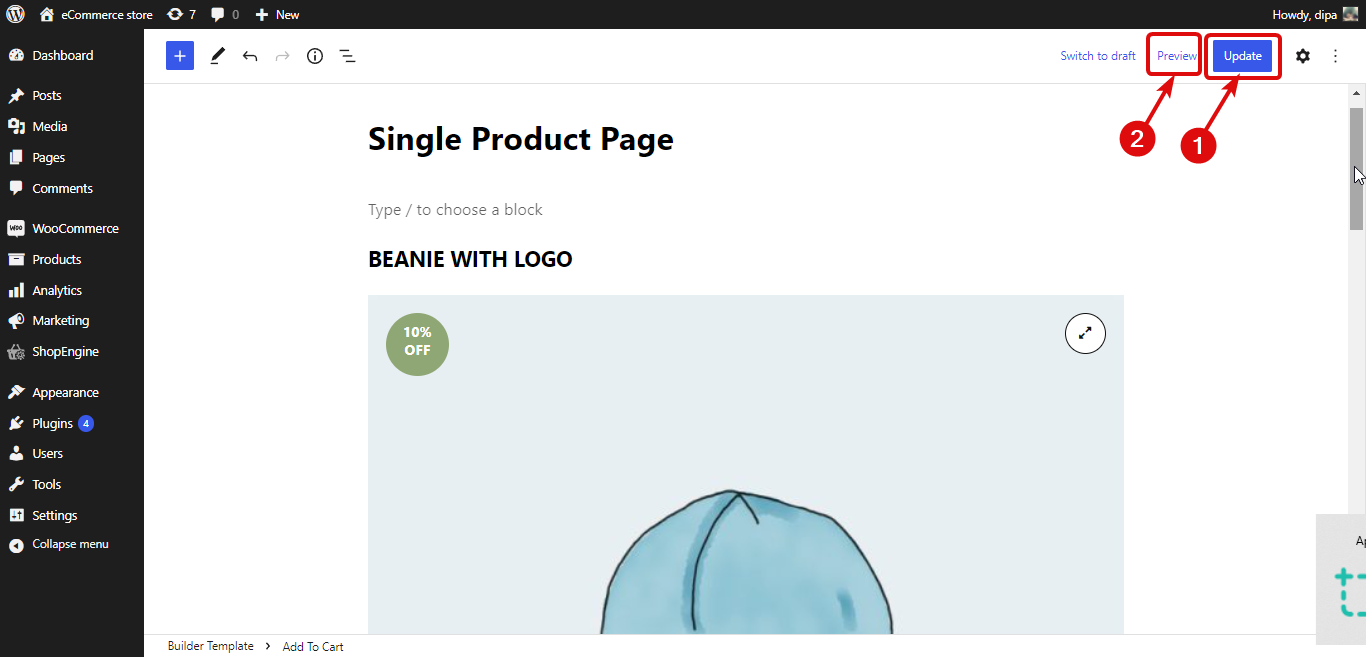
Once you are done creating your custom template click on Update to save. Then you can click on the preview button to see the preview:
