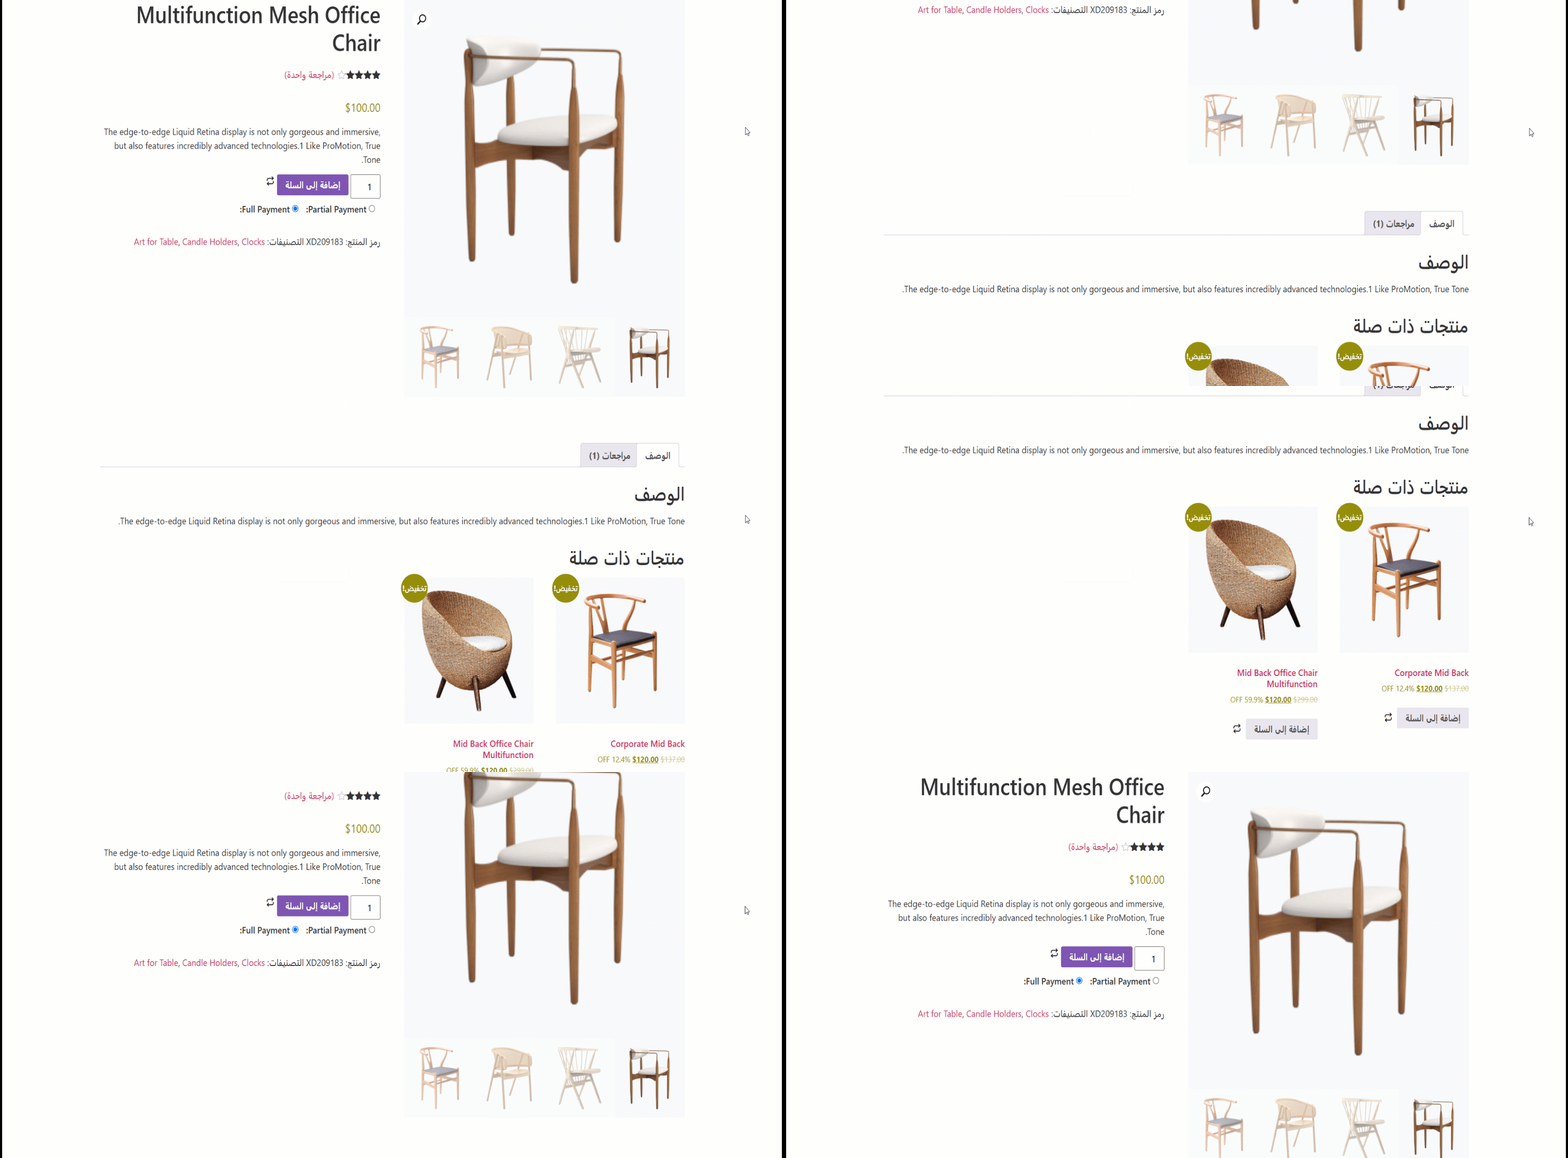
For those who build sites for languages (such as Arabic, Hebrew, etc. ) that are read right-to-left, ShopEngine provides RTL support. You will get one RTL support pre-built template for each of the WooCommerce templates. On top of that, you can also create templates from scratch.
How to use RTL layout In ShopEngine templates #
Using the RTL layout in ShopEngine templates is really easy. Check out the steps you need to follow to add RTL layout in your WooCommerce templates using ShopEngine.
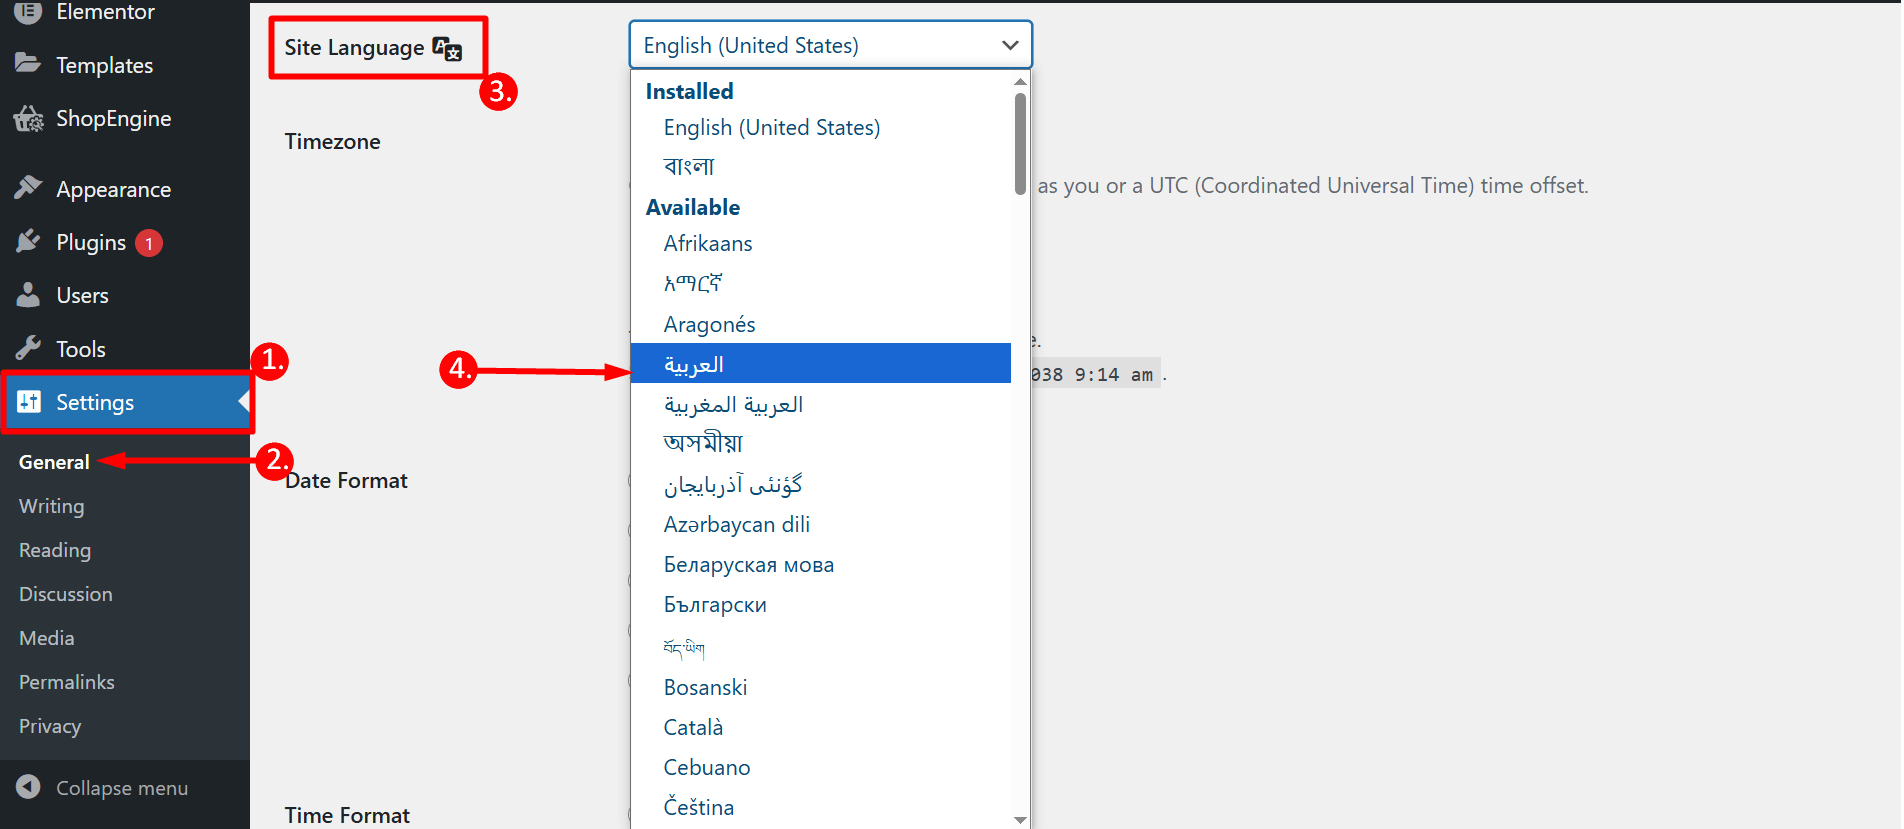
Note: Before you start the process, make sure you have selected a RTL language as Site Language. You can do that from:
- Find Settings from the dashboard
- General
- Site Language
- Select the language that is read from right-to-left

Step 1: Add a new template #
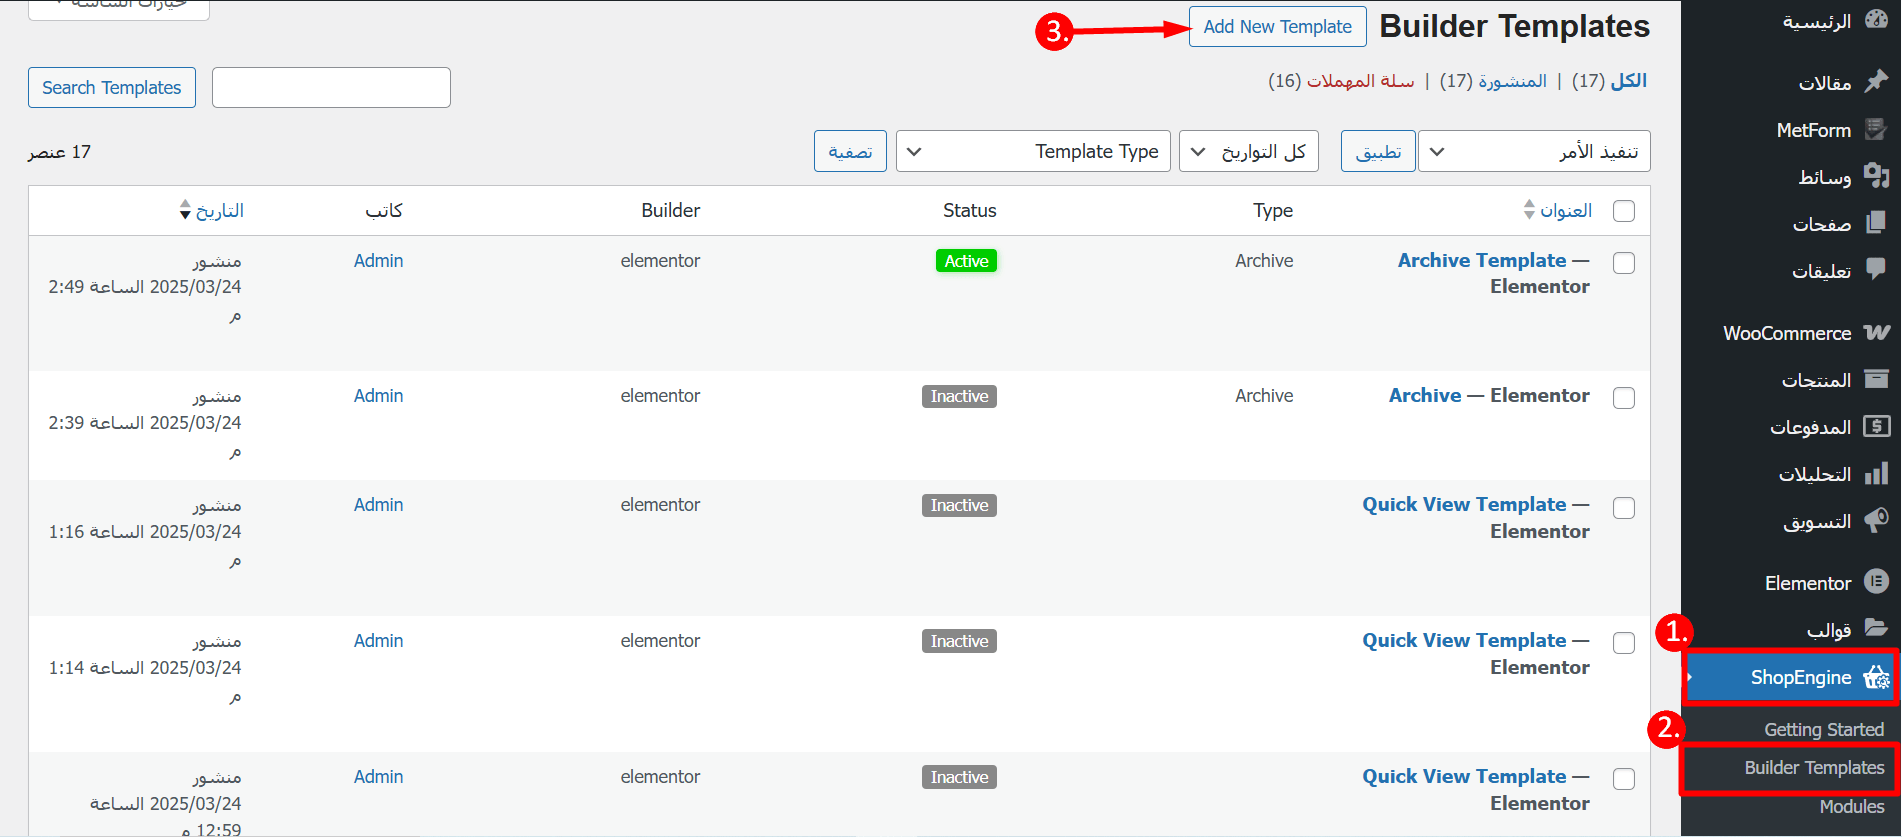
To build a WooCommerce template using RTL layout, 1. navigate to ShopEngine ⇒ 2. Builders Template ⇒ 3. click on Add New Template

Step 2: Choose a pre-built template with RTL layout #
Now, you need to fill up the following options:
- Name: Provide a name for your template.
- Type: Choose the type from the dropdown.
- Applicable Category: Set the right category for the template.
- Set Default: Must turn on this option the template you are building overrides any existing template of the same type.
- Sample Designs: You need to scroll down and choose the RTL design. The name will have RTL added to it.
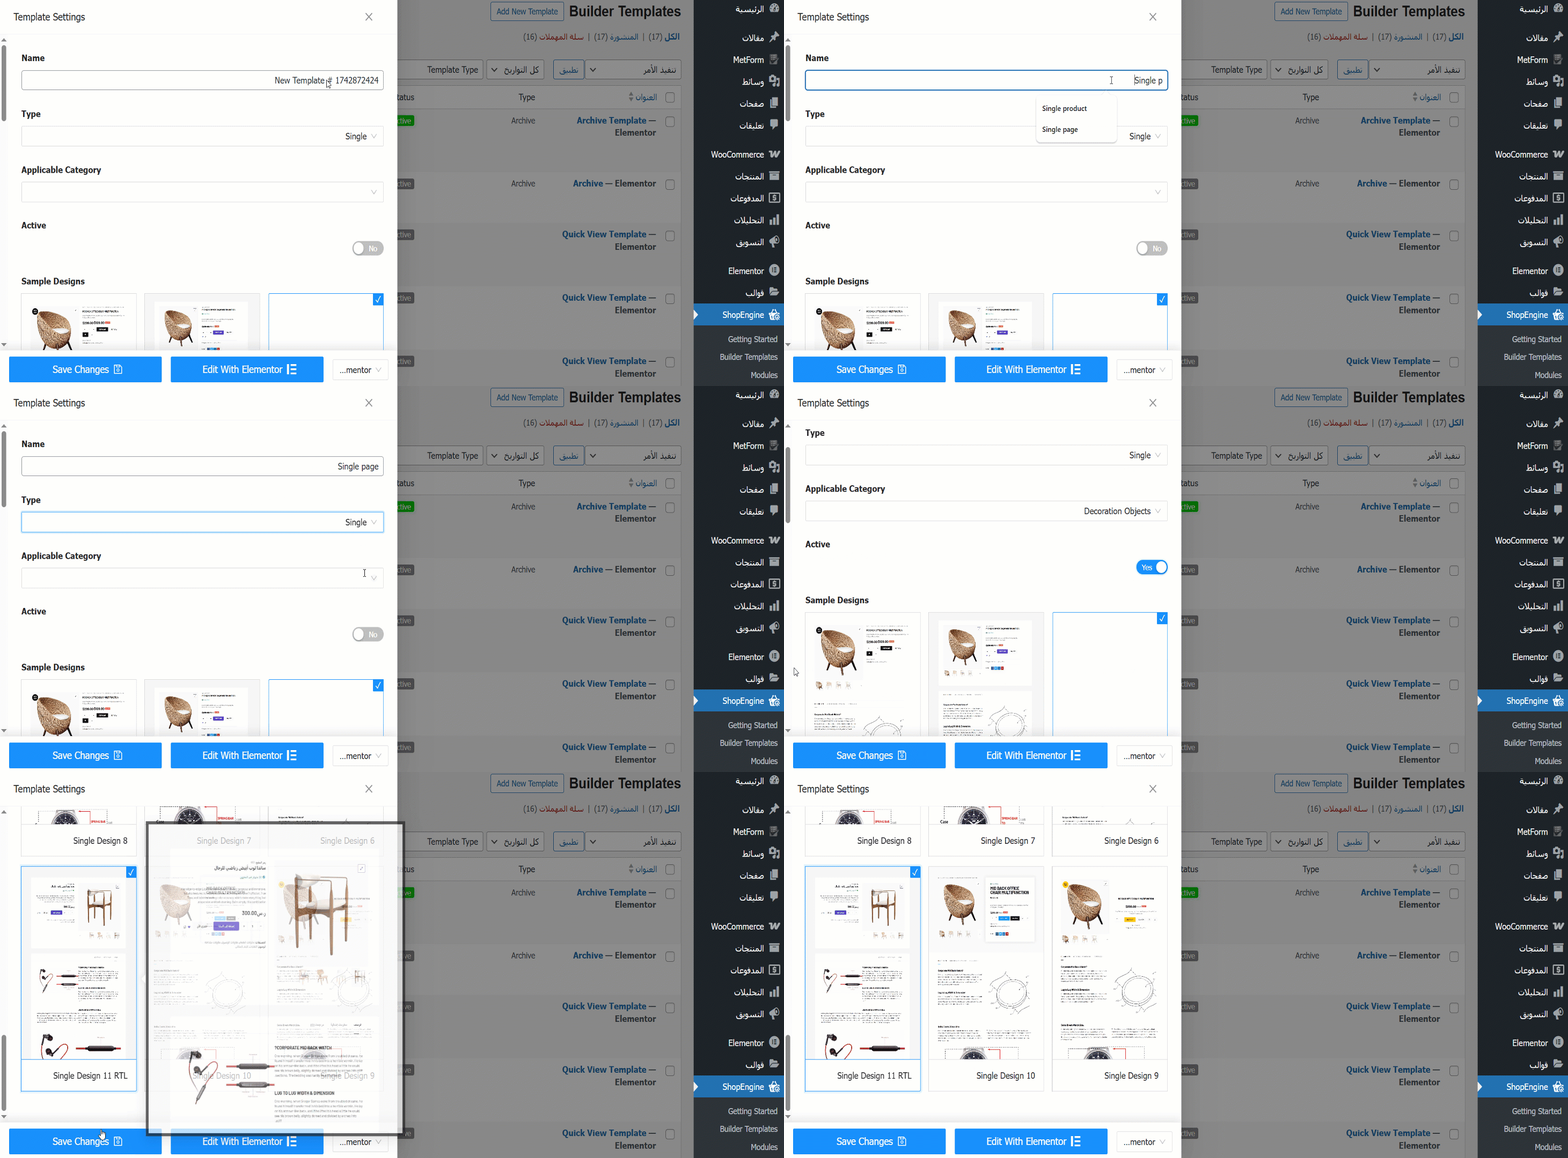

Now click on Edit with Elementor to make further changes to the template style. However, if you like the existing design, click on Save changes and the chosen RTL template will be your default template (no need to go through the following steps).
Note: If you want to build an RTL-supported template from scratch you can do that as well, just select the blank template and build your template using the relevant widgets.
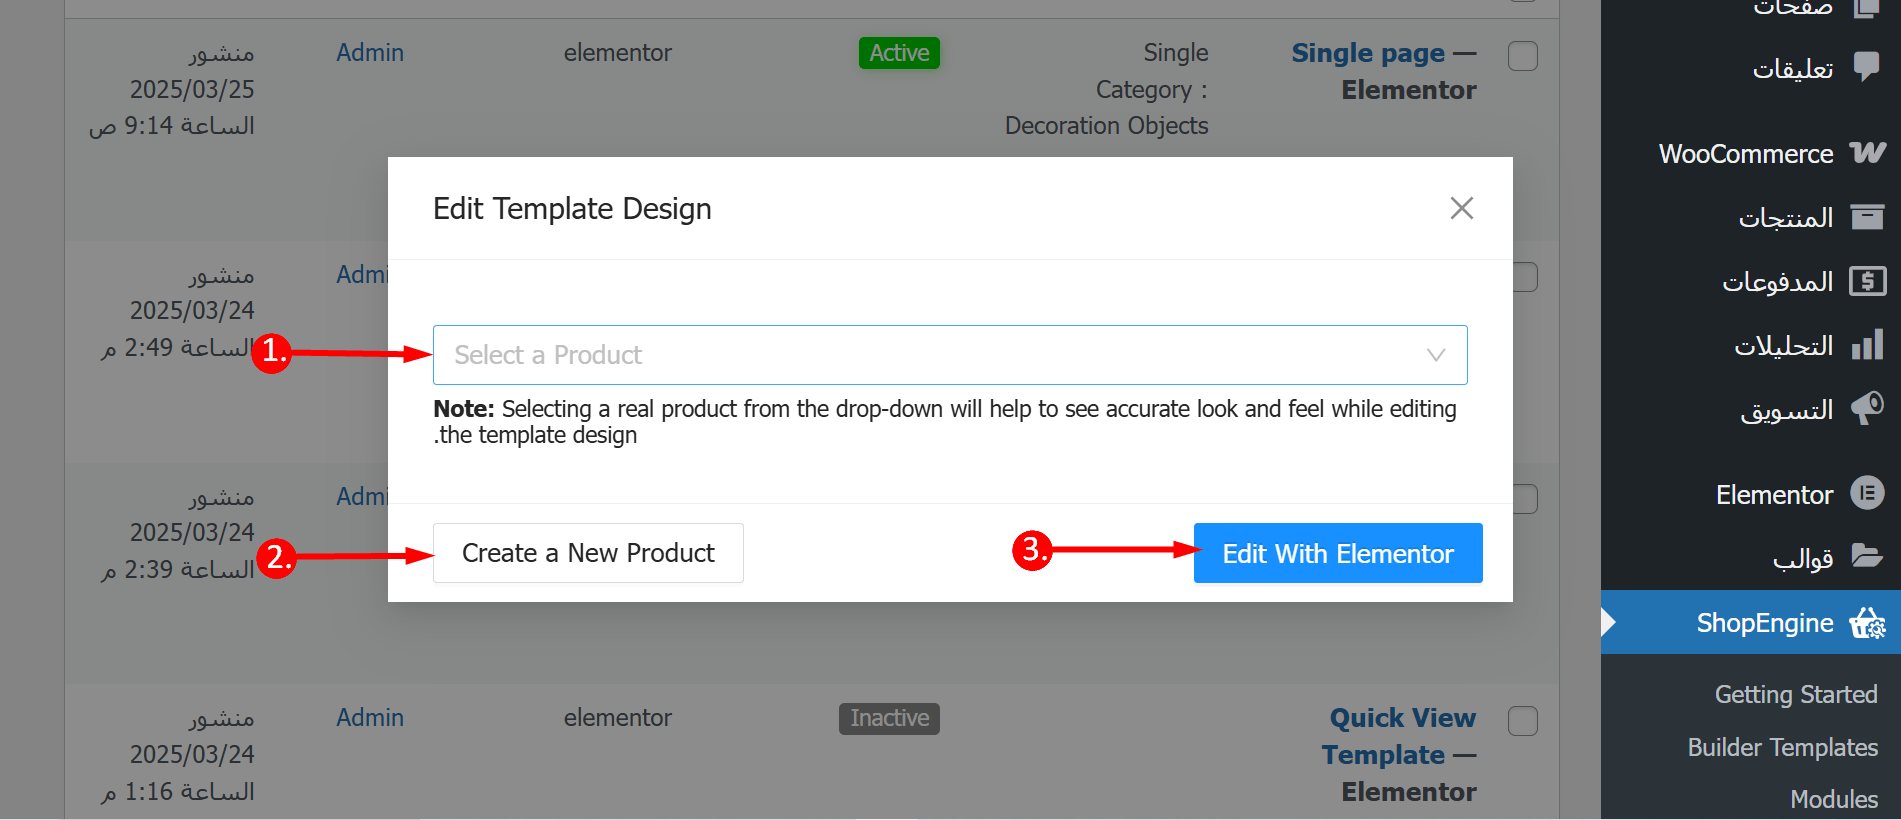
Step 3: Select the product #
Before customizing the template –
- You have to select a product from the list
- Or, you can add your desired product
- Click on the Edit with Elementor button

Step 4: Customize style (optional) #
As mentioned before, you need to click on the Edit With Elementor option to make changes to the existing template. Here you can make changes to each of the widget’s settings and styles both.
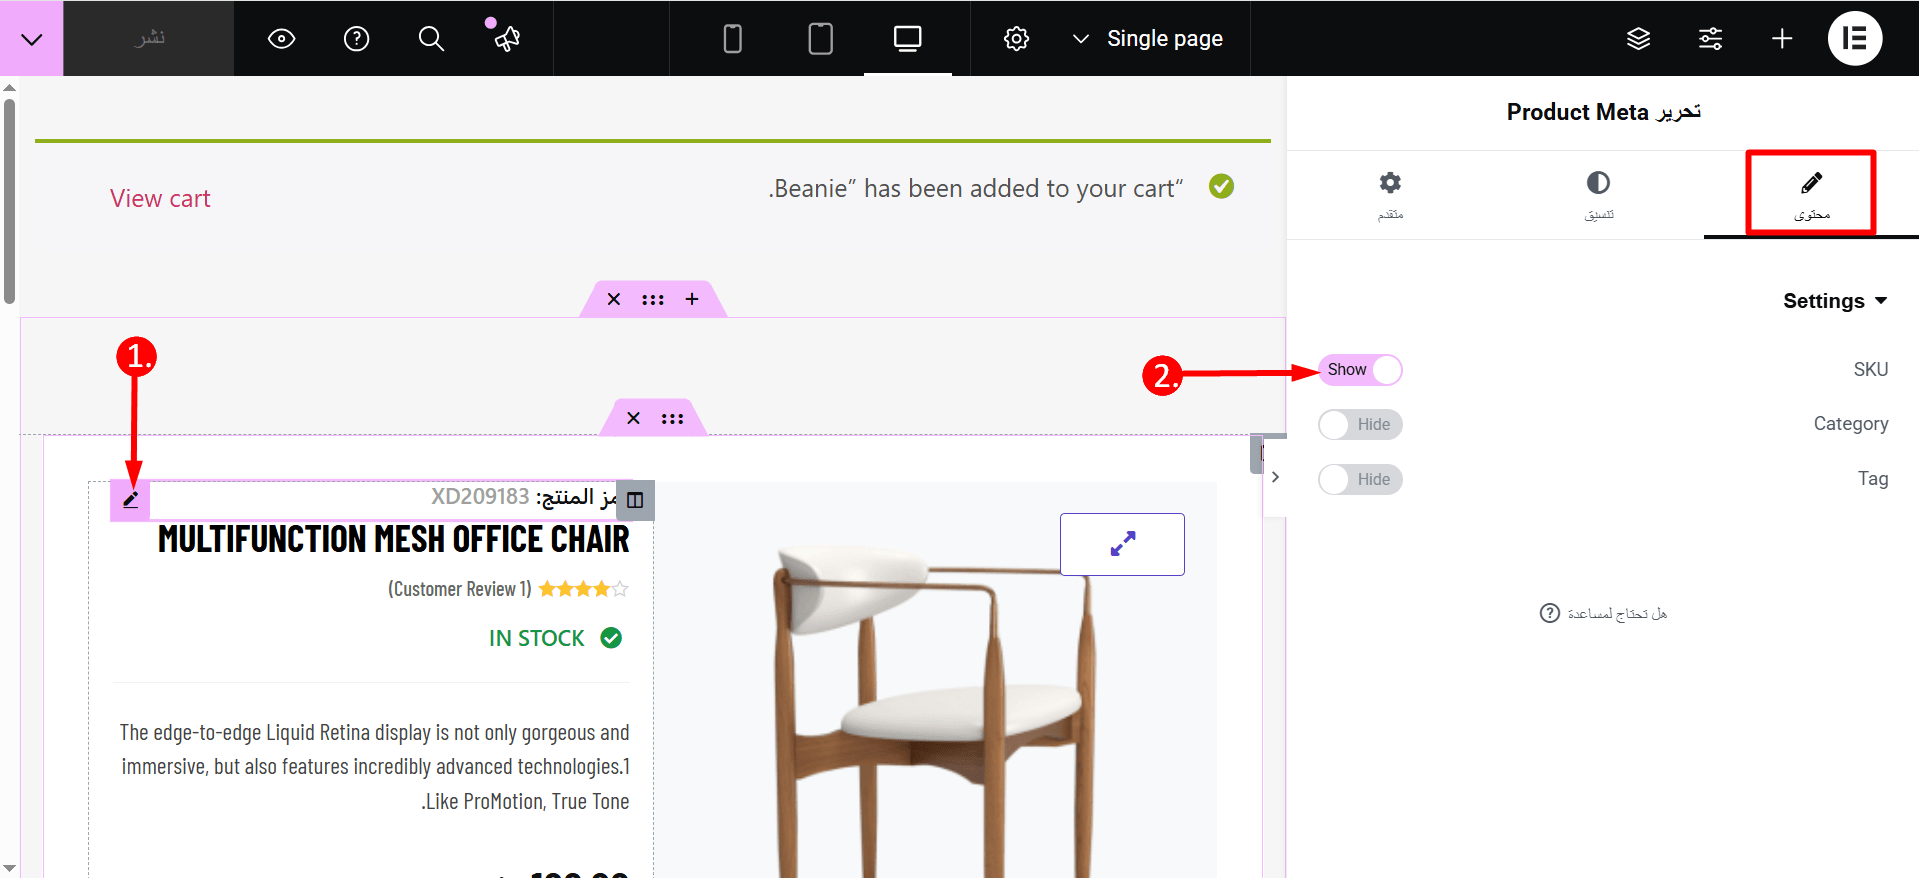
To change any of the widget styles,
1. Click on the edit icon on the top left corner. You will see the icon once you hover over a widget.
2. Once you click on the edit icon, you can customize content and style-related settings on the right panel. For example, you can toggle the “Show” button to show the SKU.

Step 4: Update and see the preview #
Once you are done with the changes click on the Publish button to publish/update the RTL template. Now you can click on the preview button to see the view or view the page for which you built the template to see the final look.
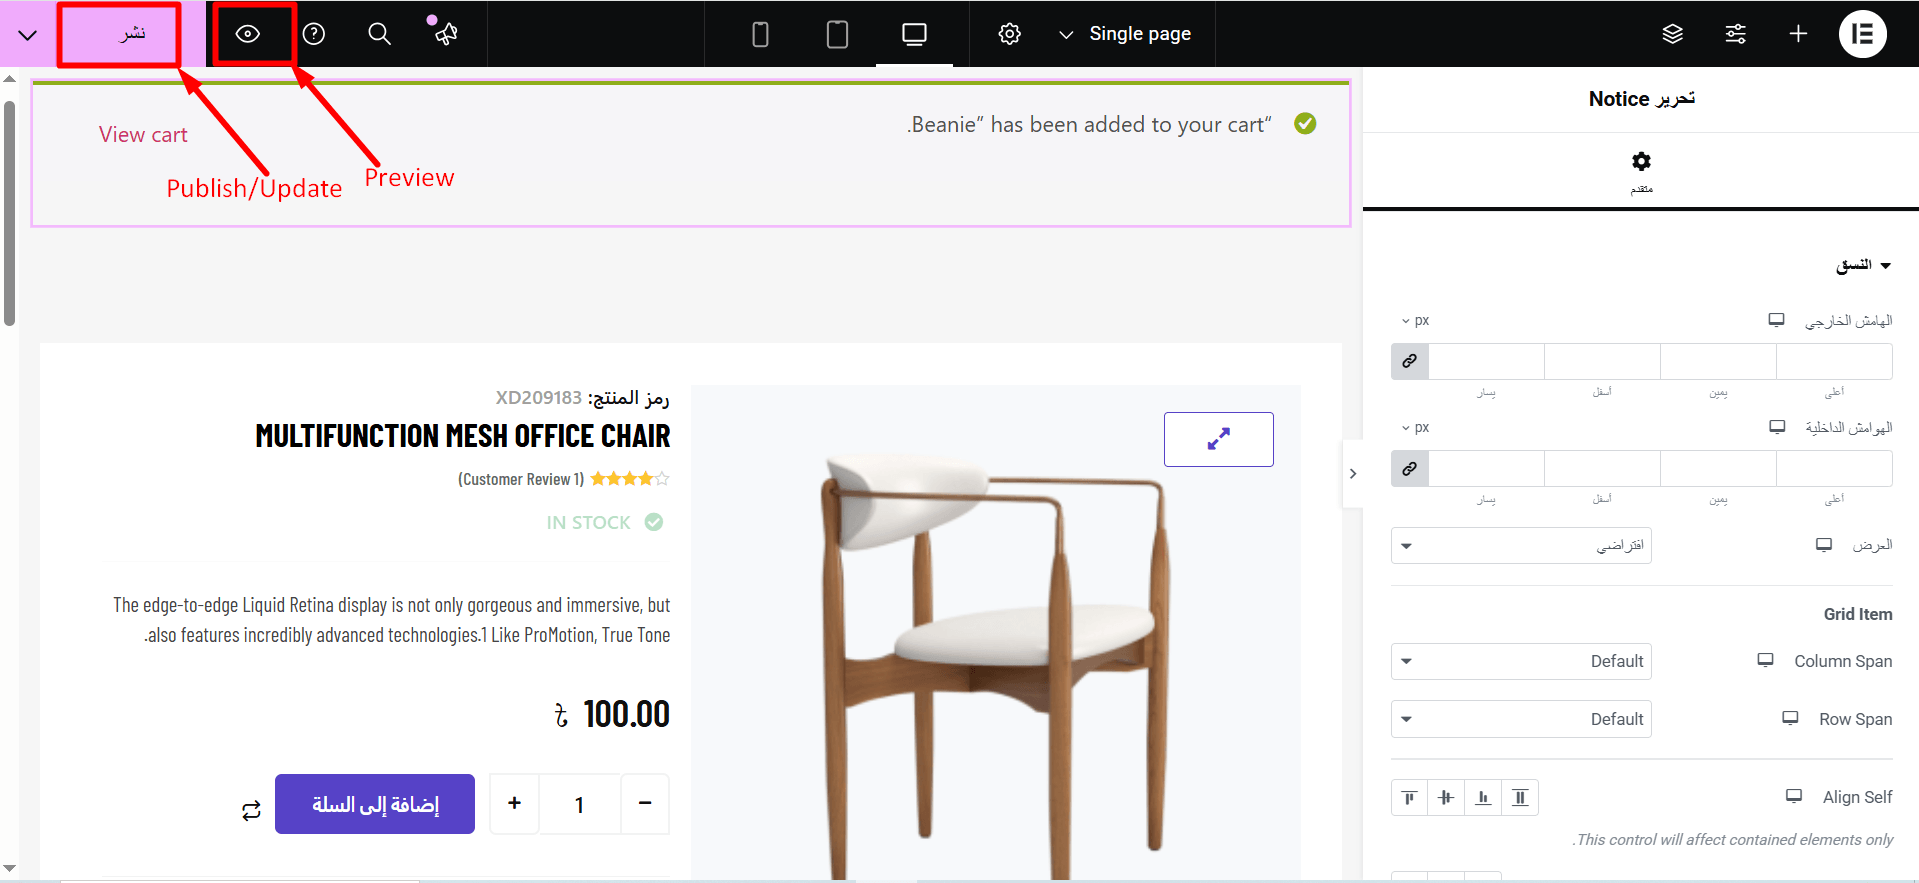

Here is preview of Single product page template with ShopEngine RTL support:
