Getting Started

Welcome to the ShopEngine documentation! Throughout all the documentation, you’ll learn how the plugin works, explore its key features, and find step-by-step guides to help you use the ShopEngine WooCommerce builder. To get started, the first documentation covers installing the ShopEngine plugin and activating the license key for the Pro version.

Steps to Install ShopEngine Free and Pro version (with license activation)

How to Install ShopEngine WooCommerce Builder for Elementor #

Since ShopEngine is a WooCommerce builder, so you need to have the WooCommerce plugin installed in your WordPress.

Before getting started make sure, Elementor plugin is installed & activated on your website.

If you want to use ShopEngine with Gutenberg, follow this documentation instead.

Pre-requisite:

  1. WooCommerce: Download Plugin
  2. Elementor: Download Plugin

Just follow the step by step process to install ShopEngine Elementor Woocommerce Builder:

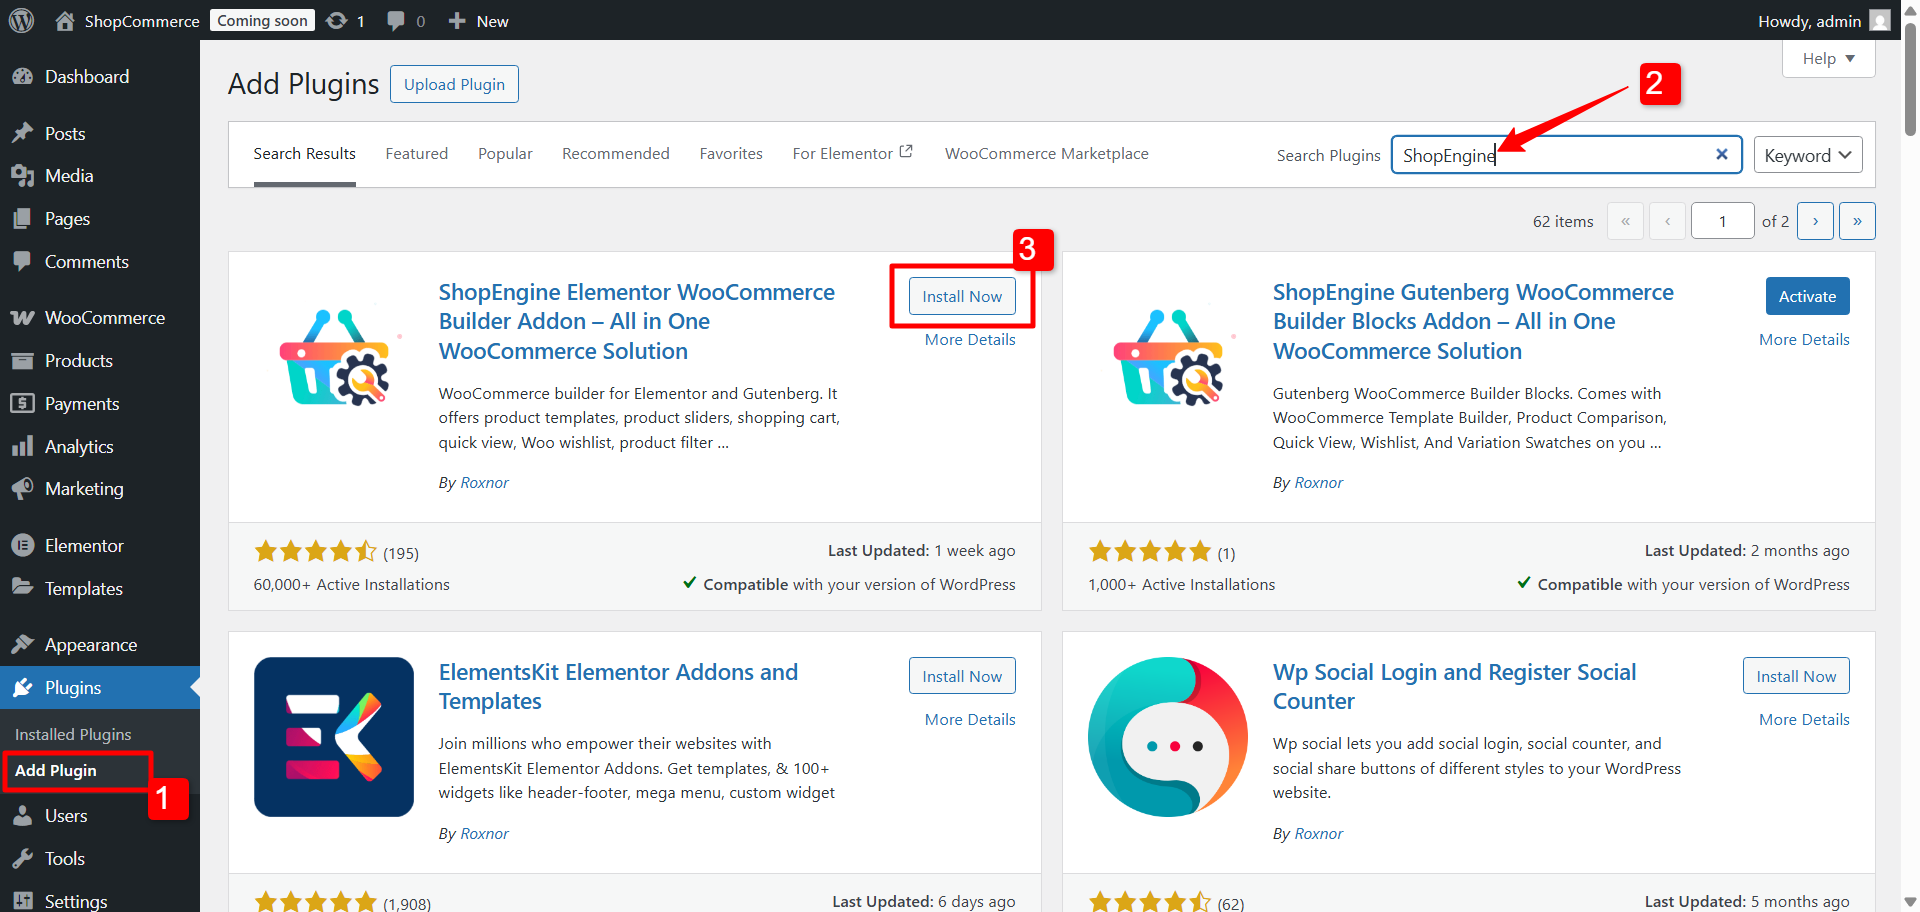
Install and activate ShopEngine plugin #

To install the the ShopEngine WooCommerce plugin:

  1. Go to the WordPress DashboardPluginsAdd Plugin.
  2. Search for ShopEngine there.
  3. Once you find the plugin, click on the install button.
Install and activate ShopEngine WooCommerce Builder for Elementor

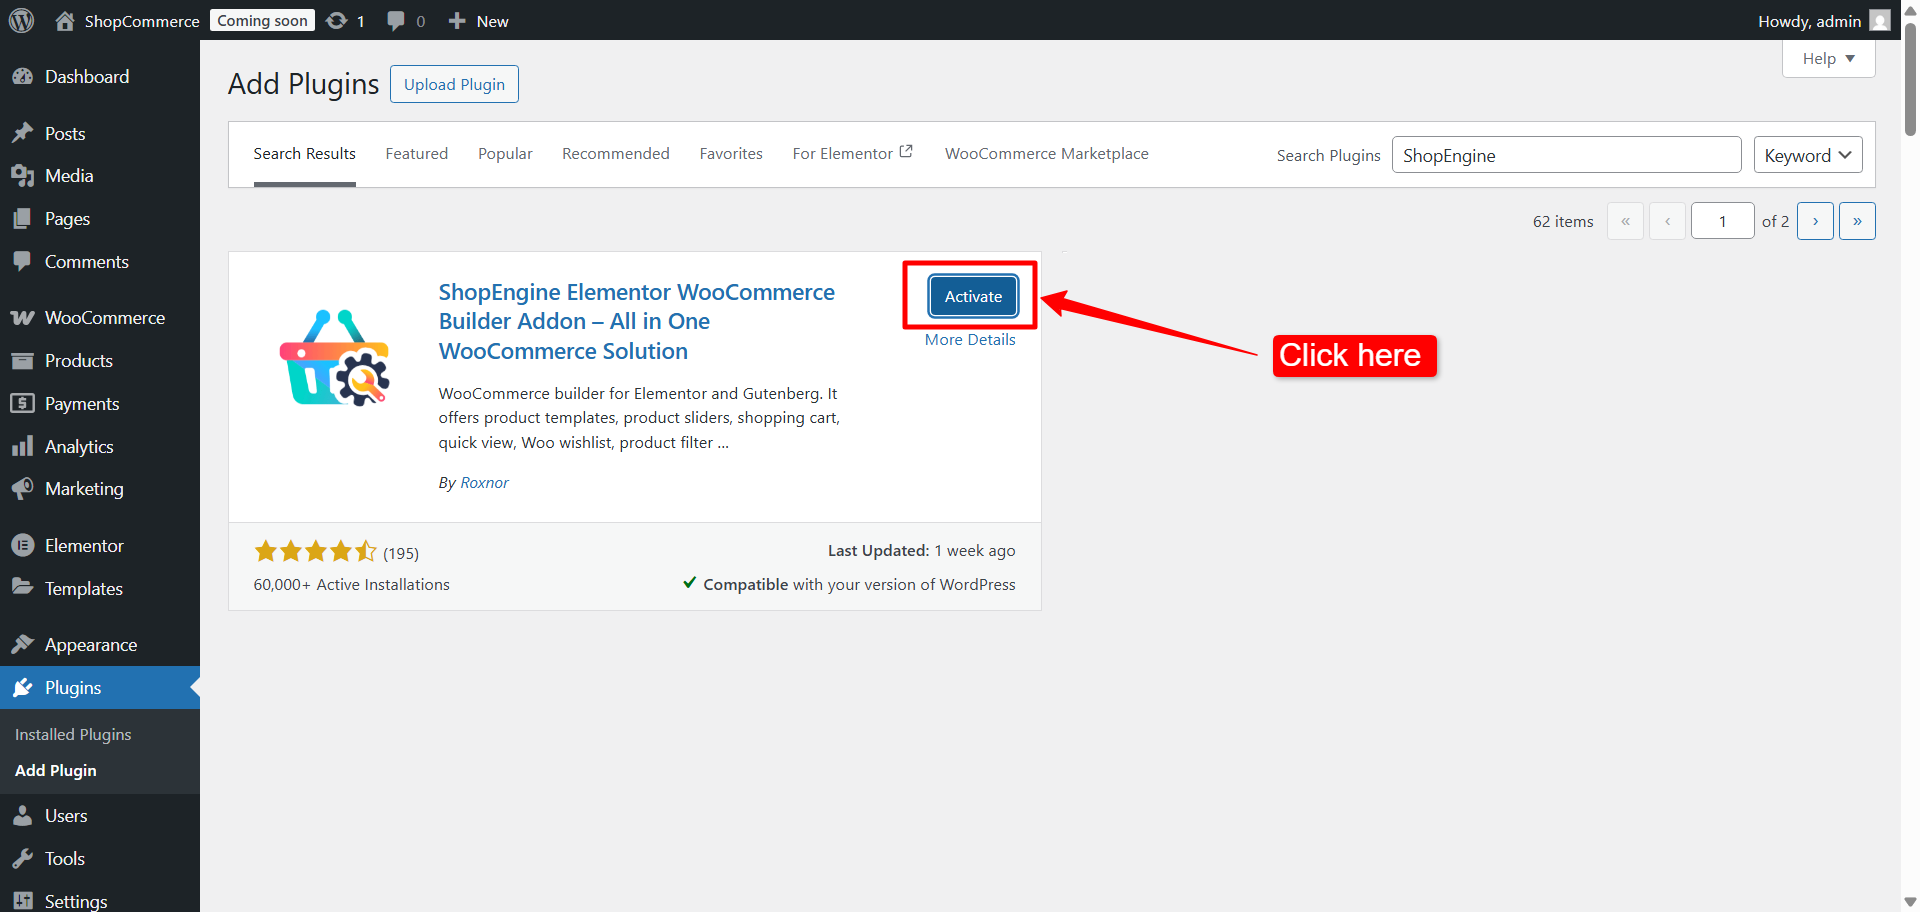
After successful installation, just click on the “Activate” button to activate ShopEngine.

Activate ShopEngine WooCommerce Builder for Elementor

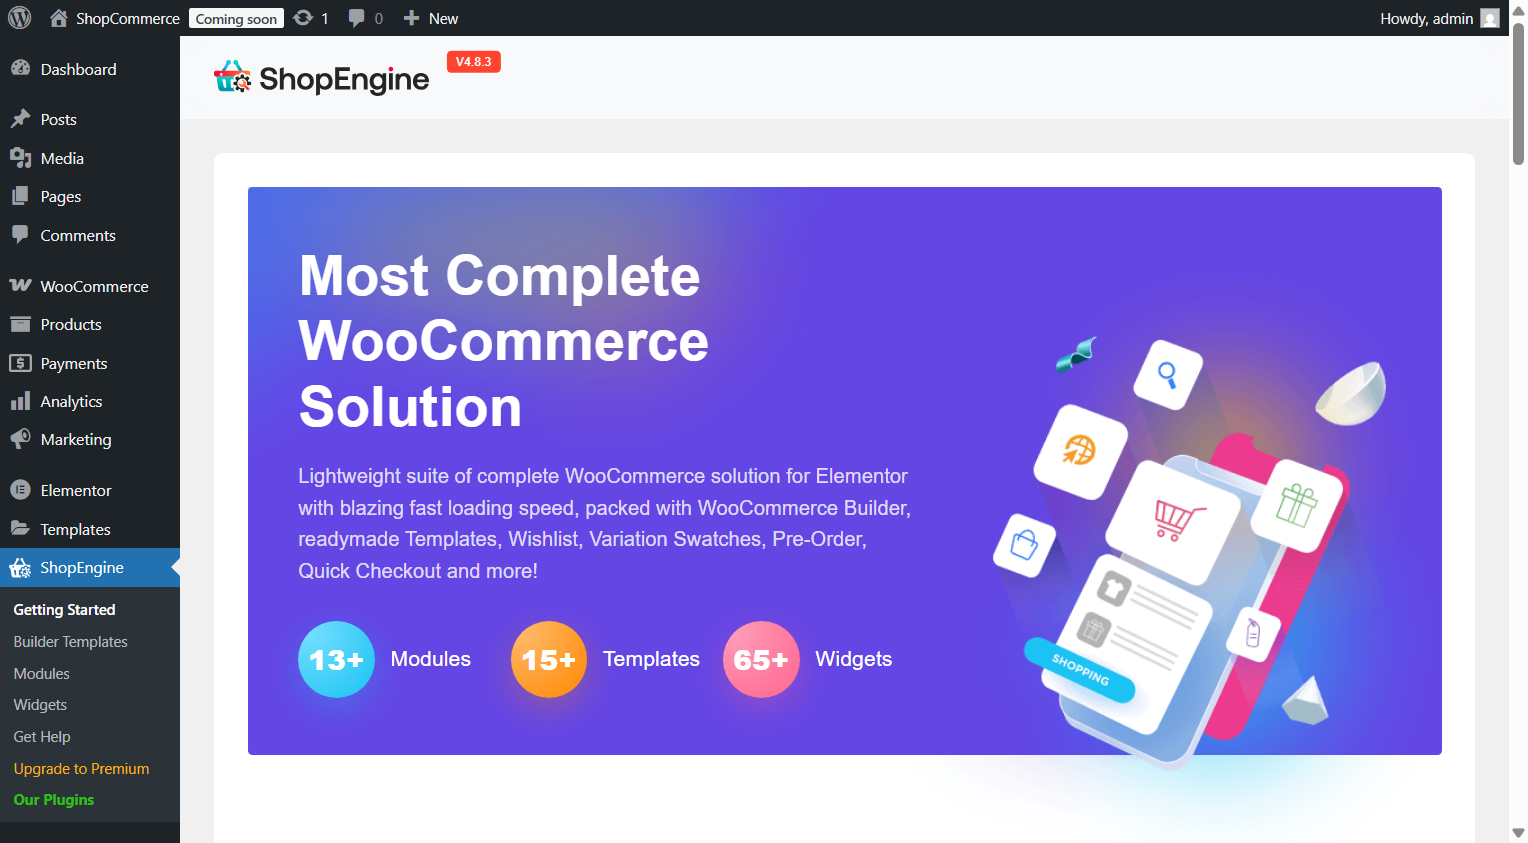
After activating the plugin, ShopEngine Menu will appear in the WordPress Dashboard. Get used to with the ShopEngine dashboard in WordPress

ShopEngine WooCommerce Builder plugin dashboard

How to install ShopEngine Pro and activate the license #

Upgrading to ShopEngine Pro gives you access to dozens of features, including Quick Checkout, Partial Payment, Flash Sale, Multi-step checkout, and a larger set of pre-designed templates.

Step 1: Purchase ShopEngine Pro Plugin for WooCommerce #

You can check the pricing plans for ShopEngine Pro on its website.

  1. Browse the ShopEngine Pro pricing page and choose the pricing plan you prefer.
  2. Click on the PURCHASE NOW button for the plan you have chosen.

As soon as you click on the purchase button, you will be redirected to the Checkout page. There, you need to enter your personal information necessary for the purchase, including your email and names (first name and last name).

Then select the payment method between Credit Card or Paddle.

For the card payment,

  • Select Billing Country
  • Enter Zip / Postal Code

Then enter the following payment information:

  1. Card number
  2. Expiration date
  3. Security code (CVC)
  4. Check the box to agree to privacy policy
  5. Finally, click Purchase button.

Once you complete this step, you can see your payment information including the order details.

Meanwhile you will receive an email with your account credentials. Please check your email inbox to get the account details.

Step 2: Get ShopEngine Pro Plugin #

 Once your payment is completed, you’ll receive a confirmation email. Inside the email, you’ll find:

  • Your Username for Wpmet account
  • Link to set new password
  • The login URL

Go to the given links to access your Wpmet account.

Once logged in, navigate to the Downloads tab from your Wpmet dashboard. There you will find a downloadable file for ShopEngine Pro.

Click on the file, and the plugin will be downloaded in .zip format.

Step 3: Install and Activate ShopEngine Pro Plugin #

Now you have to install the plugin in your WordPress site. To install the plugin:

  1. Log in to your WordPress dashboard and go to Plugins.
  2. Go to Plugins Add New to add new plugin.
  3. Click on the Upload Plugin button on the top left corner.
  4. Hit the Choose File button and upload the shopengine-pro.zip file that you have downloaded earlier.
  5. Then click on the Install Now button.
  6. Once the plugin is installed,
  7. Go to Dashboard Plugins Add new. Click on the upload plugin and choose the ShopEngine Pro plugin file you downloaded. Click on Install the plugin and activate it.

Once the plugin is installed you have to activate the ShopEngine Pro plugin in order to use it.

Step 4: Activate ShopEngine Pro License #

To get the product license key, go to your Wpmet account dashboard again. This time, switch to Product Licenses tab and click on the ShopEngine Pro under product name.

On the license management page,

  1. Enter your domain on the required field.
  2. Click on the Add Domain button.

After that, you will see a table appear, where you have a license key against your domain.

Click on the 👁 (eye icon) to view the license key. Copy the key and move to your WordPress dashboard.

On your WordPress dashboard,

  1. Navigate to ShopEngine → License.
  2. Enter your license key on the field.
  3. Click on the Active Now button.

Then you will get the following message: Congratulations! Your product is activated for “[domain_name]

That’s it. Now you should have all the premium features of ShopEngine.

In case you are looking to launch a WooCommerce website but struggling to find a good hosting service, you can reliably choose Kinsta. They have all the key hosting features that you would usually expect from a hosting service provider.

What are your feelings

Updated on September 11, 2025