Cross-selling is a method of persuading buyers to buy related products along with the products they are willing to buy. An example will make the point clear. A shopper may be willing to buy a laptop but if you can convince the shopper to buy a headphone along with the laptop, you are cross-selling the headphone.
ShopEngine’s Cross-sell widget comes with an enormous number of parameters for customizing the product details. You can control the sliders, number of products to display, sale price, add to cart button, and so on. Setting all these parameters, you can get a look as you desire.
How to Use Cross-sell Widget?
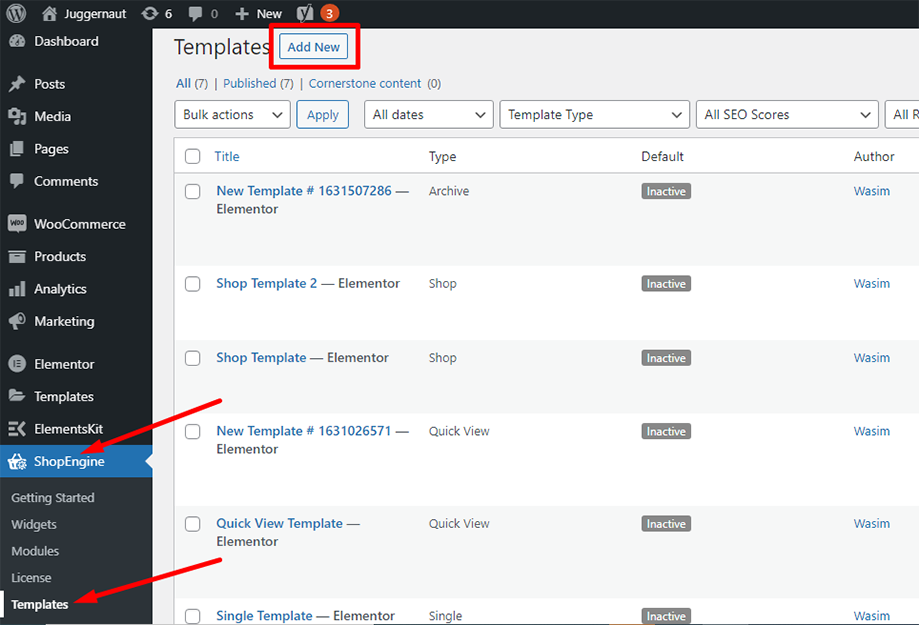
First of all, go to the dashboard of your admin panel and find ShopEngine from the list of items. Click ShopEngine and then select Templates from the drop-down menu. Then, click the “Add New” button on top right beside the text “Templates”.

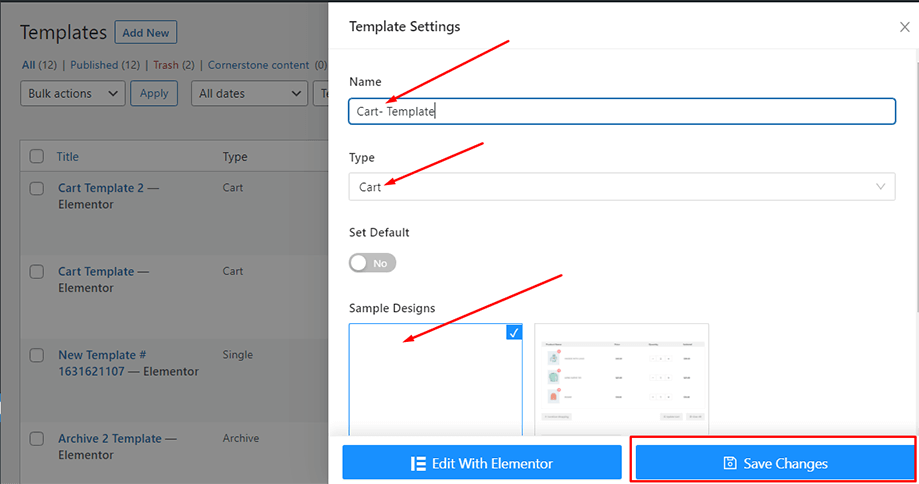
Immediately after that, a popup window will show up for template settings. Set your template name in the Name field and select the type Cart as your goal is to use Cross-sell widget.
Also, you can choose a default sample design or start designing from scratch. Finally, hit the “Save Changes” button.

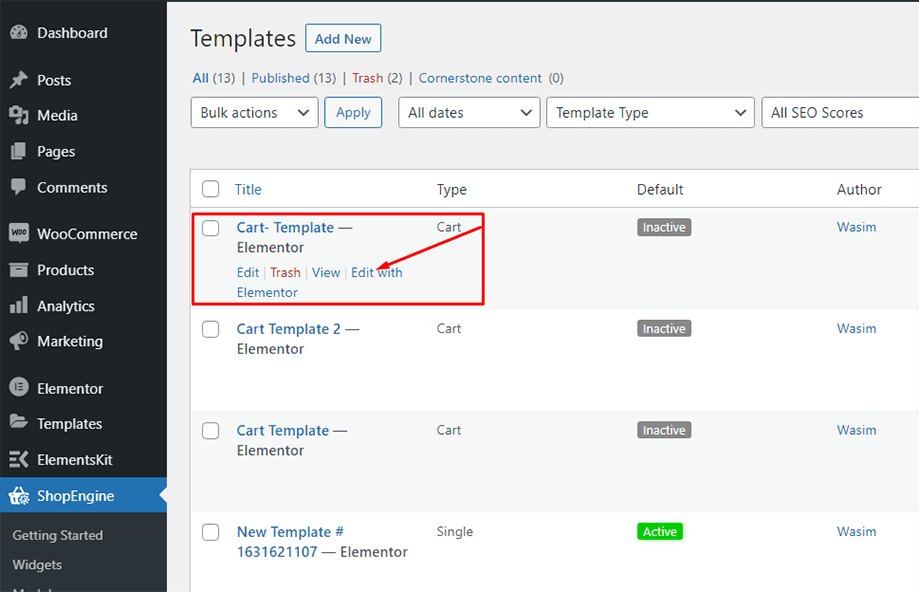
Your template is created and you can see it on top of the list. Now, click “Edit with Elementor” to switch to the Elementor window.

Now, search for the cross-sell widget on the search bar scroll down to find it under ShopEngine cart section. Drag and drop the cross-sell widget on the specified area
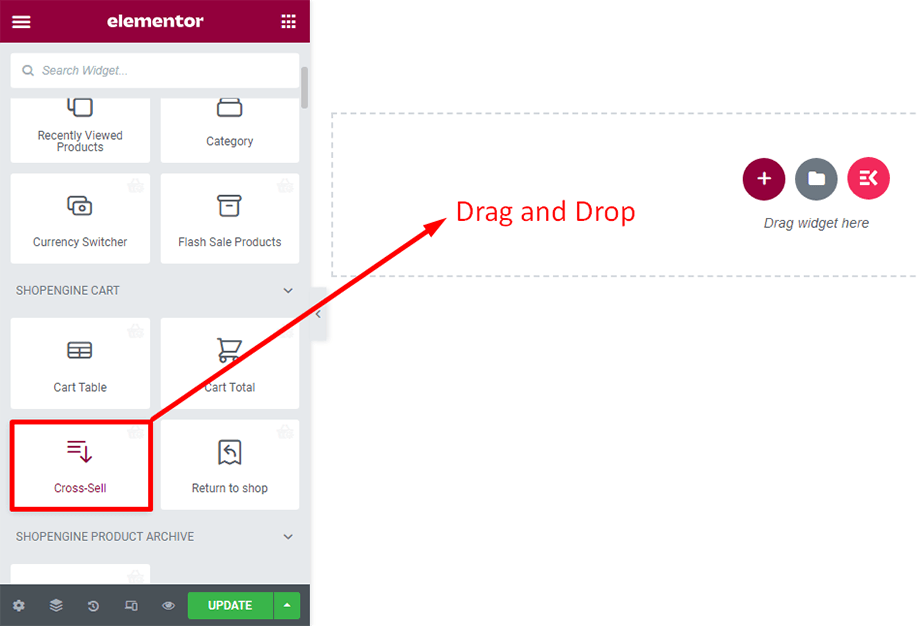

Note: You need to manually add Cross-sell products to each product for which you want the upsell to show up. The widget will only display the Cross-sell products.
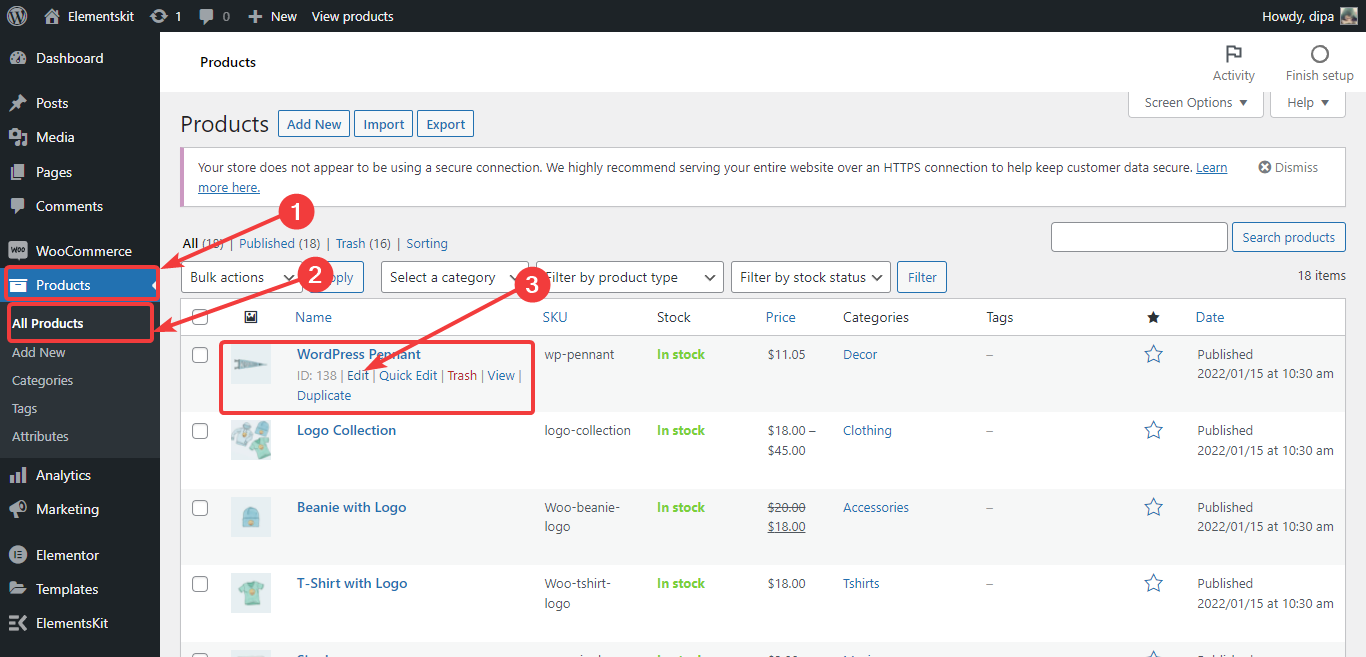
To add upsell products to any of your existing products, from the dashboard go to products ⇒ All Products and click on the edit option of the product you want to add Cross-sell.

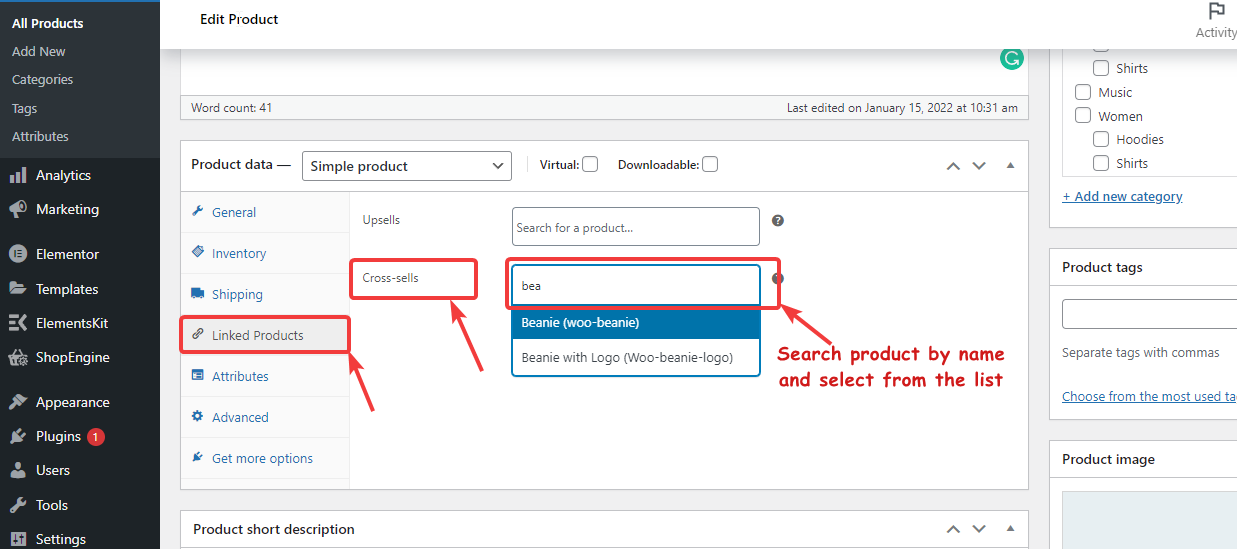
Once the product settings show up, Go to Linked Products. Then for Cross-sell, type the initial spelling of the products to search the products you want to add. A list will show up. Choose products from the list and repeat the whole process if you want to add multiple Cross-sell products. Finally, click on update to save the product Cross-sell settings.-

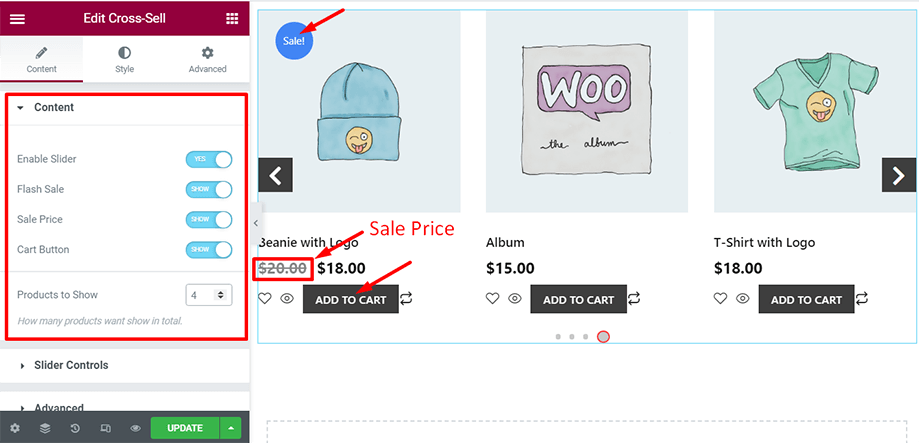
You can see a series of products showing up on the screen. The good thing is that you can choose the number of products to display from the bottom of the Content section. You can also control the display of parameters like flash sale, sale price, cart button, etc.

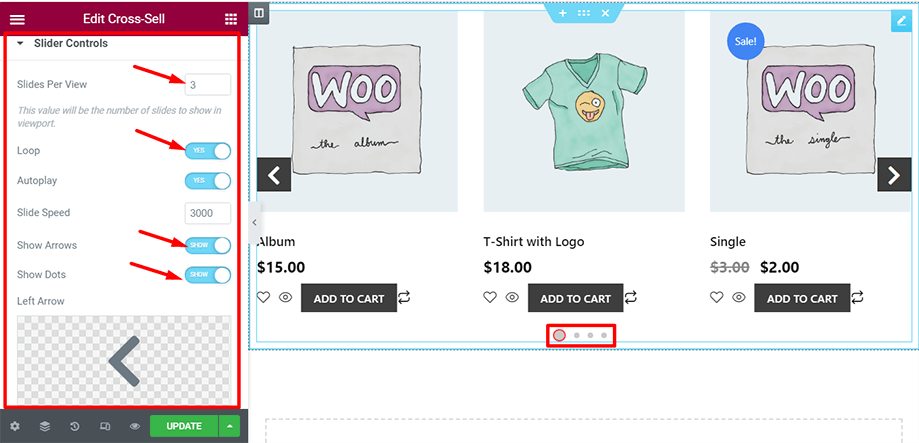
With the slider controls, you can enable parameters like loop and autoplay. At the same time, you can show or hide parameters like show arrows and show dots.

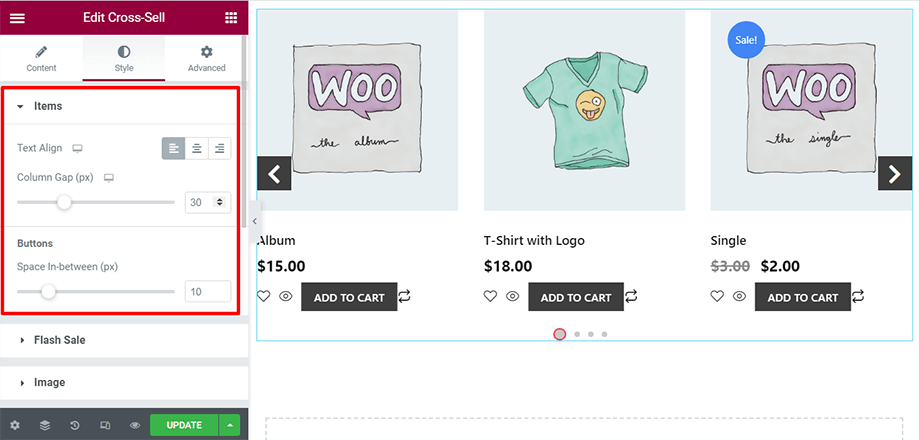
Under the Style tab, you will have more controls to adjust your cart page elements. From the Items section, you can set text alignment, column gap, and space between buttons.

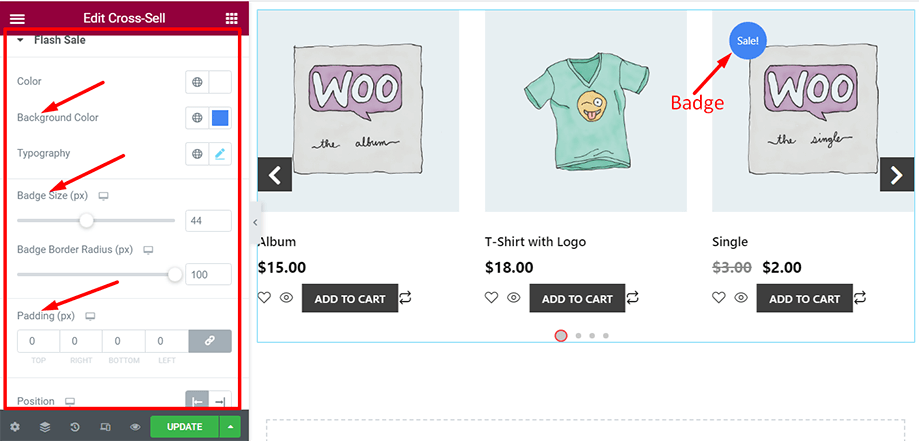
With the Flash Sale control, you can set a badge as shown in the screenshot. You can then customize the color, typography, size, border radius of it.

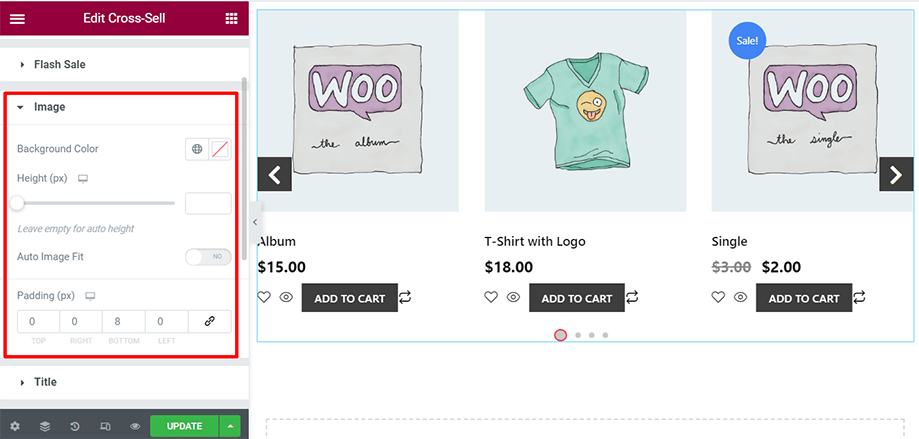
From the Image section, you can tinker around the product image background color, height, and padding. You can also fit the image automatically with the Auto Image Fit parameter.

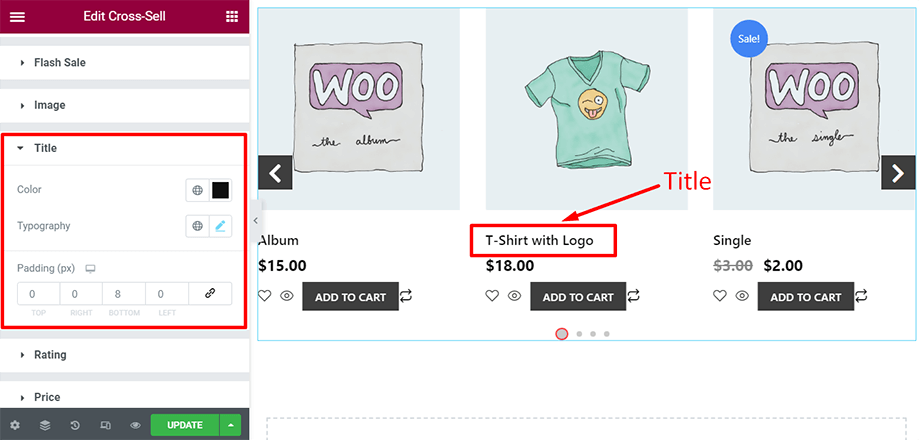
Modify the title of the product image setting parameters like color, typography, and padding.

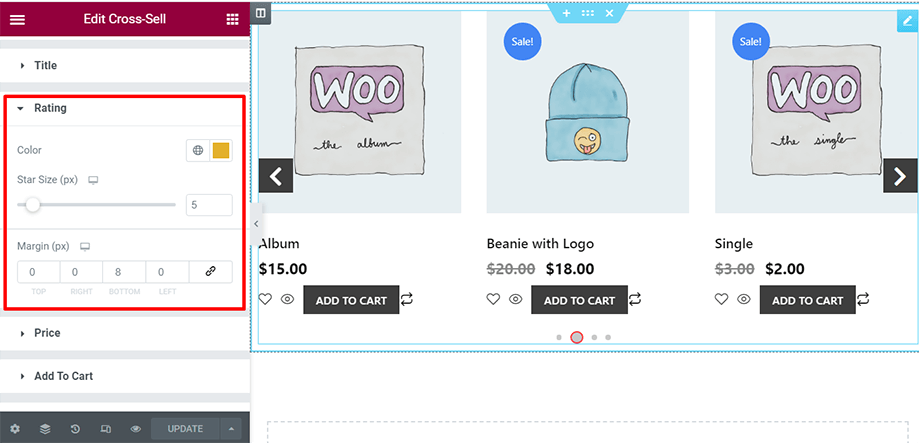
You can alter the rating color, star size, and margin from the rating section to spice up its appearance.

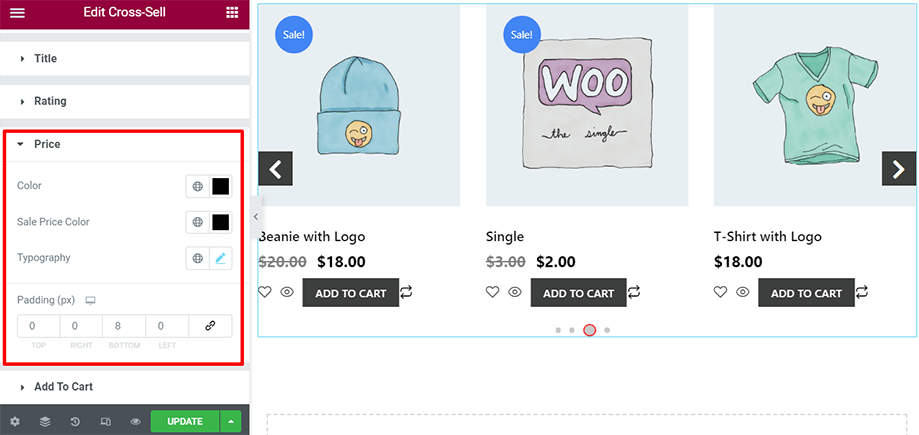
Add an extra appeal to your regular price, sale price, typography, and padding from the price section as displayed in the screenshot.

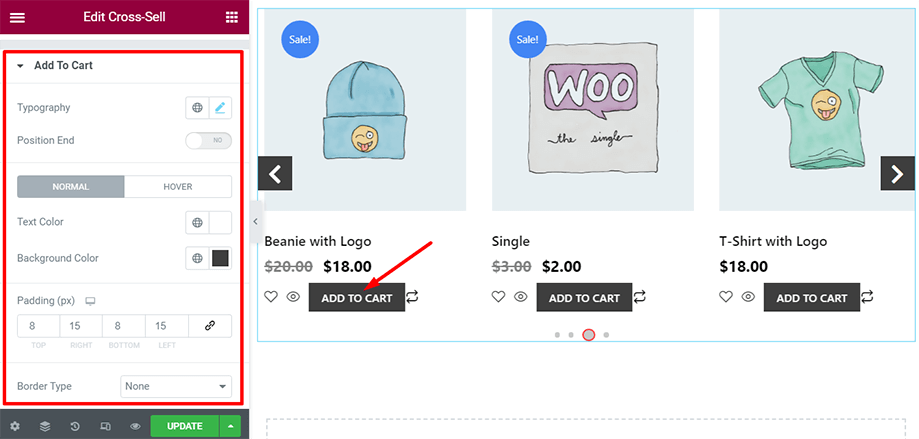
Customize the add to cart button changing text color, background color, typography, padding, and so on.

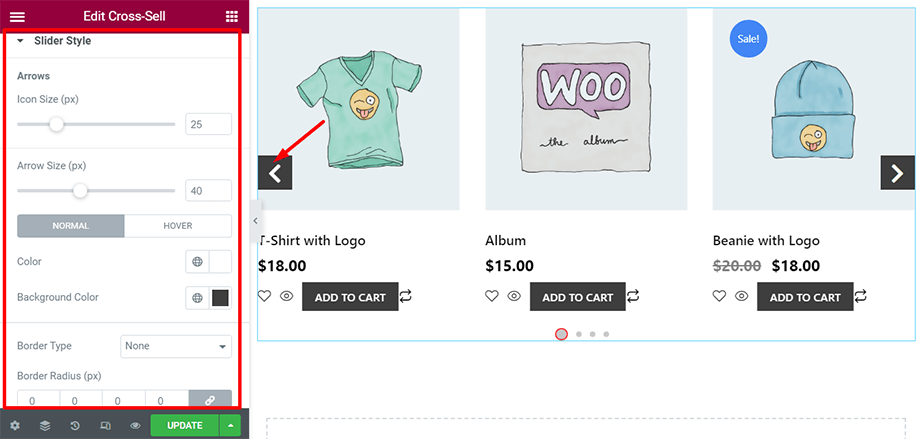
Take advantage of the Slider Style and adjust the icon size and arrow size in the slider. You can modify the slider color, border type, border radius, etc. too.

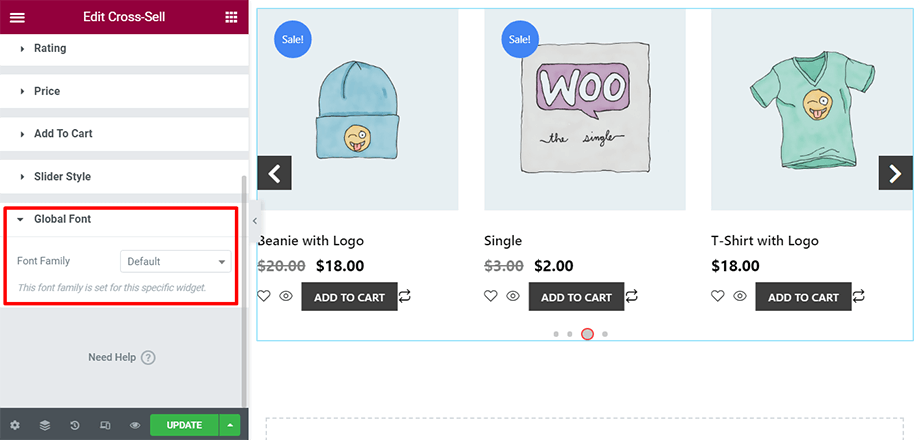
Last but not least is the Global Font section from where you can choose your preferred text font for the entire page and jazz up your cart page.

This is how you can make use of the Cross-sell widget for your cart page and stand out from your competitors.


