The Checkout Shipping Methods widget displays all the available shipping methods on the checkout page. This is a checkout template widget of ShopEngine.
Let’s learn how you can use Checkout Shipping Methods Widgets on your WooCommerce site:
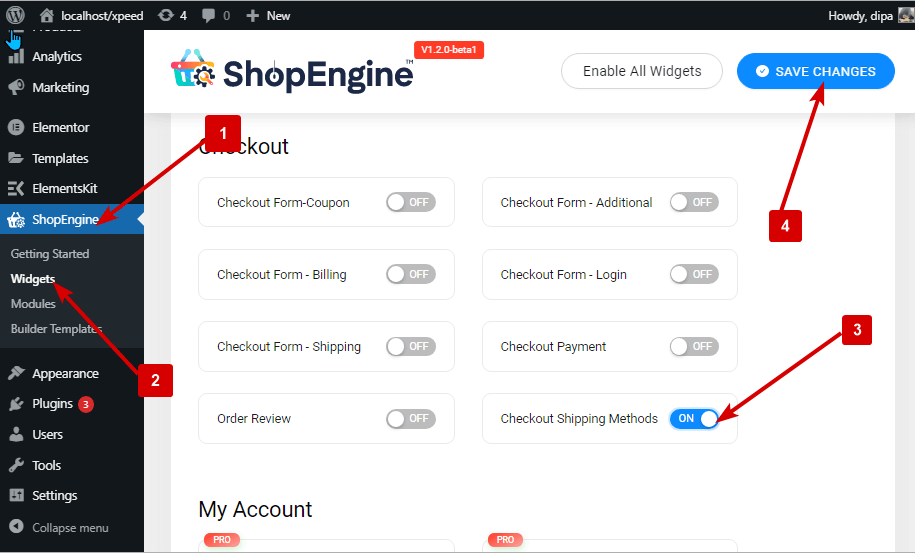
Step 1: Enable the Widget #
To enable the widget:
- Go to ShopEngine > Widgets >Checkout Shipping Methods
- Turn on
- Save changes

Note: You can turn on any widget from global settings as well. Click here to check out the process.
Step 2: Add Checkout Shipping Methods Widget #
Before you can add the widget you need to create a Checkout Template first. Check out the documentation on how to create a Check out Template.
To add Checkout Shipping Methods:
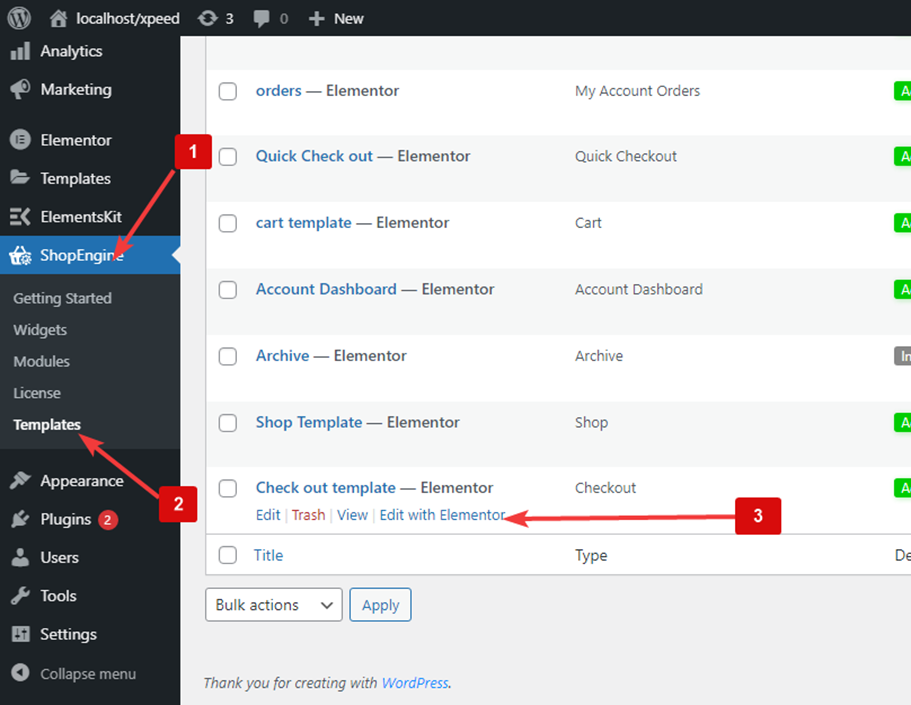
- Go to ShopEngine > Templates > Checkout Template
- Click on Edit with Elementor

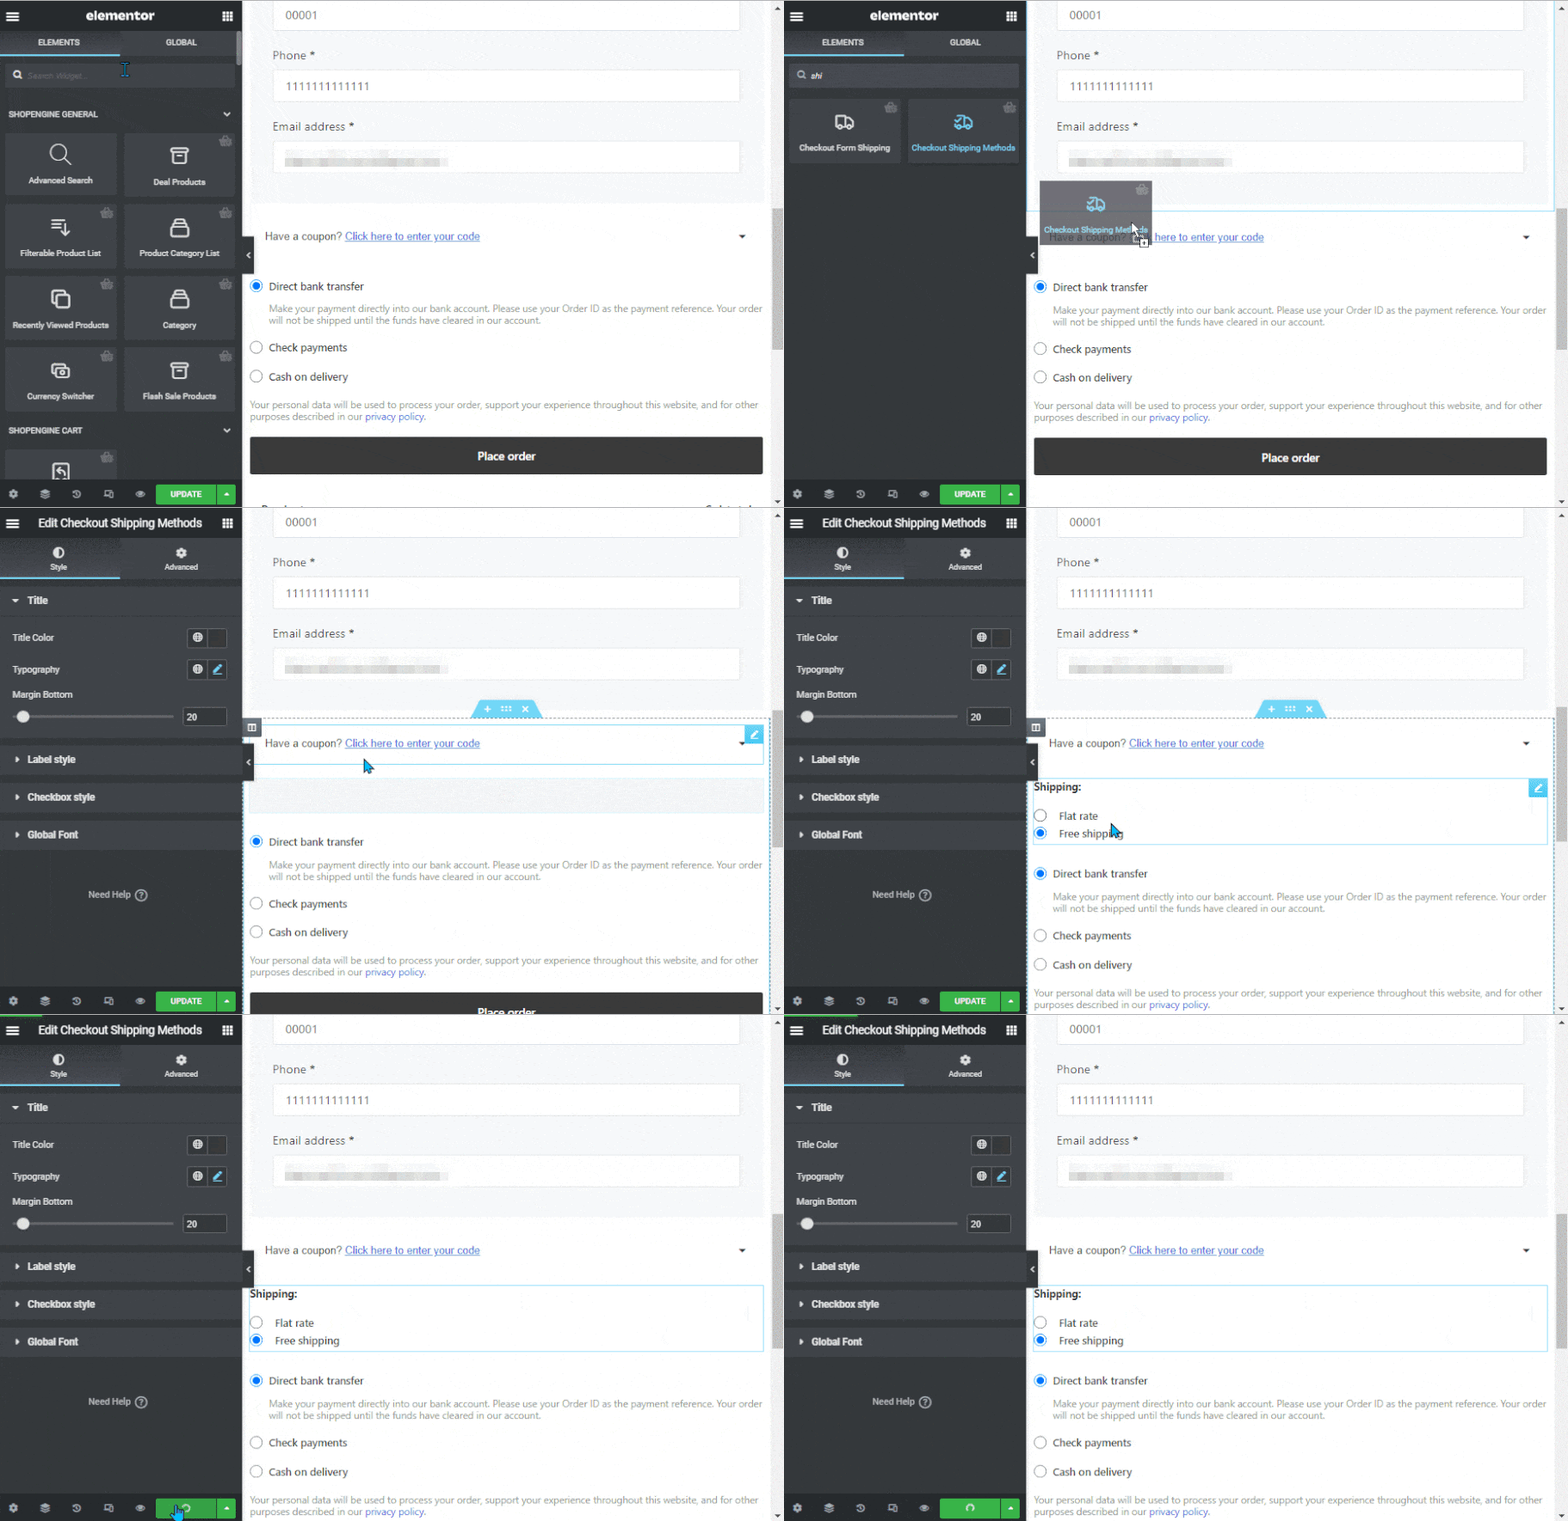
- Search for Checkout Shipping Methods on Elements Search option
- Drag and drop the widget
- Click on Update to save changes.

Step 3: Style Settings #

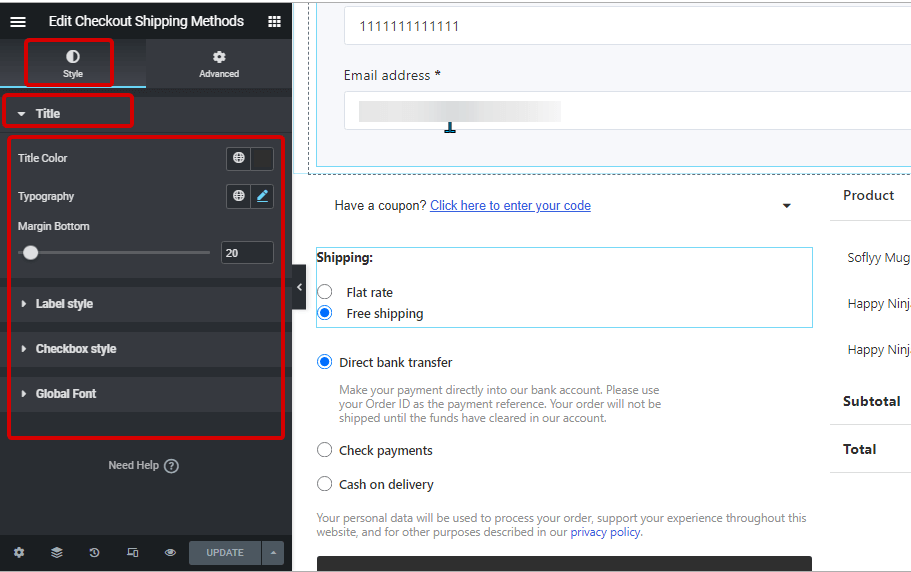
Click on the edit option to go to the Style Tab to customize the following styles of this widget:
Title: #
- Title Color: Change the color of the widget title.
- Typography: Choose the font size, weight and transform for the title.
- Margin Bottom: Pick how much margin you want on the bottom of the title.
Label style: #
- Label Text Color: Change the text color for the labels.
- Label Typography: Choose the font size, weight, and transform for the title.
Checkbox style #
- Checkbox Position (Y): Here you can change the vertical position of the checkbox position.
- Margin (px): Adjust the top, right, left, and bottom margin around the checkbox.
Global Font: #
- Font family: You can change the font family for the whole widget.
Finally, click on Update to save all the changes.


