With the Checkout Form- Payment widget of ShopEngine, you can a plenty of variation in your payment checkout form. The widget will let you display your payment checkout form with an extra appeal making all the necessary changes.
How to Use Checkout Form- Payment Widget?
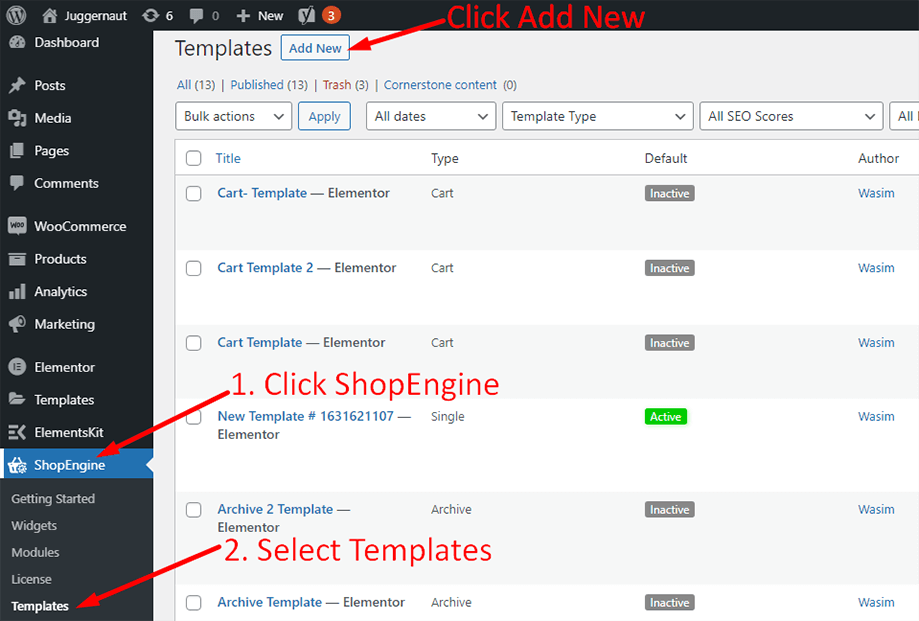
First of all, go to the dashboard of your admin panel and find ShopEngine from the list of items. Click ShopEngine and then select Templates from the drop-down menu. Then, click the “Add New” button on top right beside the text “Templates”.
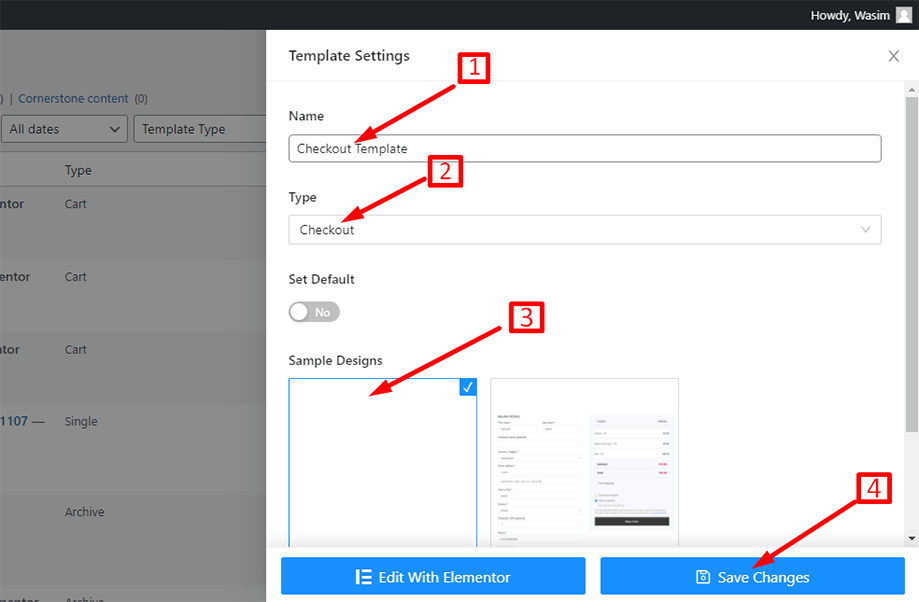
Immediately after that, a popup window will show up for template settings. Set your template name in the Name field and select the type Checkout as your goal is to use Checkout Form- Payment widget.
Also, you can choose a default sample design or start designing from scratch. Finally, hit the “Save Changes” button.
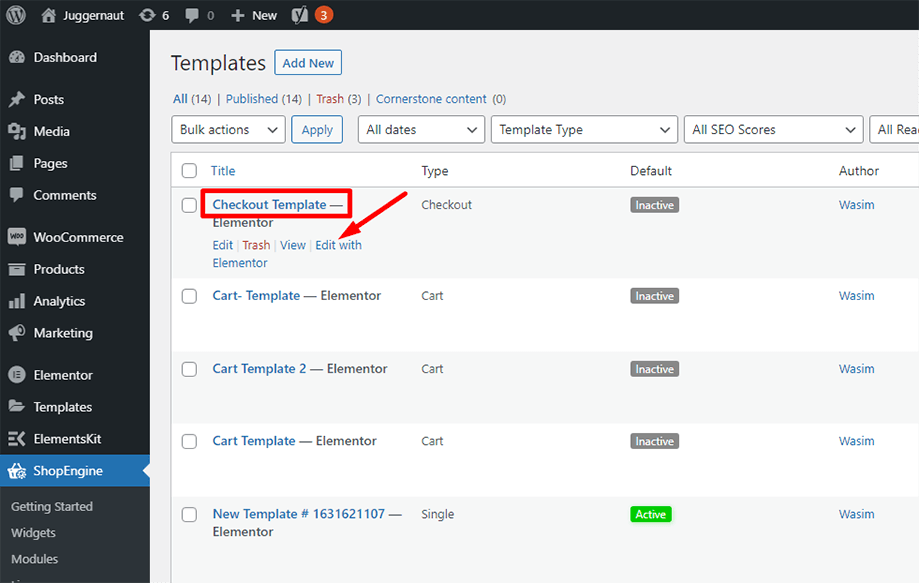
Your template is created and you can see it on top of the list. Now, click “Edit with Elementor” to switch to the Elementor window.
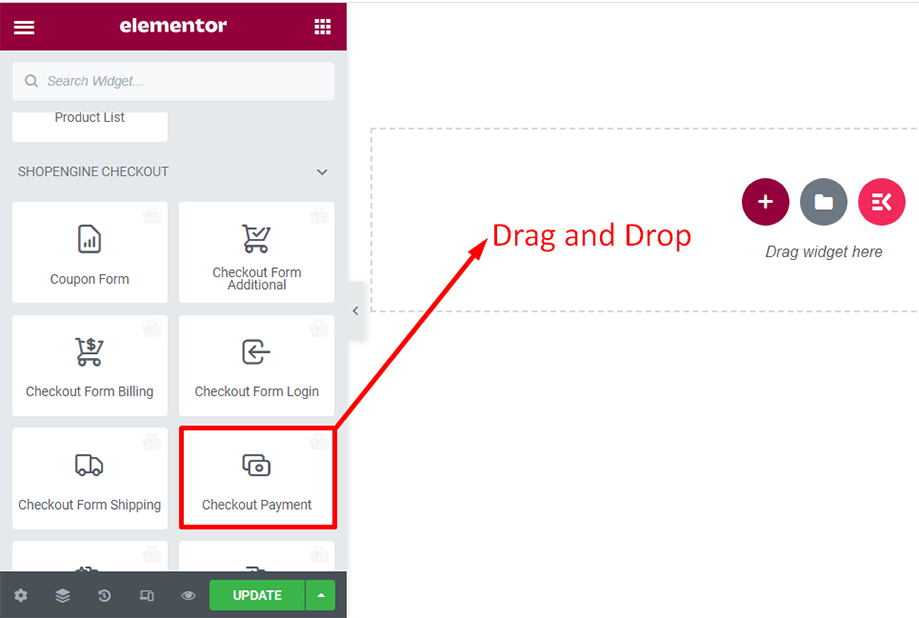
In this step, you will notice a sidebar on the left with a list of ShopEngine widgets. Find Checkout Form- Payment widget from the ShopEngine Checkout section or you can normally search the widget on the search field and then drag and drop it to the designated area.
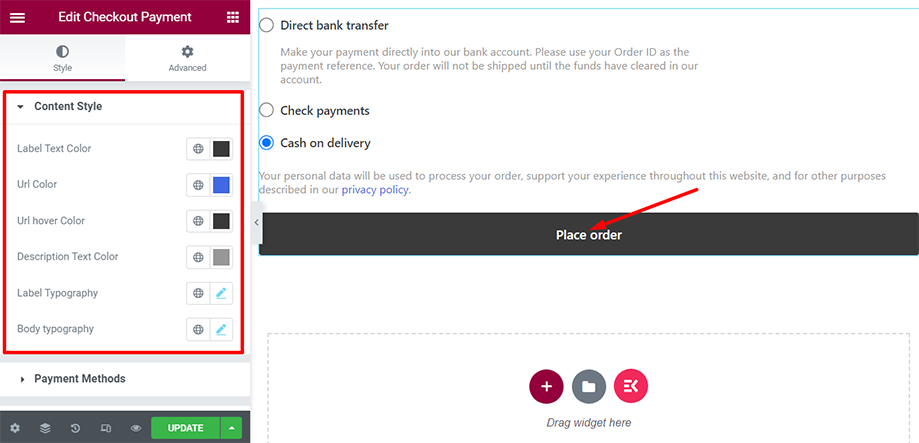
You can notice payment checkout form on your screen immediately after that. Customize the content style of the form using the parameters label text color, url color, url hover color, label typography, etc.
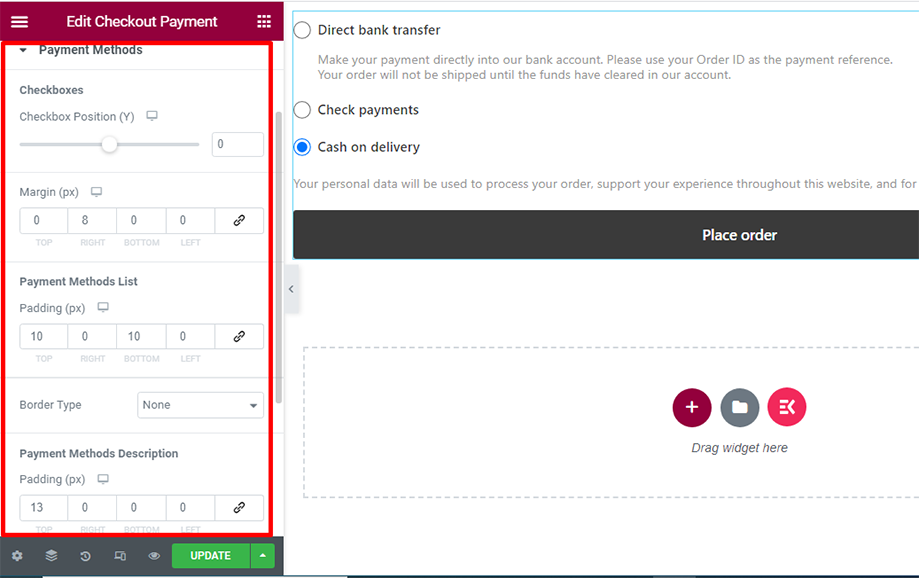
You can also control the checkboxes, payment methods list, and payment methods description using the parameters checkbox position, margin, and padding.
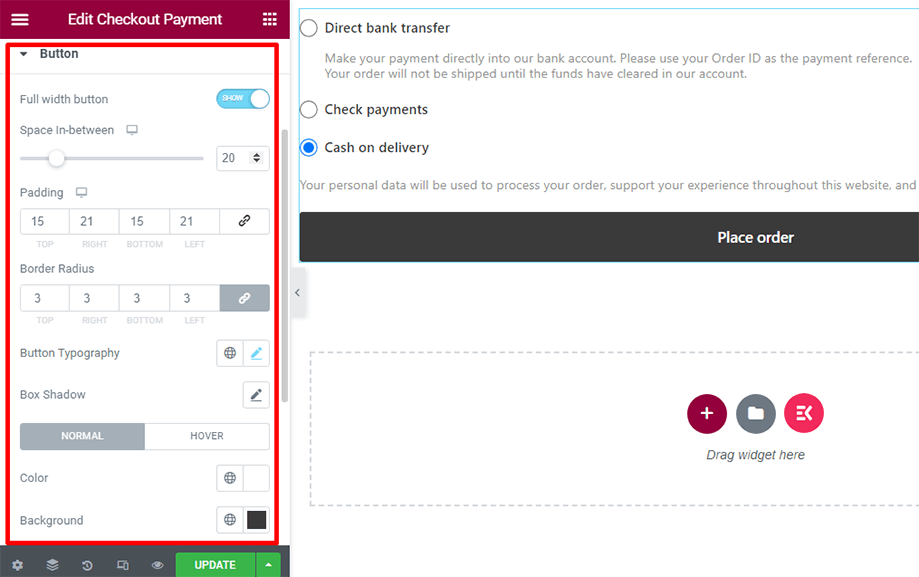
You can spice up the button using parameters like button typography, padding, border radius, color, etc. You also have the control to show a full-width button.
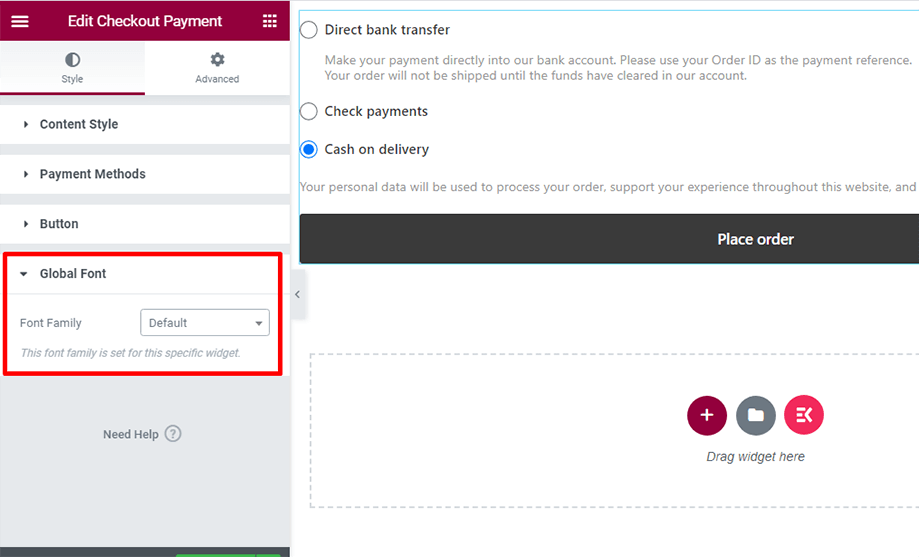
In Global Font section, you can pick the text font as per your choice to jazz up your Checkout Payment- Form.
Take a look at the checkout- payment methods on the checkout page as shown below-
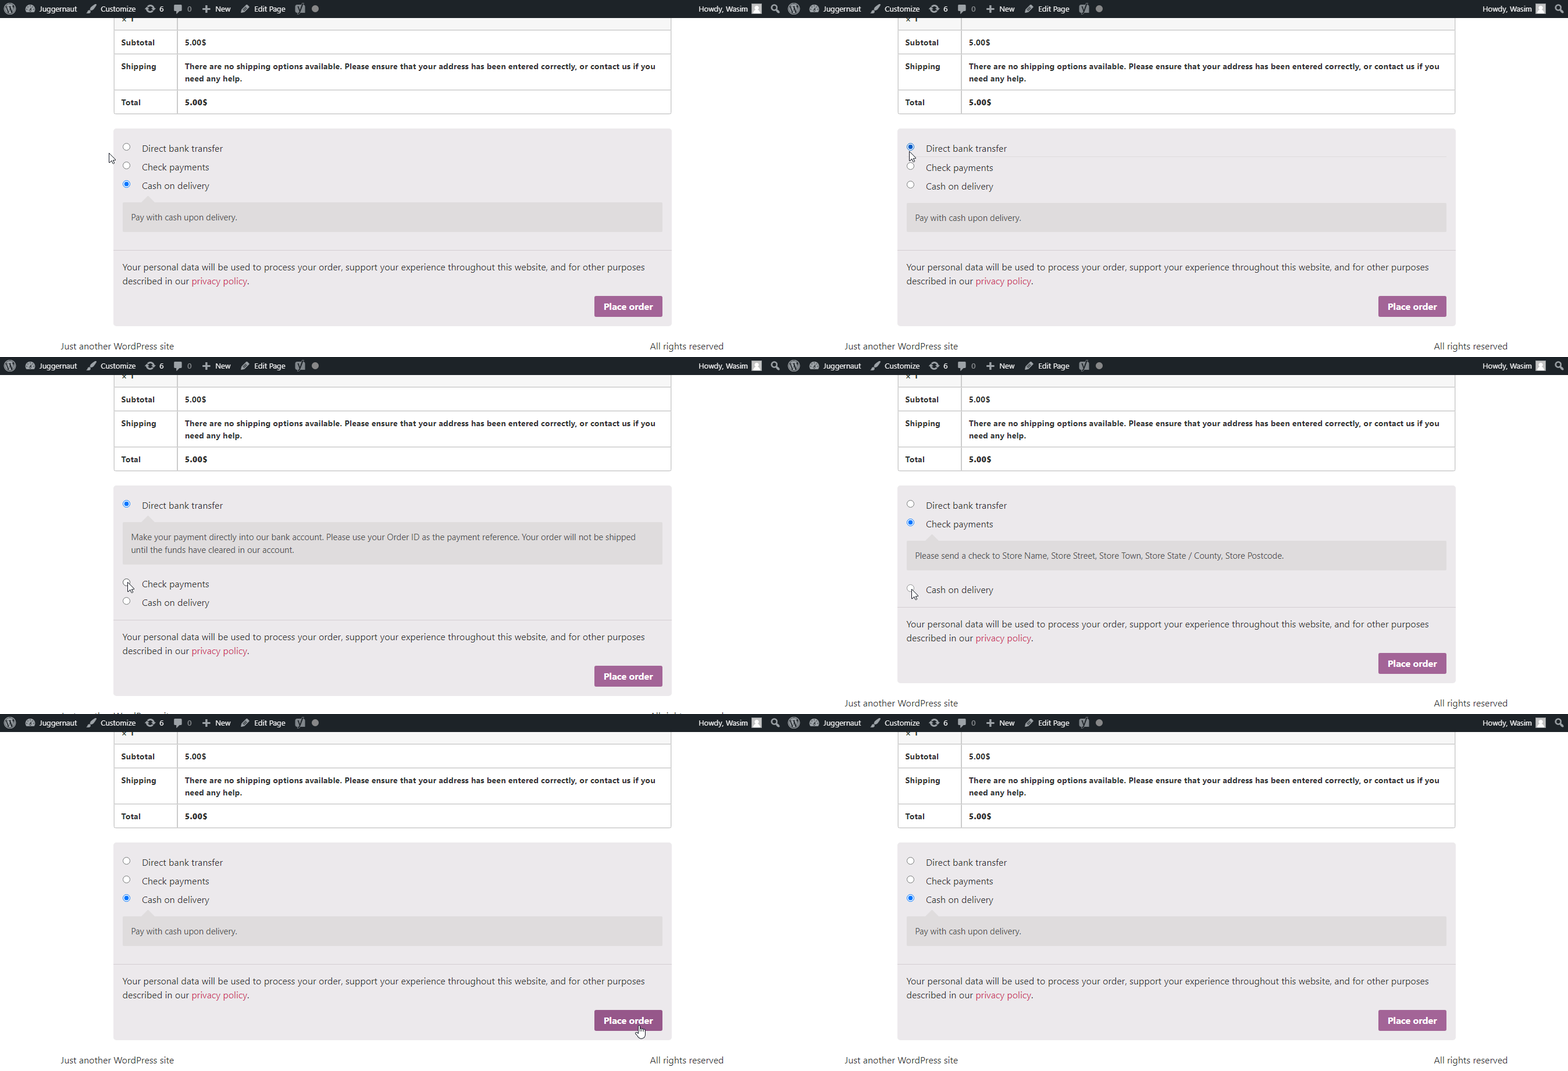
This is how you can add charm to your payment checkout form using ShopEngine’s Checkout Form- Payment widget.
To get access to additional fields of checkout, enable the Checkout Additional Fields Module and take a look at the checkout additional fields. Then, make your necessary changes in the additional fields.


