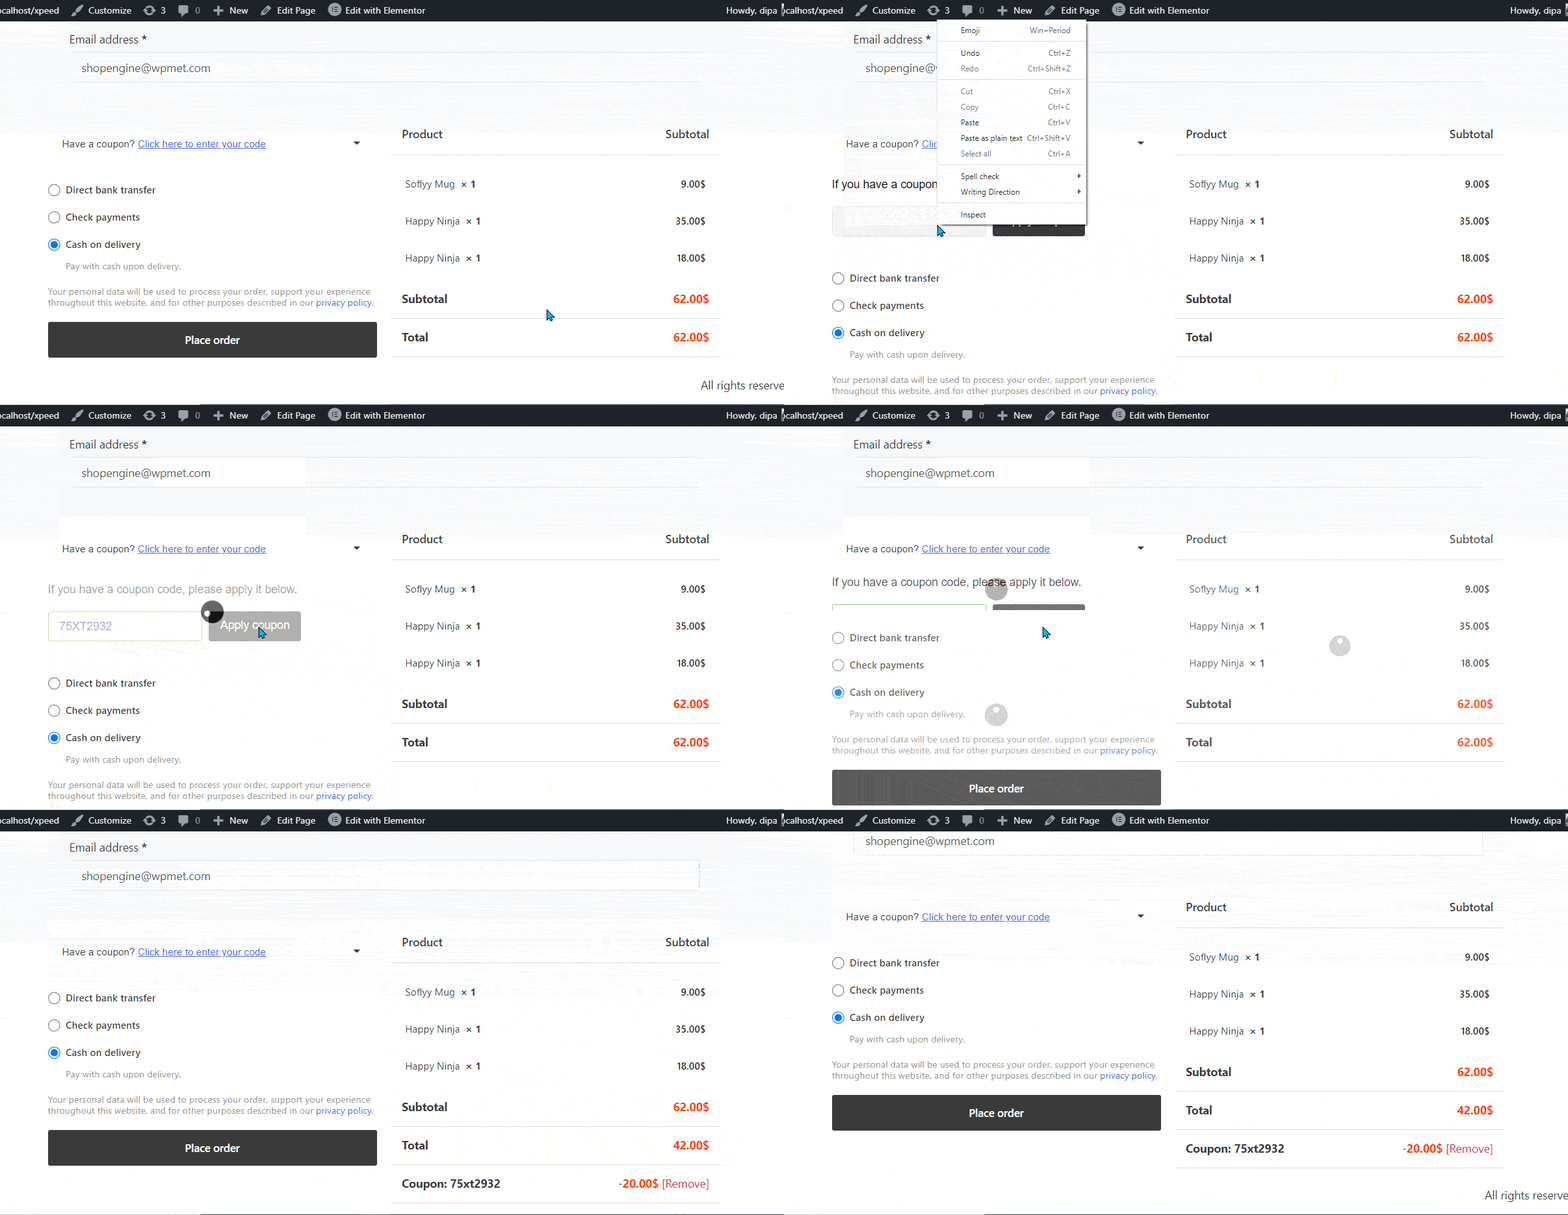
Checkout Form-Coupon widget of ShopEngine is a checkout template widget that customers can use to avail discount coupons on their order total.
Let’s learn how you can use Checkout Form-Coupon Widgets on your wooCommerce site:
Step 1: Enable Checkout Form-Coupon Widget #
To enable the widget,
- Go to ShopEngine > Widgets > Checkout Form-Coupon
- Turn on
- Save changes
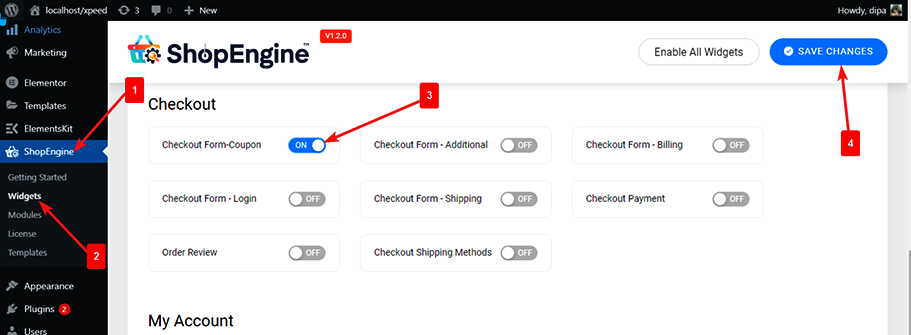
Note: You can also turn on Checkout Form-Coupon with a global setting that turns on all the widgets of ShopEngine at the same time.
Step 2: Add Checkout Form-Coupon #
Before you can add the widget you need to create a Checkout Template first. Check out the documentation on how to create a Check out Template.
To add Checkout Form-Coupon:
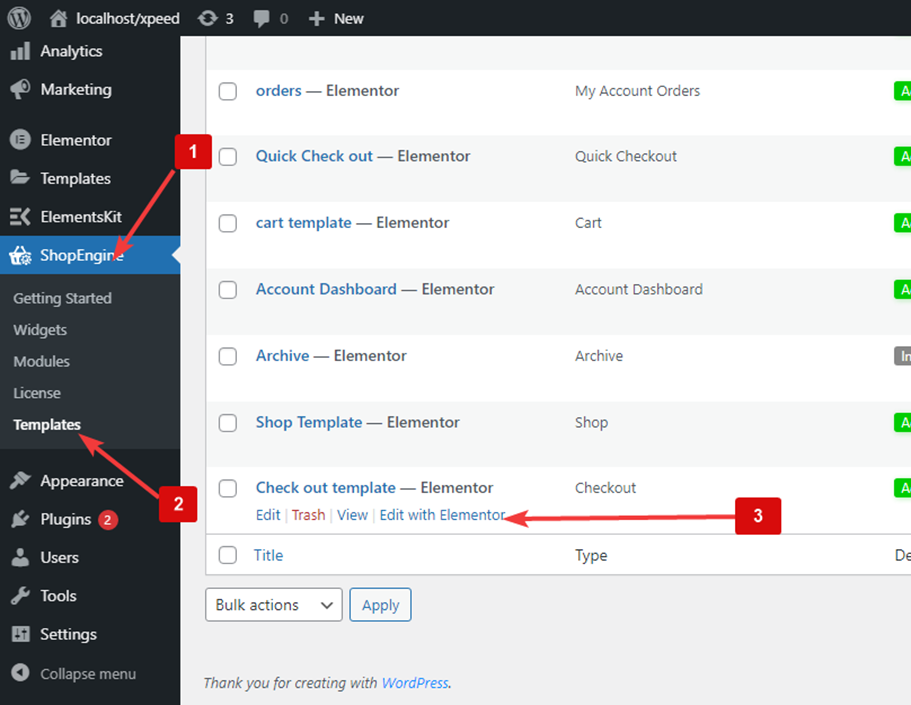
- Go to ShopEngine > Templates > Checkout Template
- Click on Edit with Elementor
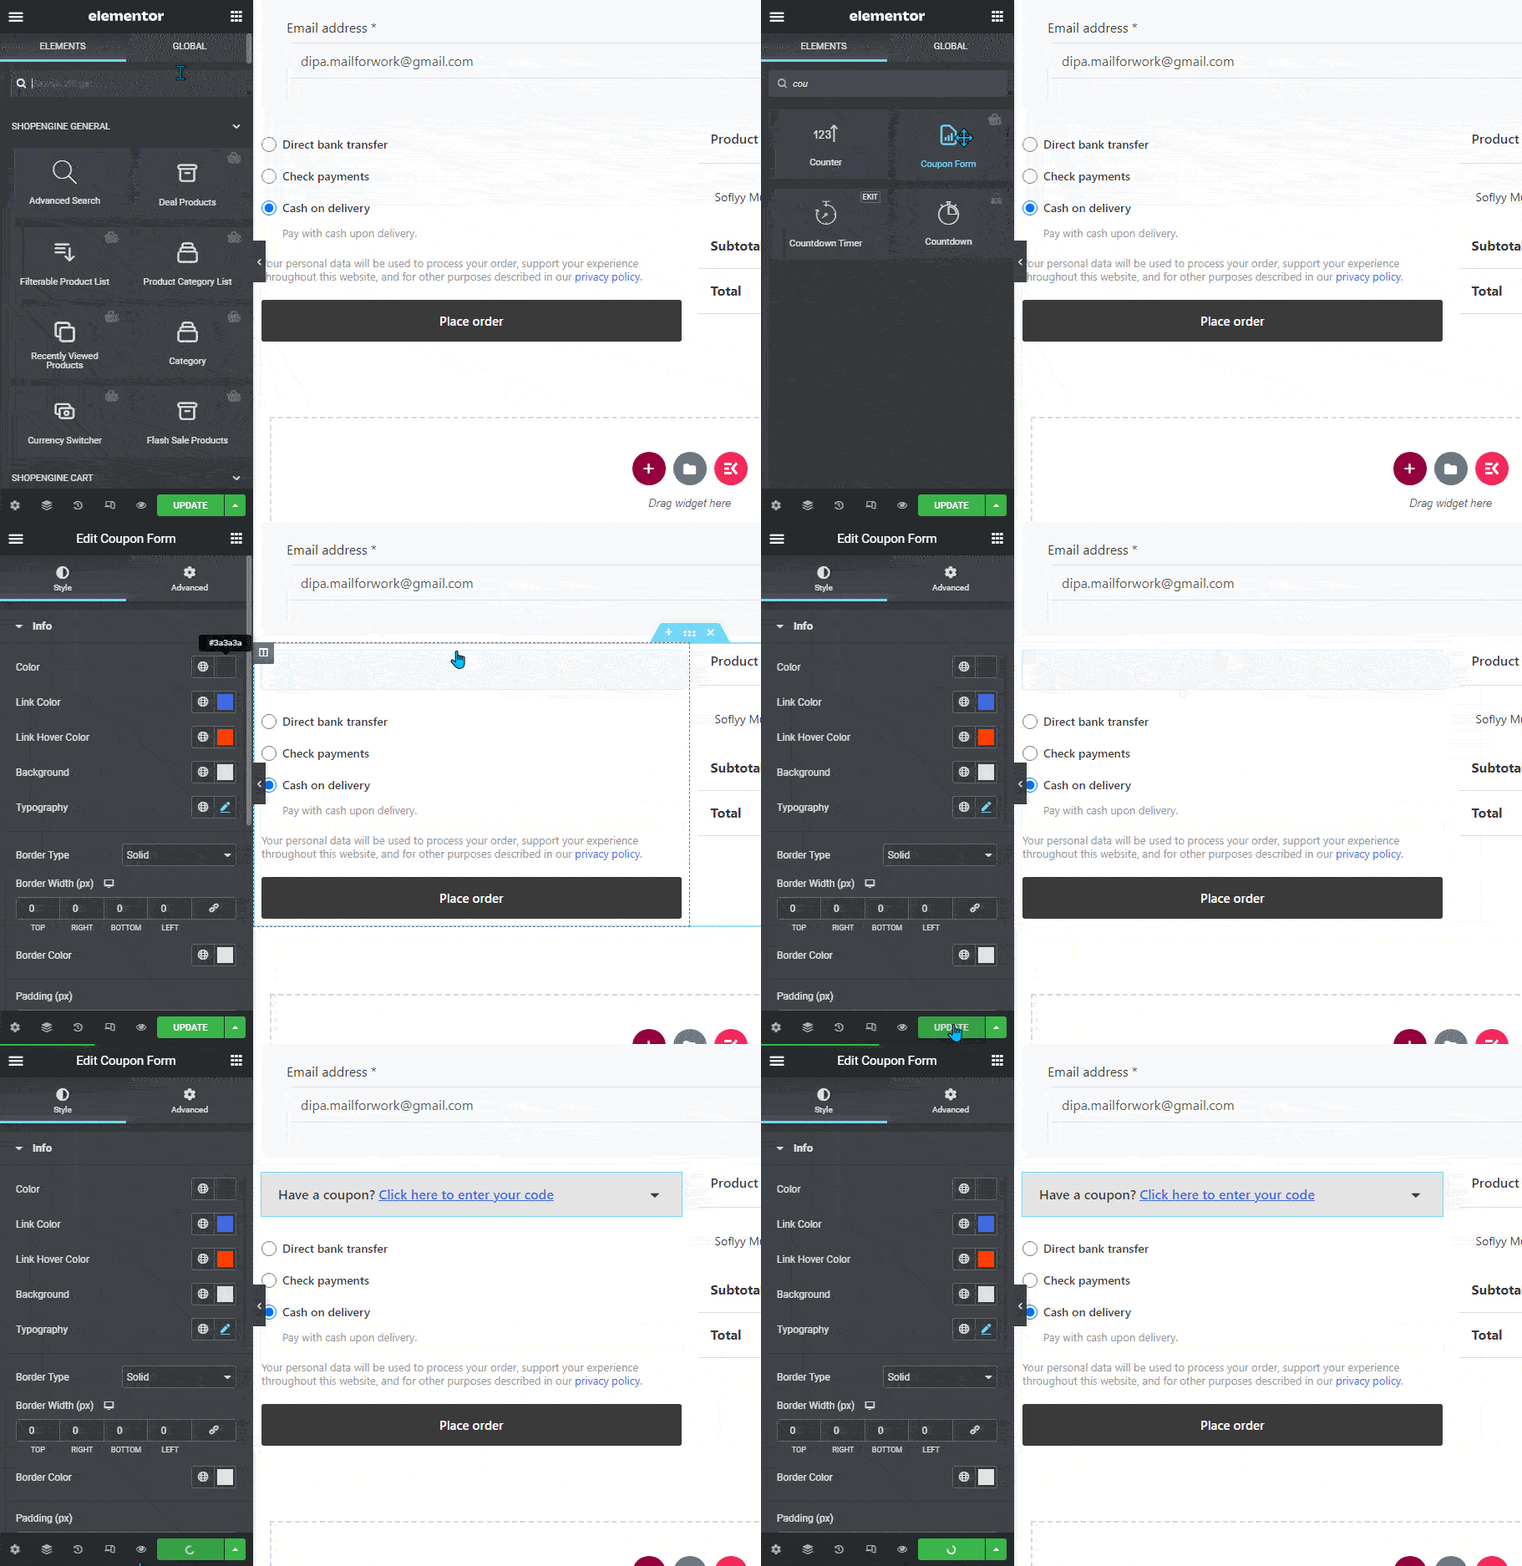
- Search for Coupon Form on Elements Search option
- Drag and drop the widget
- Click on Update to save changes.
Step 3: Style Settings of Checkout Form-Coupon #
Go to the Style tab to access the style settings.
Expand the Info tab to customize the following settings:
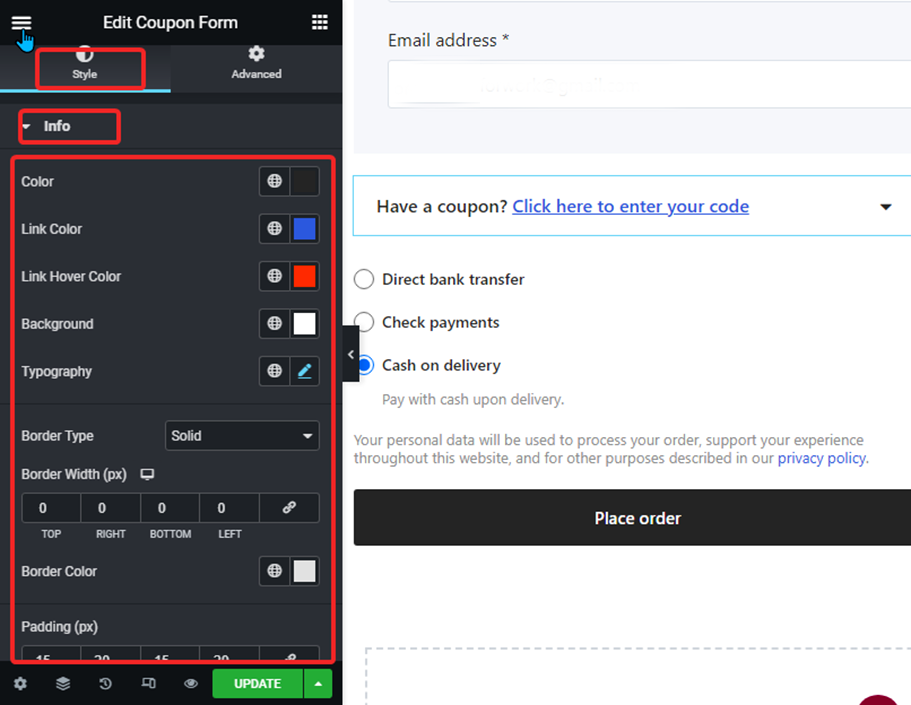
- Color: Change the color of the text.
- Link Color: Select the color of the link.
- Link Hover Color: Choose the hover color for the link.
- Background: Select a background color.
- Typography: You can change the font family, font size, font weight, transform, and line height for texts here.
- Border type: you can choose the border type to be solid, dotted, doubled dashed, groove or none.
- Border Width: Select the top, left, right, and bottom width of the border.
- Border Color: Pick a color for the border.
- Padding: Adjust the top, left, right, and bottom padding.
Expand the Description option to customize the following settings:
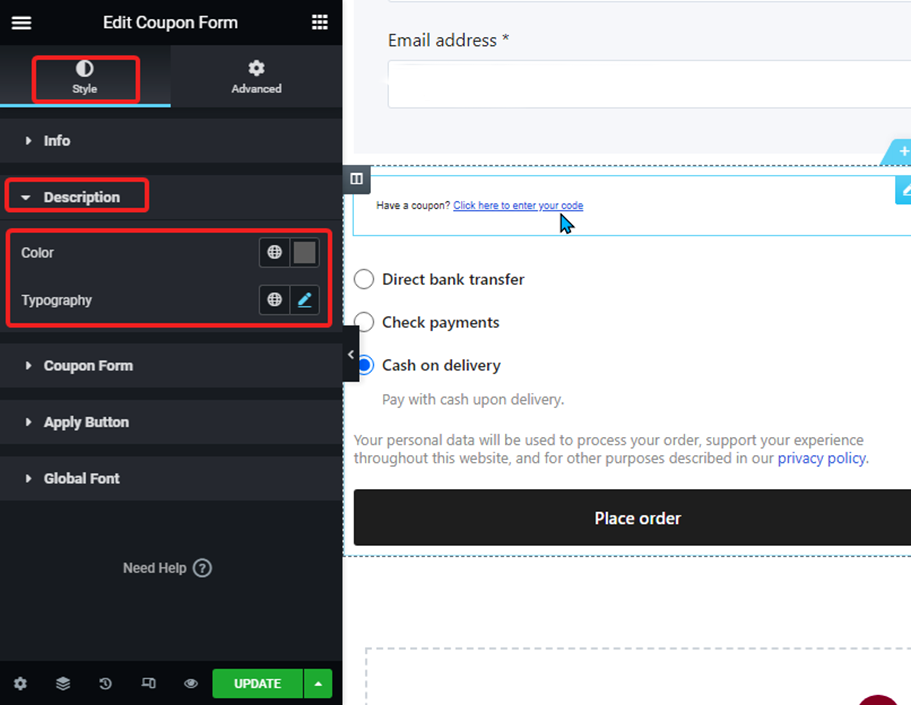
- Color: Change the color of the description text.
- Typography: You can change the font size, weight, and line height for description texts here.
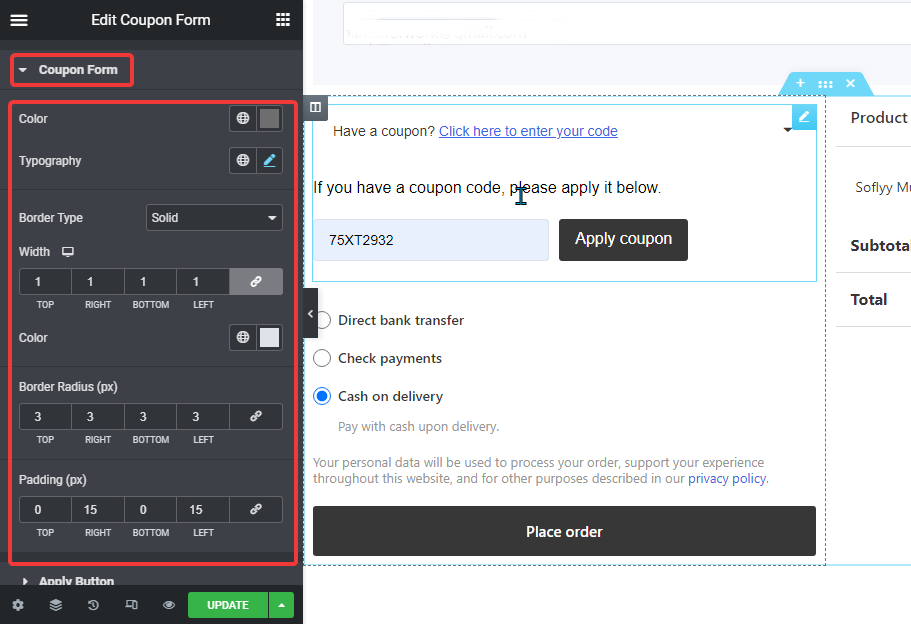
- Color: Change the color of the text.
- Typography: You can change the font size, weight, and line height here.
- Border type: you can choose the border type to be solid, dotted, doubled dashed, groove or none.
- Width: Select the top, left, right, and bottom width of the border.
- Color: Pick a color for the border.
- Border Radius: Select the top, left, right, and bottom values for the border radius.
- Padding: Adjust the top, left, right, and bottom padding
.Expand the Apply Form option to customize the following settings:
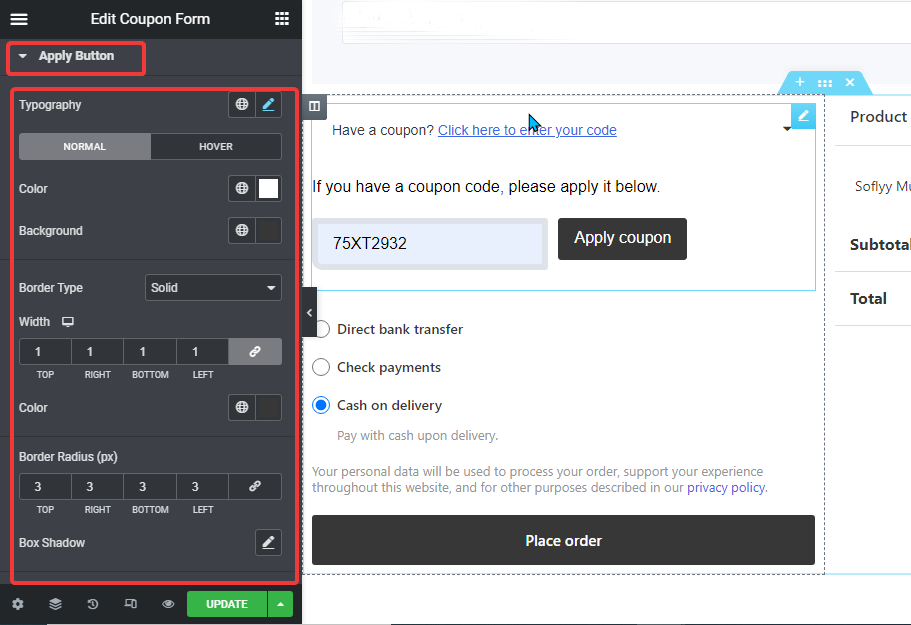
- Typography: You can change the font size, weight, and line height here.
- Normal/ Hover: Switch to the Normal and Hover tab to change the text color and background color for both the normal and hover views.
- Border type: you can choose the border type to be solid, dotted, doubled dashed, groove or none.
- Width: Select the top, left, right, and bottom width of the border.
- Color: Pick a color for the border.
- Border Radius: Select the top, left, right, and bottom values for the border radius.
- Box Shadow: Click on the edit option to choose the shadow color, horizontal, vertical, blur and spread value. You can also set the position as outline or inset.
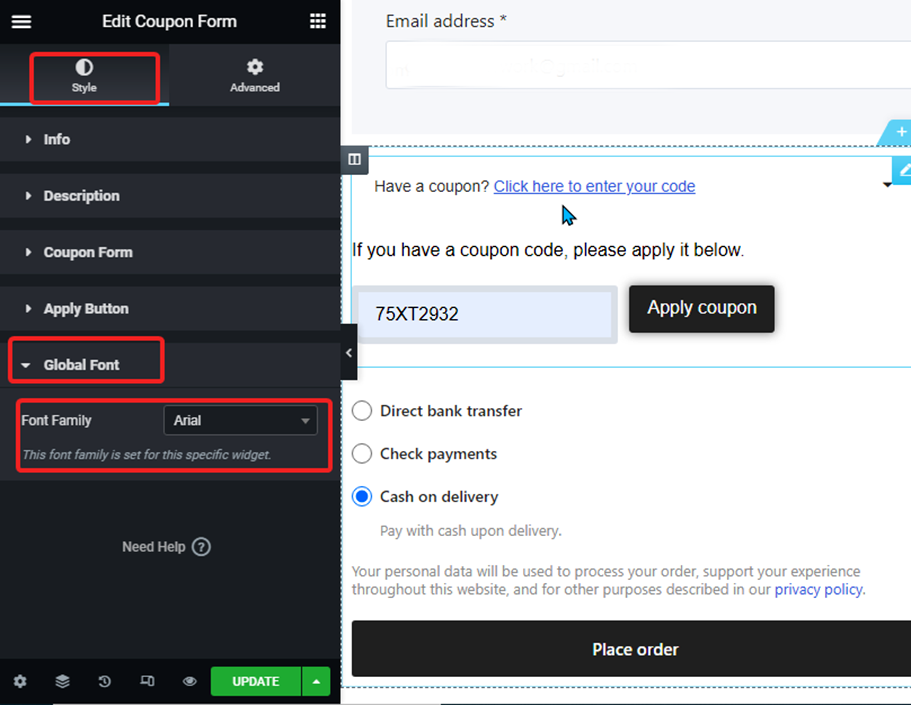
- Font family: Here you can change the font family for the whole widget.
Finally, click on Update to save all the changes.
Now, coupons should work in your checkout. Check out the preview below:
