Get Started #
Create and manage mailing list, automated mailing, newsletter, and many other options. Through our Mailchimp Elementor Addon you can personalize your sign-up form with attractive and multiple styles.
- Go to Elementor=> Search for Mailchimp

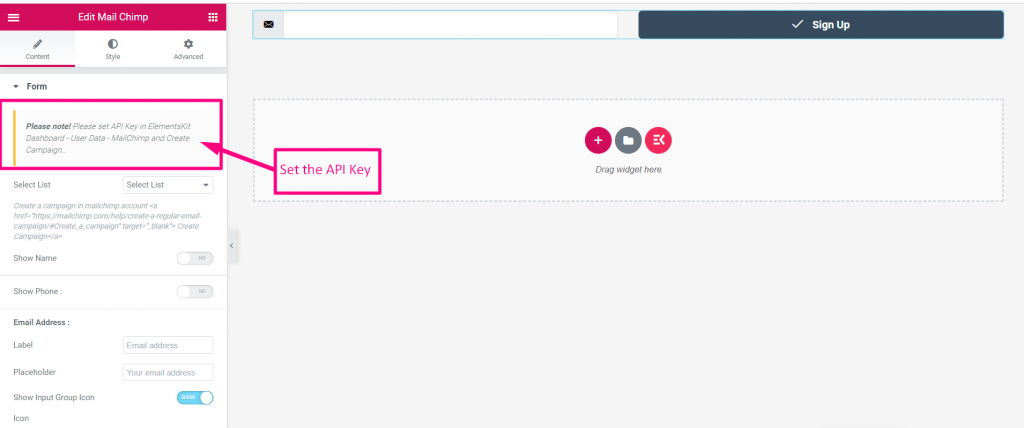
- Now You Have to Set the API key
Mailchimp API key Generate #
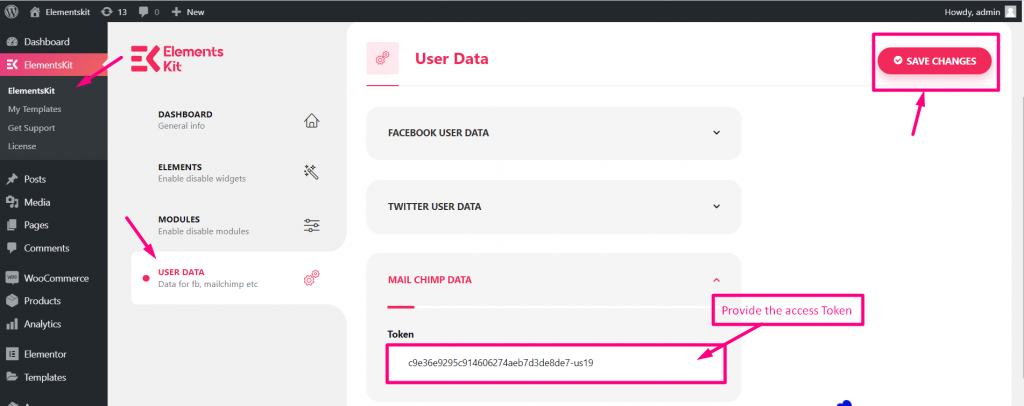
- Go to Elementskit=> User data=> Mailchimp data
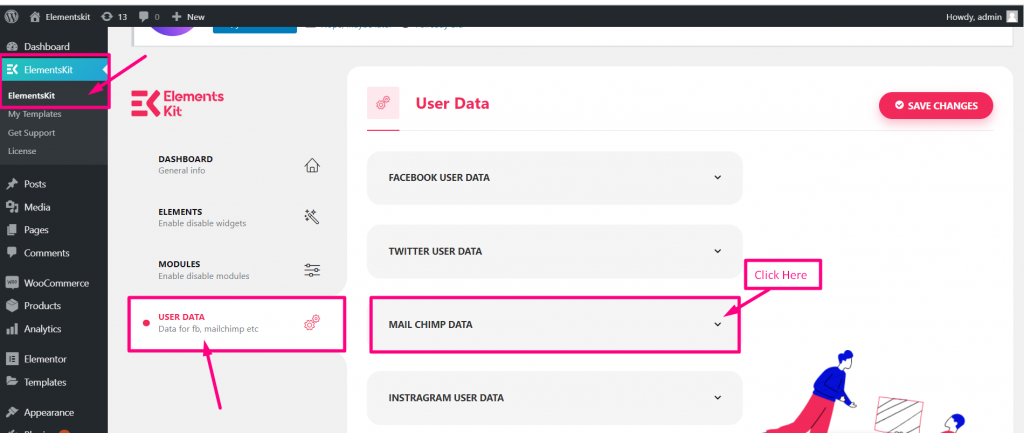
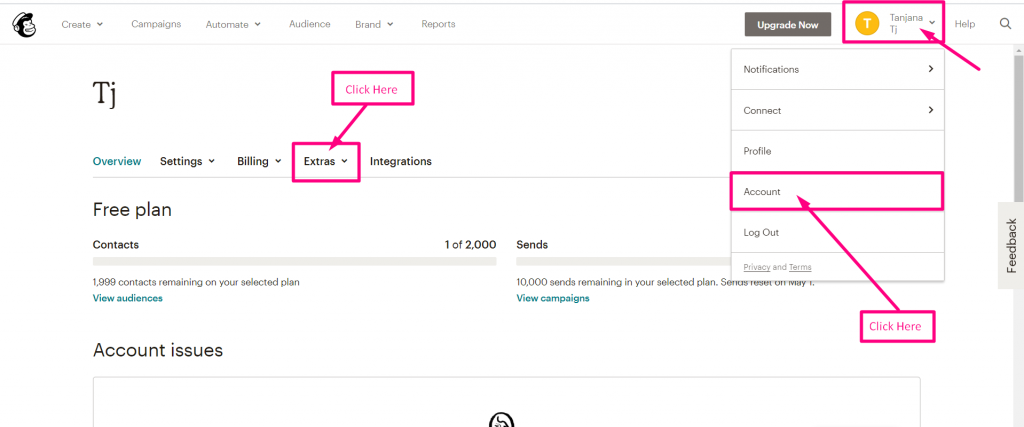
Get Mailchimp API Key #
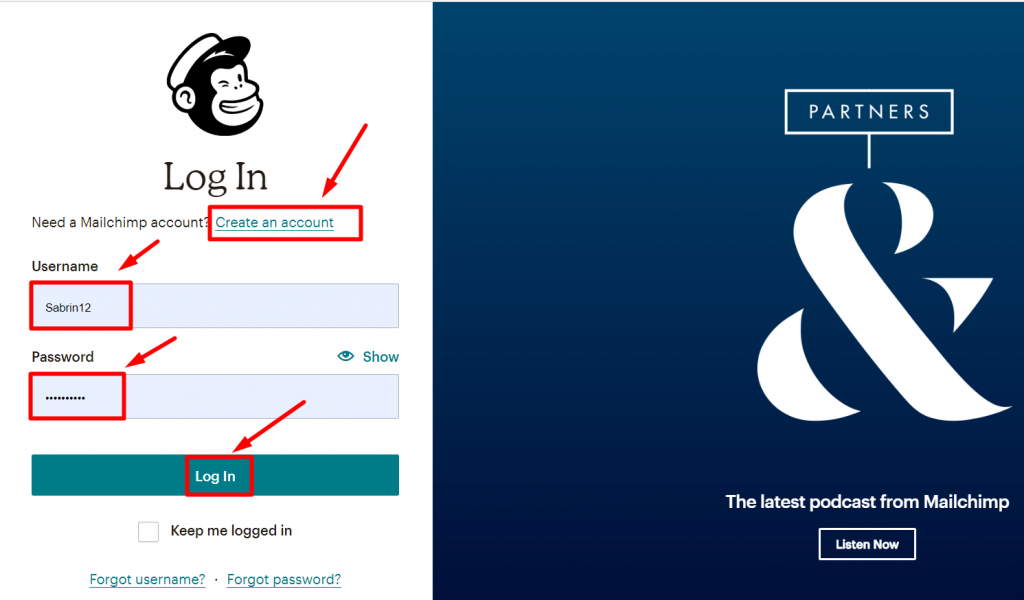
- Step=>1: To get the API key Create a Mailchimp account and Log In with your Username and Password
- Step=>2: Click On the Selected Icon=> Account=> Click on Extras
- Step=>3: Click on Extras=> API keys=> Create A key
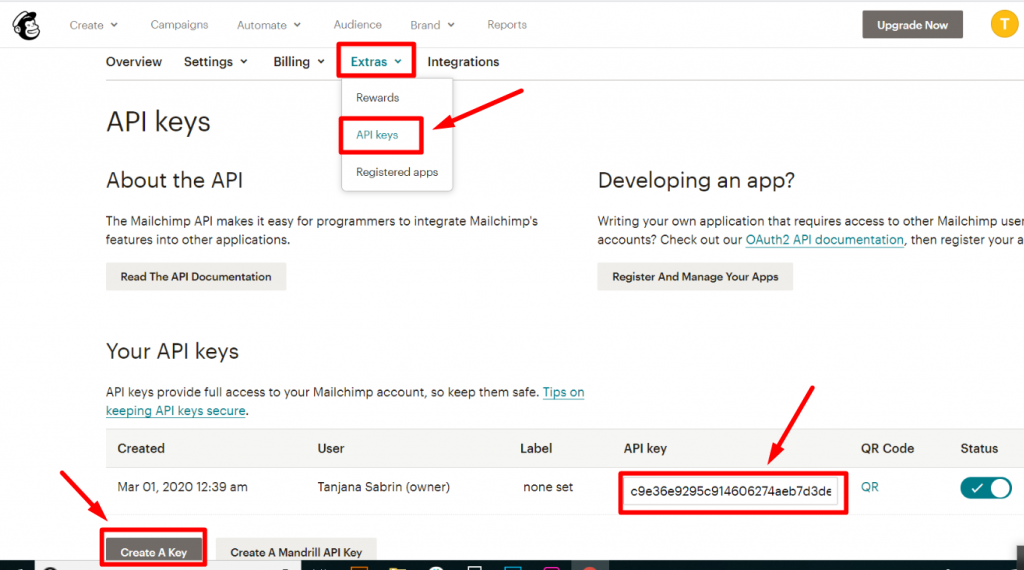
- Step=>4: Paste the Key Here
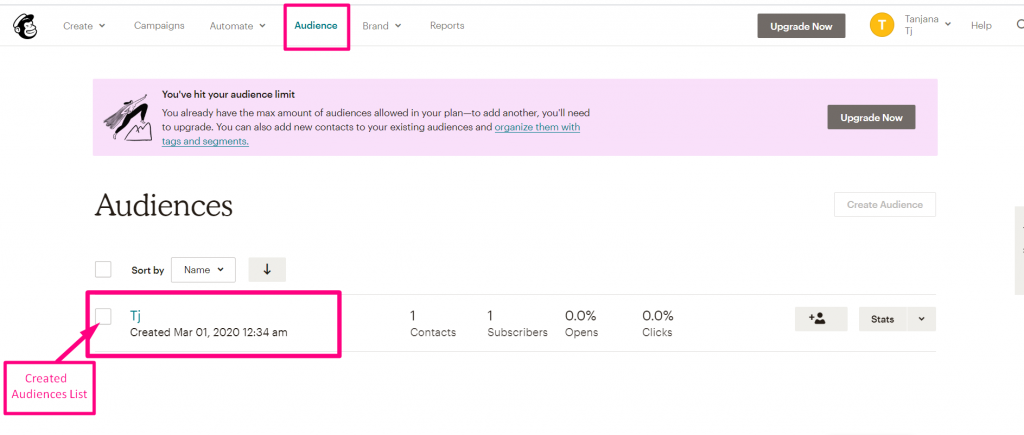
Create List/ Audience in Mailchimp #
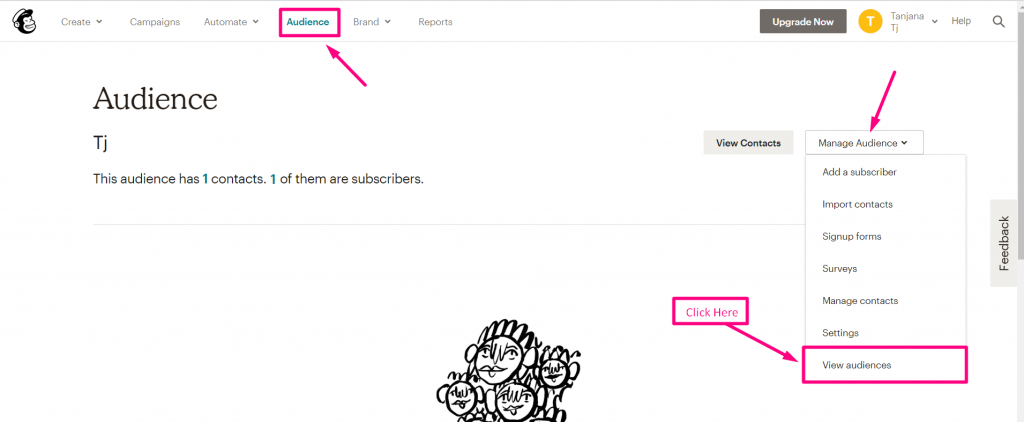
Step=>1: Go to Mailchimp Audience => Manage Audience→ View Audience
- Step=>2: Create Audience from “Create Audience”
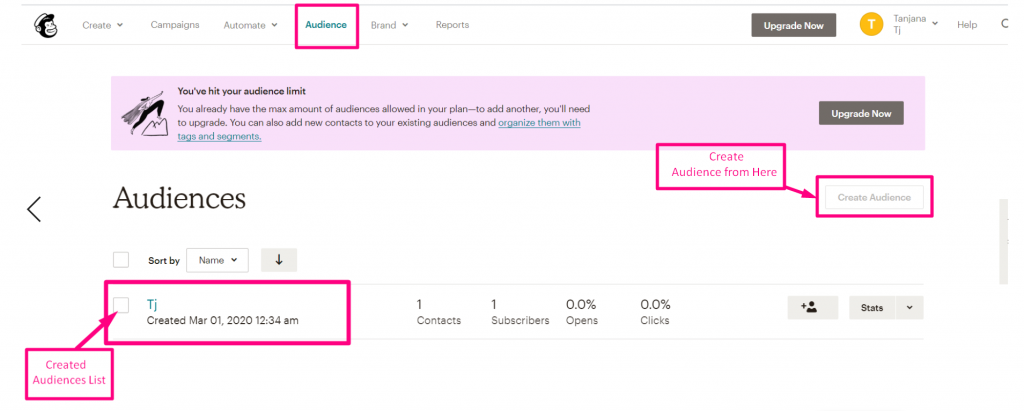
- Showing Created Audience
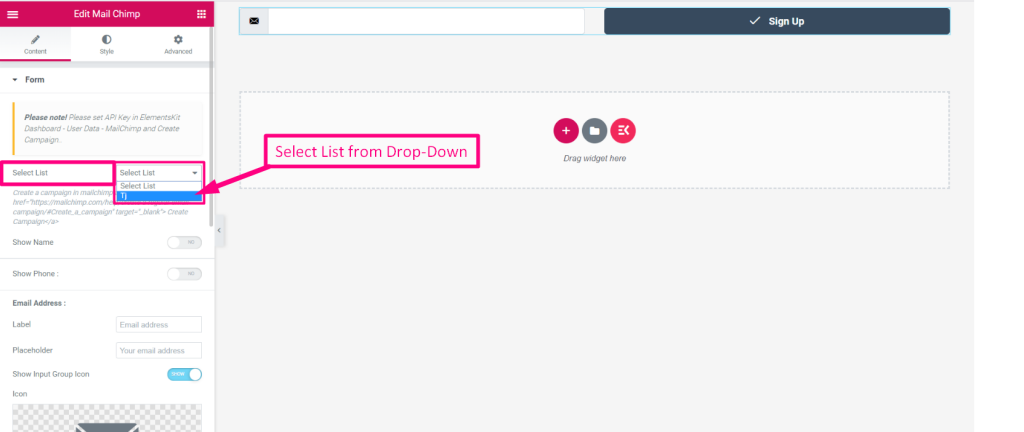
Functionalities #
- Go to the Maillchimp Widget=> Select List from the Drop-Down
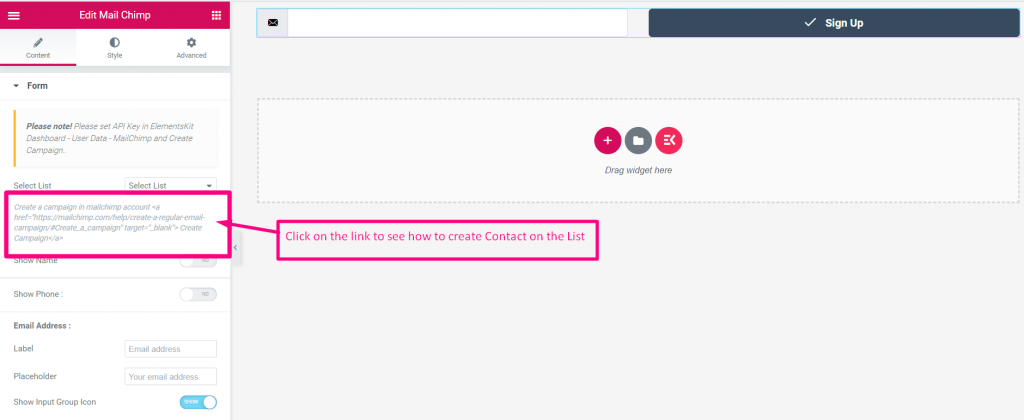
Create Contact #
Click on the Documentation Link to see How to Create Contact list from your Mailchimp Account: https://mailchimp.com/help/create-a-regular-email-campaign/#Create_a_campaign%22%20target=%22_blank%22%3E%20Create%20Campaign
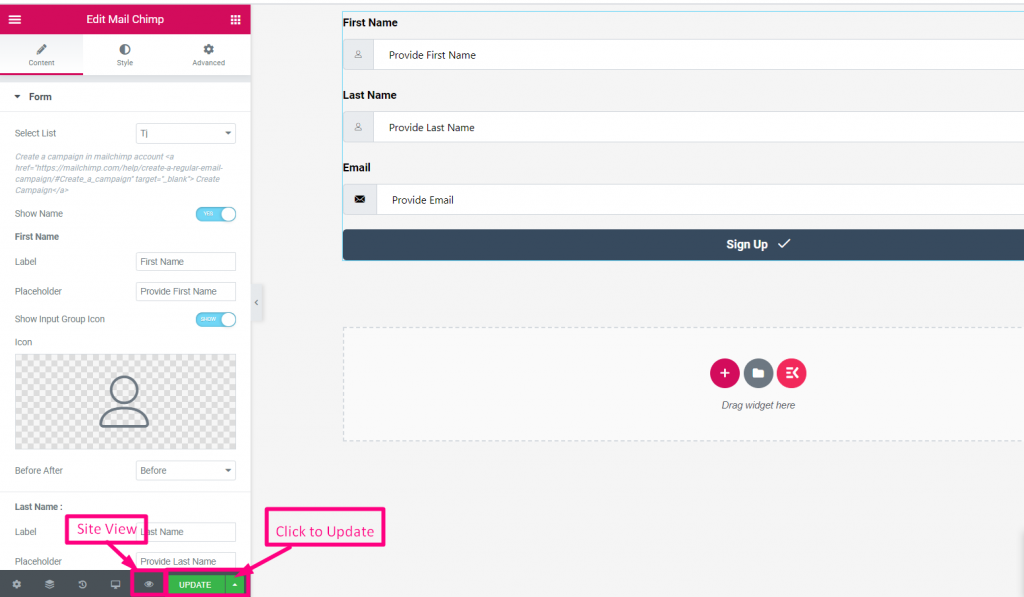
First Name #
- Enable the toggle to Show First Name Field
- Add or Edit First Name
- Provide Place Holder
- Show or Hide Icon
- Upload Icon
- Choose Icon Position: Before Text or After Text

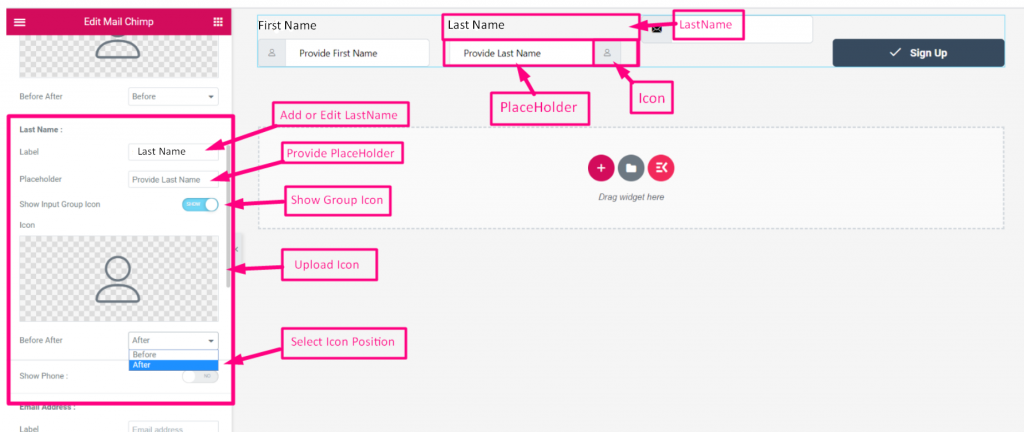
Last Name #
- Enable the toggle to Show Last Name Field
- Add or Edit Label
- Provide Place Holder
- Show or Hide Icon
- Upload Icon
- Choose Icon Position: Before Text or After Text
Phone No #
- Enable the toggle to Show Phone No Field
- Add or Edit Label
- Provide Place Holder
- Enable toggle to Show or Hide Icon
- Upload Icon
- Choose Icon Position: Before Text or After Text

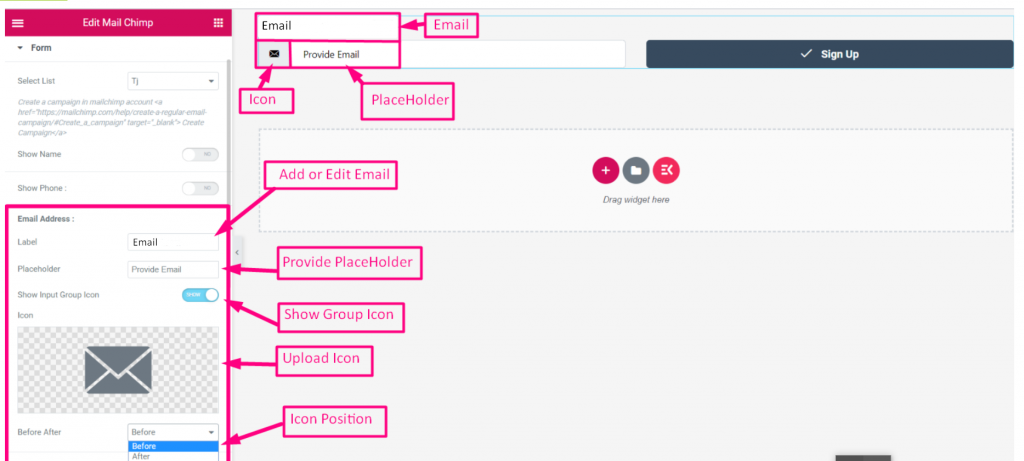
Email #
- Enable the toggle to Show Email Field
- Add or Edit Label
- Provide Place Holder
- Show or Hide Icon
- Upload Icon
- Choose Icon Position: Before Text or After Text
Submit Button #
- Enable the toggle to Show Submit Button Field
- Add or Edit Submit Button Label
- Enable toggle to Show or Hide Icon
- Upload Icon
- Choose Form Style: Inline or Full Width
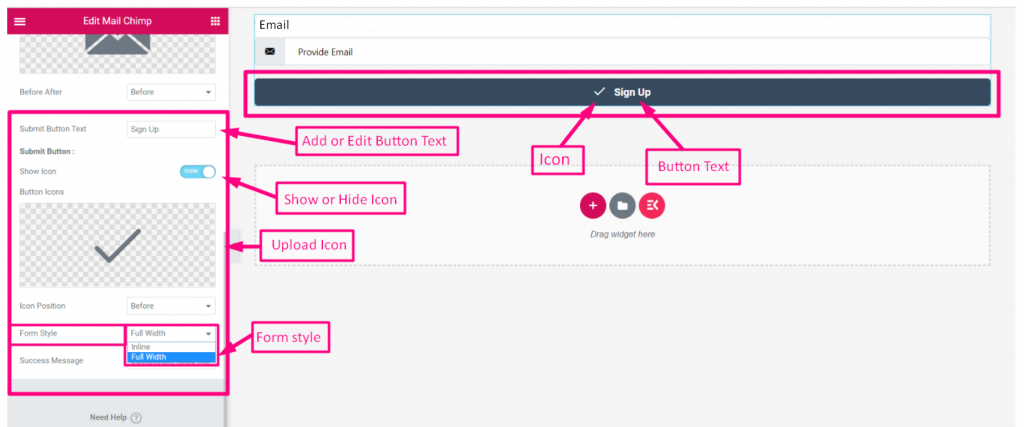
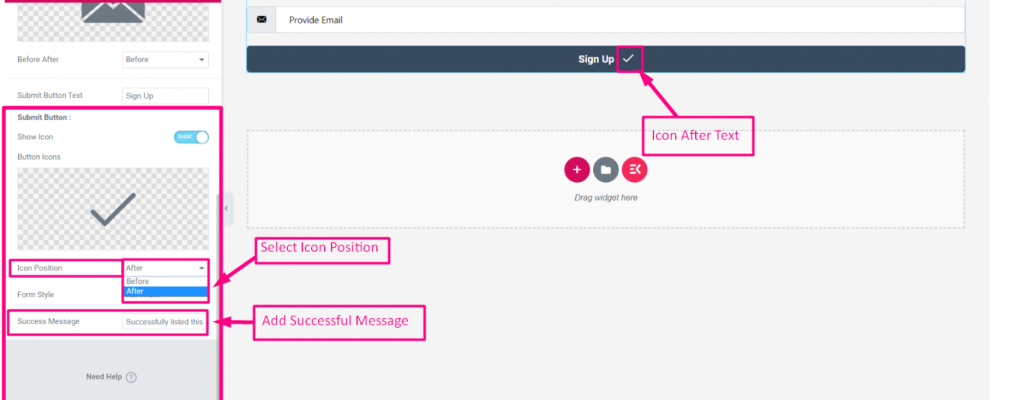
- Select Icon Position: Before text or After Text
- Add Successful Message
- Click to Update
- Click on the Icon for Site View
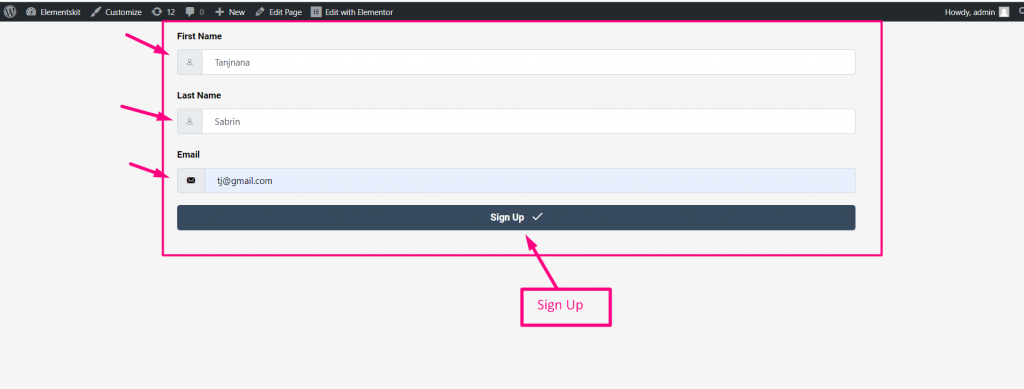
- Enter First Name
- Last Name
- Click on Sign Up to Submit
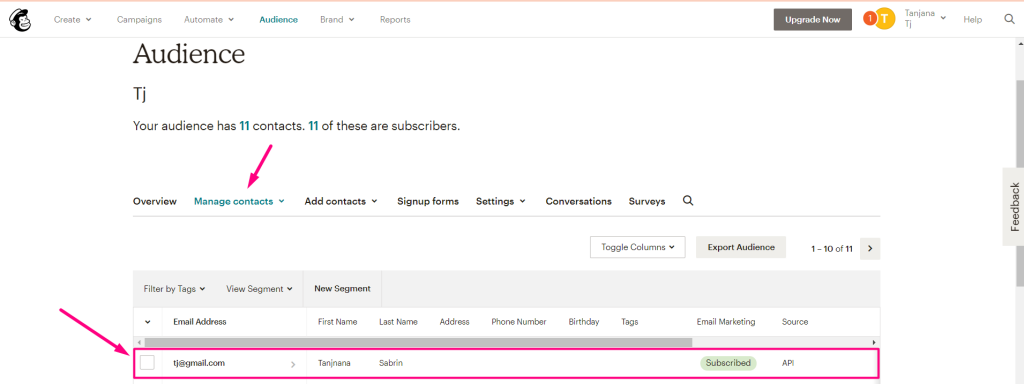
- Now go to your MailChimp Account=> Audiences=> View Contacts
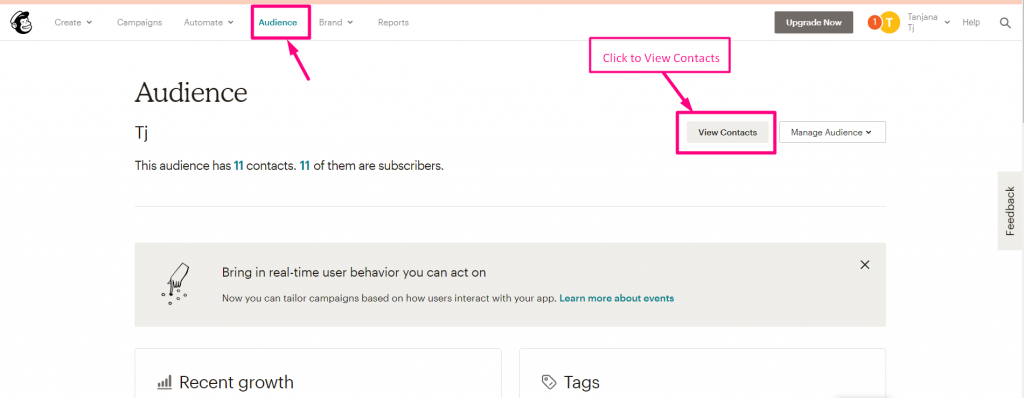
- You can see the Contacts/ Subscribers Appeared Here