

 Portuguese
  English
  German
  Spanish
  Italian
  French
  Danish
  Swedish
  Polish
  Korean
  Japanese
 Iniciar #
Crie e gerencie listas de e-mails, e-mails automatizados, boletins informativos e muitas outras opções. Através do nosso complemento Mailchimp Elementor você pode personalizar seu formulário de inscrição com estilos atraentes e múltiplos.
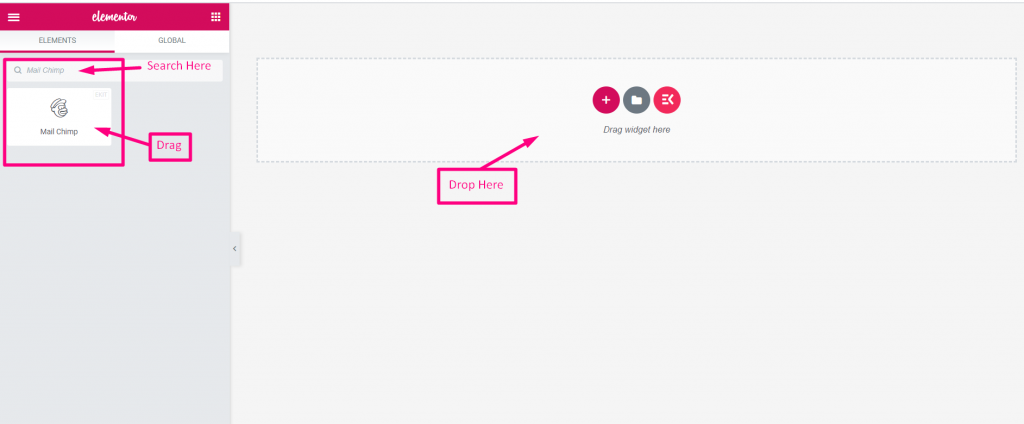
- Vá para Elementor=> Procurar MailChimp
- Agora você precisa definir a chave API
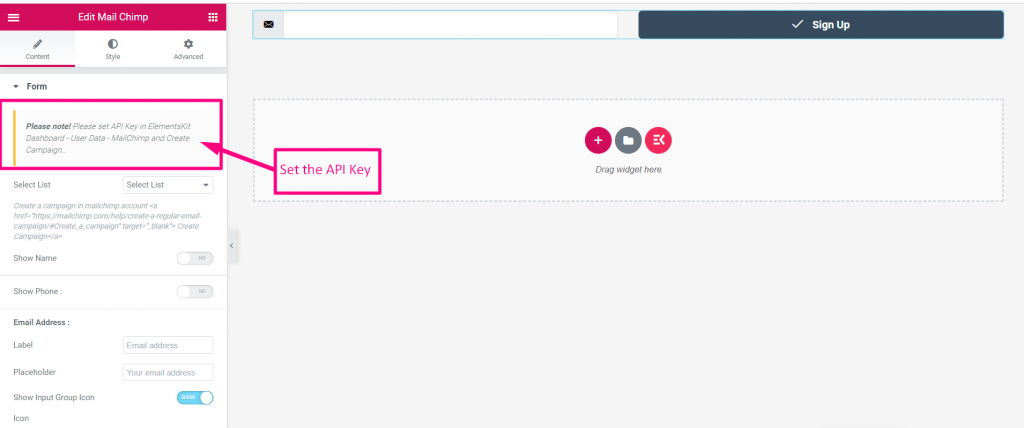
Chave de API Mailchimp gerada #
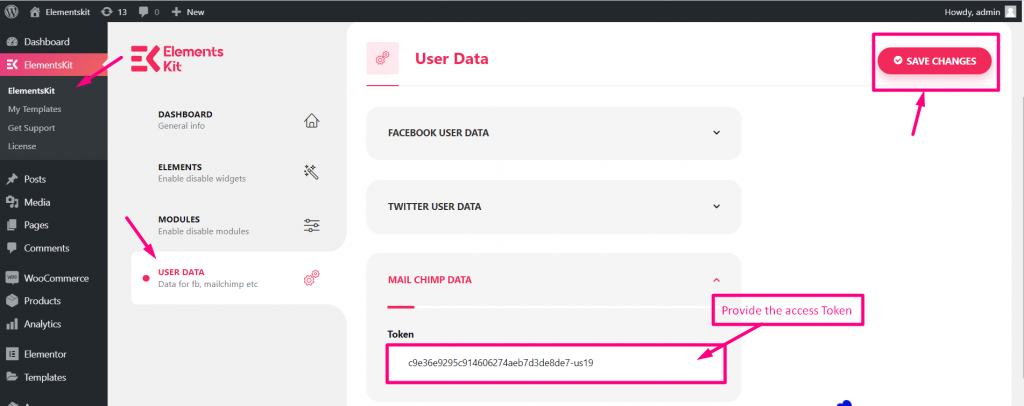
- Vá para Kit de elementos=> Dados do usuário=> MailChimp dados
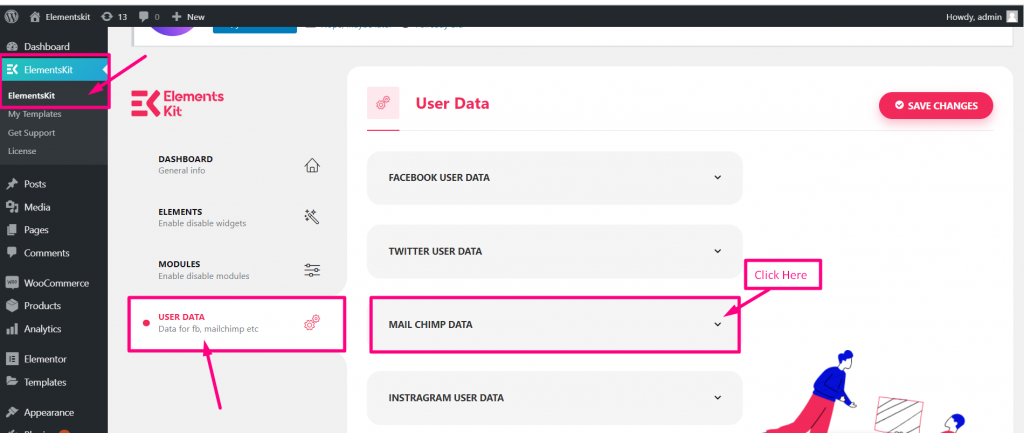
Obtenha a chave da API Mailchimp #
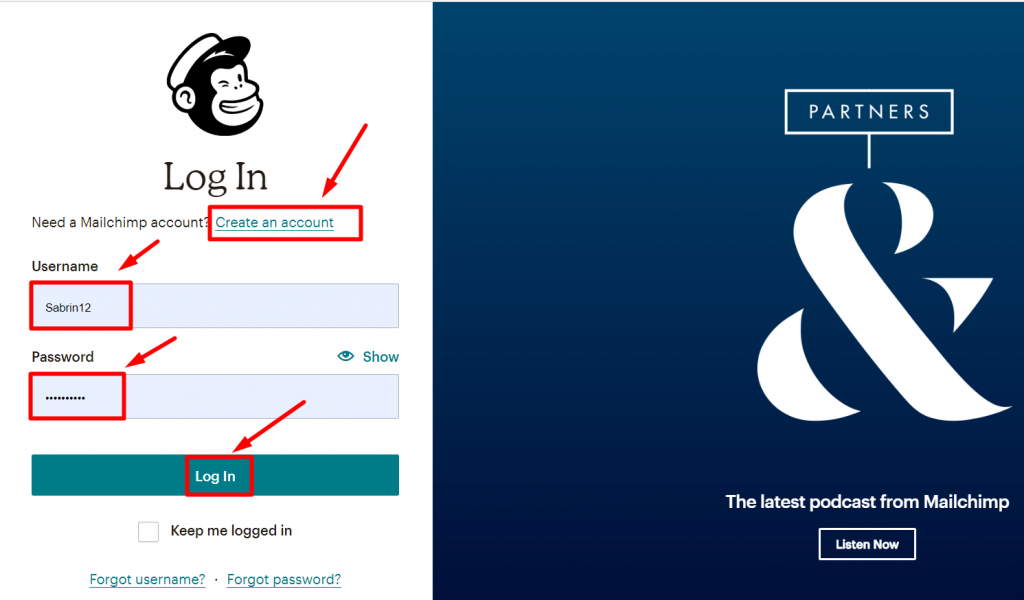
- Etapa => 1: Para obter a chave API Criar uma conta Mailchimp e faça login com seu Usuário e senha
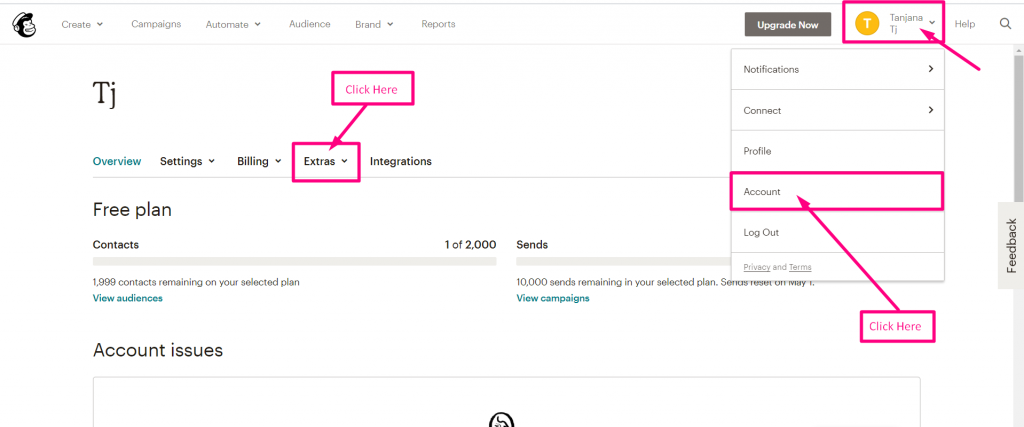
- Etapa => 2: Clique no Ícone selecionado=> Conta=> Clique em Extras
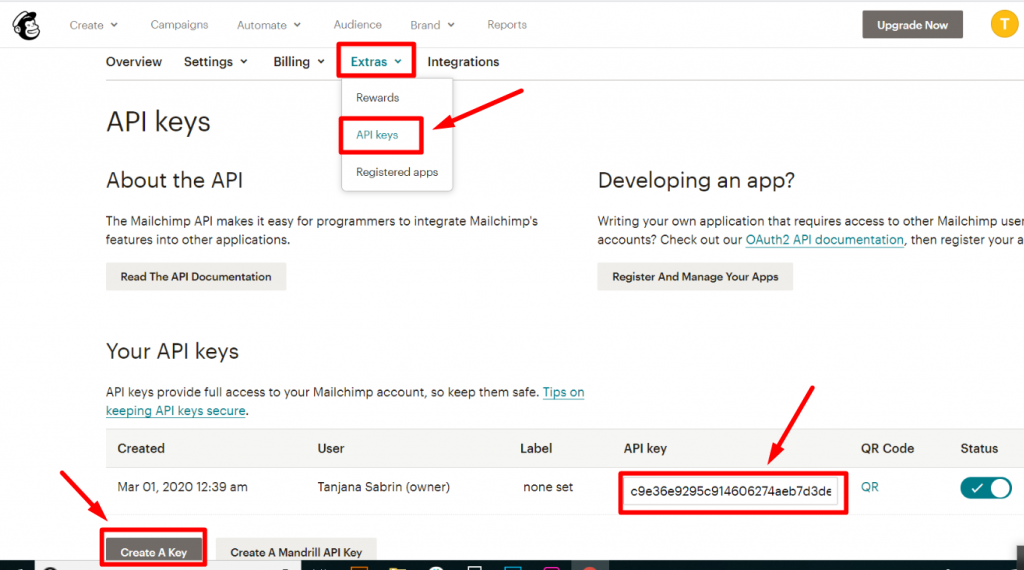
- Etapa=>3: Clique em Extras=> Chaves de API=> Crie uma chave
- Etapa => 4: Cole a chave aqui
Criar lista/público no Mailchimp #
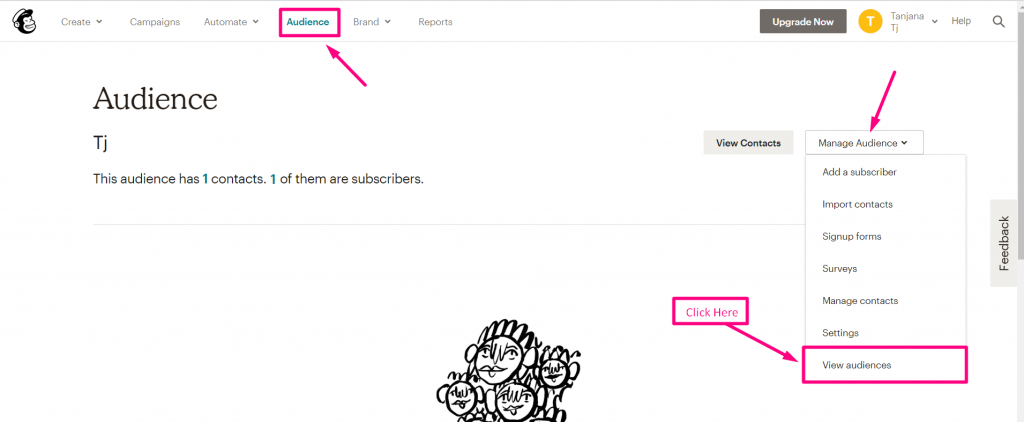
Etapa => 1: Vá para Público Mailchimp => Gerenciar público→ Ver público
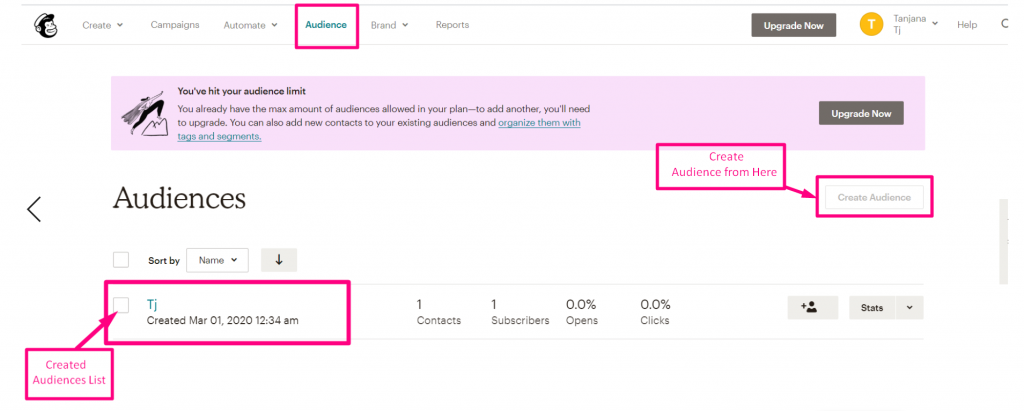
- Etapa => 2: Criar público em “Criar público”
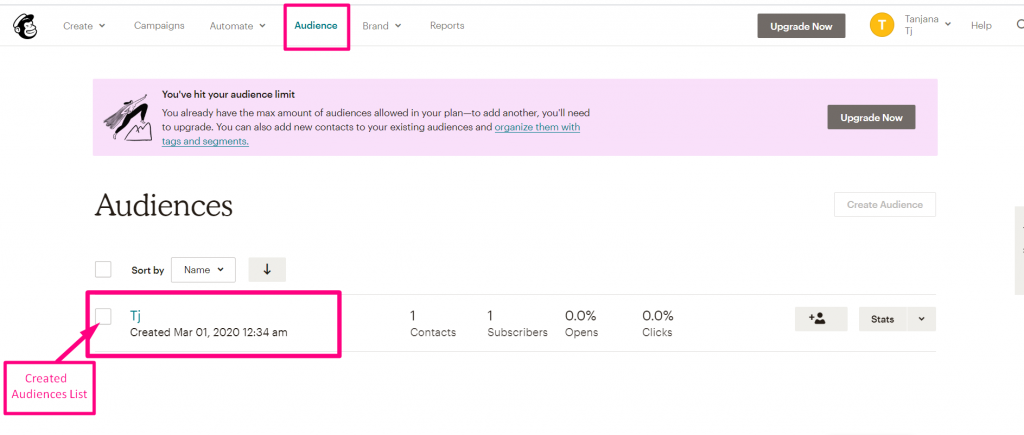
- Mostrando o público criado
Funcionalidades #
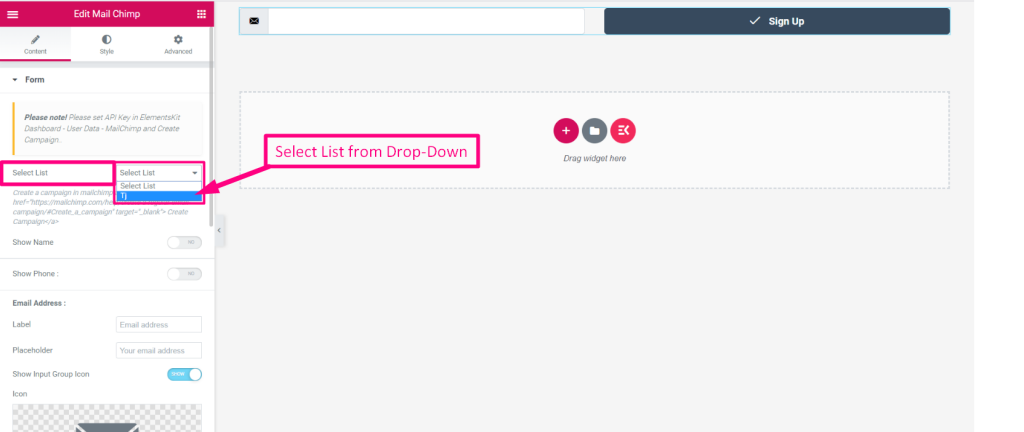
- Vou ao Widget Mailchimp=> Selecione Lista no menu suspenso
Criar contato #
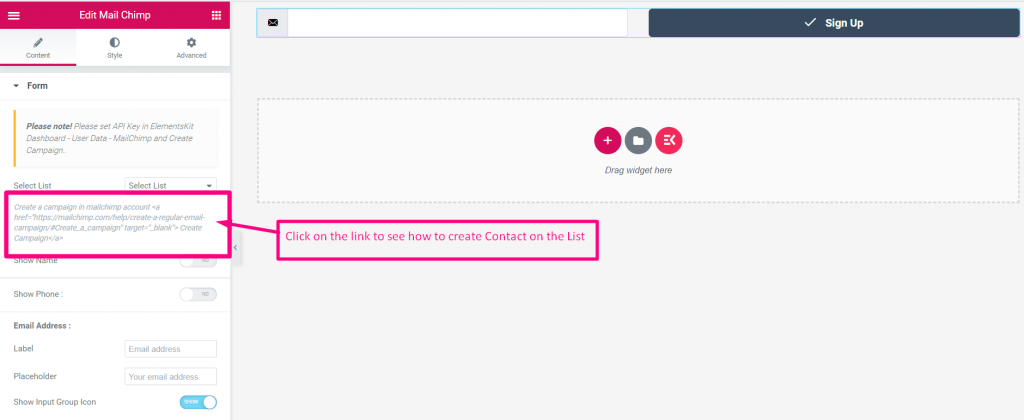
Clique no Link da documentação para ver Como criar uma lista de contatos a partir do seu Conta Mailchimp: https://mailchimp.com/help/create-a-regular-email-campaign/#Create_a_campaign%22%20target=%22_blank%22%3E%20Create%20Campaign
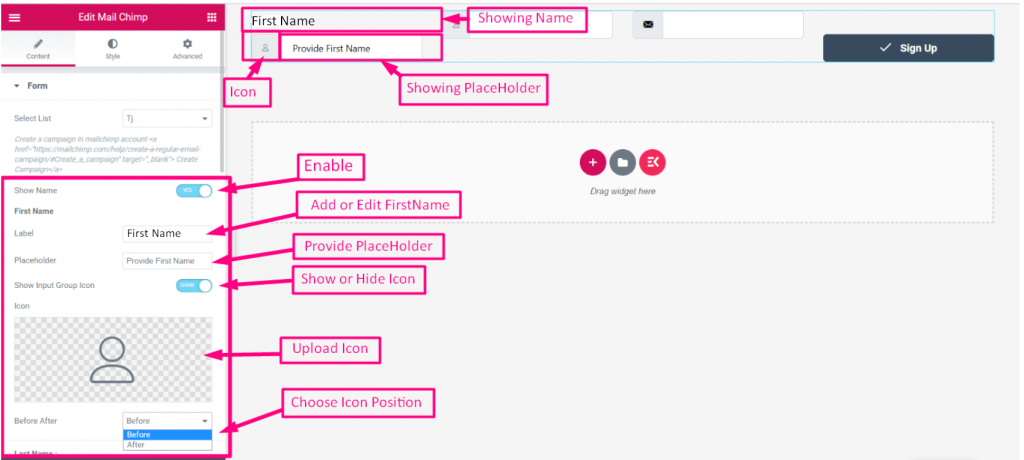
Primeiro nome #
- Ative a alternância para Mostrar campo de nome
- Adicionar ou editar Primeiro nome
- Fornecer Suporte de lugar
- Mostrar ou ocultar ícone
- Carregar ícone
- Escolha a posição do ícone: Antes do texto ou depois do texto
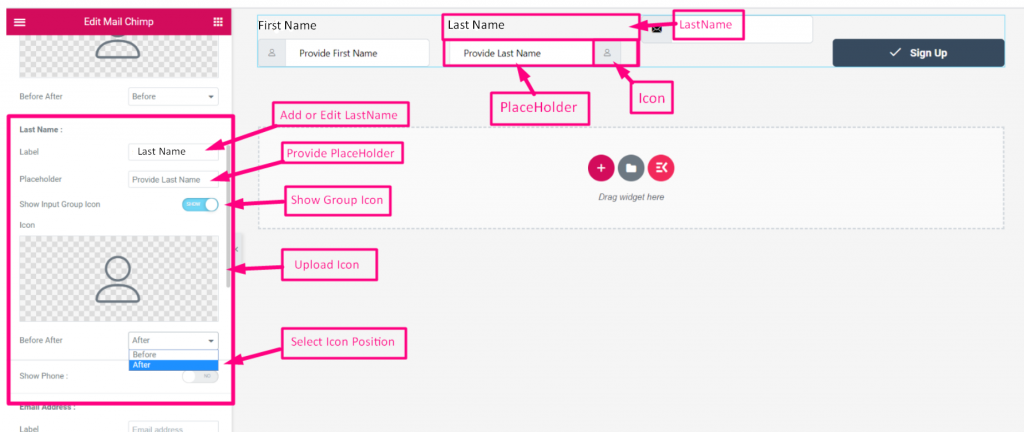
Sobrenome #
- Ative a alternância para Mostrar Campo Sobrenome
- Adicionar ou editar Rótulo
- Fornecer Suporte de lugar
- Mostrar ou ocultar ícone
- Carregar ícone
- Escolha a posição do ícone: Antes do texto ou depois do texto
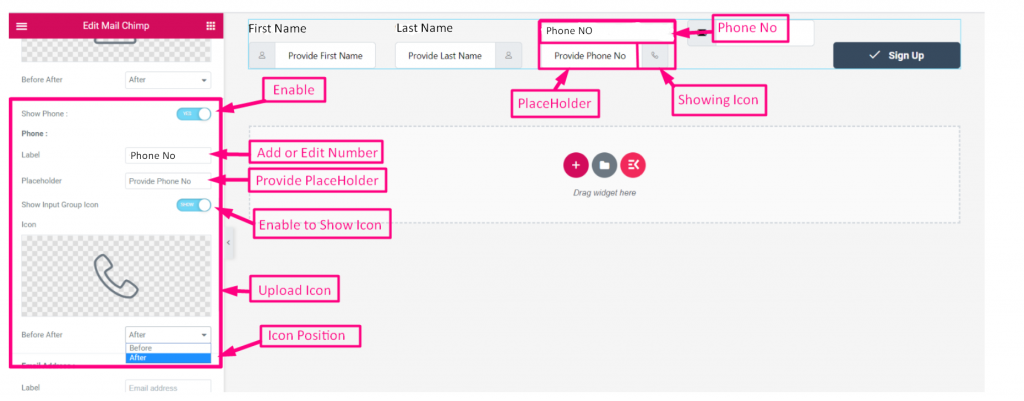
Telefone não #
- Ative a alternância para Mostrar Telefone sem campo
- Adicionar ou editar Rótulo
- Fornecer Suporte de lugar
- Ative alternar para Mostrar ou ocultar ícone
- Carregar ícone
- Escolha a posição do ícone: Antes do texto ou depois do texto
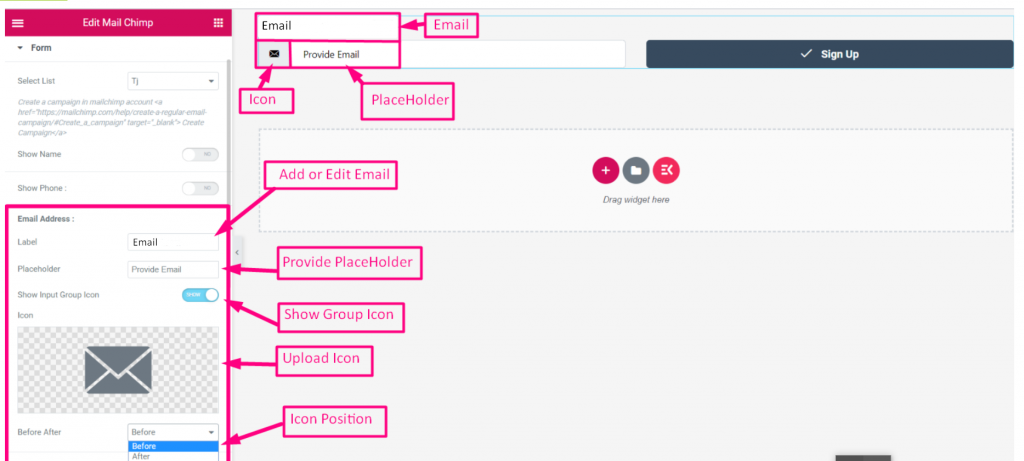
E-mail #
- Ative a alternância para Mostrar Campo de e-mail
- Adicionar ou editar Rótulo
- Fornecer Suporte de lugar
- Mostrar ou ocultar ícone
- Carregar ícone
- Escolha a posição do ícone: Antes do texto ou depois do texto
Botão de envio #
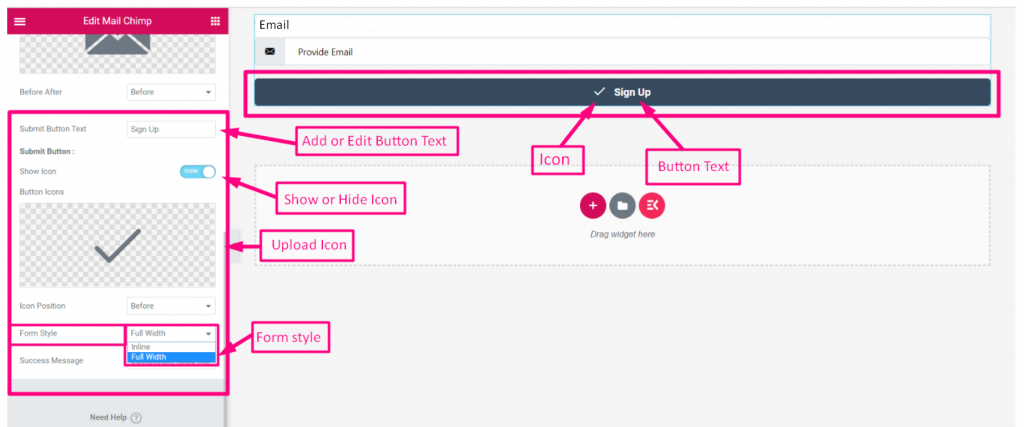
- Ative a alternância para Mostrar Campo do botão Enviar
- Adicionar ou editar Etiqueta do botão Enviar
- Ative alternar para Mostrar ou ocultar ícone
- Carregar ícone
- Escolha o estilo do formulário: Inline ou largura total
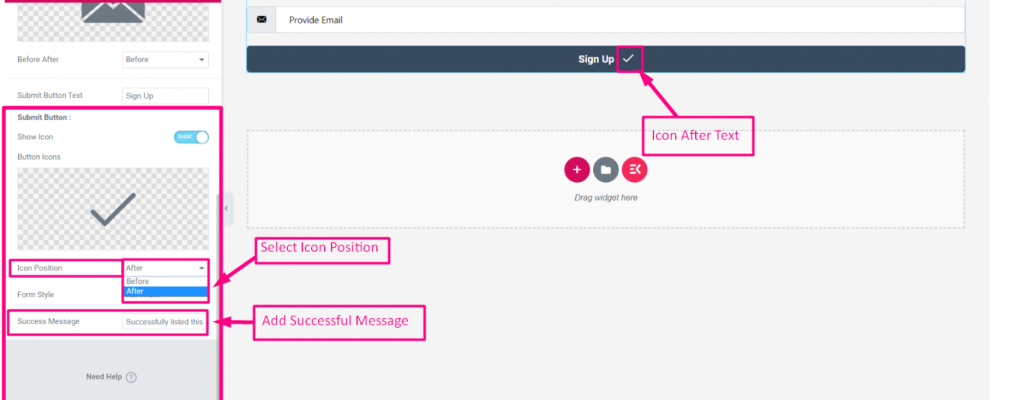
- Selecione a posição do ícone: Antes do texto ou depois do texto
- Adicionar Mensagem de sucesso
- Clique para Atualizar
- Clique no ícone para Visualização do site
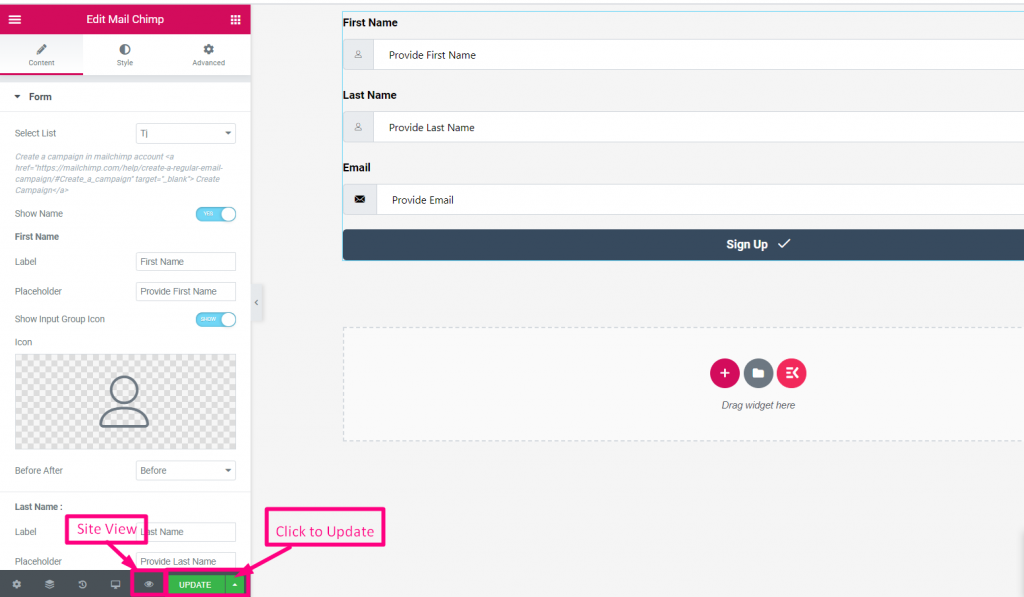
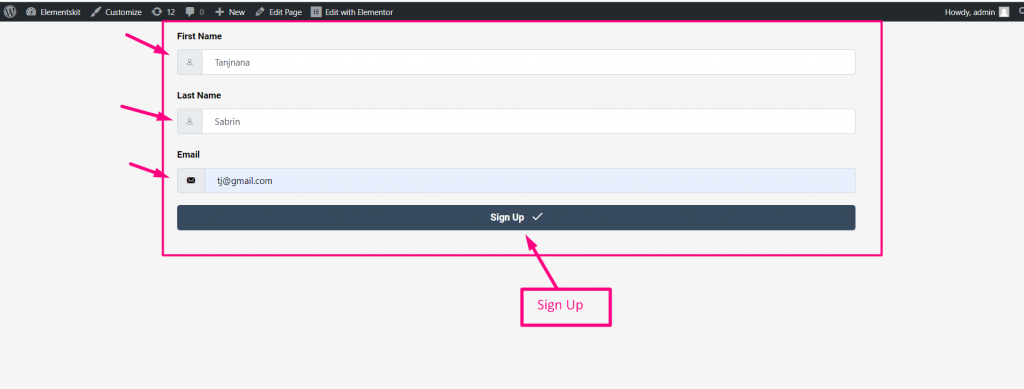
- Introduza o primeiro nome
- Sobrenome
- Clique em assinar Até enviar
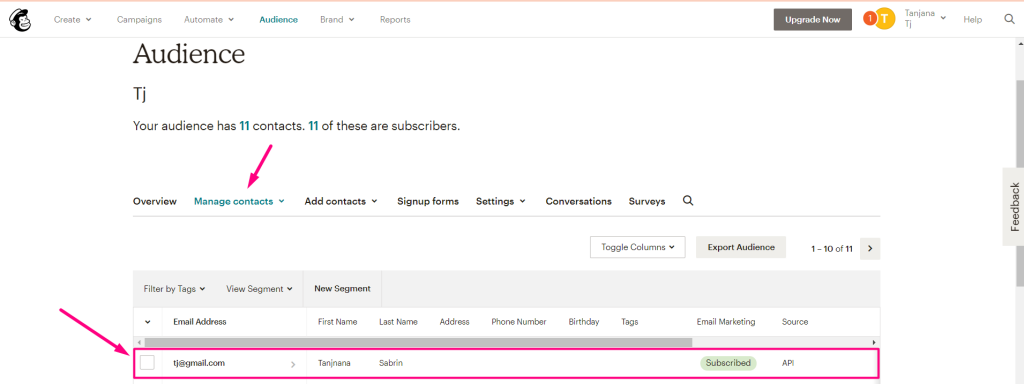
- Agora vá para o seu Conta MailChimp=> Públicos=> Ver contatos
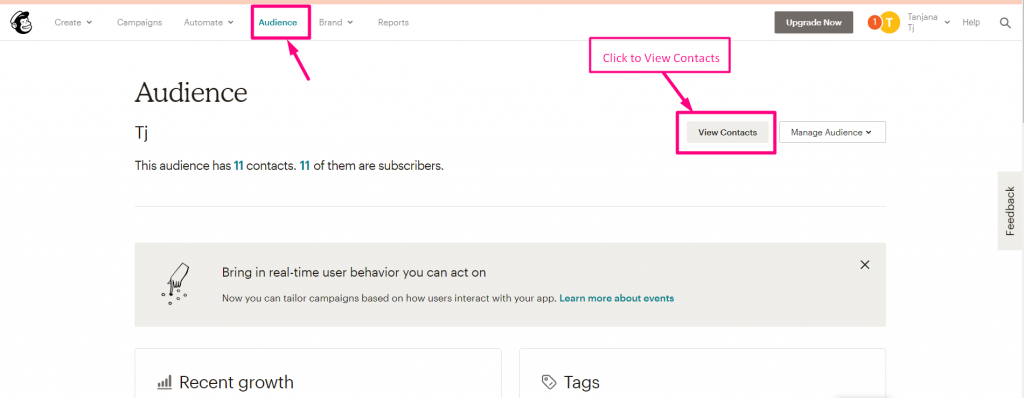
- Você pode ver o Contatos/Assinantes Apareceu aqui