French
  English
  German
  Spanish
  Italian
  Danish
  Portuguese
  Swedish
  Polish
  Korean
  Japanese
 Commencer #
Créez et gérez une liste de diffusion, un envoi automatisé, une newsletter et de nombreuses autres options. Grâce à notre module complémentaire Mailchimp Elementor, vous pouvez personnaliser votre formulaire d'inscription avec des styles attrayants et multiples.
- Aller à Élémentor => Rechercher MailChimp
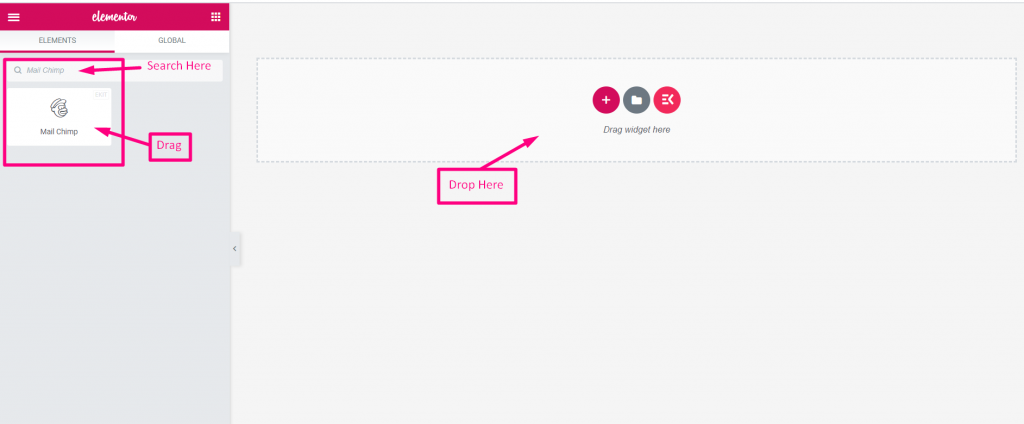
- Vous devez maintenant définir la clé API
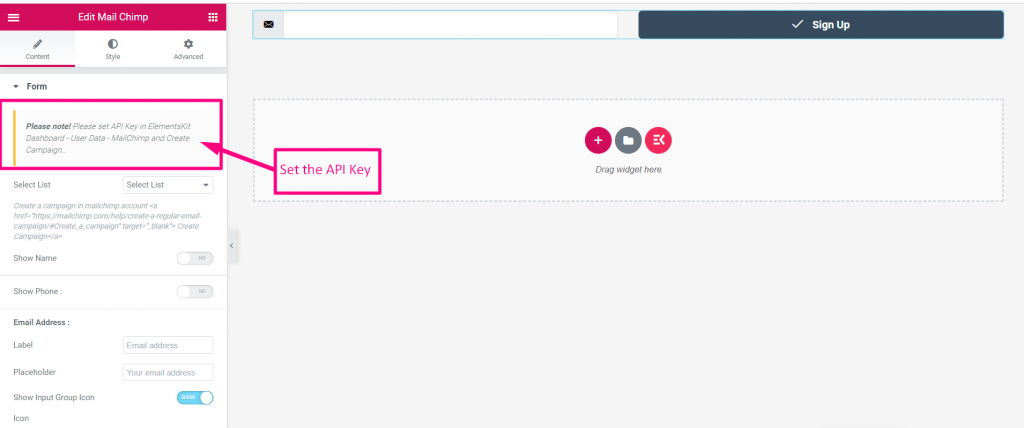
Clé API Mailchimp Générer #
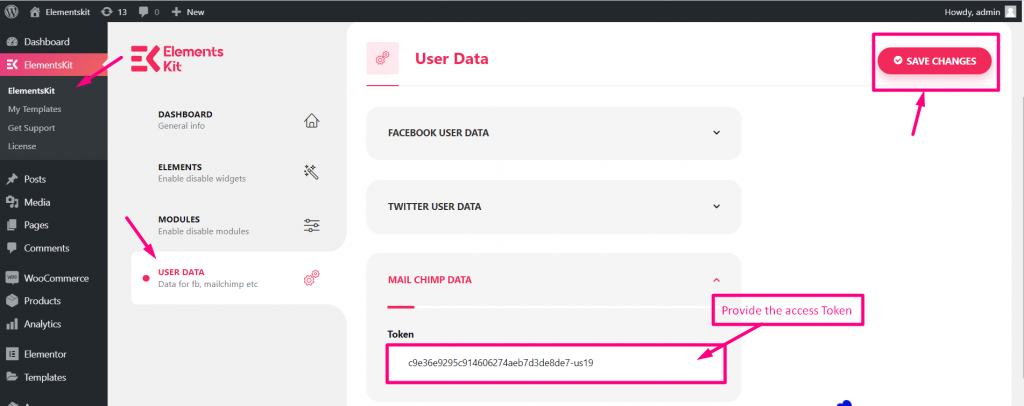
- Aller à Kit d'éléments=> Données d'utilisateur=> Mailchimp données
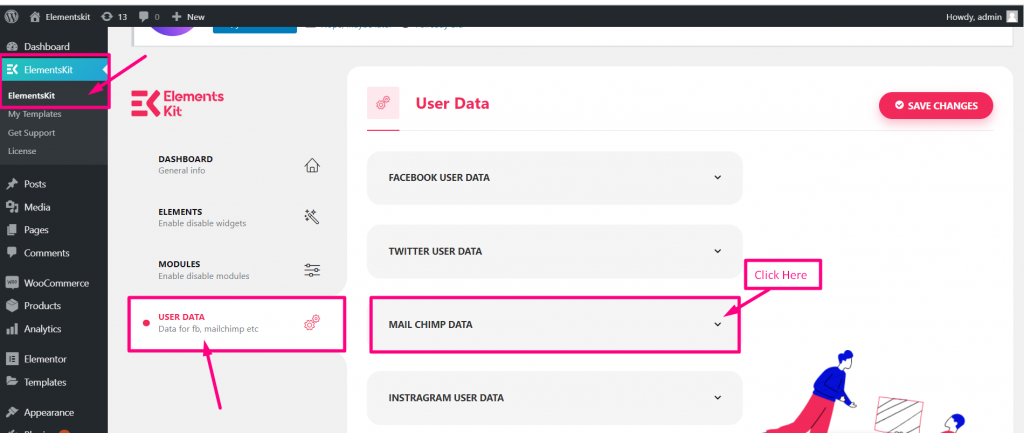
Obtenir la clé API Mailchimp #
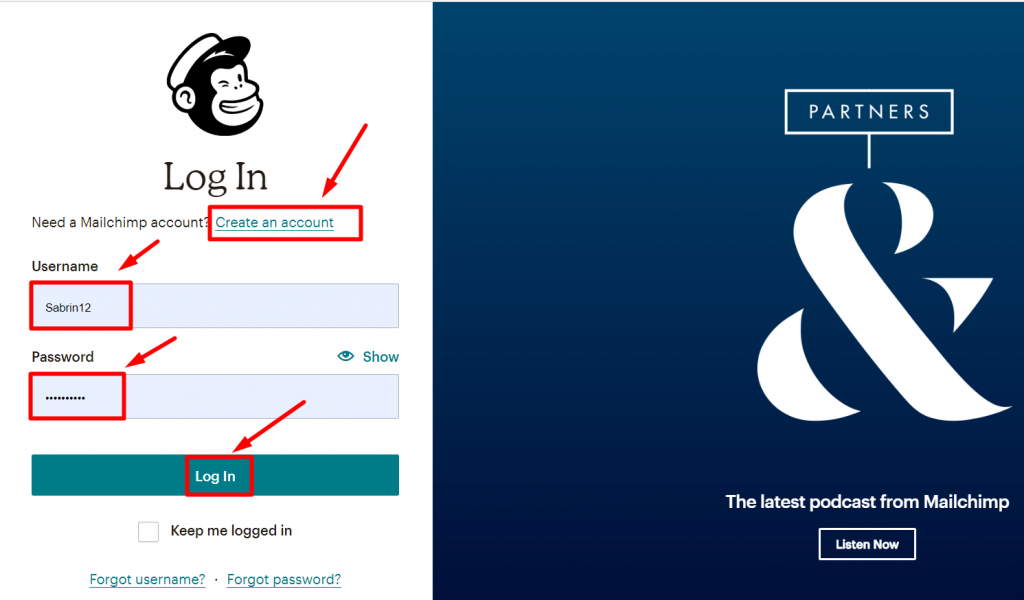
- Étape=>1 : Pour obtenir la clé API Créer un compte Mailchimp et connectez-vous avec votre Nom d'utilisateur et mot de passe
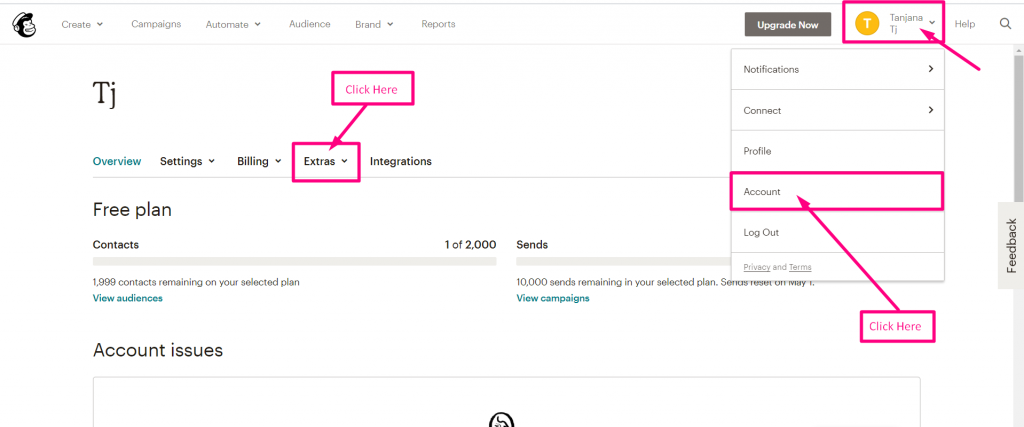
- Étape=>2 : Clique sur le Icône sélectionnée=> Compte=> Cliquez sur Suppléments
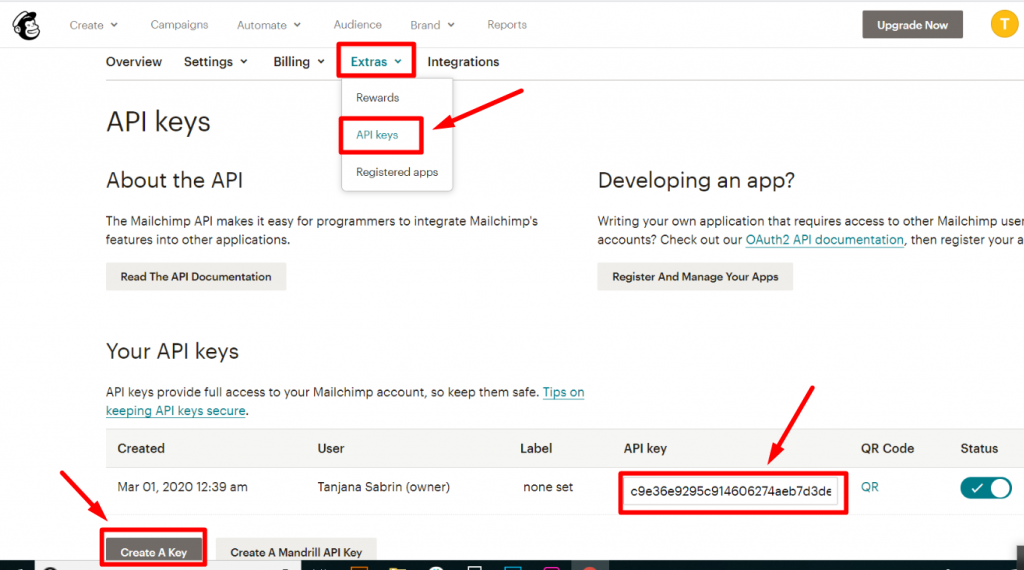
- Étape=>3 : Cliquer sur Suppléments=> Clés API=> Créer une clé
- Étape=>4 : Collez la clé ici
Créer une liste/audience dans Mailchimp #
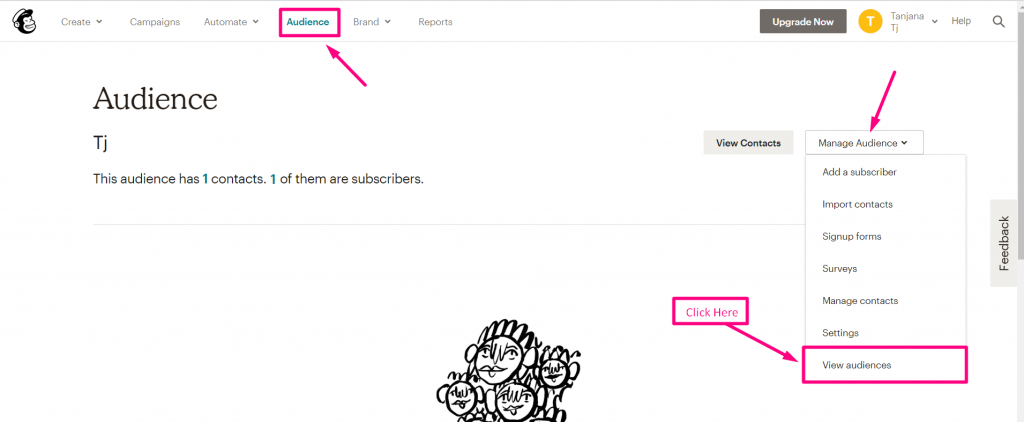
Étape=>1 : Aller à Audience Mailchimp => Gérer l'audience→ Voir le public
- Étape=>2 : Créer une audience à partir de « Créer une audience »
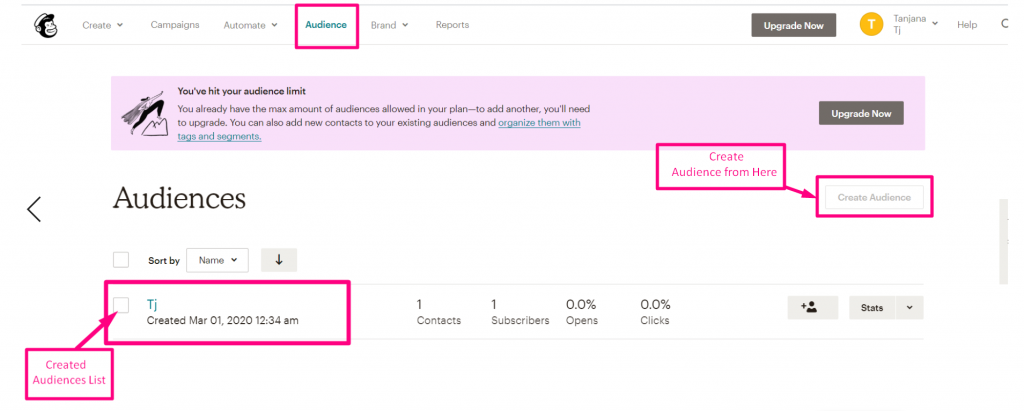
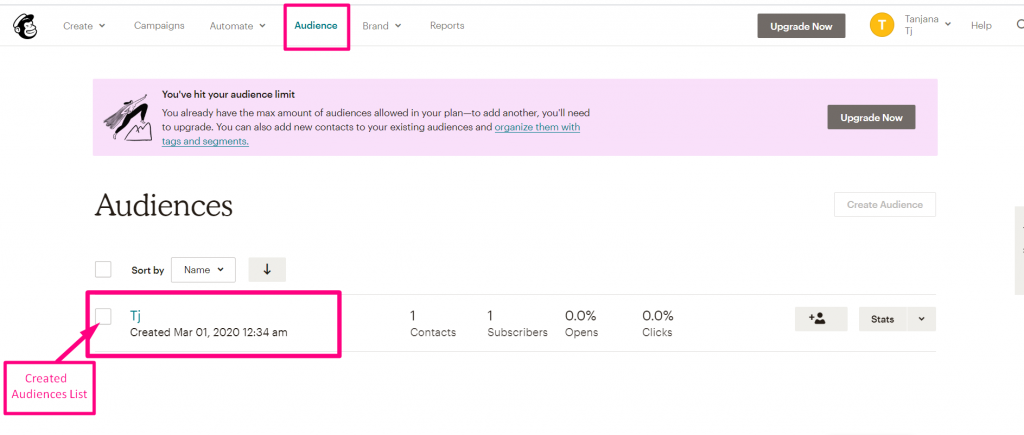
- Affichage de l'audience créée
Fonctionnalités #
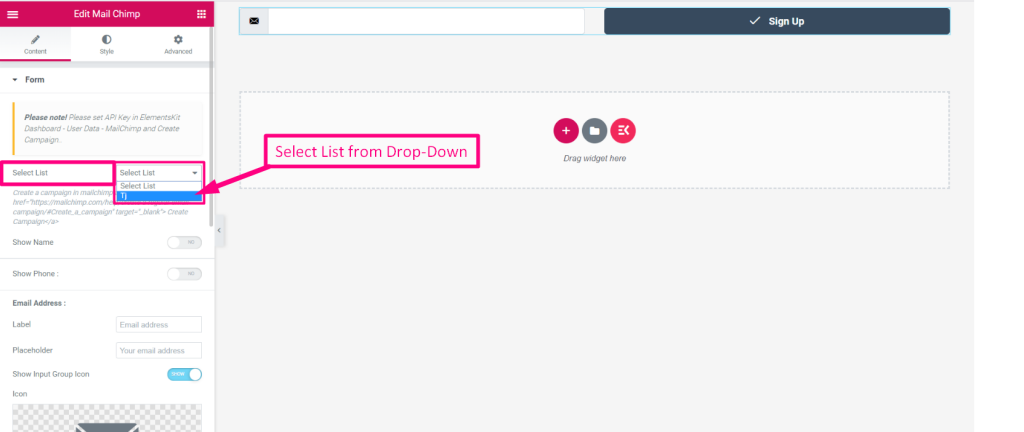
- Allez au Widget Mailchimp=> Sélectionnez Liste dans la liste déroulante
Créer un contact #
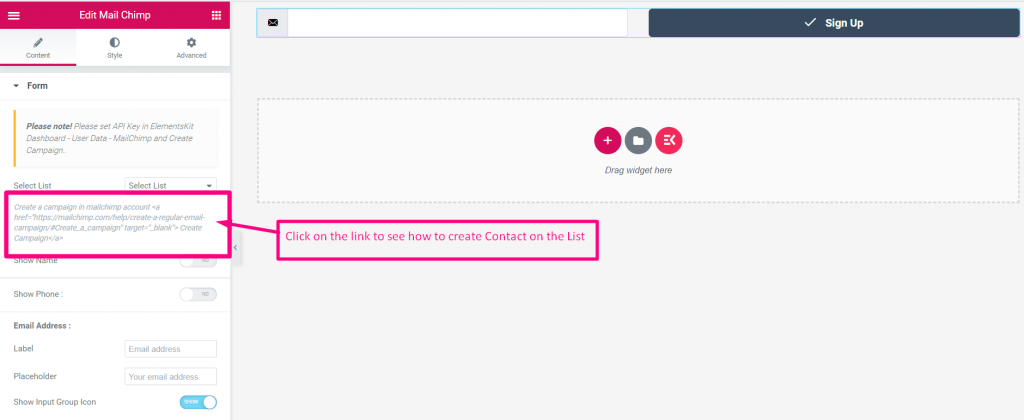
Clique sur le Lien vers la documentation pour voir Comment créer une liste de contacts à partir de votre Compte Mailchimp: https://mailchimp.com/help/create-a-regular-email-campaign/#Create_a_campaign%22%20target=%22_blank%22%3E%20Create%20Campaign
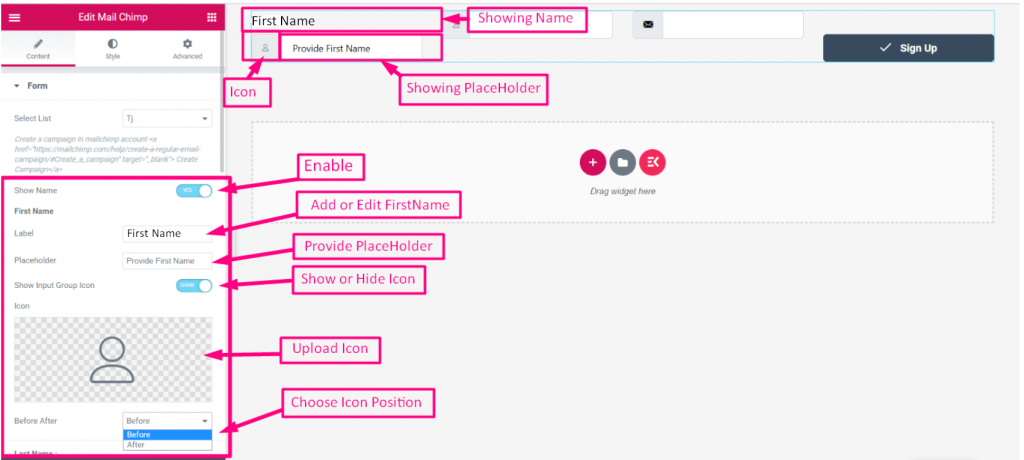
Prénom #
- Activez le bouton pour Afficher le champ Prénom
- Ajouter ou modifier Prénom
- Fournir Espace réservé
- Afficher ou masquer l'icône
- Icône de téléchargement
- Choisissez la position de l'icône : Avant le texte ou après le texte
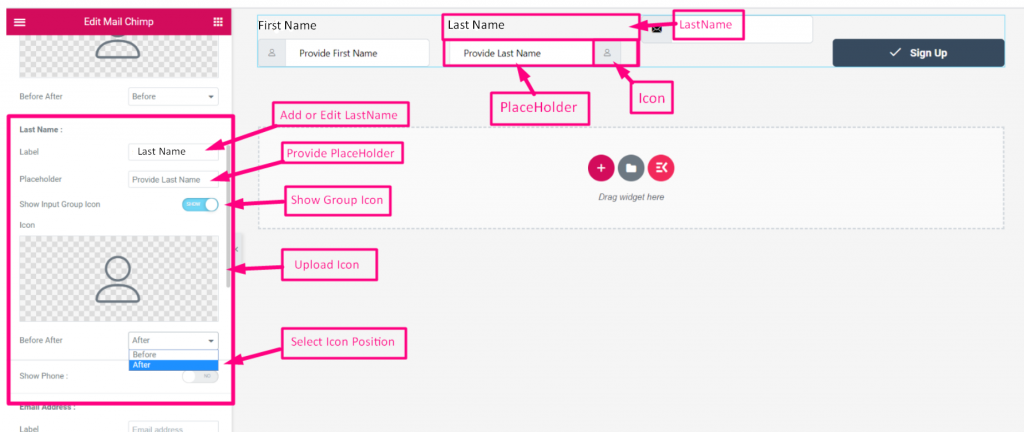
Nom de famille #
- Activez le bouton pour Afficher Champ Nom de famille
- Ajouter ou modifier Étiquette
- Fournir Espace réservé
- Afficher ou masquer l'icône
- Icône de téléchargement
- Choisissez la position de l'icône : Avant le texte ou après le texte
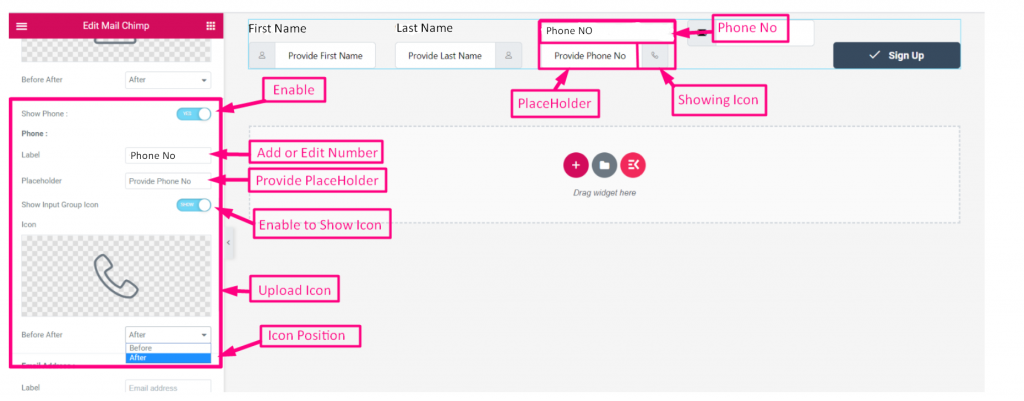
Pas de téléphone #
- Activez le bouton pour Afficher Numéro de téléphone
- Ajouter ou modifier Étiquette
- Fournir Espace réservé
- Activer le basculement vers Afficher ou masquer l'icône
- Icône de téléchargement
- Choisissez la position de l'icône : Avant le texte ou après le texte
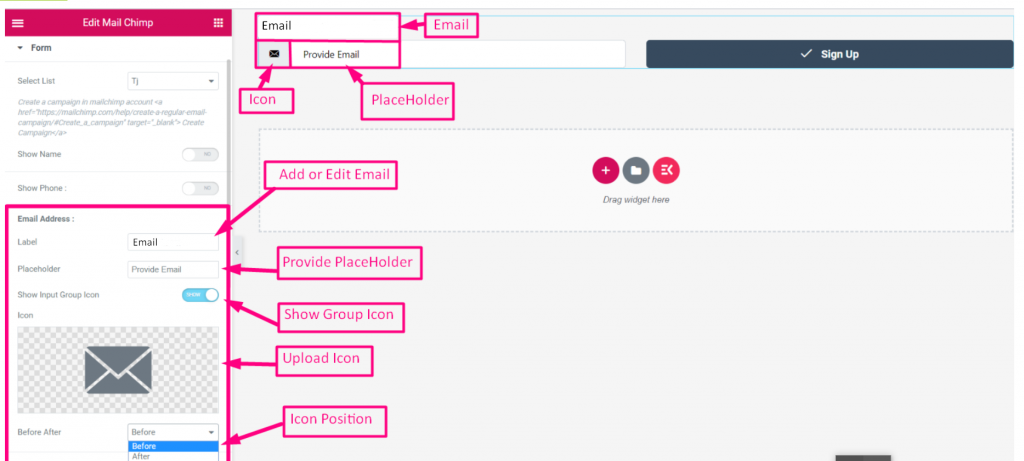
E-mail #
- Activez le bouton pour Afficher Champ de courrier électronique
- Ajouter ou modifier Étiquette
- Fournir Espace réservé
- Afficher ou masquer l'icône
- Icône de téléchargement
- Choisissez la position de l'icône : Avant le texte ou après le texte
Bouton de soumission #
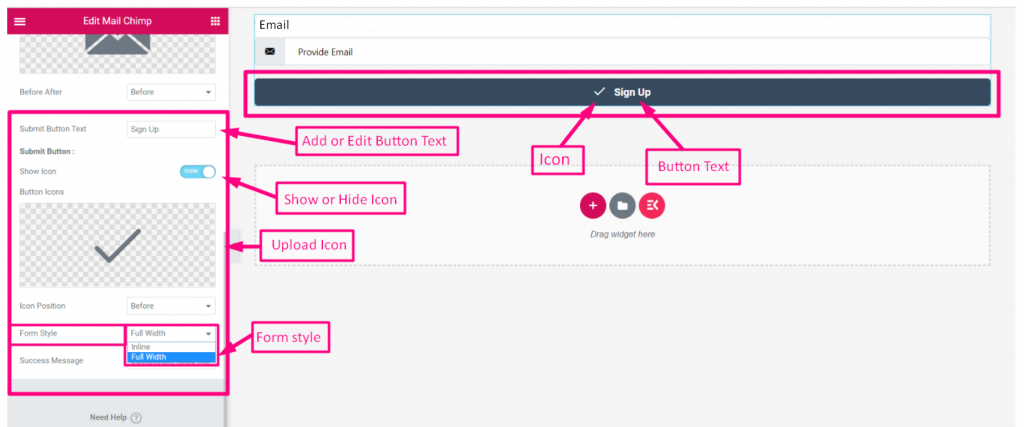
- Activez le bouton pour Afficher Champ du bouton Soumettre
- Ajouter ou modifier Libellé du bouton Soumettre
- Activer le basculement vers Afficher ou masquer l'icône
- Icône de téléchargement
- Choisissez le style de formulaire : En ligne ou pleine largeur
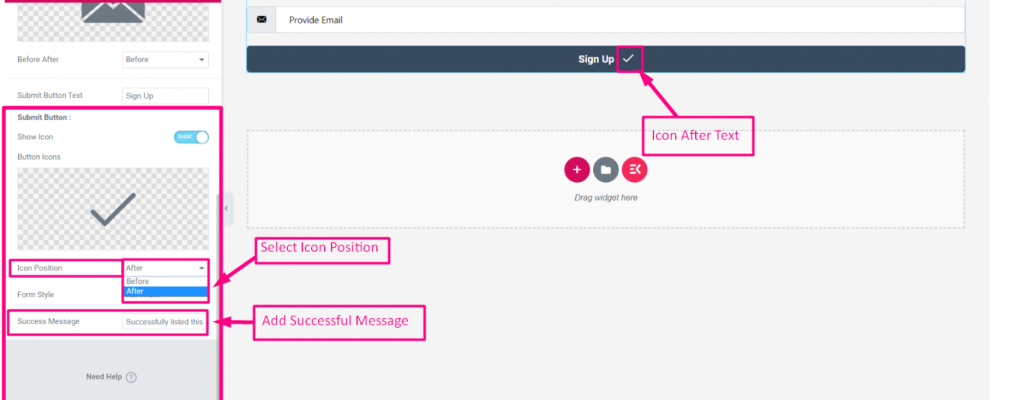
- Sélectionnez la position de l'icône : Avant le texte ou Après le texte
- Ajouter Message réussi
- Cliquez pour Mise à jour
- Cliquez sur l'icône pour Vue du site
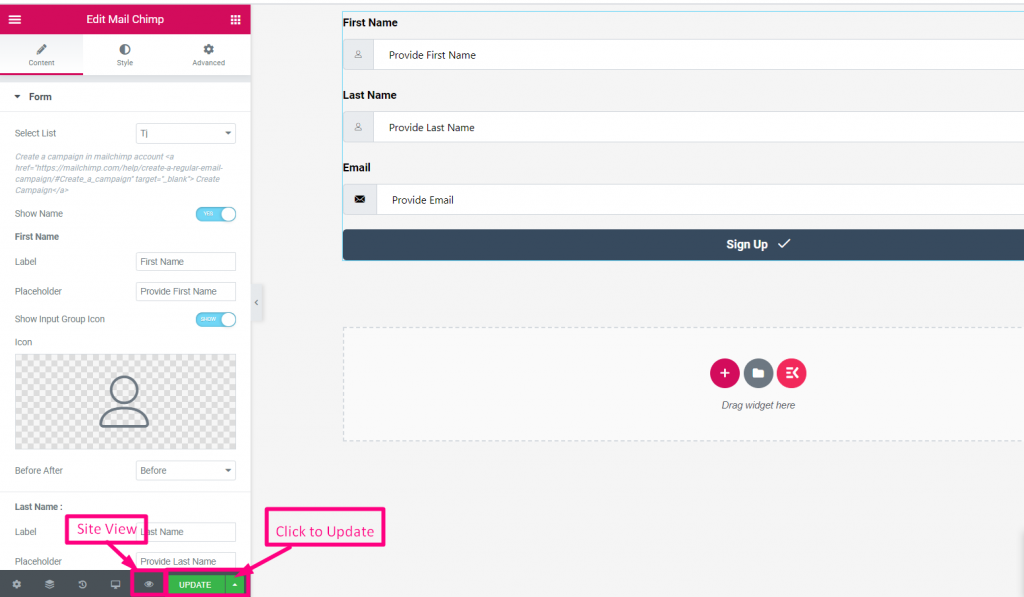
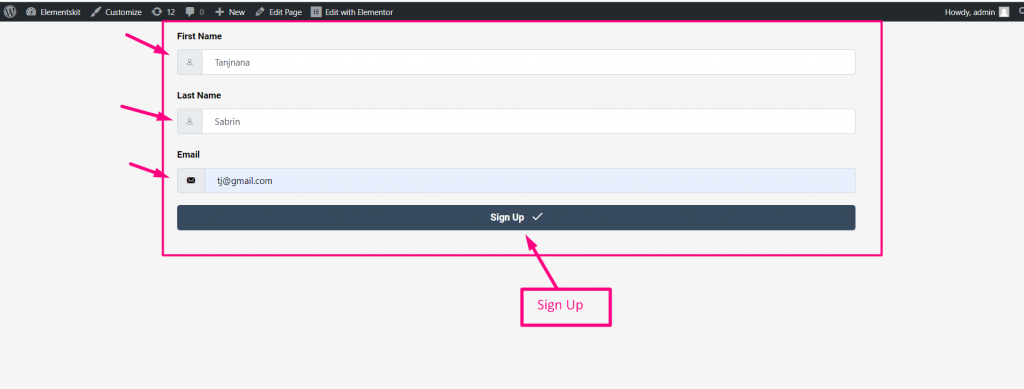
- Entrez votre prénom
- Nom de famille
- Cliquez sur Signer Jusqu'à Soumettre
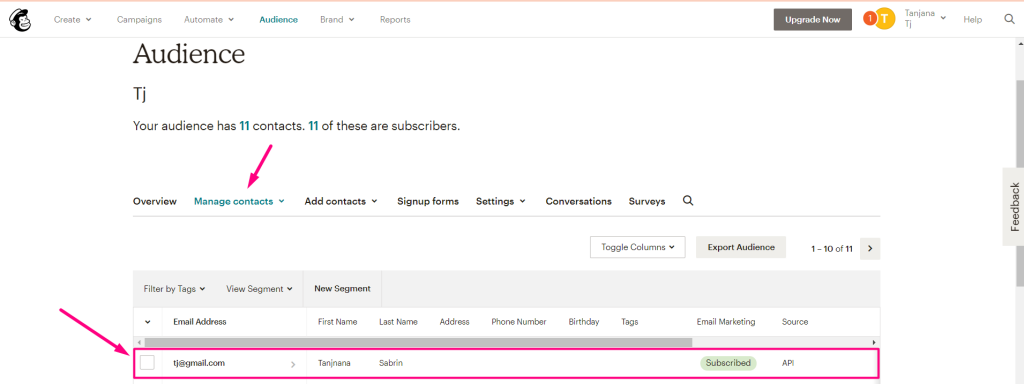
- Maintenant, va dans ton Compte MailChimp=> Publics=> Afficher les contacts
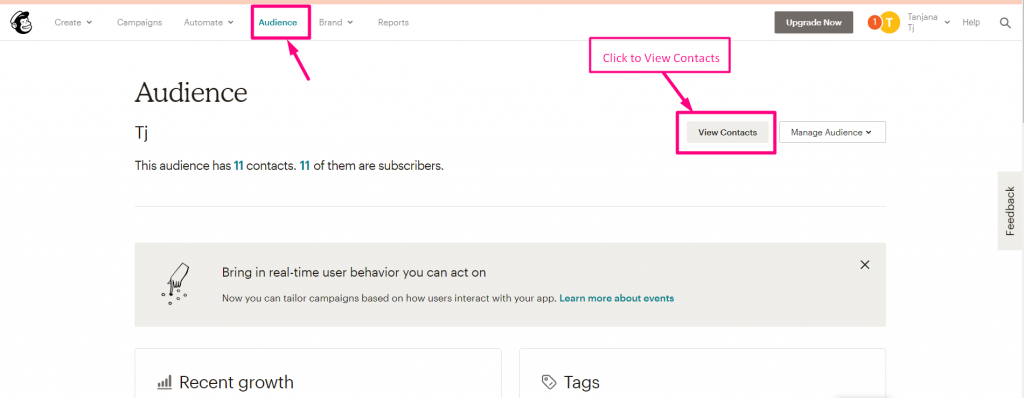
- Tu peux voir le Contacts/Abonnés Apparu ici