

 Polish
  English
  German
  Spanish
  Italian
  French
  Danish
  Portuguese
  Swedish
  Korean
  Japanese
 Zaczynaj #
Twórz i zarządzaj listą mailingową, automatyczną wysyłką, biuletynem i wieloma innymi opcjami. Dzięki naszemu dodatkowi Mailchimp Elementor możesz spersonalizować swój formularz rejestracyjny za pomocą atrakcyjnych i różnorodnych stylów.
- Iść do Elementora=> Szukaj Mailchimp
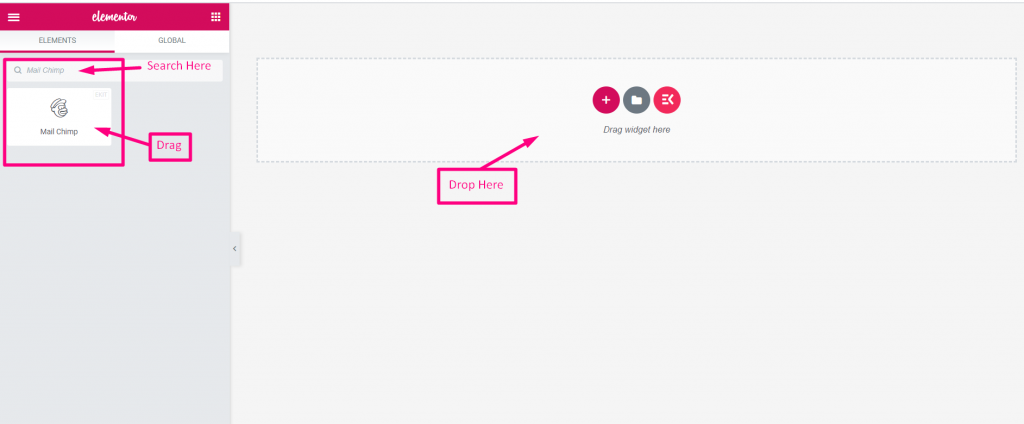
- Teraz musisz ustawić klucz API
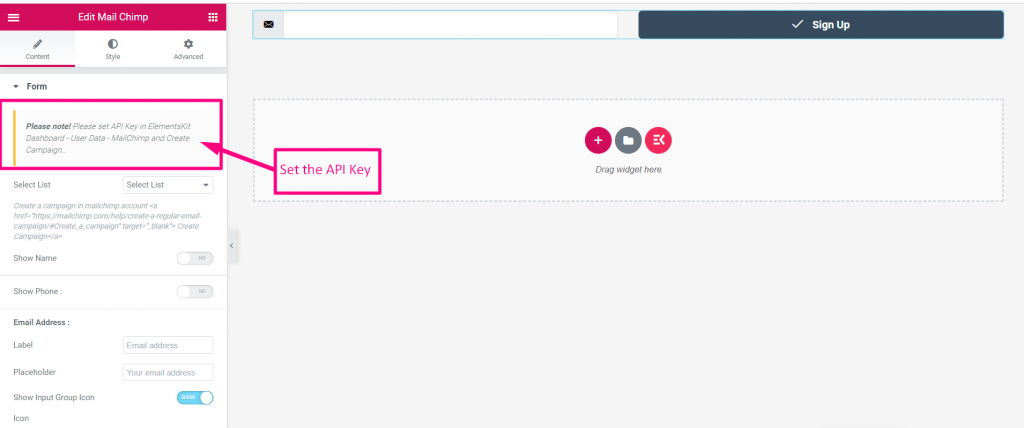
Wygeneruj klucz API Mailchimp #
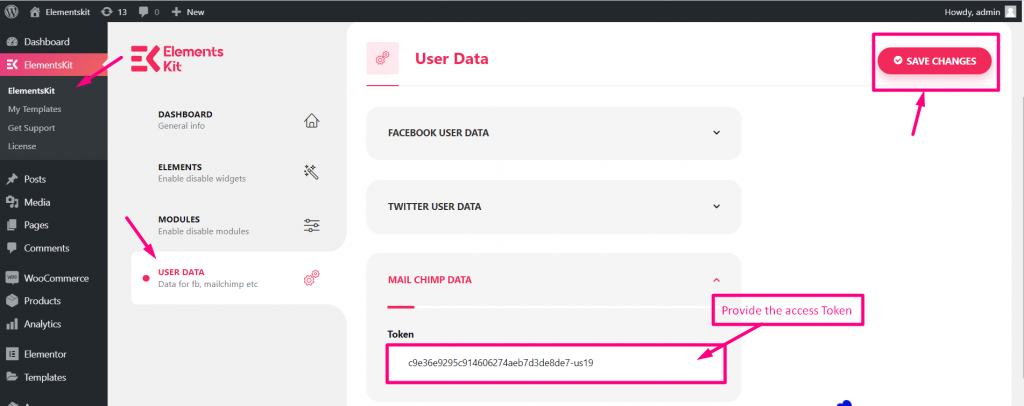
- Iść do Elementskit=> Dane użytkownika=> Mailchimp dane
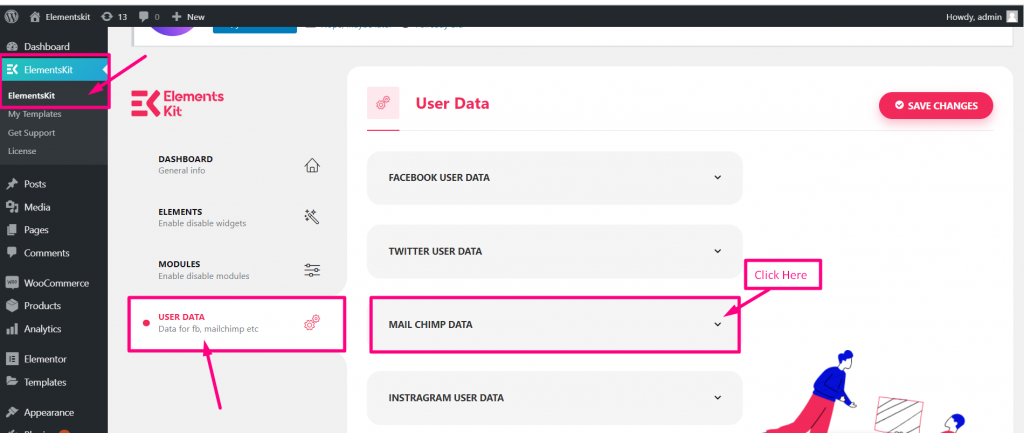
Uzyskaj klucz API Mailchimp #
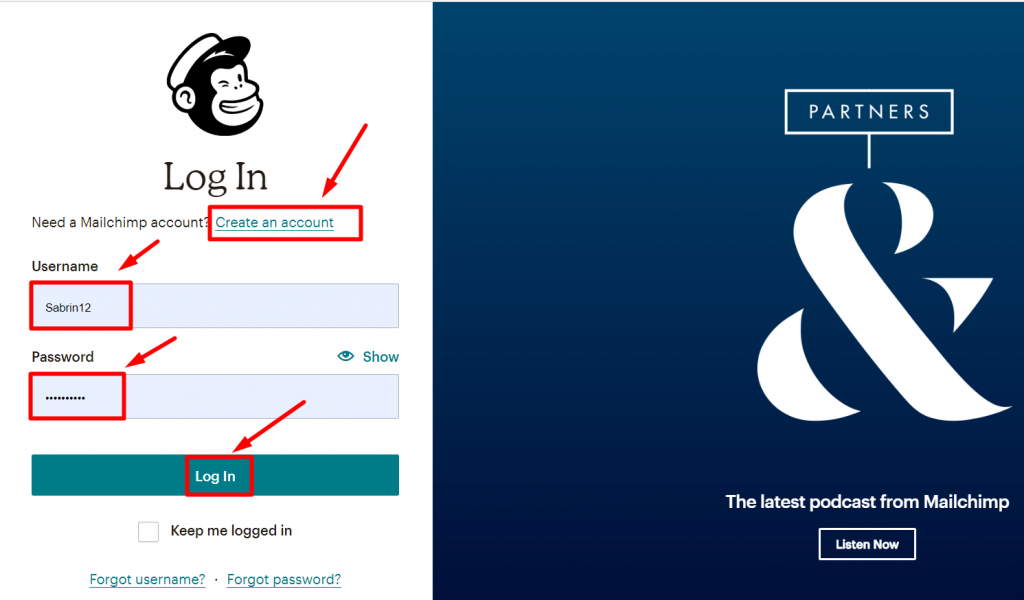
- Krok=>1: Aby uzyskać klucz API Tworzyć konto Mailchimp i zaloguj się za pomocą swojego Nazwa użytkownika i hasło
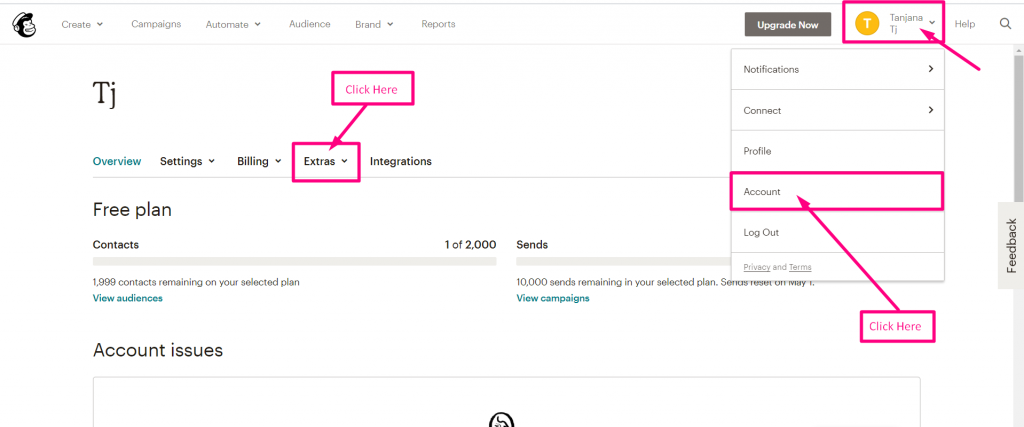
- Krok=>2: Kliknij na Wybrana ikona=> Konto=> Kliknij Dodatki
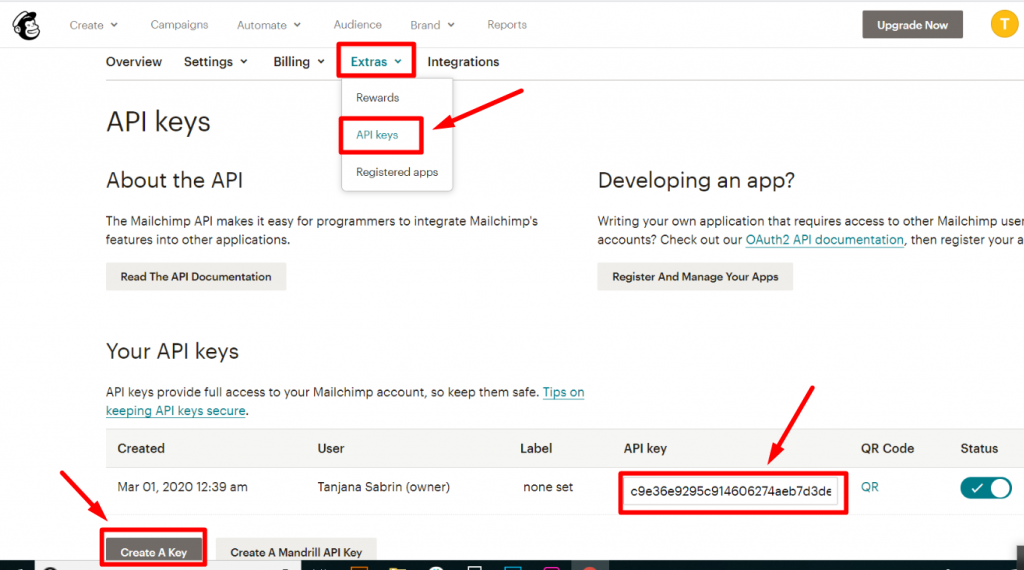
- Krok=>3: Kliknij Dodatki=> Klucze API=> Utwórz klucz
- Krok=>4: Wklej tutaj klucz
Utwórz listę/odbiorców w Mailchimp #
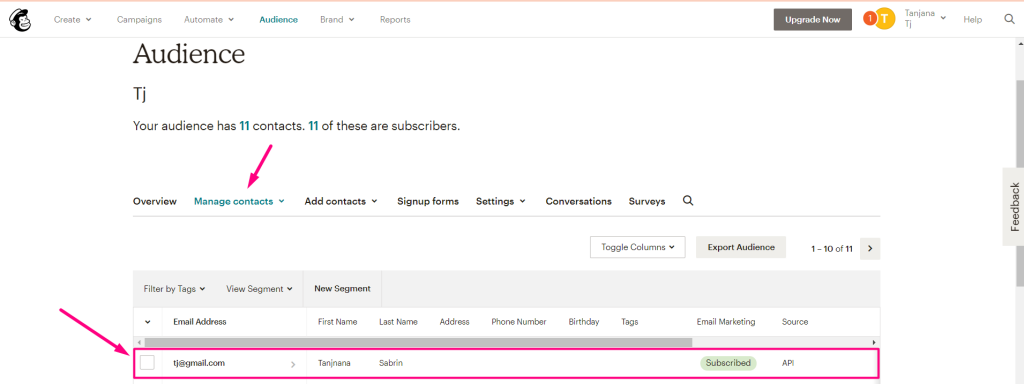
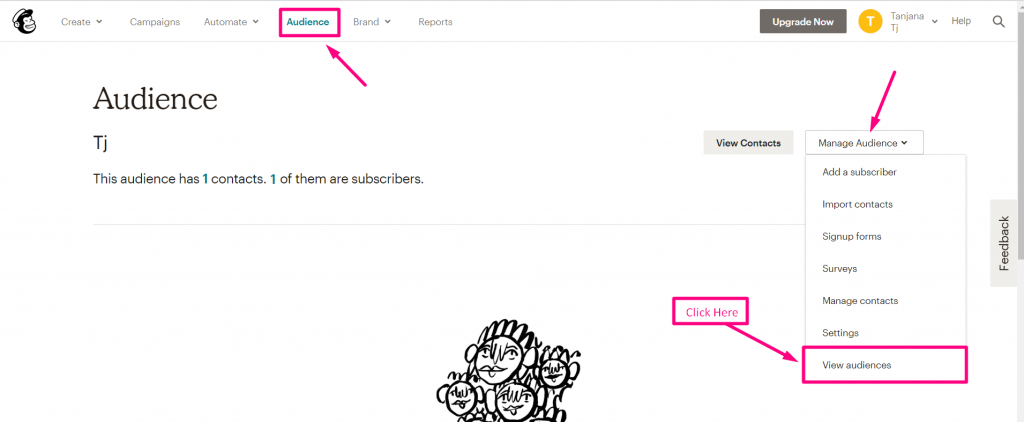
Krok=>1: Iść do Publiczność Mailchimp => Zarządzaj odbiorcami→ Zobacz publiczność
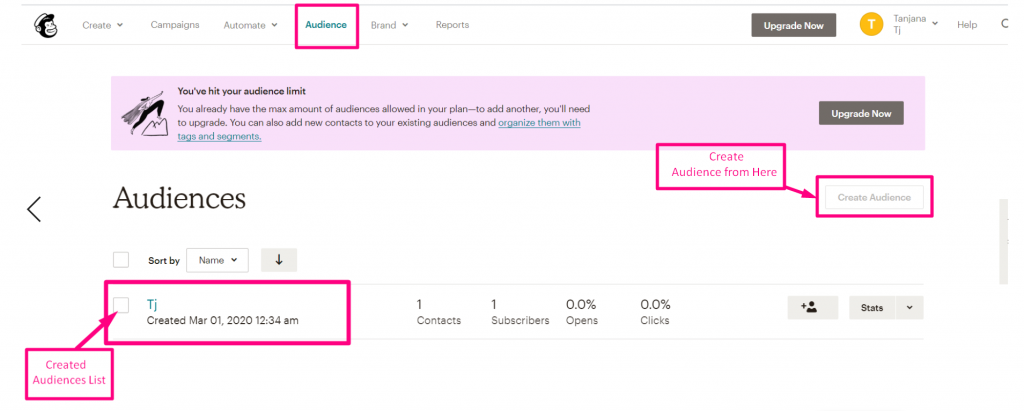
- Krok=>2: Utwórz grupę odbiorców za pomocą opcji „Utwórz grupę odbiorców”
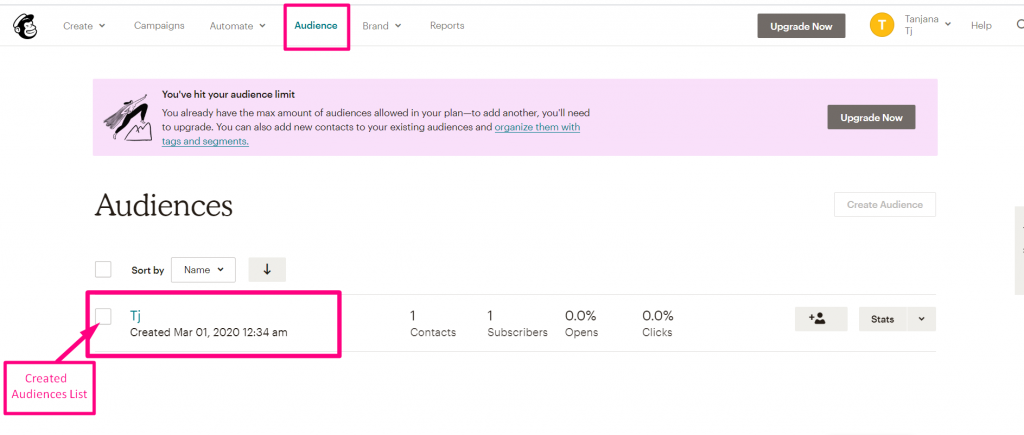
- Wyświetlanie utworzonej publiczności
Funkcjonalności #
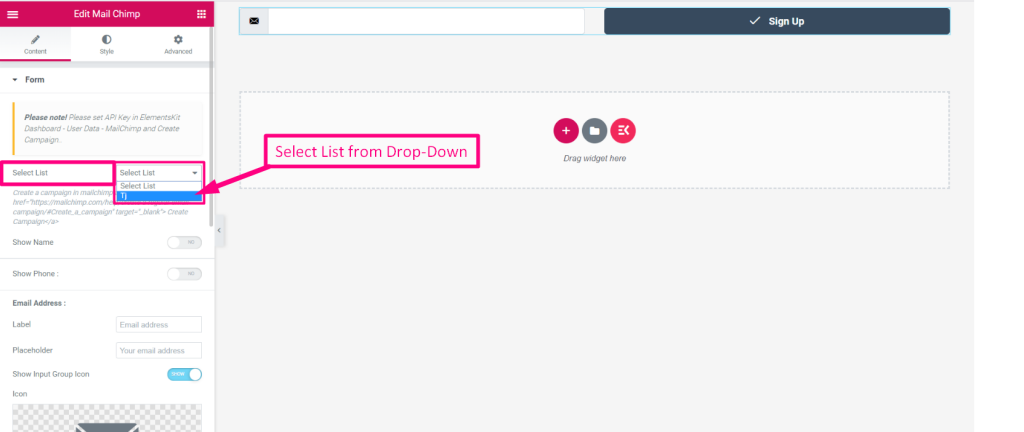
- Idź do Widżet Mailchimp=> Wybierz Lista z listy rozwijanej
Stworzyć kontakt #
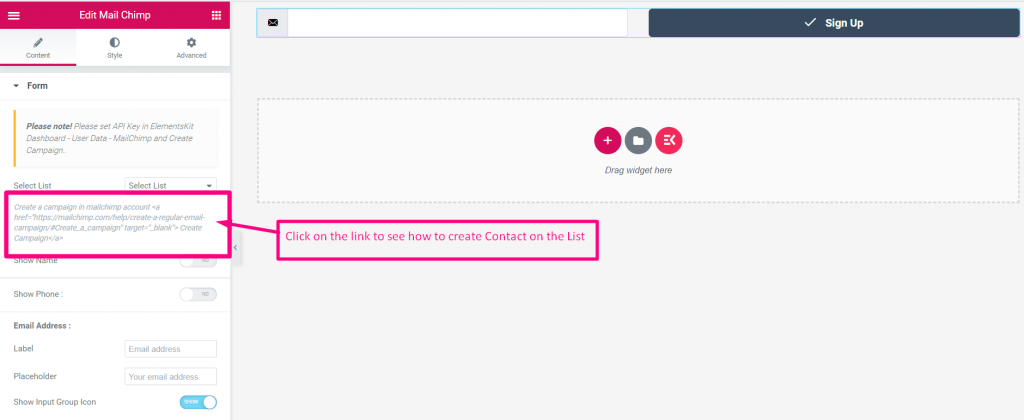
Kliknij na Link do dokumentacji aby zobaczyć Jak utworzyć listę kontaktów ze swojego Konto Mailchimp: https://mailchimp.com/help/create-a-regular-email-campaign/#Create_a_campaign%22%20target=%22_blank%22%3E%20Create%20Campaign
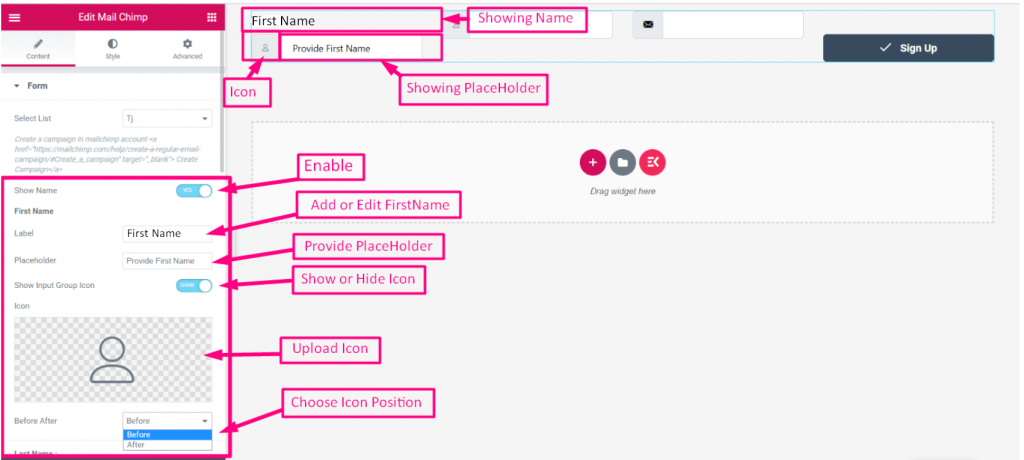
Imię #
- Włącz przełącznik na Pokaż pole imienia
- Dodaj lub edytuj Imię
- Dostarczać Uchwyt miejsca
- Pokaż lub ukryj ikonę
- Prześlij ikonę
- Wybierz pozycję ikony: Przed tekstem lub po tekście
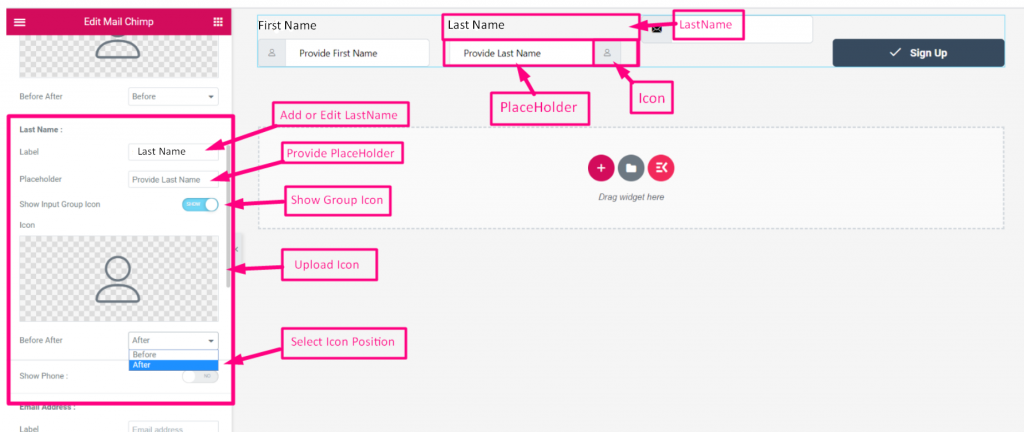
Nazwisko #
- Włącz przełącznik, aby wyświetlić Pole nazwiska
- Dodaj lub edytuj Etykieta
- Dostarczać Uchwyt miejsca
- Pokaż lub ukryj ikonę
- Prześlij ikonę
- Wybierz pozycję ikony: Przed tekstem lub po tekście
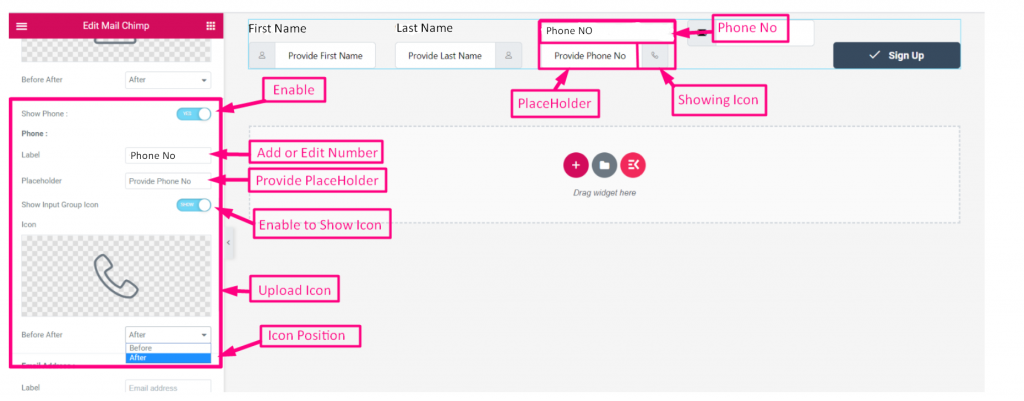
Nr telefonu #
- Włącz przełącznik, aby wyświetlić Nr telefonu. Pole
- Dodaj lub edytuj Etykieta
- Dostarczać Uchwyt miejsca
- Włącz przełącznik do Pokaż lub ukryj ikonę
- Prześlij ikonę
- Wybierz pozycję ikony: Przed tekstem lub po tekście
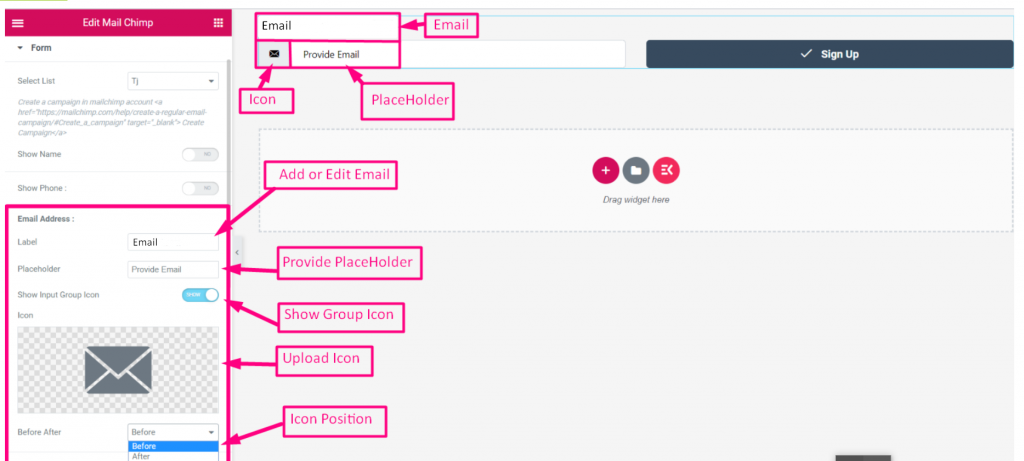
E-mail #
- Włącz przełącznik, aby wyświetlić Pole e-mail
- Dodaj lub edytuj Etykieta
- Dostarczać Uchwyt miejsca
- Pokaż lub ukryj ikonę
- Prześlij ikonę
- Wybierz pozycję ikony: Przed tekstem lub po tekście
Przycisk Prześlij #
- Włącz przełącznik, aby wyświetlić Pole przycisku Prześlij
- Dodaj lub edytuj Etykieta przycisku Prześlij
- Włącz przełącznik do Pokaż lub ukryj ikonę
- Prześlij ikonę
- Wybierz styl formularza: W linii lub na całej szerokości
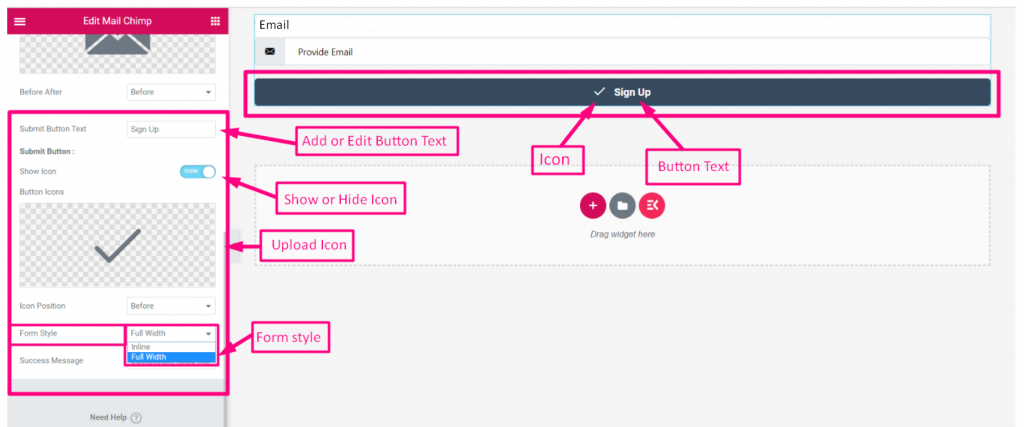
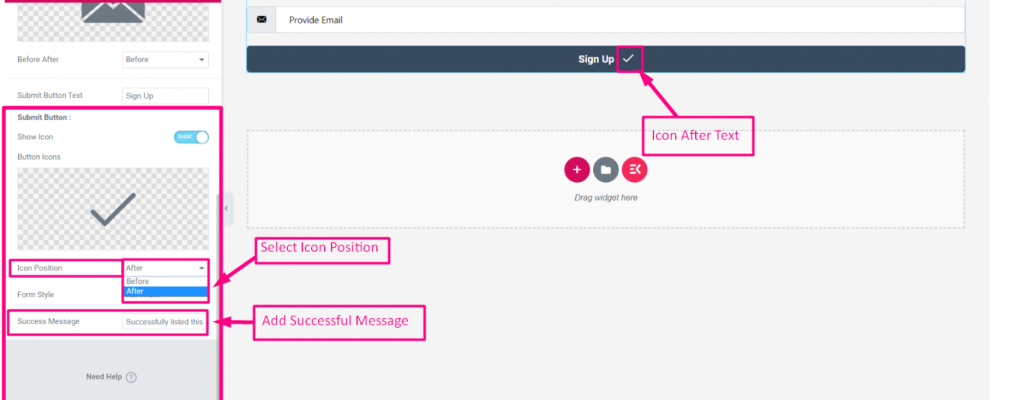
- Wybierz pozycję ikony: Przed tekstem lub po tekście
- Dodać Pomyślna wiadomość
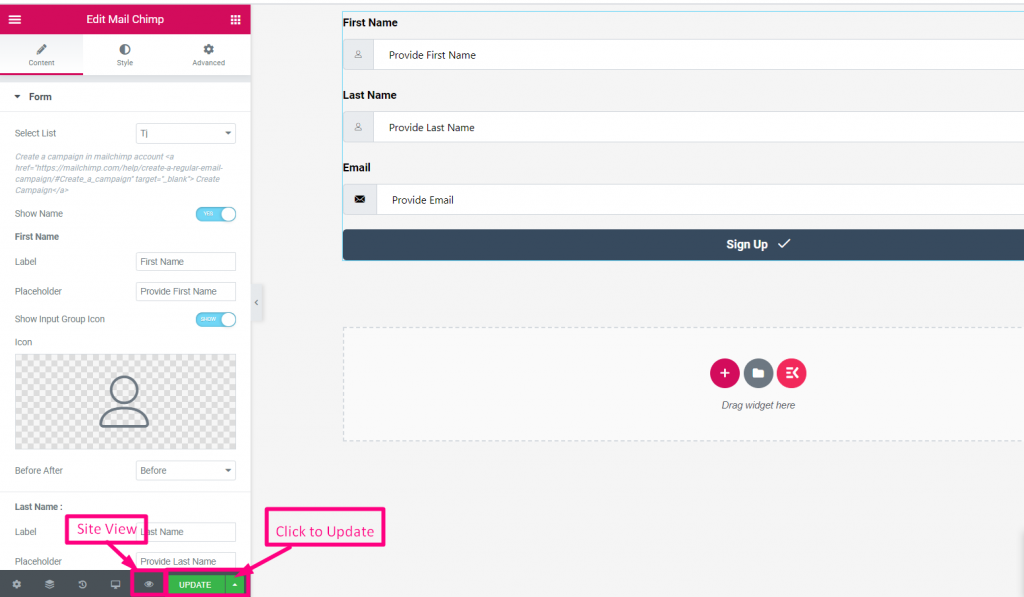
- Kliknij, aby Aktualizacja
- Kliknij ikonę dla Widok witryny
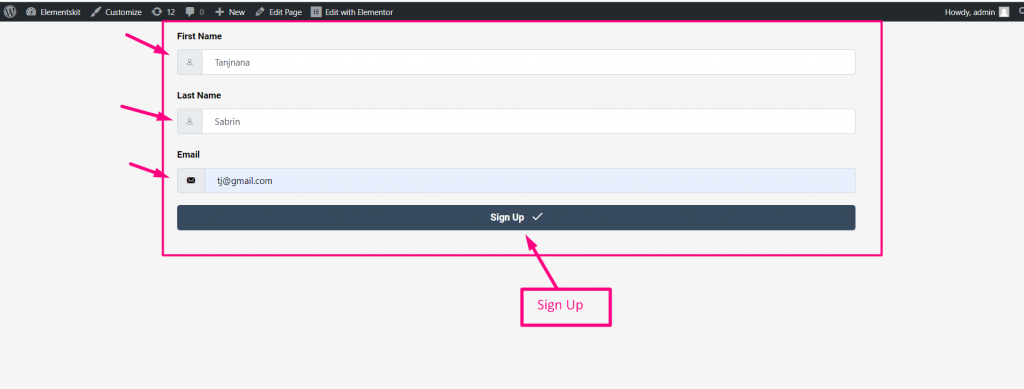
- Wprowadź imię
- Nazwisko
- Kliknij Podpisz Do przesłania
- Teraz idź do swojego Konto MailChimp=> Publiczność=> Wyświetl kontakty
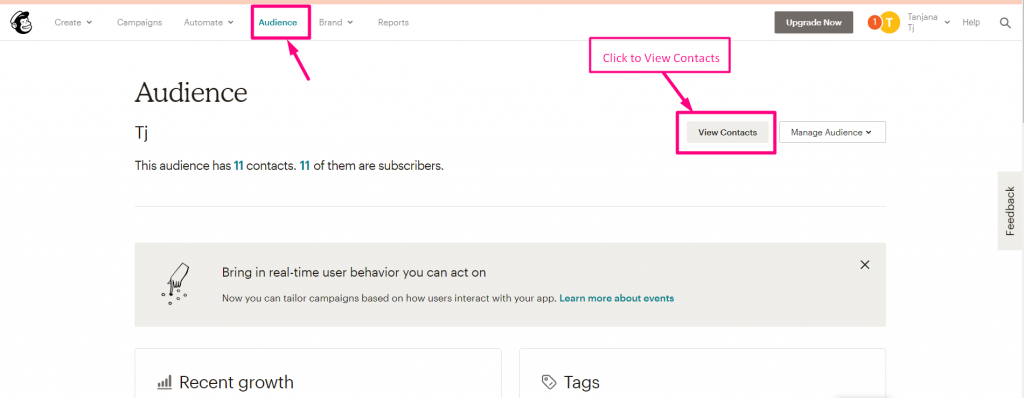
- Możesz zobaczyć Kontakty/Abonenci Pojawił się tutaj