

 Swedish
  English
  German
  Spanish
  Italian
  French
  Danish
  Portuguese
  Polish
  Korean
  Japanese
 Komma igång #
De Instagram-widget låter dig visa din senaste Instagram inlägg på dina WordPress-webbplatser. Här är en omfattande artikel för att förklara varje metod i detalj. Följ steg-för-steg-processen för att ansluta till Instagram-flödet.
Skapa Instagram Användar-ID och Access Token #
Så här genererar du ett Instagram-användar-ID och åtkomsttoken.
First browse to this link: developers.facebook.com/apps. Note that you need to be logged in here with your Facebook credential. Or, it will automatically synch with your Facebook account, if you stay logged in.
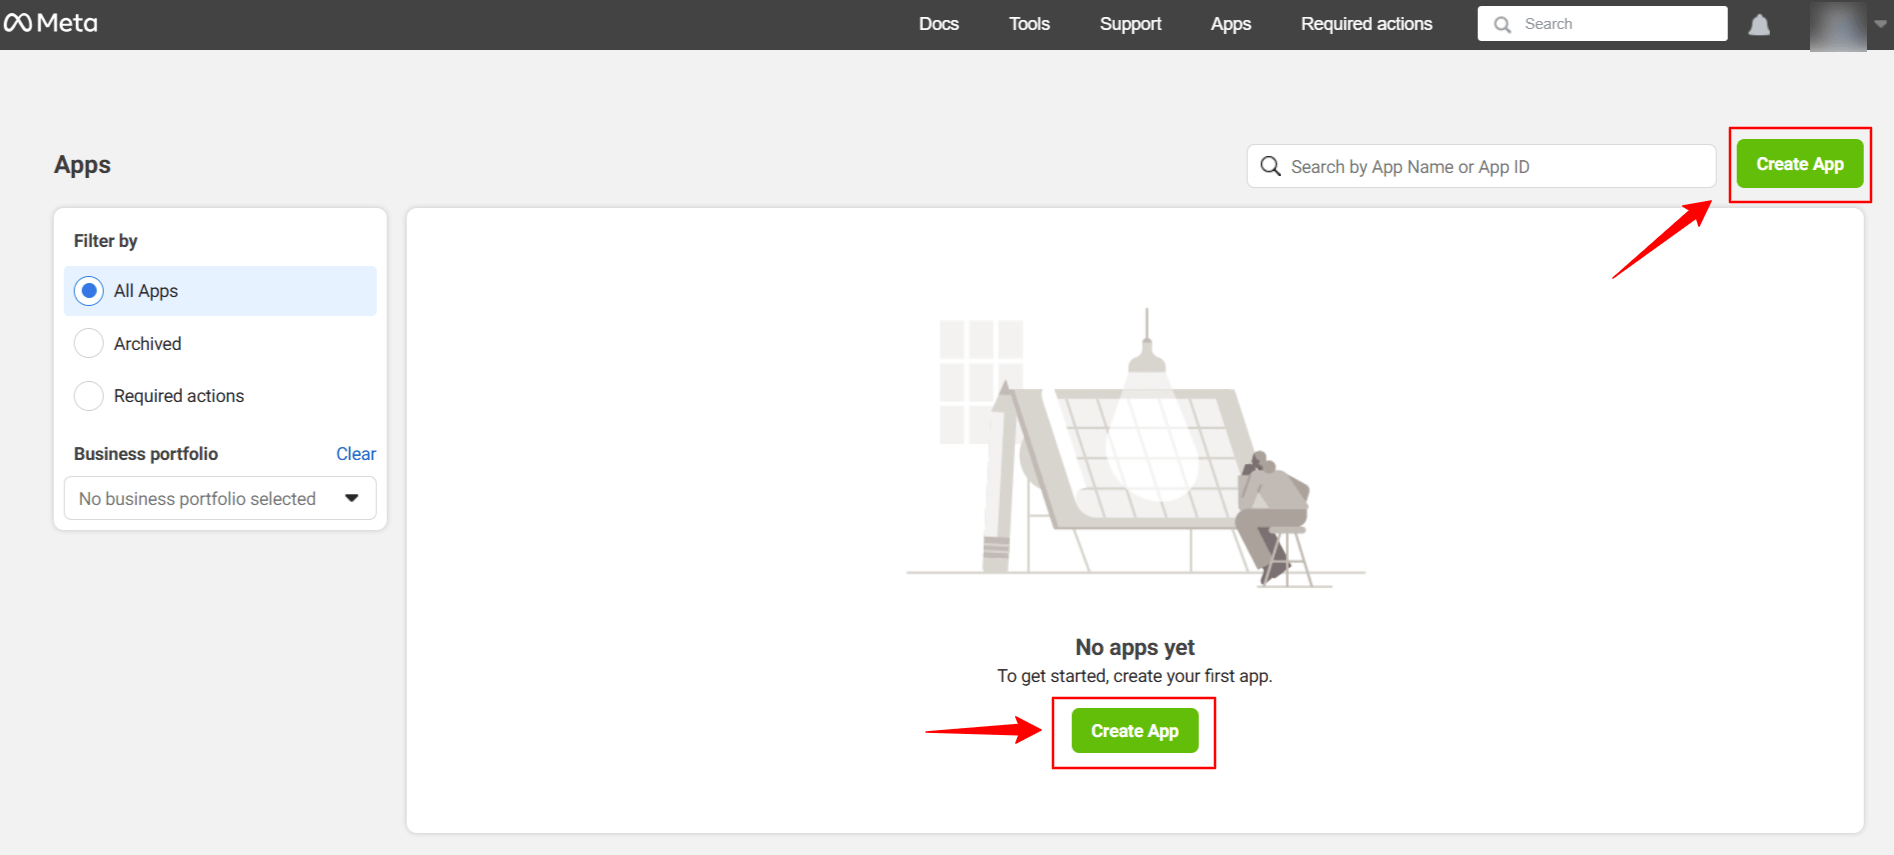
Klicka på Create App. Doing this, a page will load an interface with different tabs.
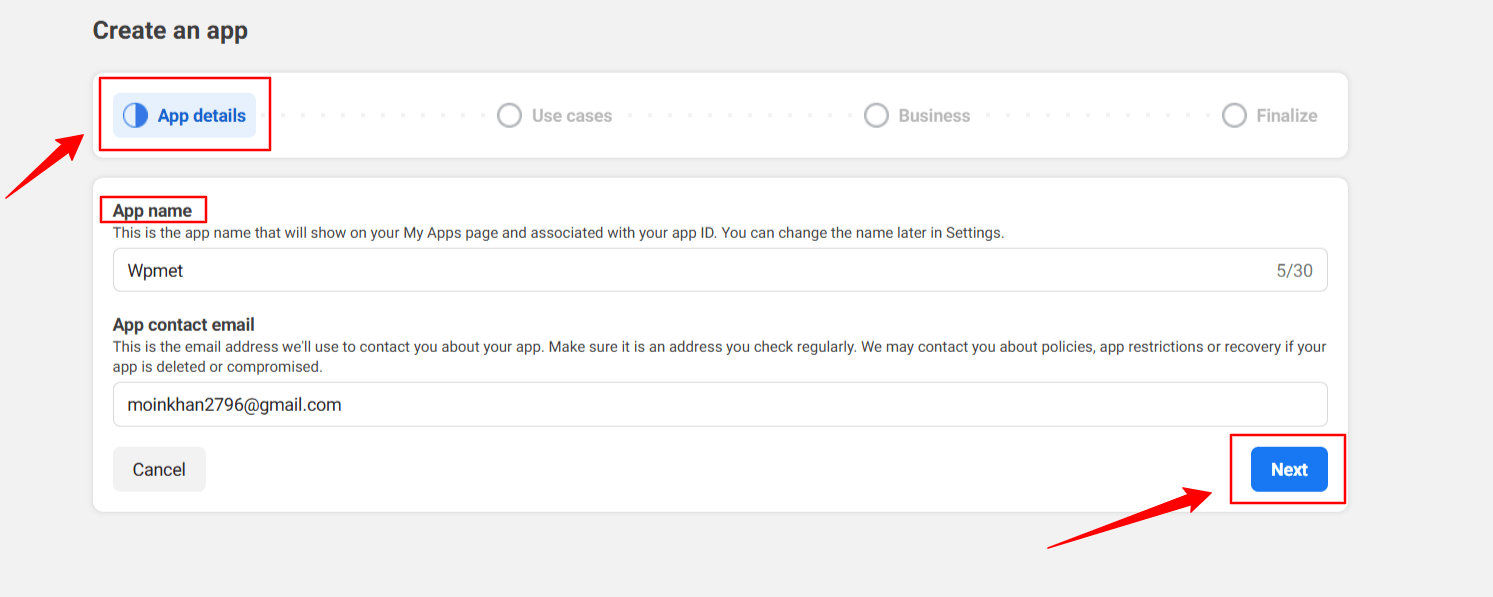
Give a name to the app, for this demo tutorial, I enter the app name as Wpmet. Tryck sedan på Nästa flik.
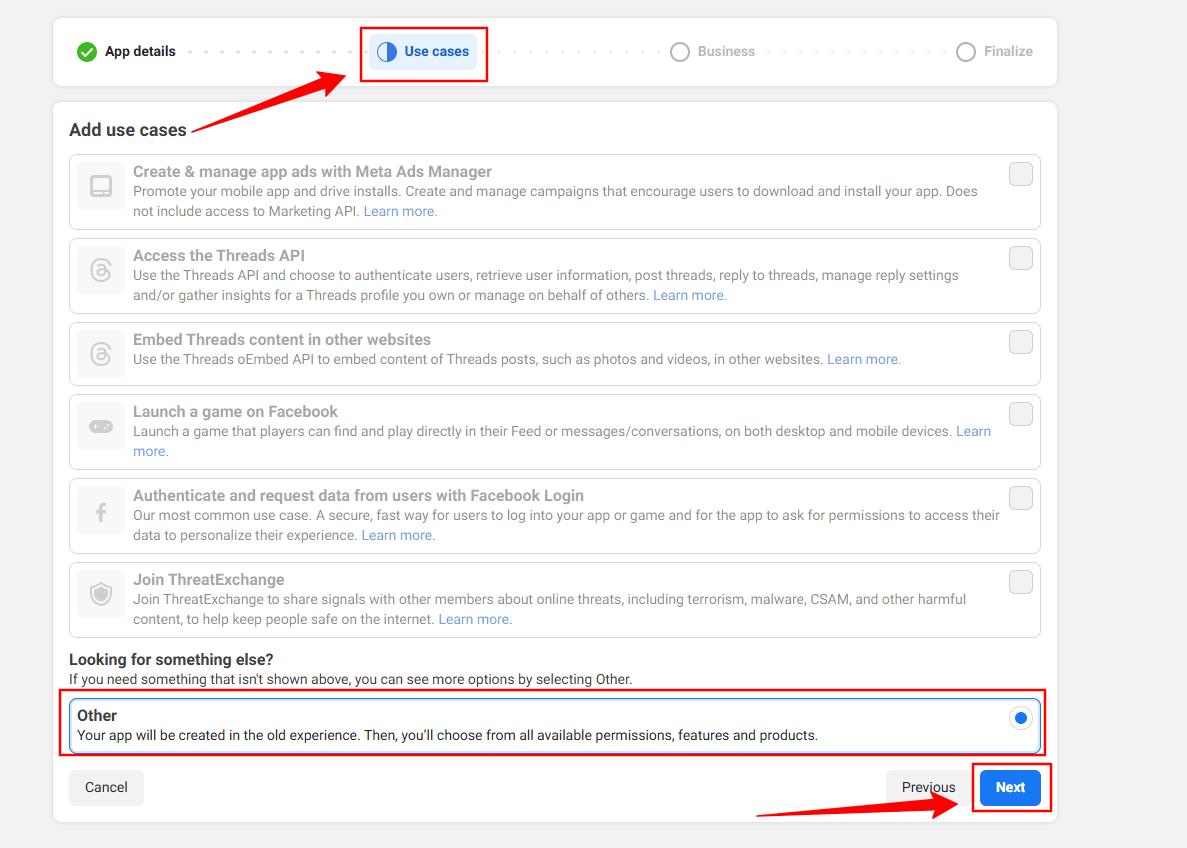
Then, select the “Other” option from the Use Cases tab. And, hit the Nästa knapp.
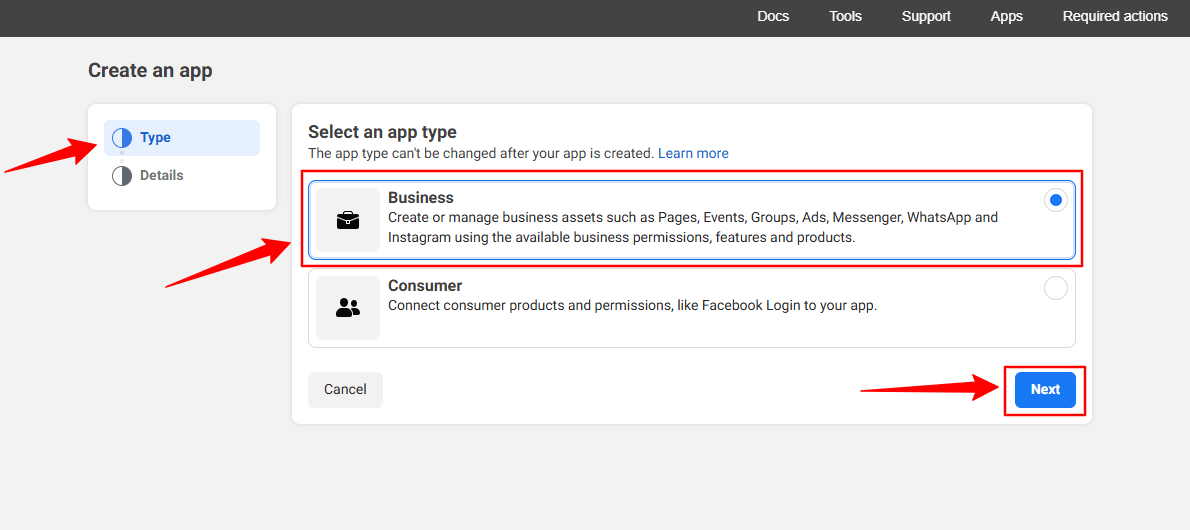
In the next screen, you’ll see two options. First, select Företag från Typ flik.
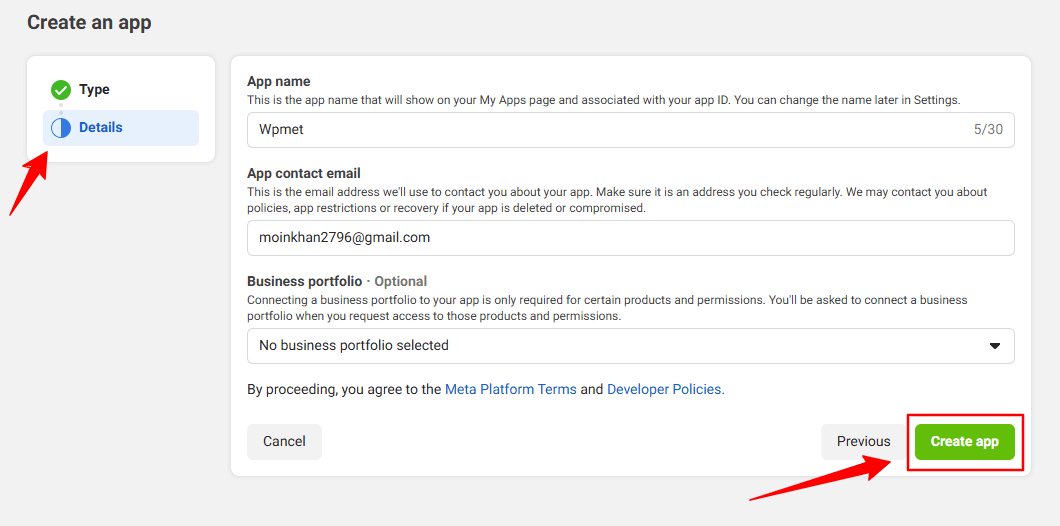
However, you don’t have to put any information in the Detaljer option, just click the Skapa app knapp.
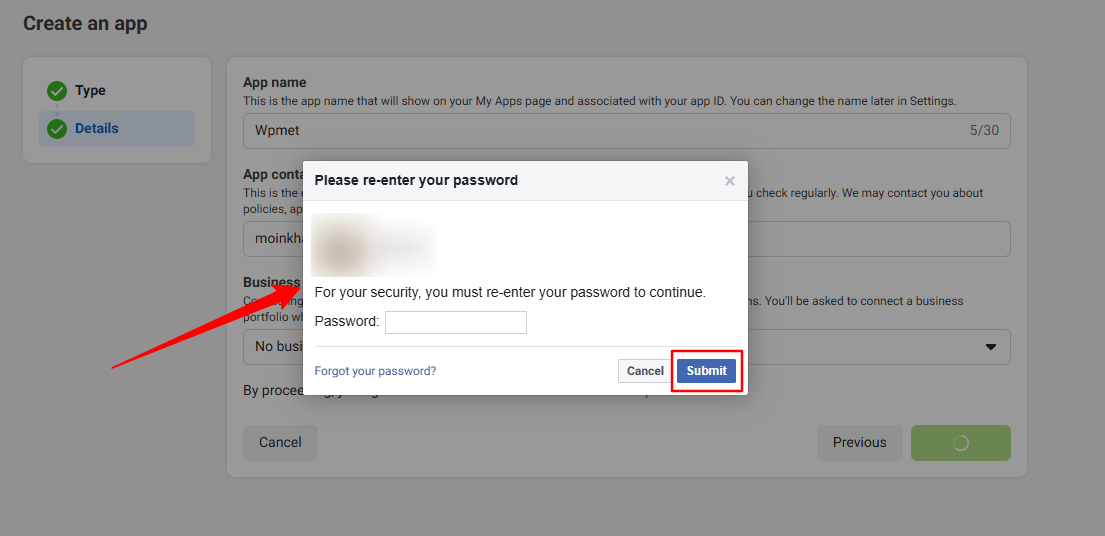
You may need to re-login with your Facebook credentials. Once, you’ve successfully login with your Facebook details, you’ll see all the apps.
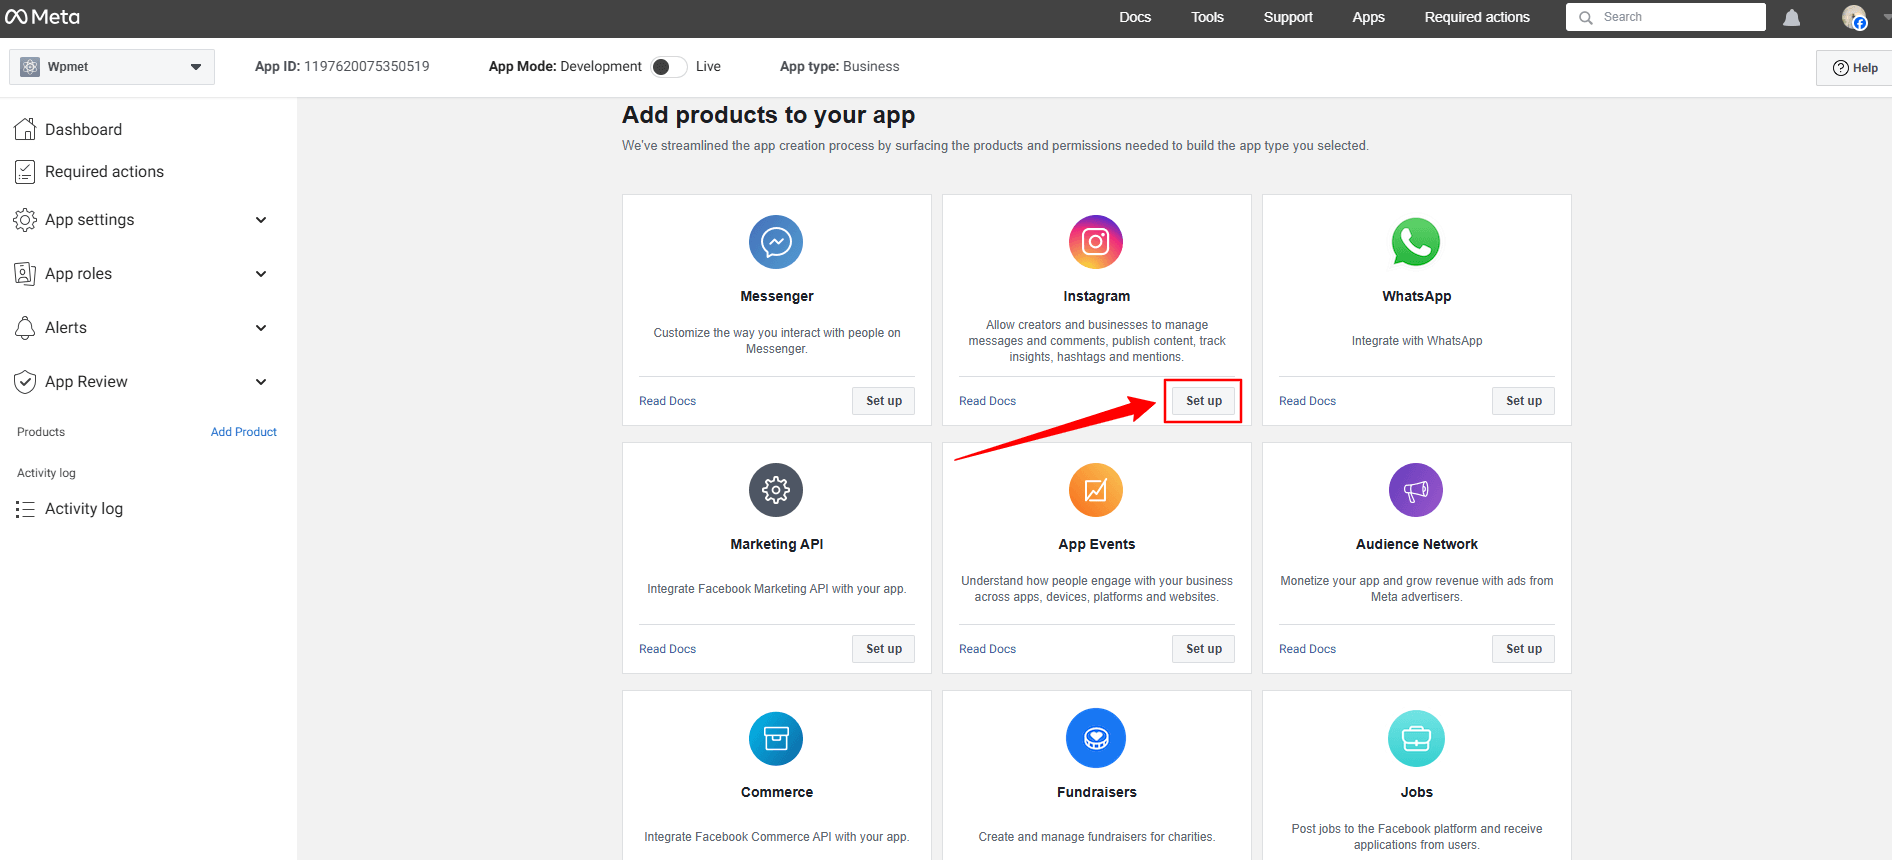
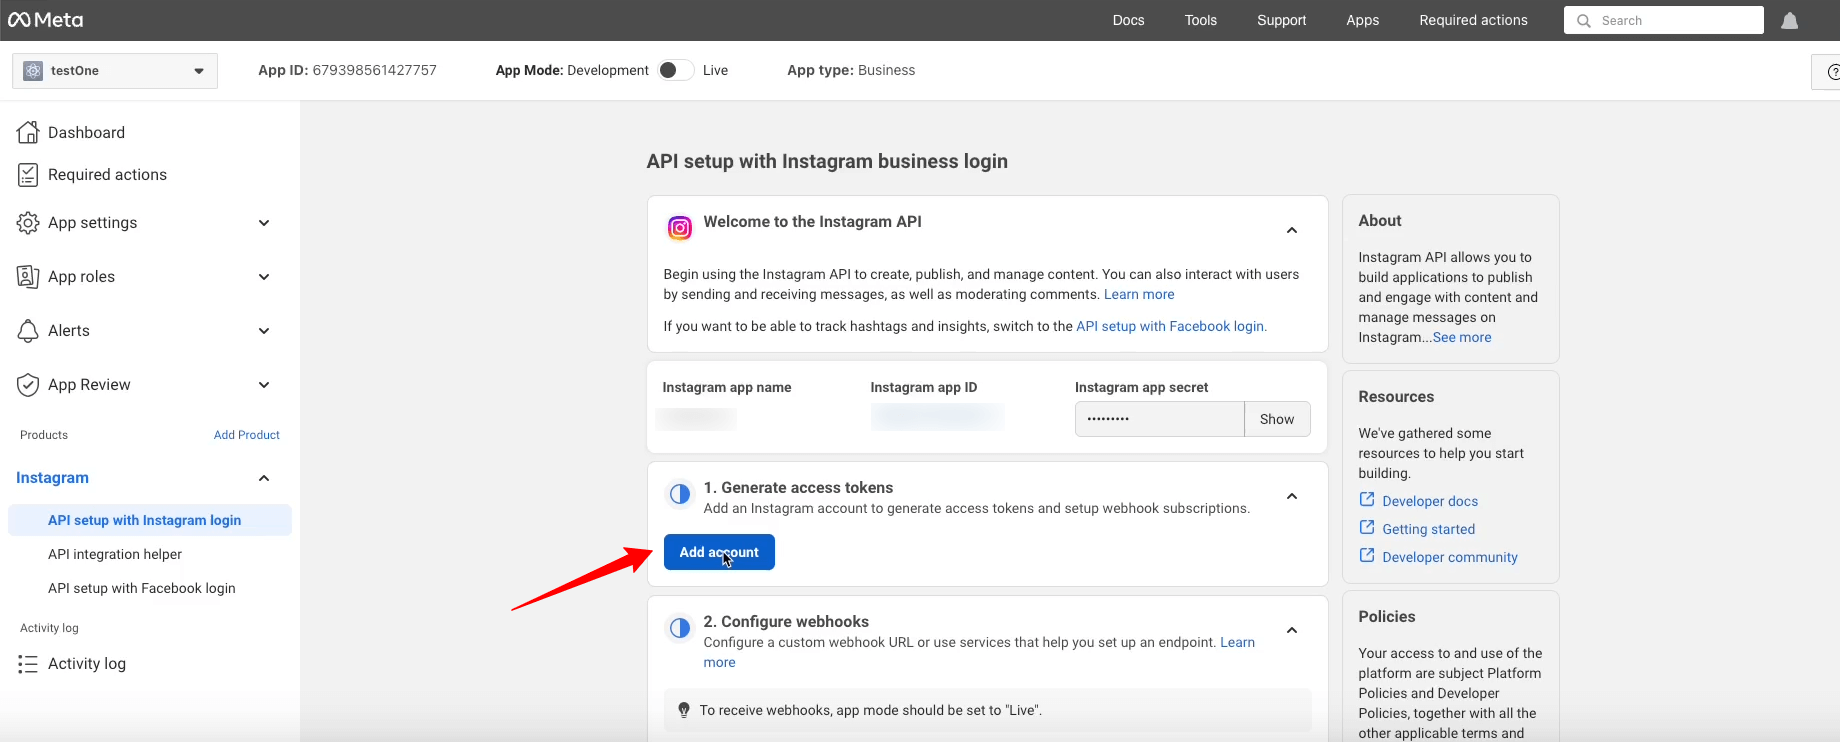
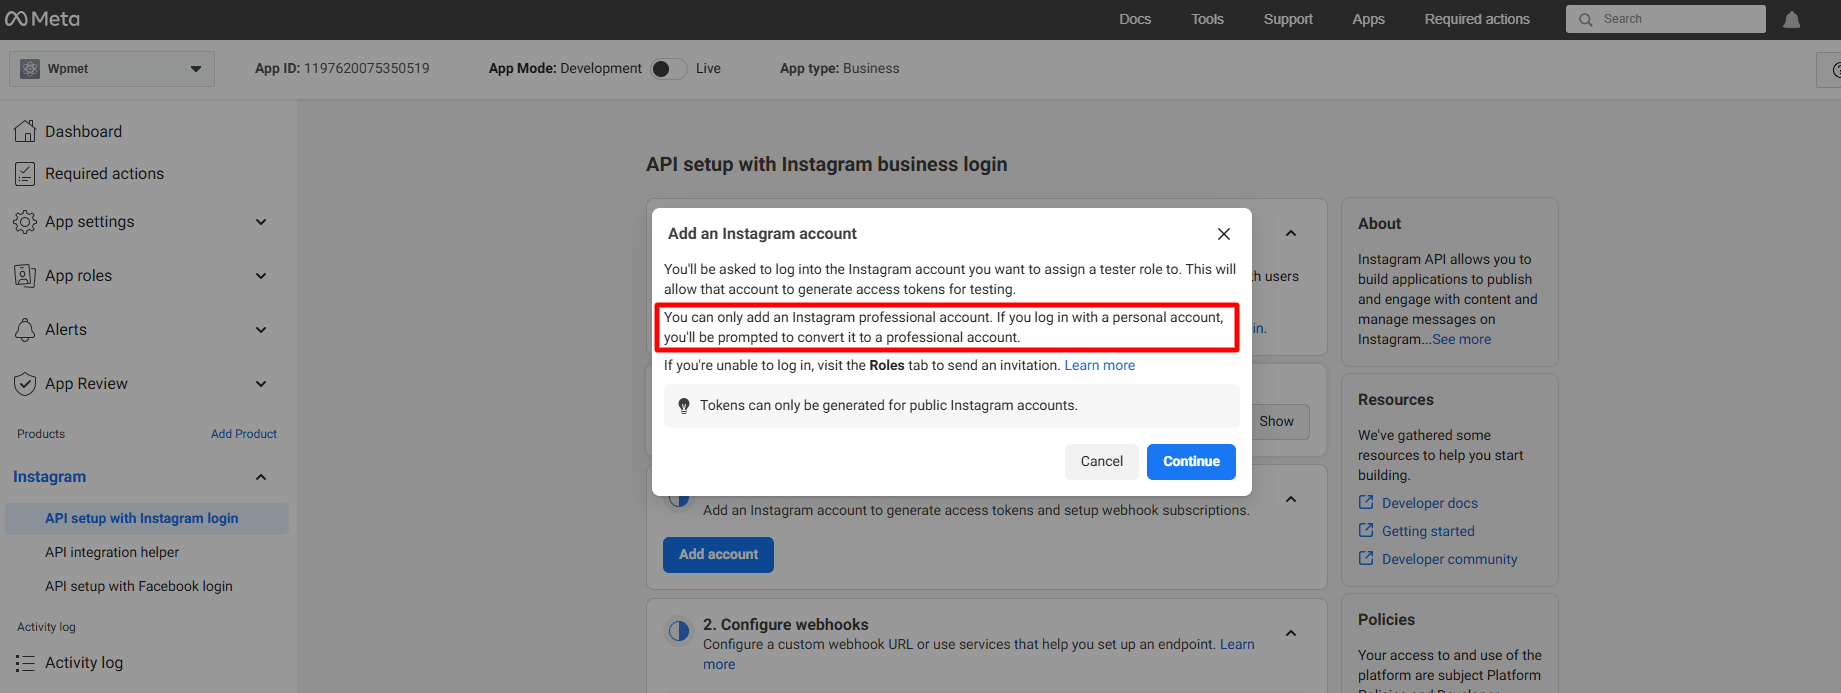
Look for the Instagram app, click the Set up option. Now, a page will load before you, where you can add Instagram account from the Generate Access Token option by clicking the Add account button. However, when you’ll click this button a popup will appear saying only a professional account can be used.
Here’s the professional account requirement popup.
But, here we won’t proceed with this. Rather, we’ll add a regular account. To do this, go under the App Roles falla ner.
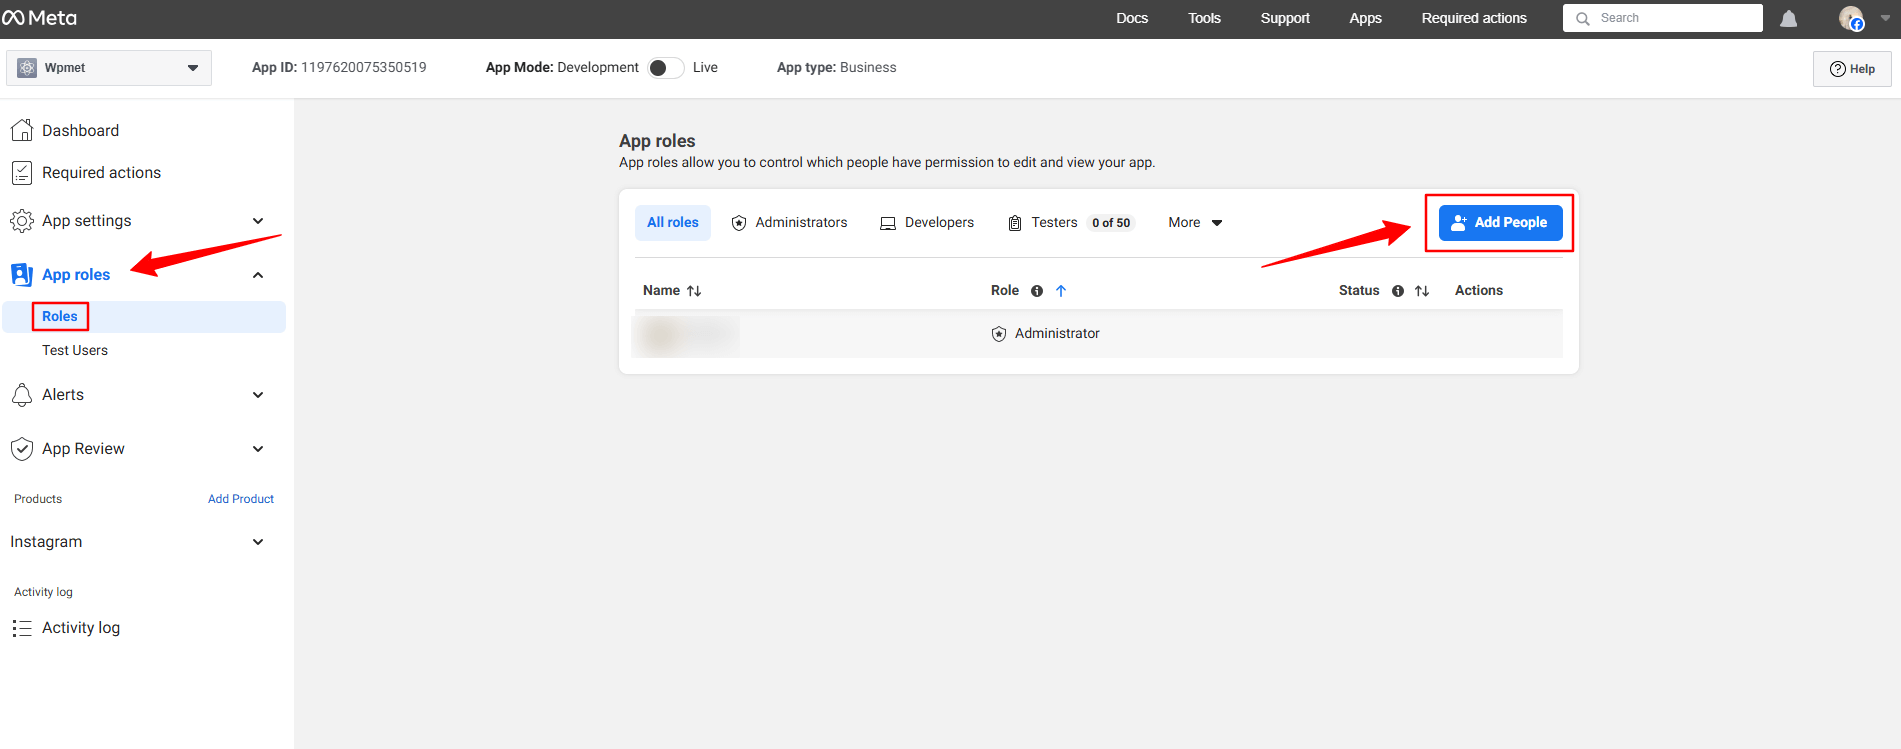
Klicka på Roles alternativet under App roles dropdown. In the next page, you’ll see an Add People button. Clicking here will reveal a popup like image below.
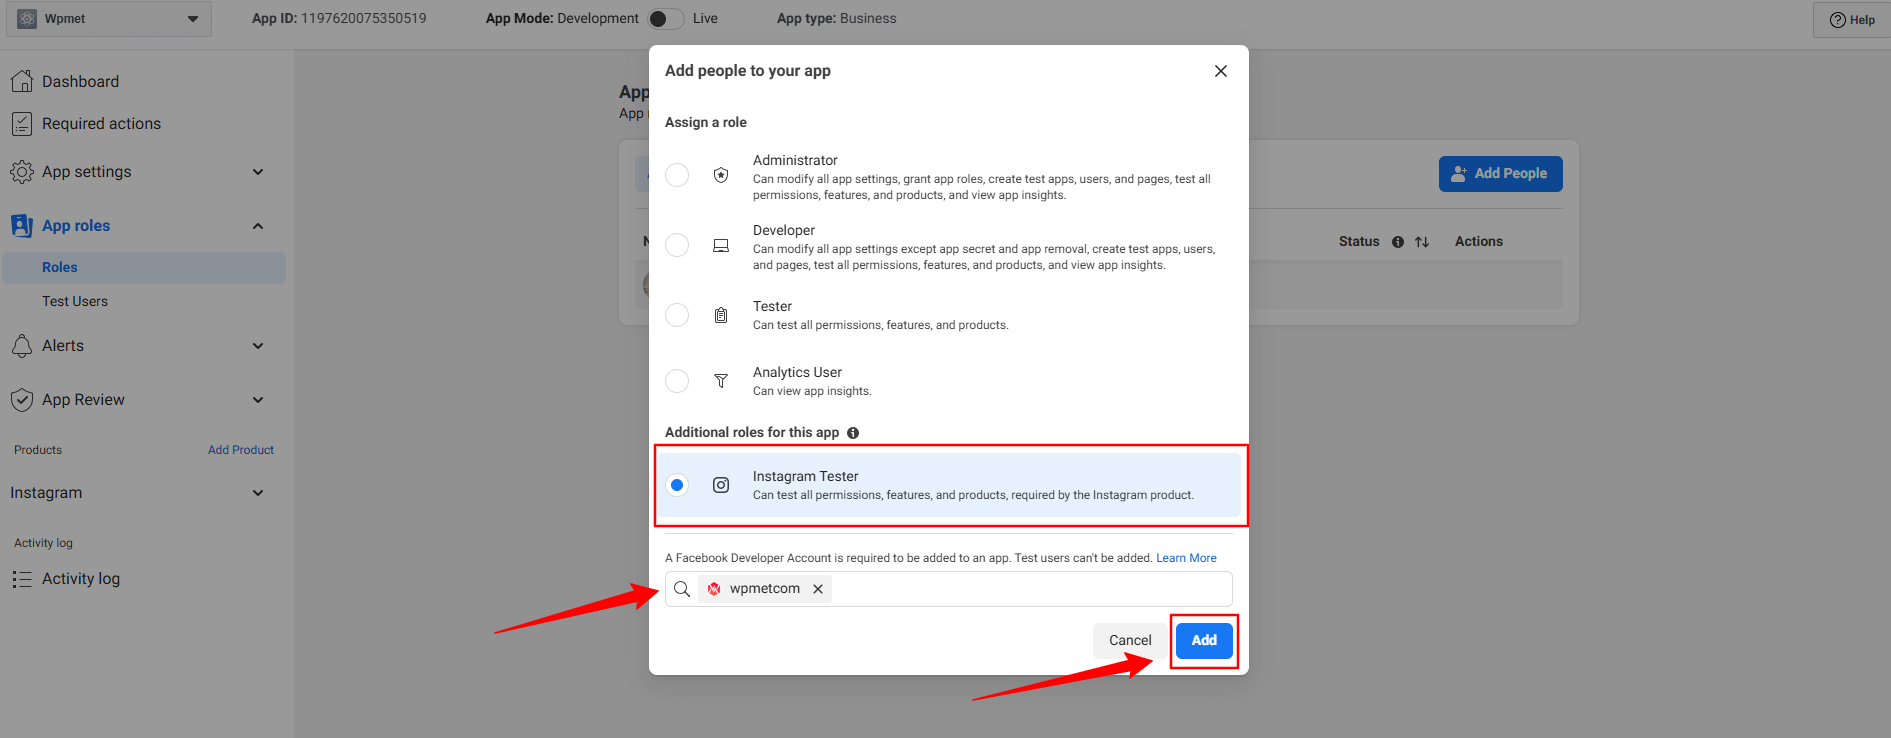
Välj här Instagram Tester option. When you’ll check this option, a search box will reveal. Search for the Instagram account that you want to integrate with your Elementor website. For example, in our case, we’ve searched for the Wpmetcom Instagram profile and click it from the search result to add in the box.
Tryck sedan på Lägg till button. You will see the pending status with the newly added profile. To resolve that, you need to verify your Instagram account.
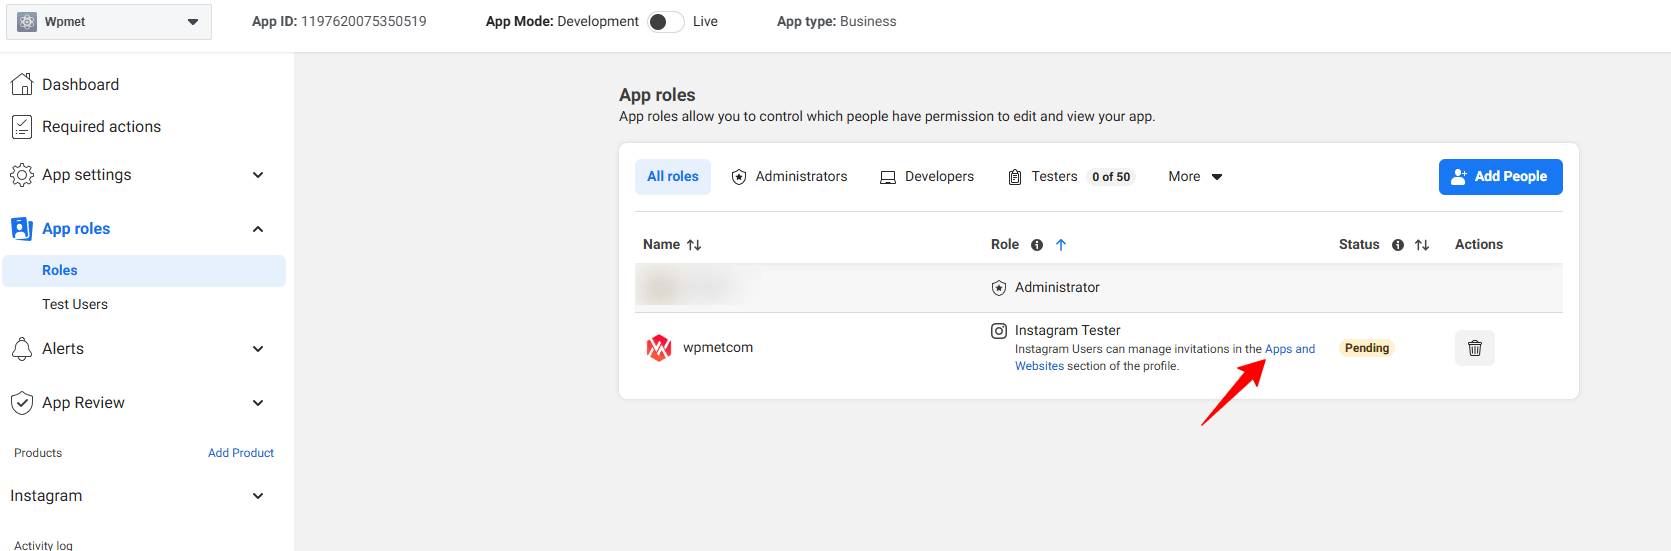
Click in the Apps and Websites, marked in the above image. Doing this will open up the Facebook profile in a new tab.
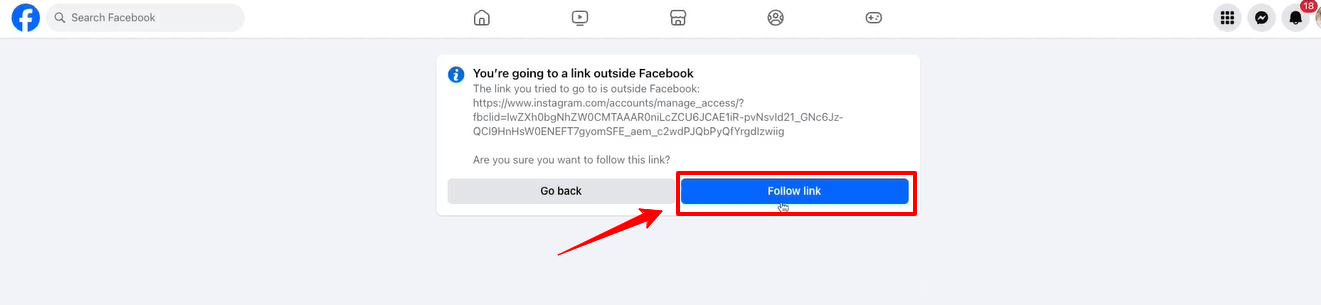
Klicka på Follow link option and it will take you to your Instagram profile web page.
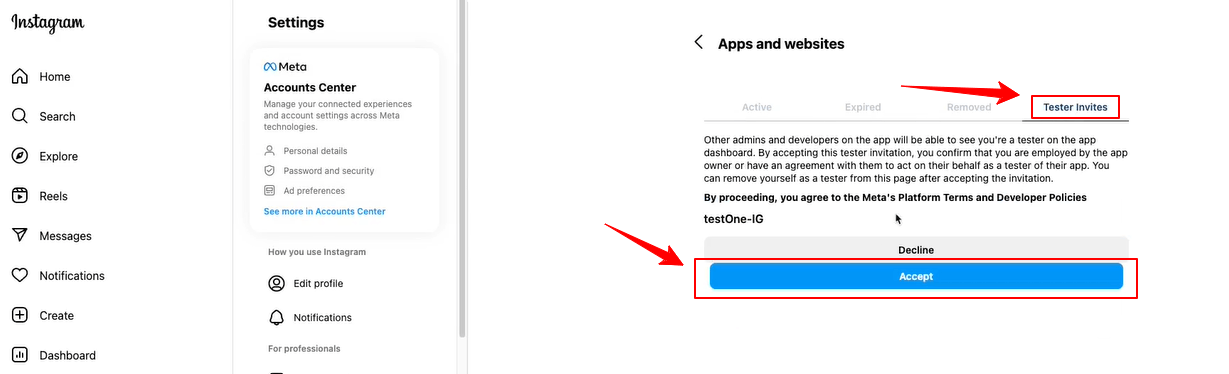
When the Instagram page will load on your screen, navigate to the Tester Invites tab and click the Accept button. Then, return to the Facebook developer dashboard and refresh the page. Now, there will be no pending status anymore with the newly added profile.
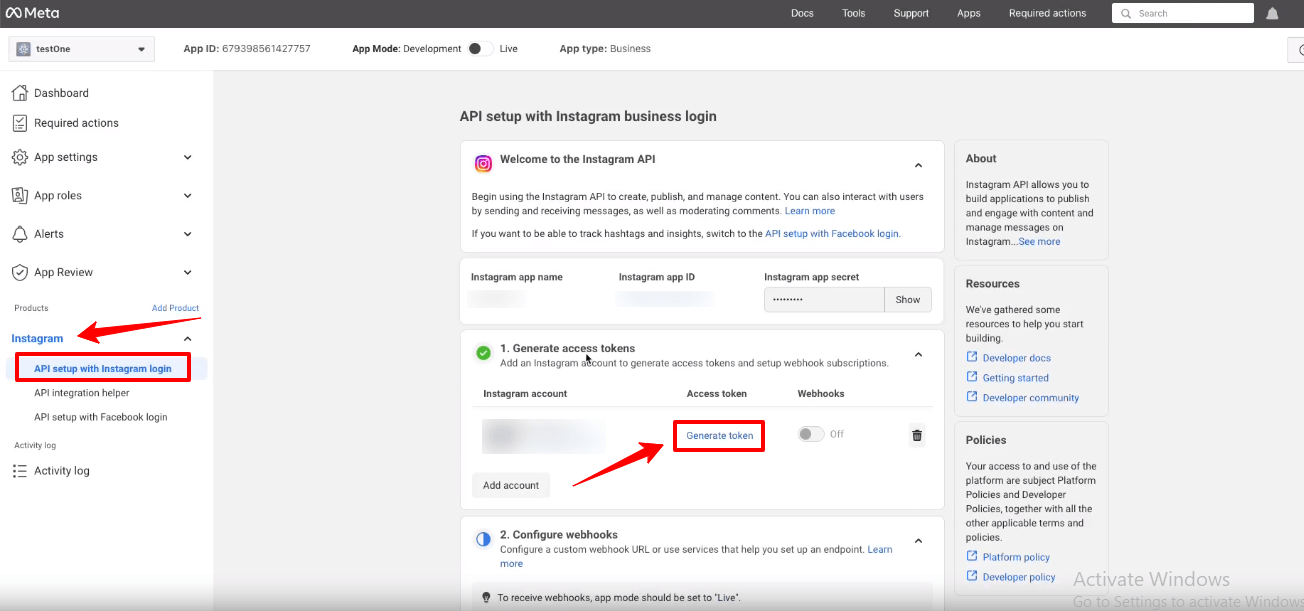
Now, you will see the green check mark with the Generate access tokens option. Click the Generate token option next to your instagram account and you’ll see a popup to re-login with your Instagram account.
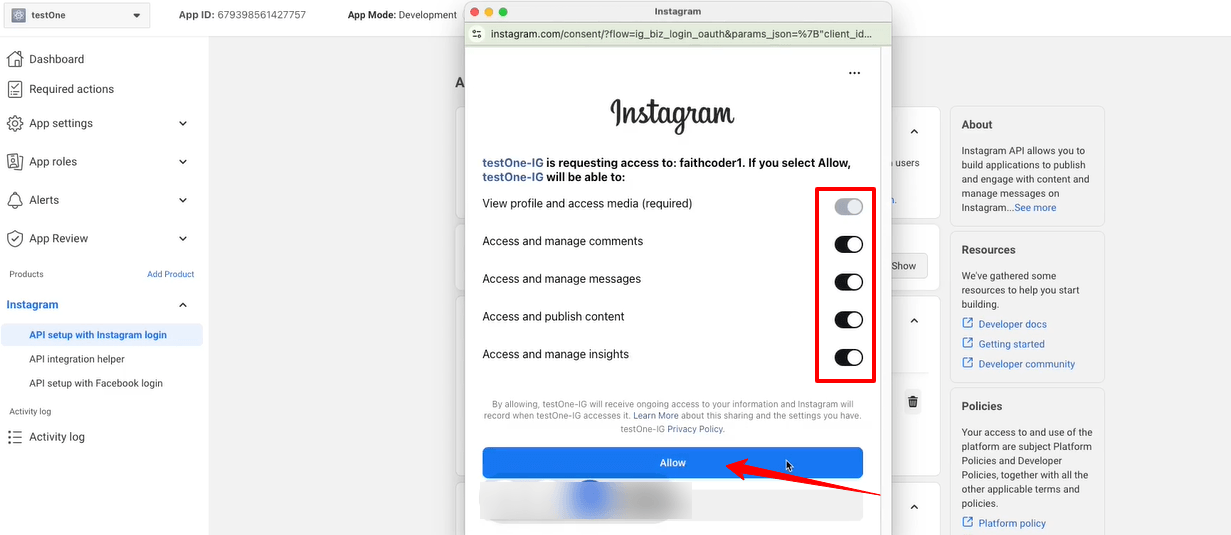
You also need to allow all the access and actions. Toggle all the options to permit like the image above and click the Tillåta knapp.
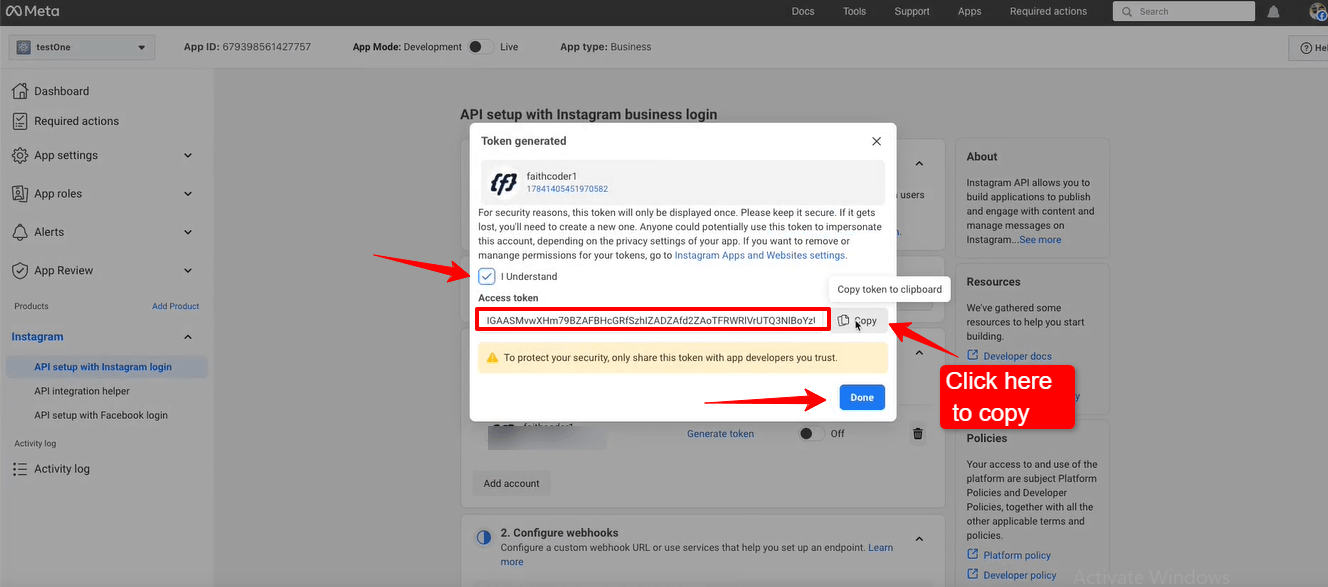
Up next, you’ll see the access token. Check the box with I Understand and select the Kopiera button to copy your Instagram access token. You need to paste it within the ElementsKit settings. We’re going to show the process in the next phase.
Slå Gjort button to clear the popup.
Adding Instagram Access Tokens to ElementsKit #
Du behöver en Användar-ID och Access Token för att ansluta till din Instagram.
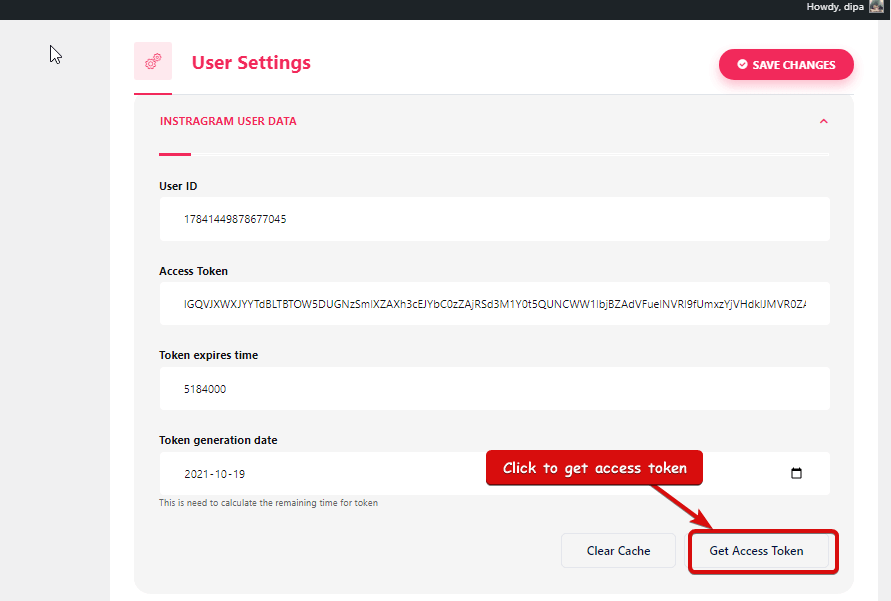
- Steg=>1: Gå till Elementskit=> Användardata=> Klicka på Instagram användardata för att expandera-> Klicka på Få åtkomsttoken.
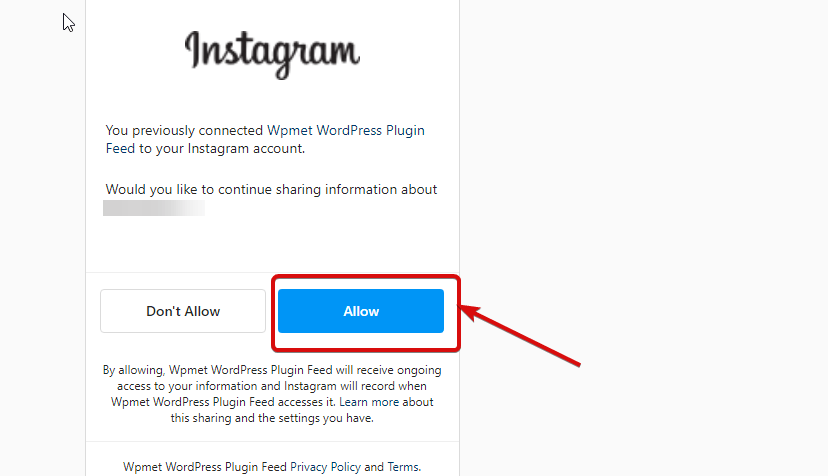
- Steg=>2: Ange ditt Instagram-konto Referenser och klicka på Logga in. Eller så kan du logga in med din Facebook-konto. När du har bett om tillåtelse klickar du på tillåt.
- Steg=>3: Här är din Instagram användar ID, Long Lived Token, Token löper ut och Token genereras. Kopiera dem.
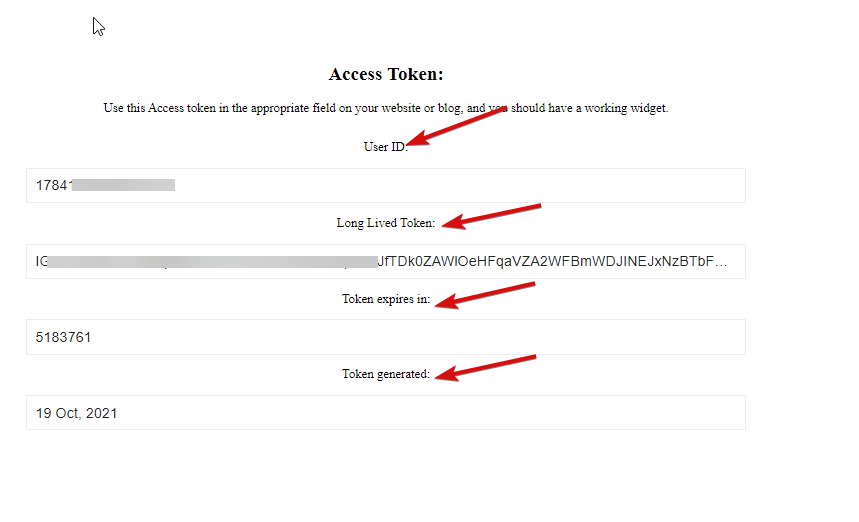
- Steg=>4: Gå sedan till Instagram användardata och klistra de Användar-ID, Long Lived Token, Token upphör att gälla och Token-genererade värden.
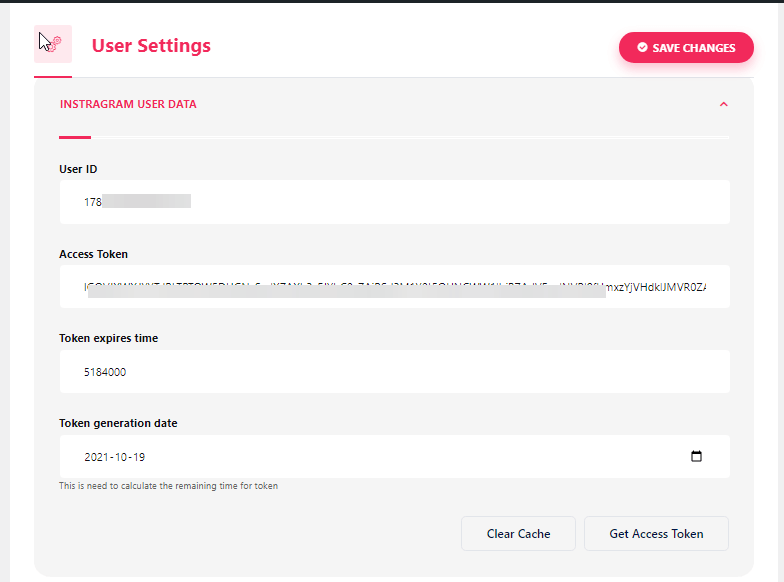
Obs! Du måste synkronisera data innan tokens utgångstid överskrider.
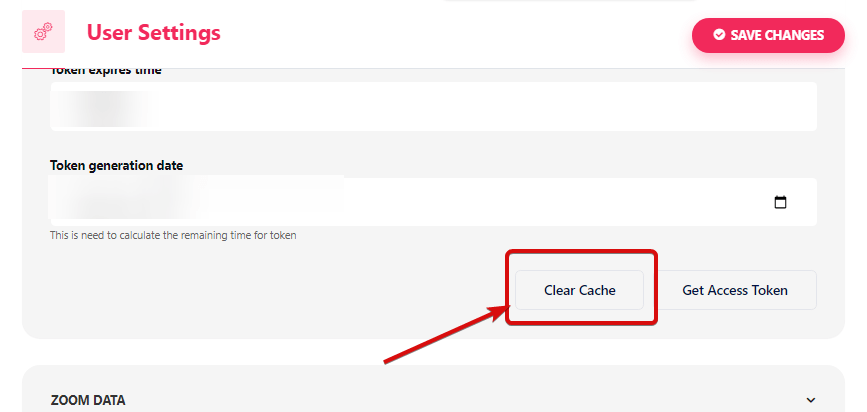
- Om du har problem med att synkronisera data klickar du bara på rensa cache.
- Steg=>5: Gå till Elementor=> Sök Instagram-flöde=> Bara Dra och släpp fältet.
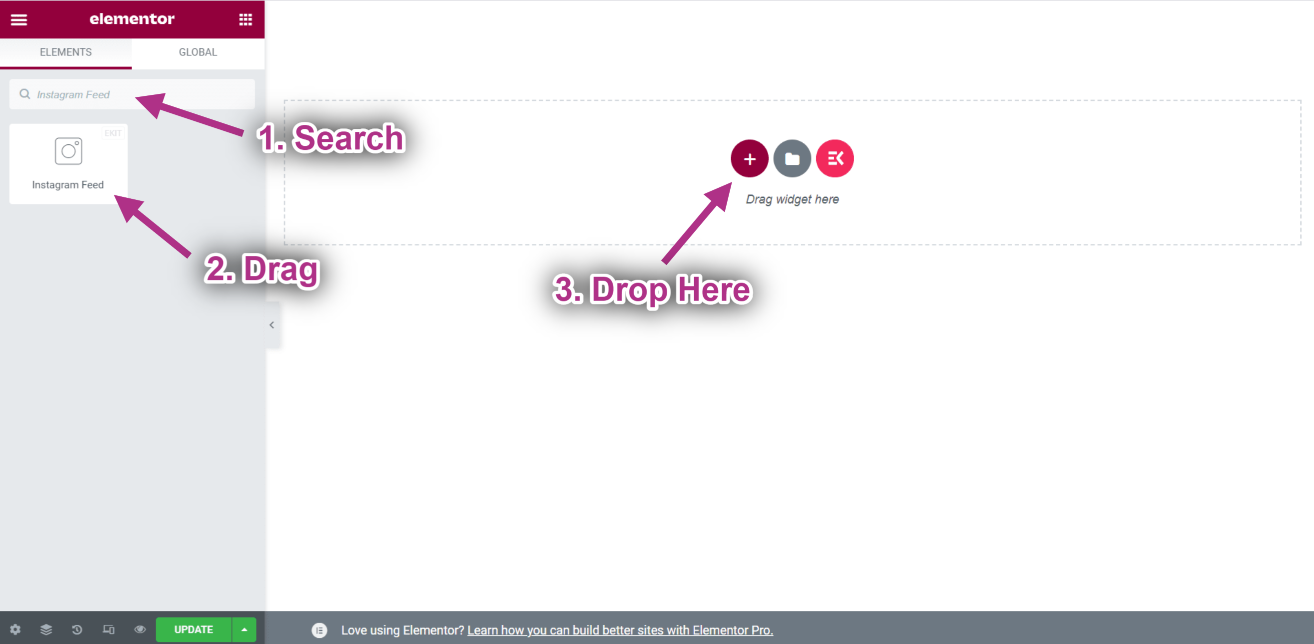
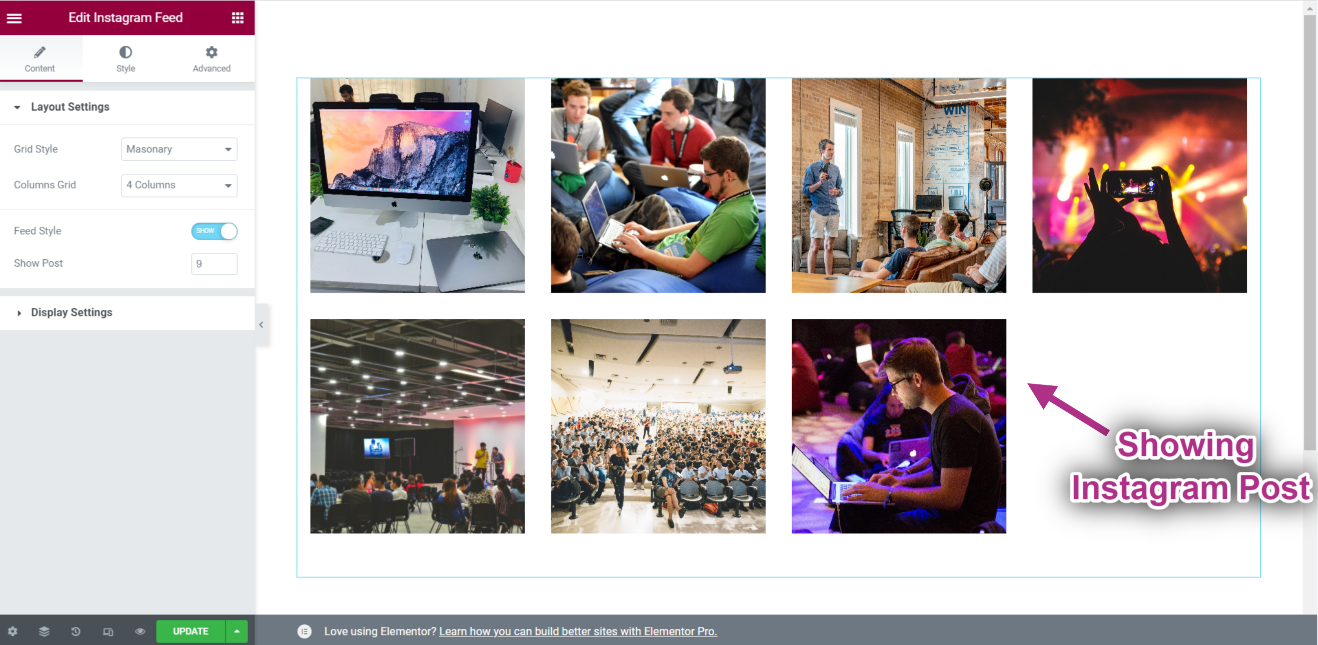
- Nu kan du se ditt Instagram-inlägg på din Instagram-flödeswidget.