

 Italian
  English
  German
  Spanish
  French
  Danish
  Portuguese
  Swedish
  Polish
  Korean
  Japanese
 Iniziare #
IL Widget di Instagram ti consente di visualizzare le tue ultime novità Instagram post sui tuoi siti WordPress. Ecco un articolo completo per spiegare ogni metodo in dettaglio. Segui la procedura passo passo per connetterti al feed di Instagram.
Genera Instagram ID utente e Token di accesso #
Ecco come generare un ID utente e un token di accesso Instagram.
First browse to this link: developers.facebook.com/apps. Note that you need to be logged in here with your Facebook credential. Or, it will automatically synch with your Facebook account, if you stay logged in.
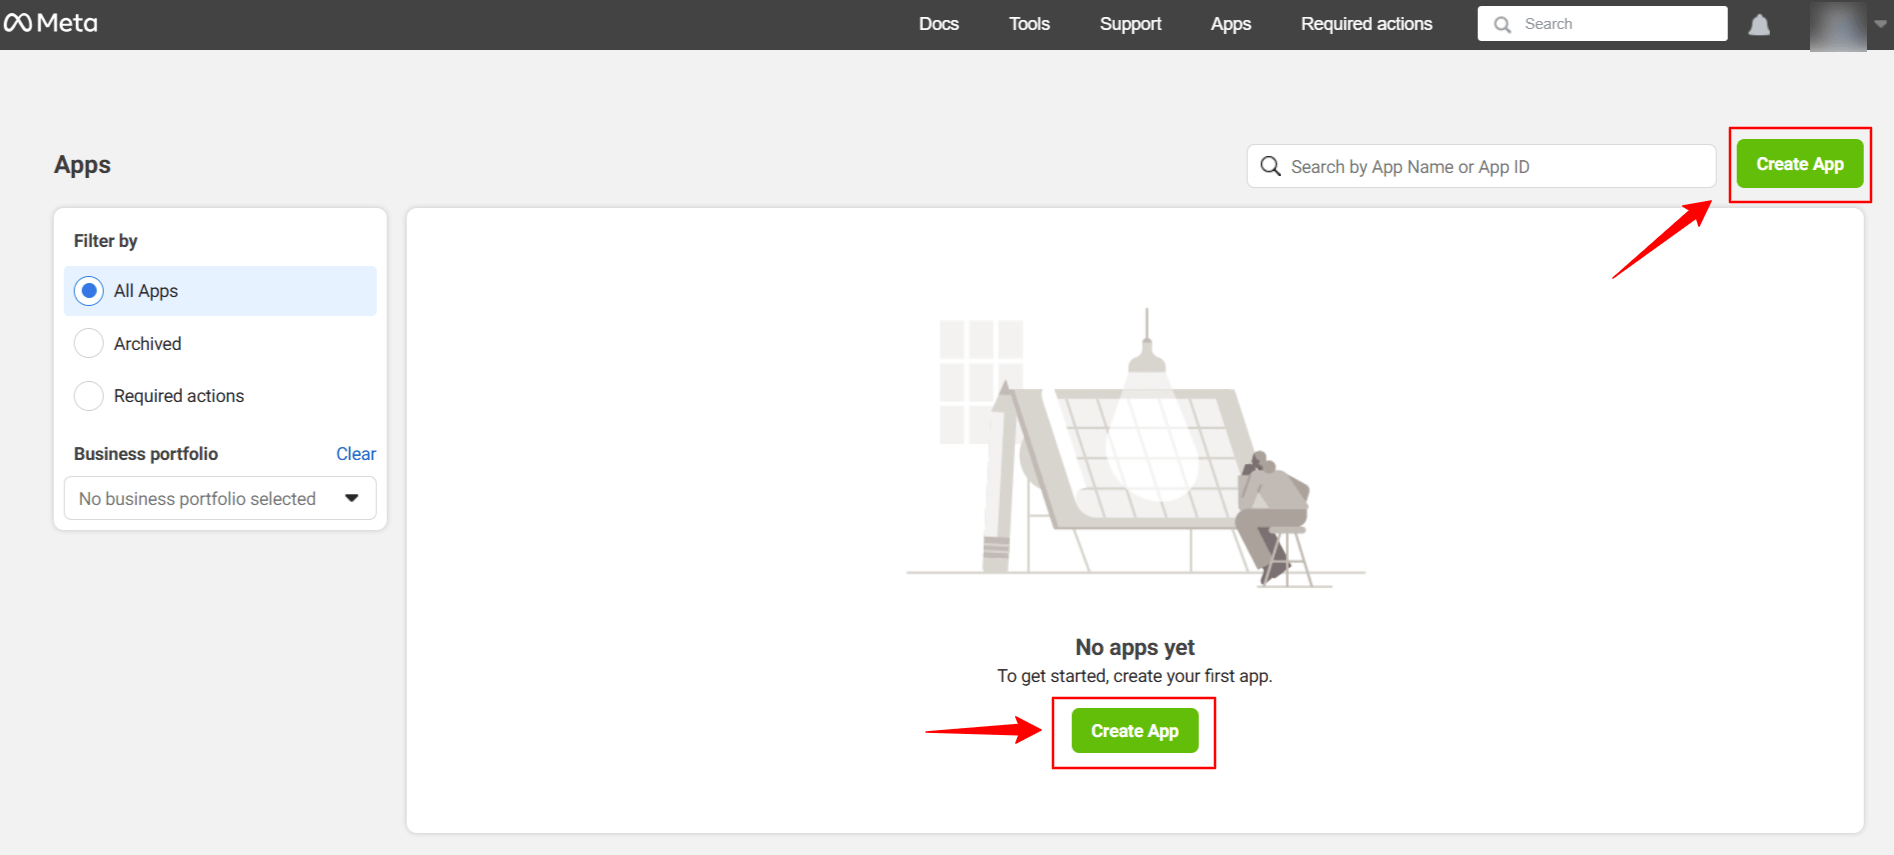
Clicca su Create App. Doing this, a page will load an interface with different tabs.
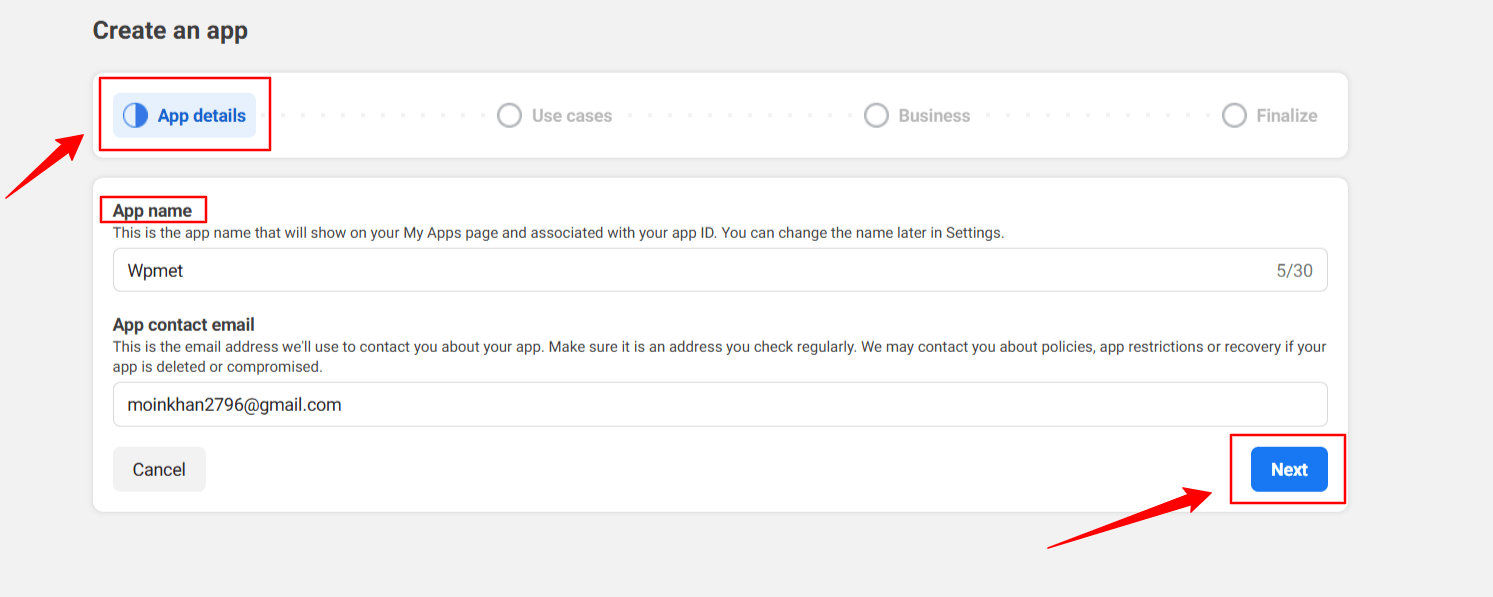
Give a name to the app, for this demo tutorial, I enter the app name as Wpmet. Quindi, premi il Prossimo scheda.
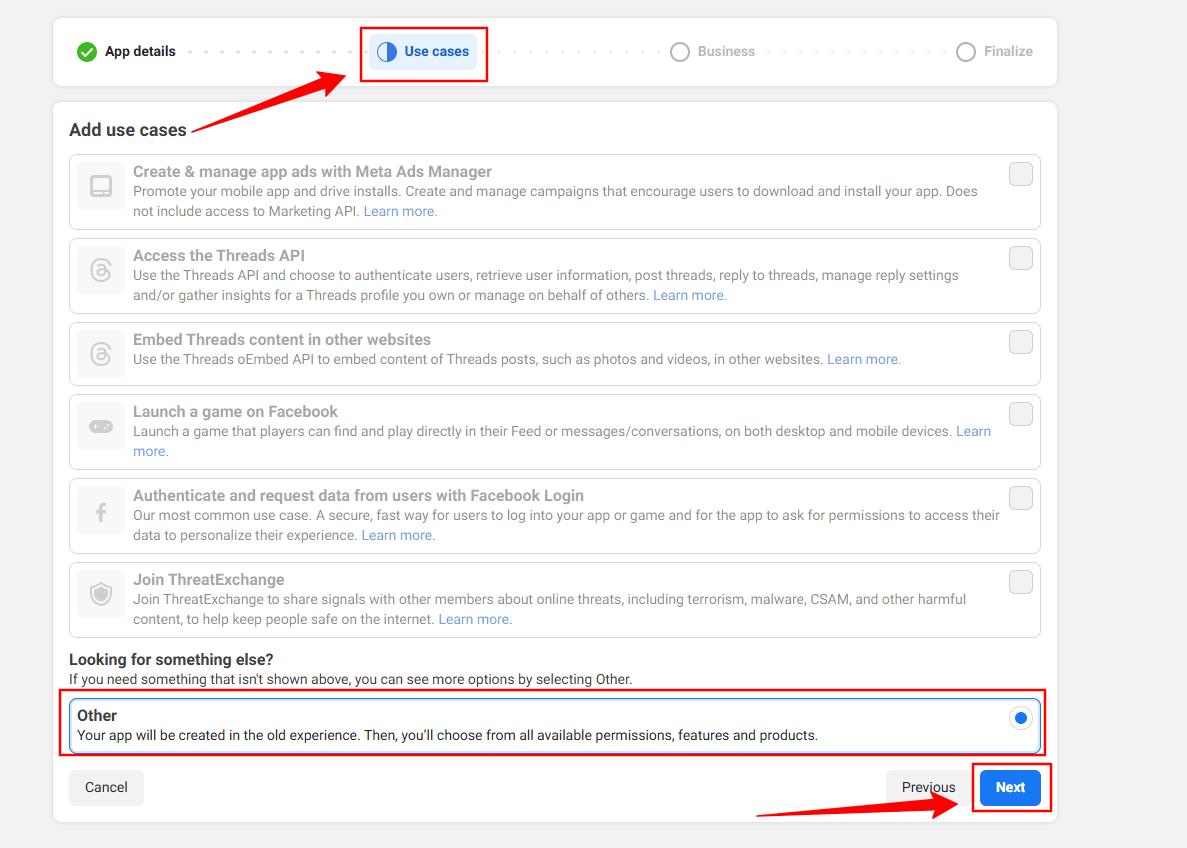
Then, select the “Other” option from the Use Cases tab. And, hit the Prossimo pulsante.
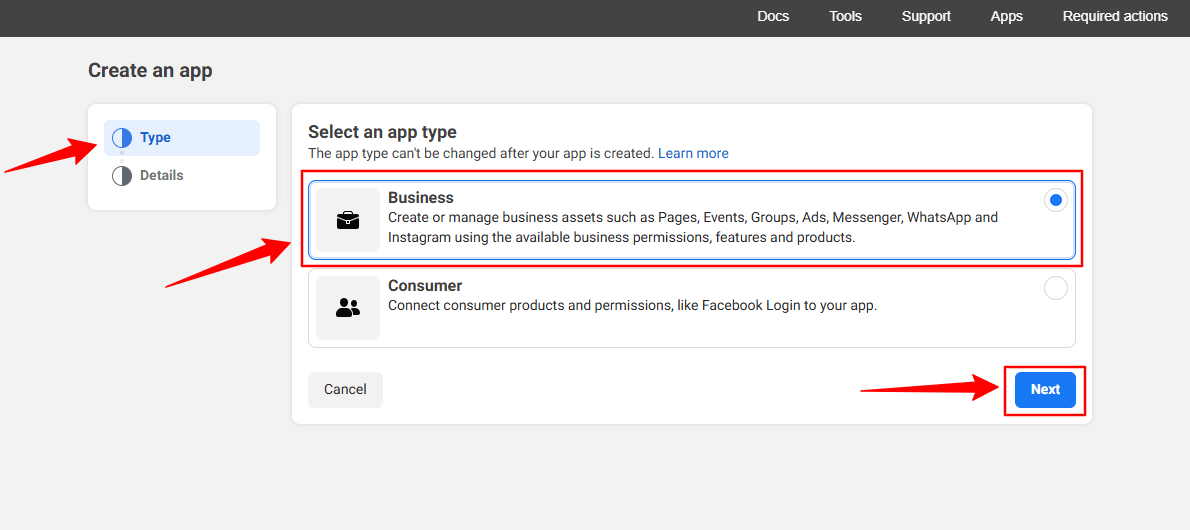
In the next screen, you’ll see two options. First, select Attività commerciale dal Tipo scheda.
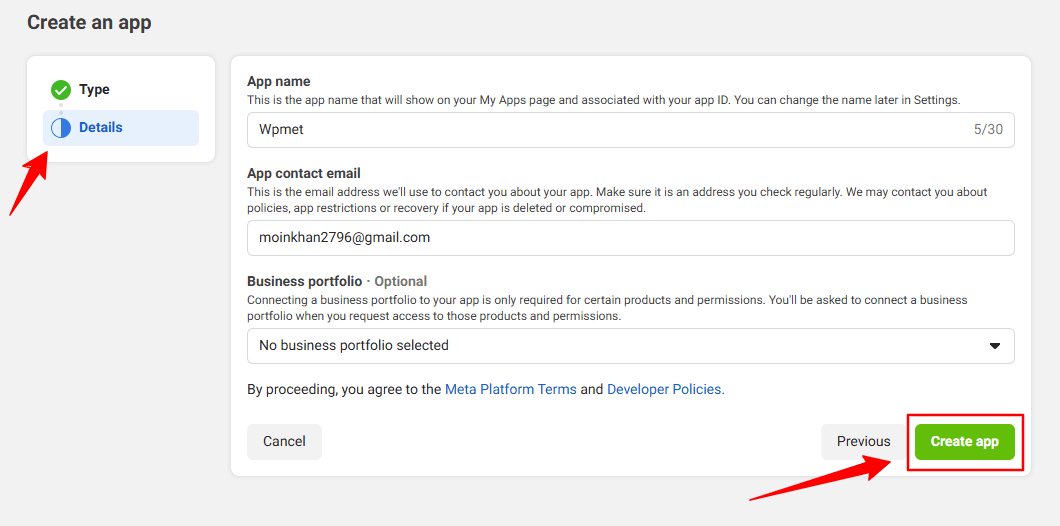
However, you don’t have to put any information in the Dettagli option, just click the Crea app pulsante.
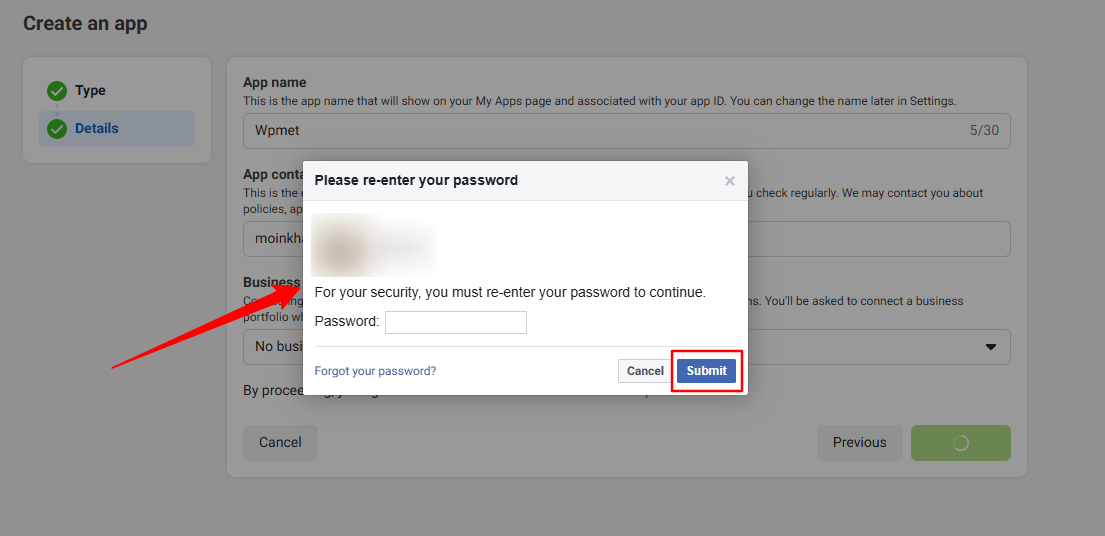
You may need to re-login with your Facebook credentials. Once, you’ve successfully login with your Facebook details, you’ll see all the apps.
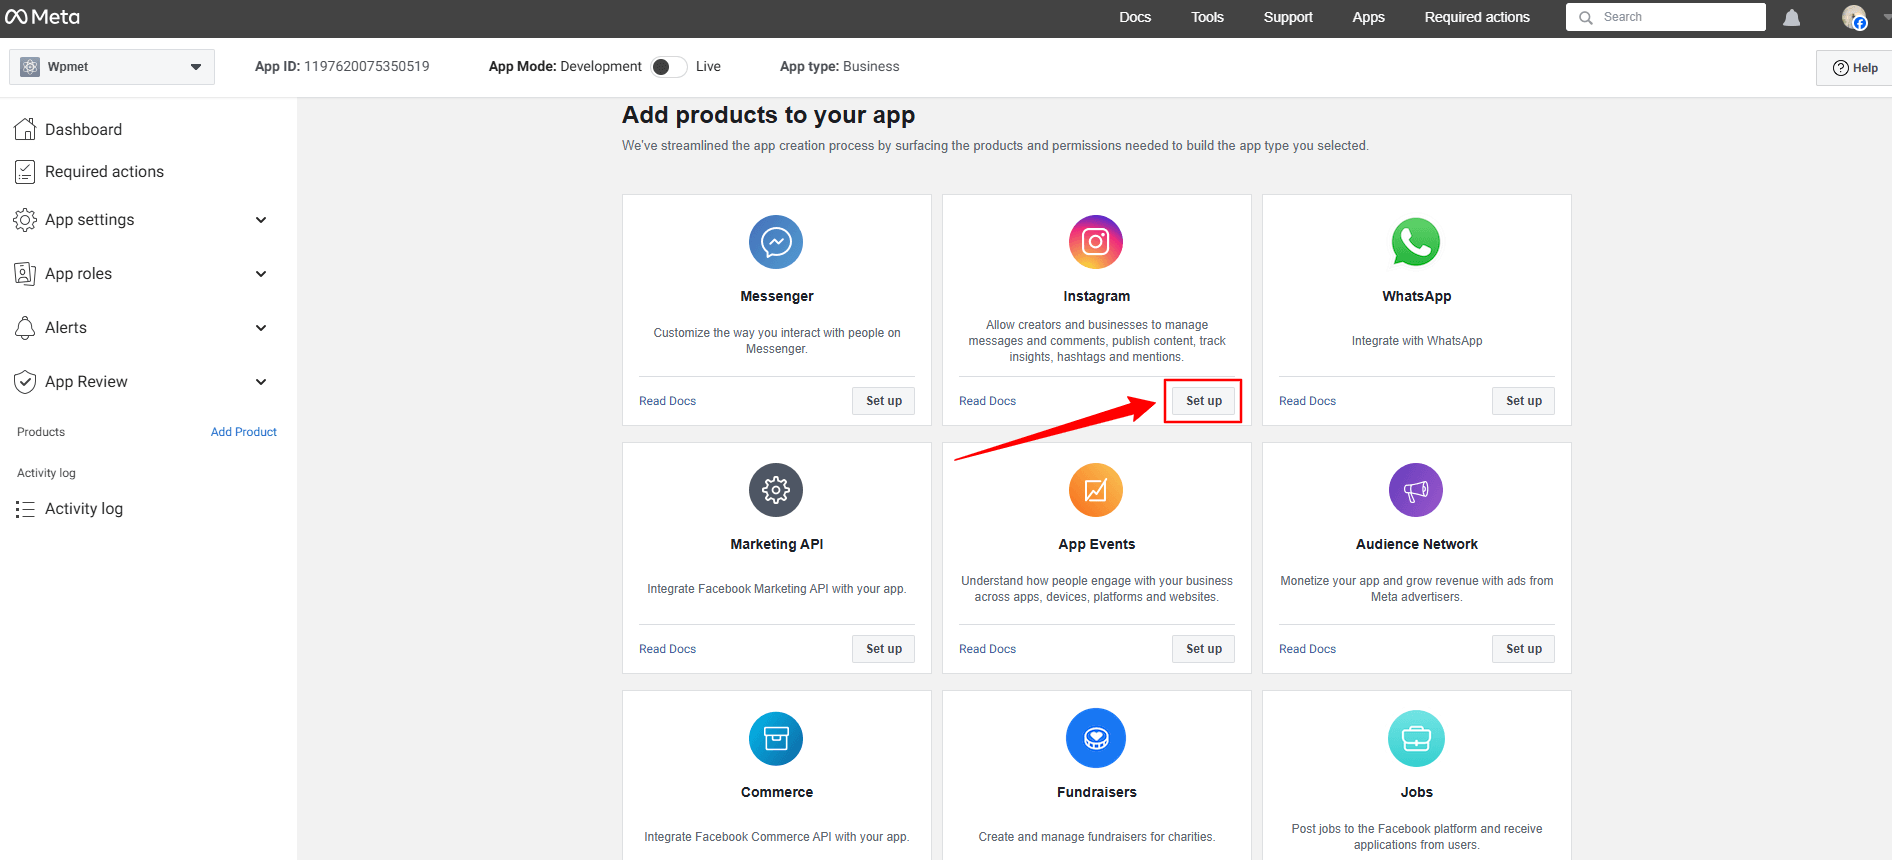
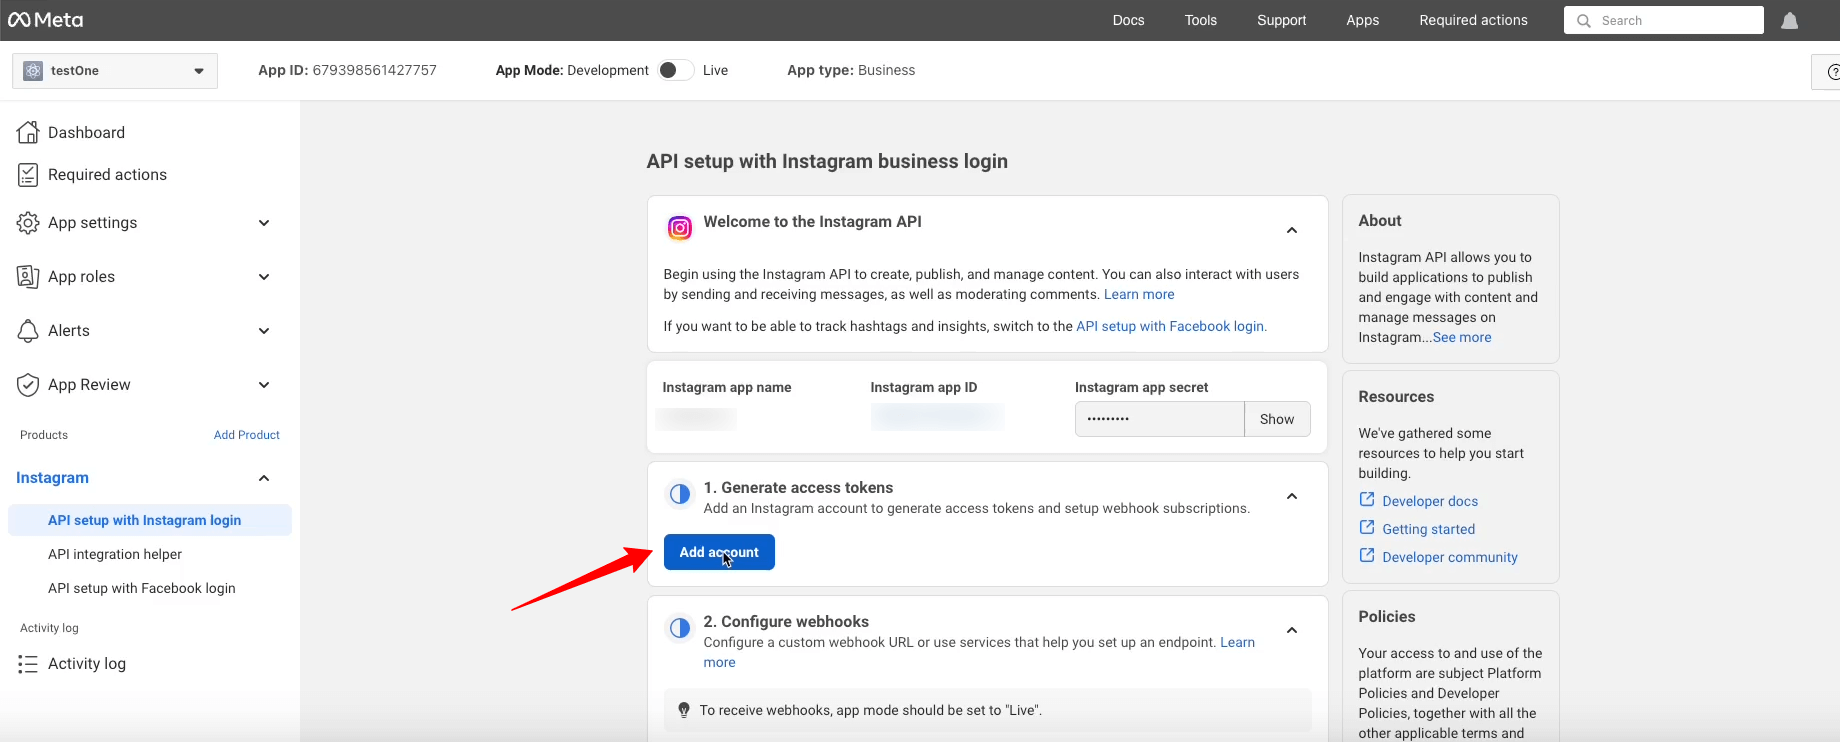
Look for the Instagram app, click the Set up option. Now, a page will load before you, where you can add Instagram account from the Generate Access Token option by clicking the Add account button. However, when you’ll click this button a popup will appear saying only a professional account can be used.
Here’s the professional account requirement popup.
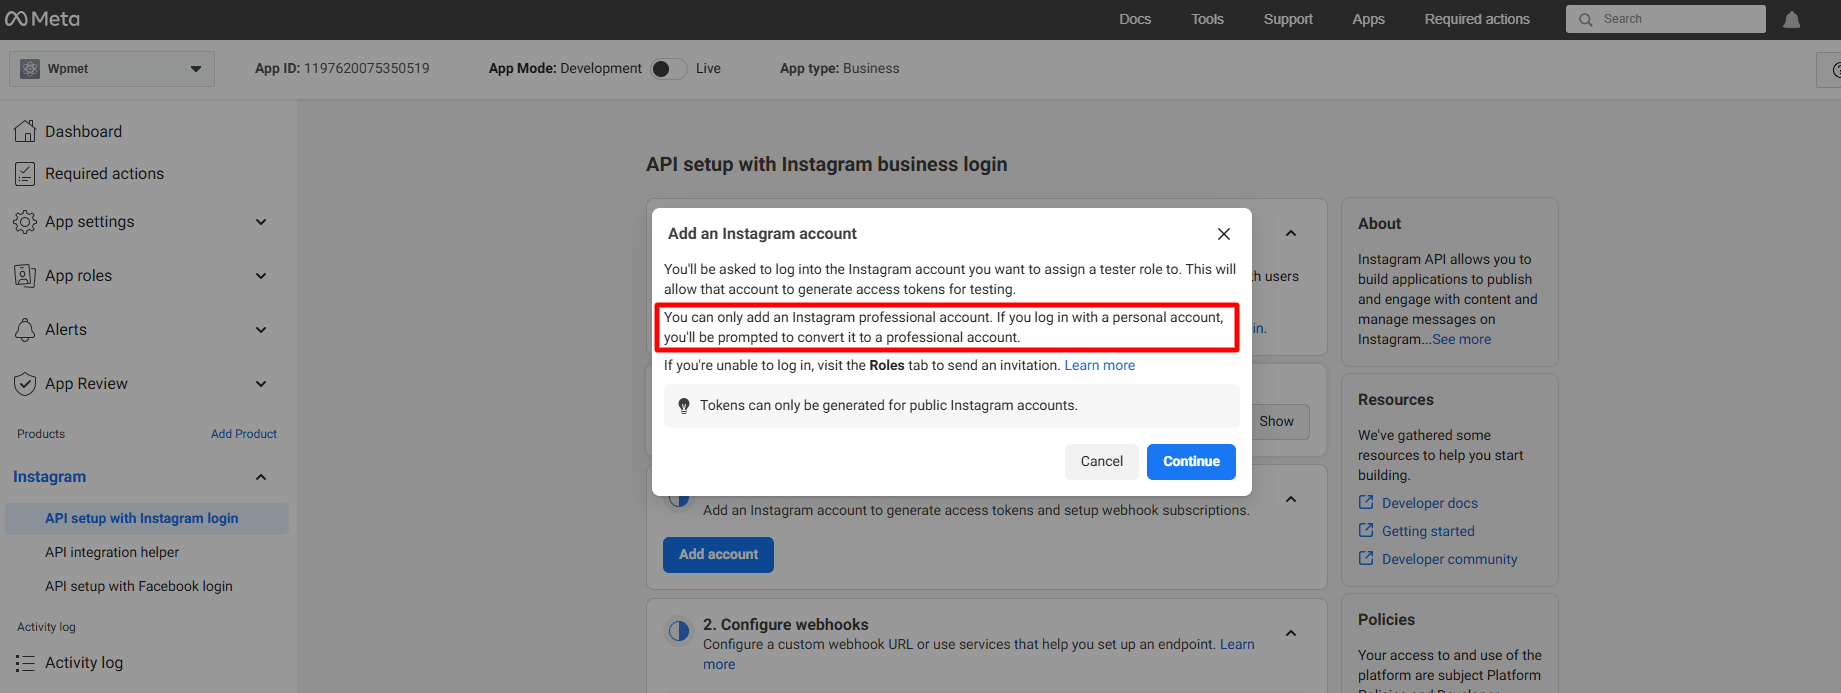
But, here we won’t proceed with this. Rather, we’ll add a regular account. To do this, go under the App Roles cadere in picchiata.
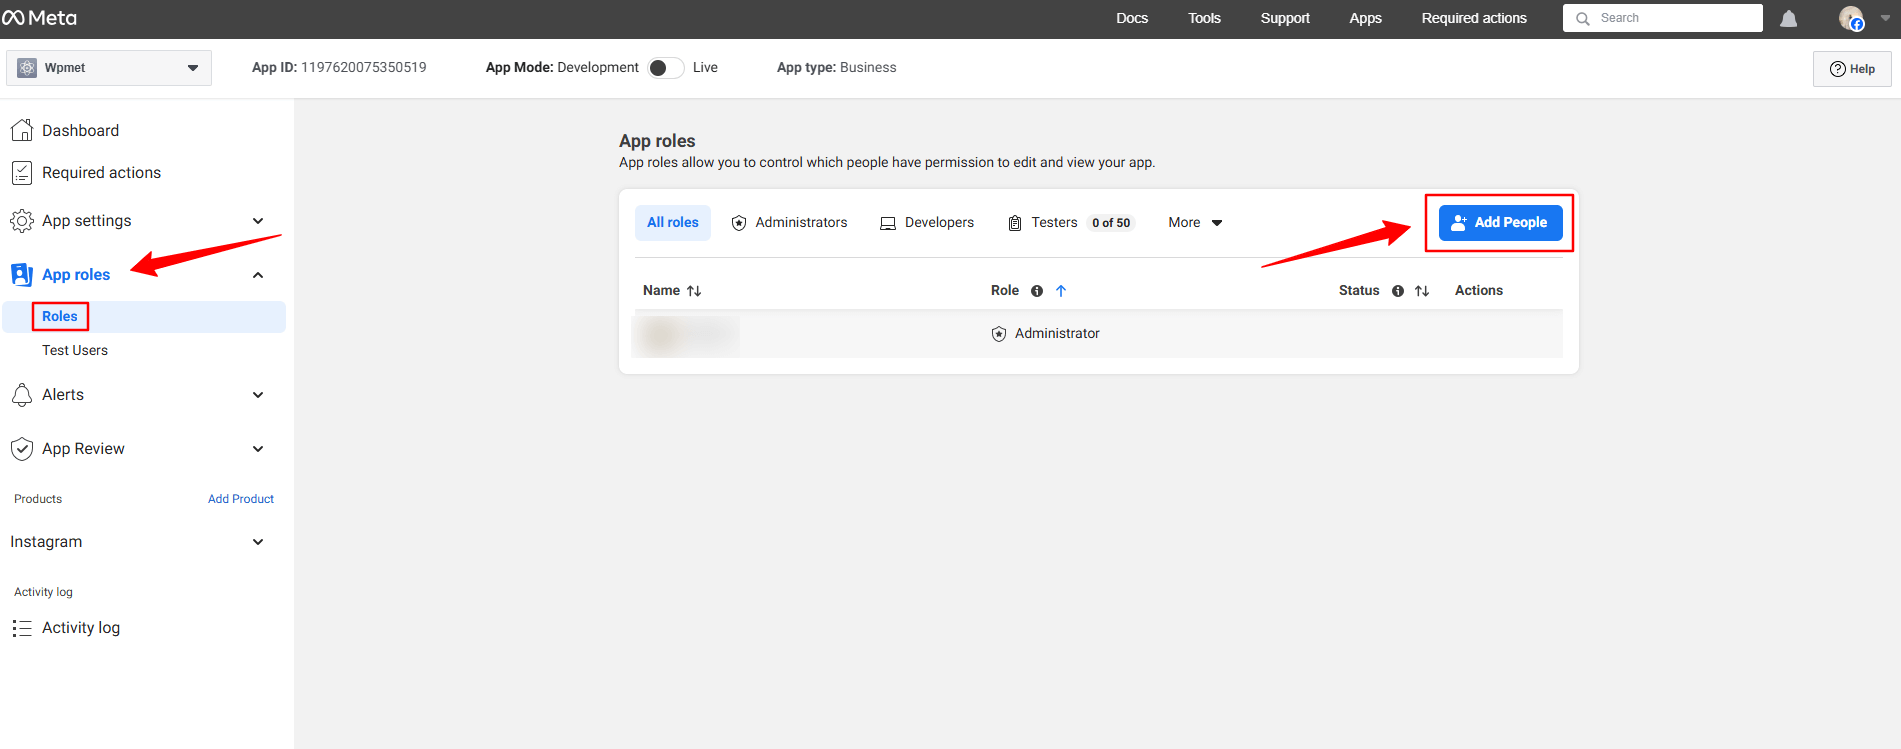
Clicca il Roles opzione sotto la App roles dropdown. In the next page, you’ll see an Add People button. Clicking here will reveal a popup like image below.
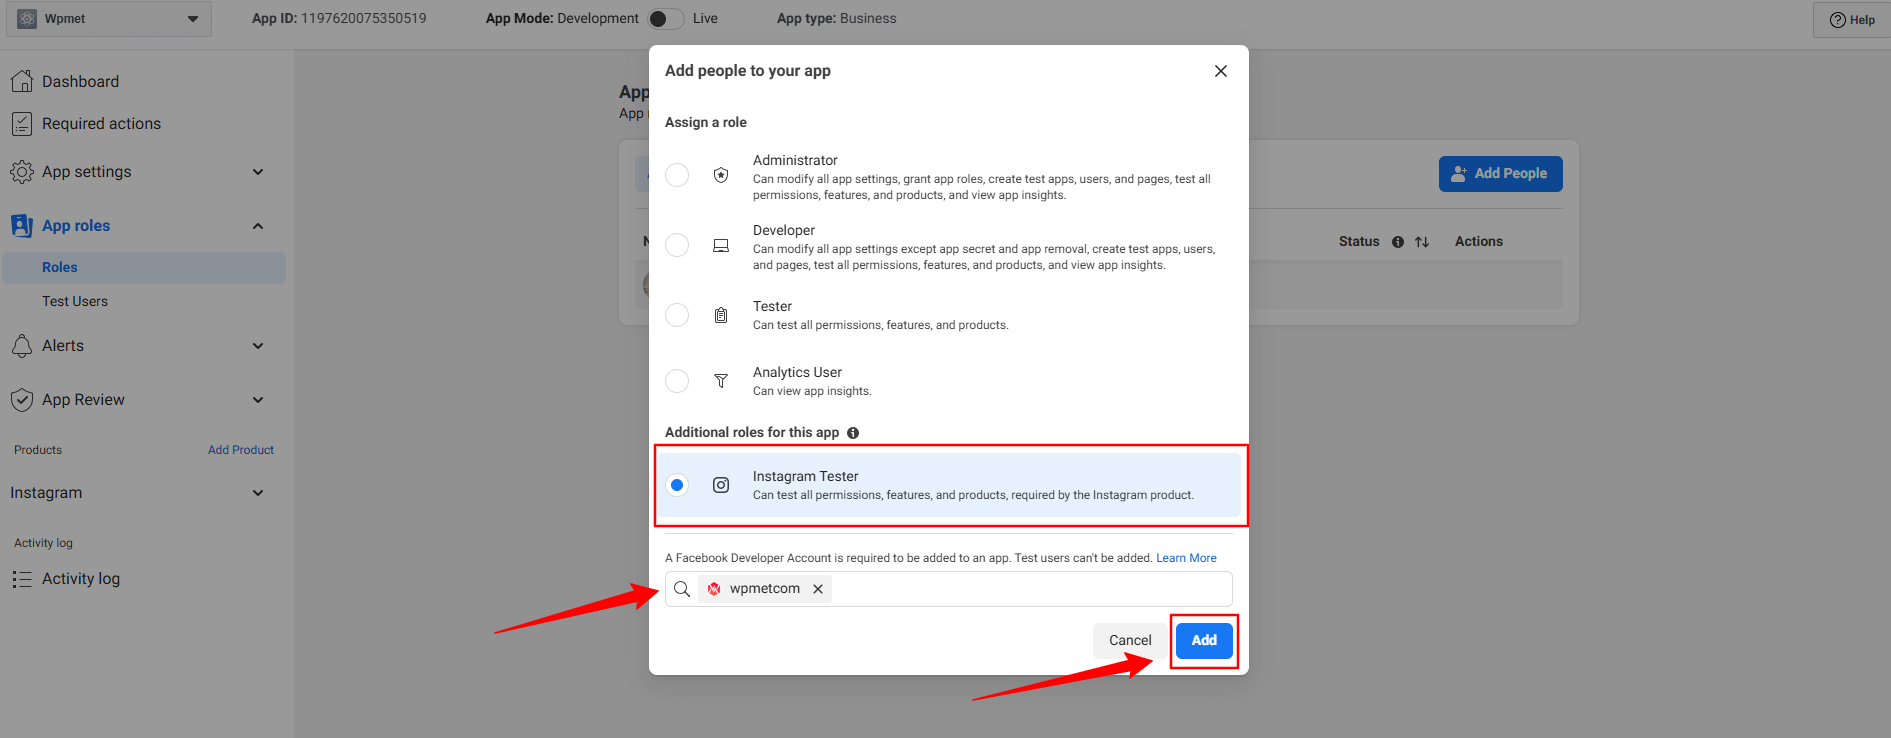
Qui, seleziona il Instagram Tester option. When you’ll check this option, a search box will reveal. Search for the Instagram account that you want to integrate with your Elementor website. For example, in our case, we’ve searched for the Wpmetcom Instagram profile and click it from the search result to add in the box.
Quindi, premi il Aggiungere button. You will see the pending status with the newly added profile. To resolve that, you need to verify your Instagram account.
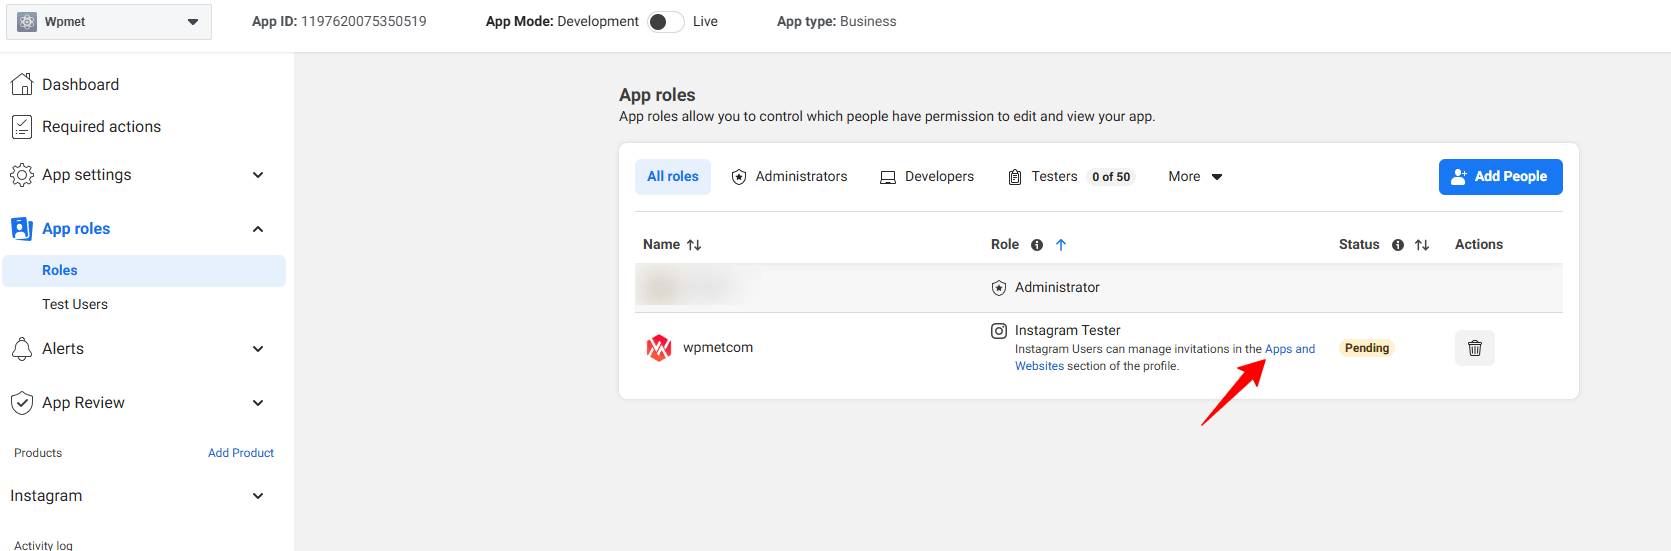
Click in the Apps and Websites, marked in the above image. Doing this will open up the Facebook profile in a new tab.
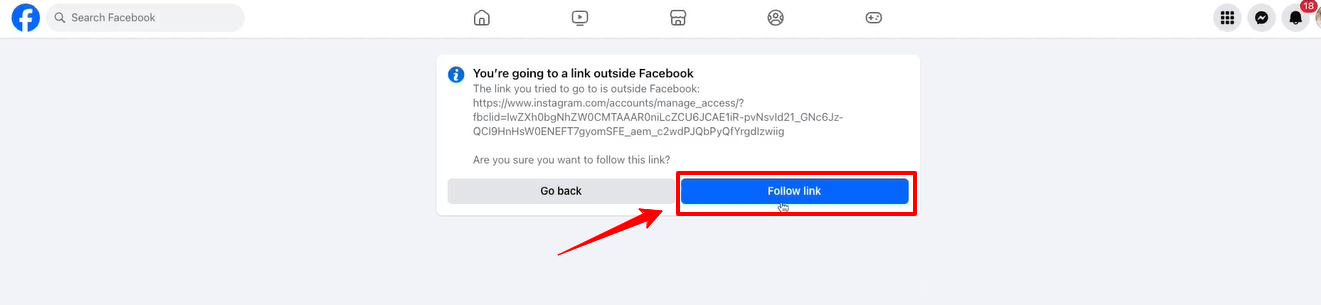
Clicca il Follow link option and it will take you to your Instagram profile web page.
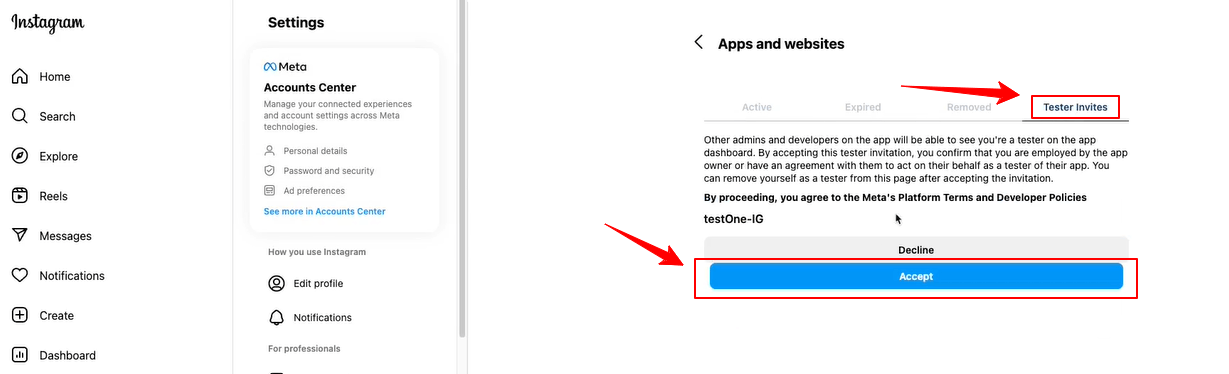
When the Instagram page will load on your screen, navigate to the Tester Invites tab and click the Accept button. Then, return to the Facebook developer dashboard and refresh the page. Now, there will be no pending status anymore with the newly added profile.
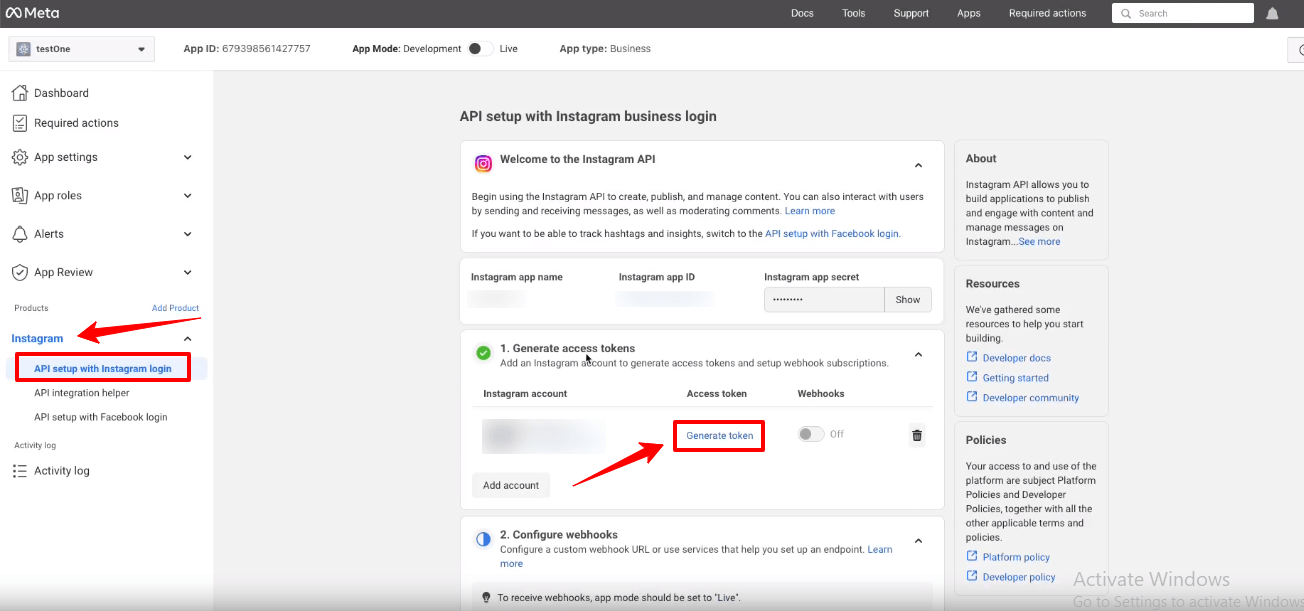
Now, you will see the green check mark with the Generate access tokens option. Click the Generate token option next to your instagram account and you’ll see a popup to re-login with your Instagram account.
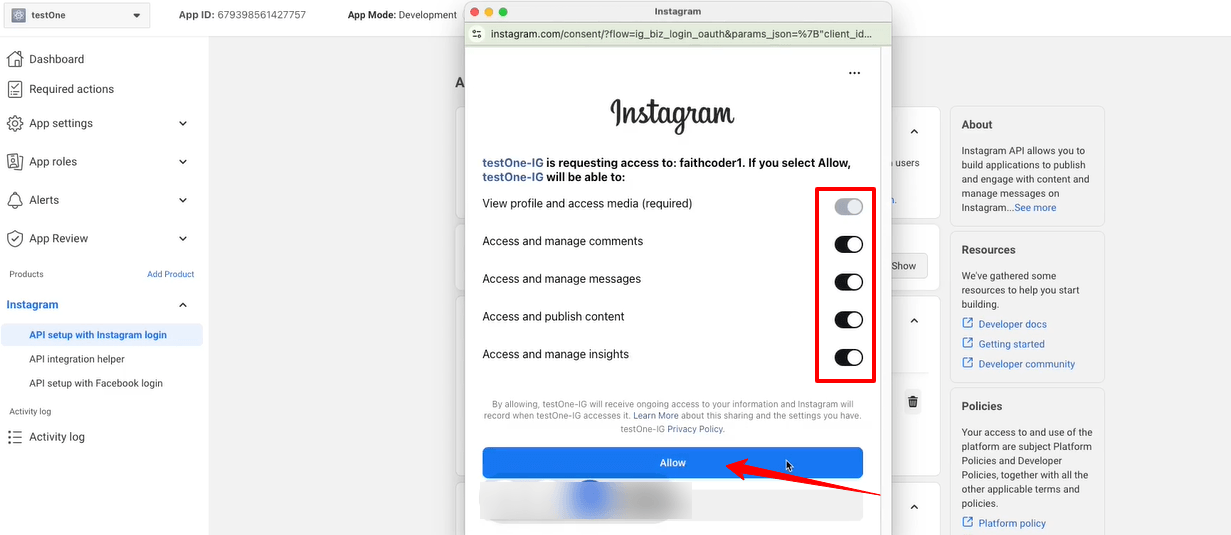
You also need to allow all the access and actions. Toggle all the options to permit like the image above and click the Permettere pulsante.
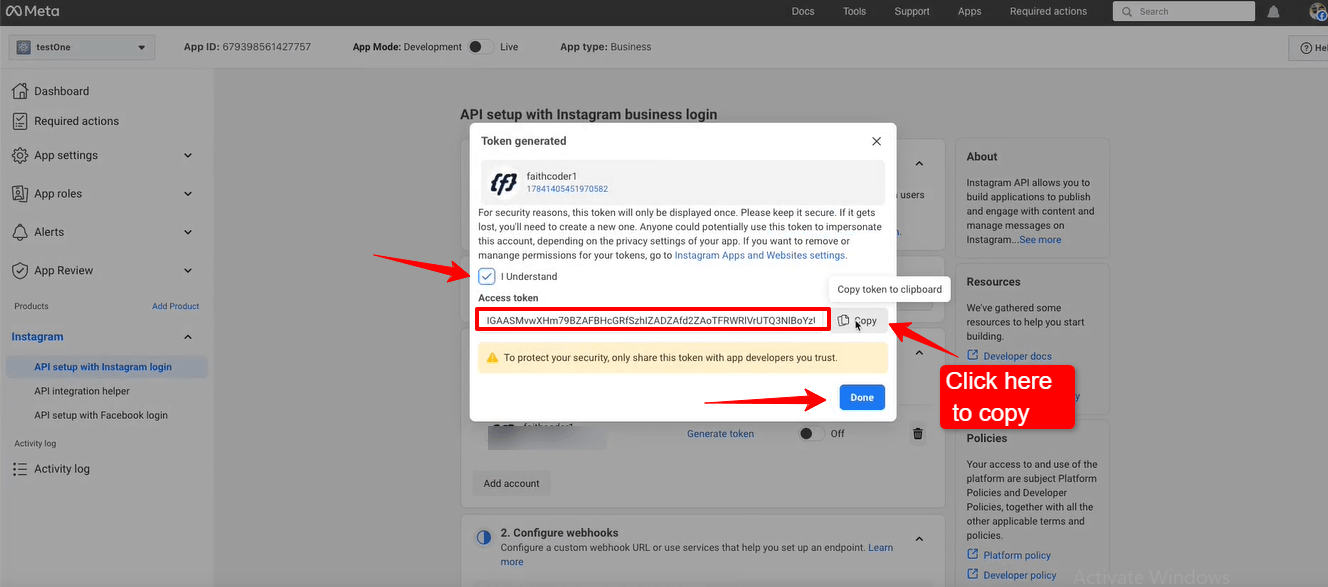
Up next, you’ll see the access token. Check the box with I Understand and select the copia button to copy your Instagram access token. You need to paste it within the ElementsKit settings. We’re going to show the process in the next phase.
Colpire il Fatto button to clear the popup.
Adding Instagram Access Tokens to ElementsKit #
Avrai bisogno di un ID utente e Token di accesso per connetterti al tuo Instagram.
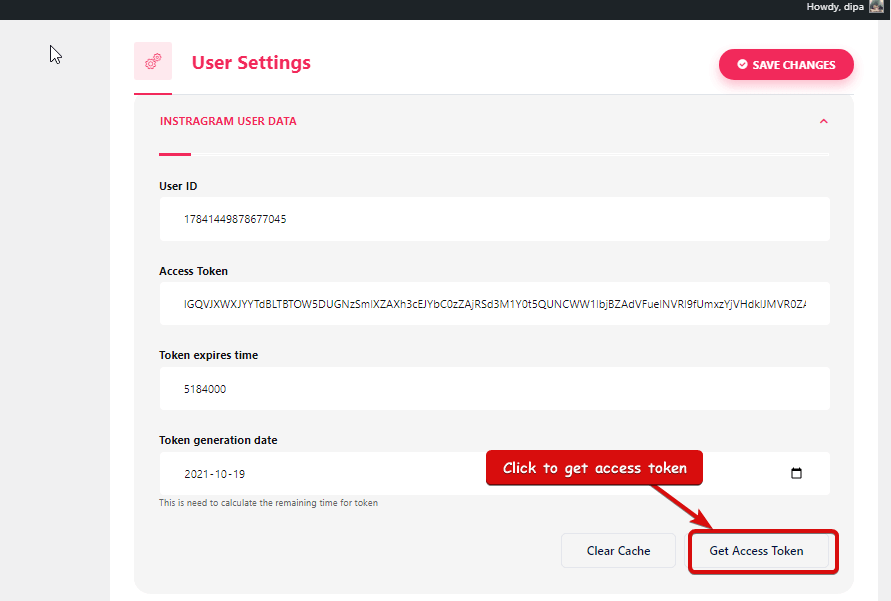
- Passaggio => 1: Vai a Elementskit=> Dati utente=> Fare clic su Dati utente di Instagram per espandere-> fare clic su Ottieni token di accesso.
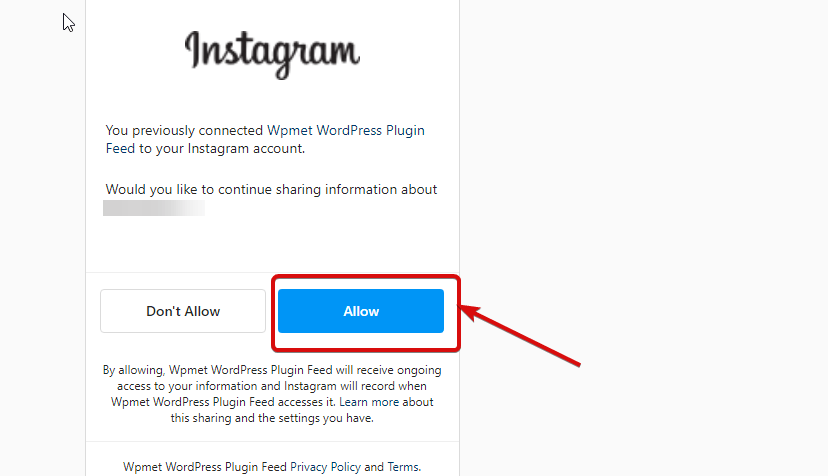
- Passaggio => 2: Inserisci il tuo account Instagram Credenziali e fare clic su Login. Oppure puoi accedere con il tuo Account Facebook. Una volta richiesta l'autorizzazione, fare clic su Consenti.
- Passaggio => 3: Ecco il tuo Instagram ID utente, Token di lunga durata, il token scade e il token viene generato. copia loro.
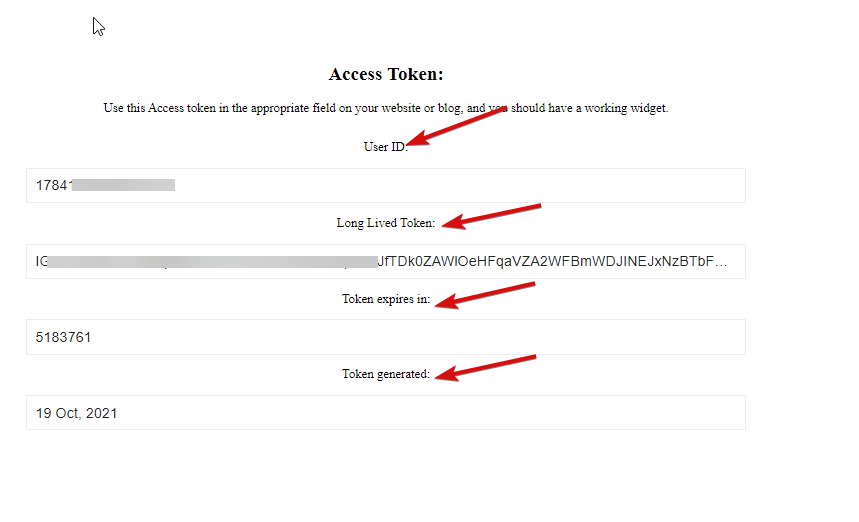
- Passaggio => 4: Allora vai a Dati utente di Instagram E impasto IL ID utente, Long Token vissuto, Il token scade tra e i valori generati dal token.
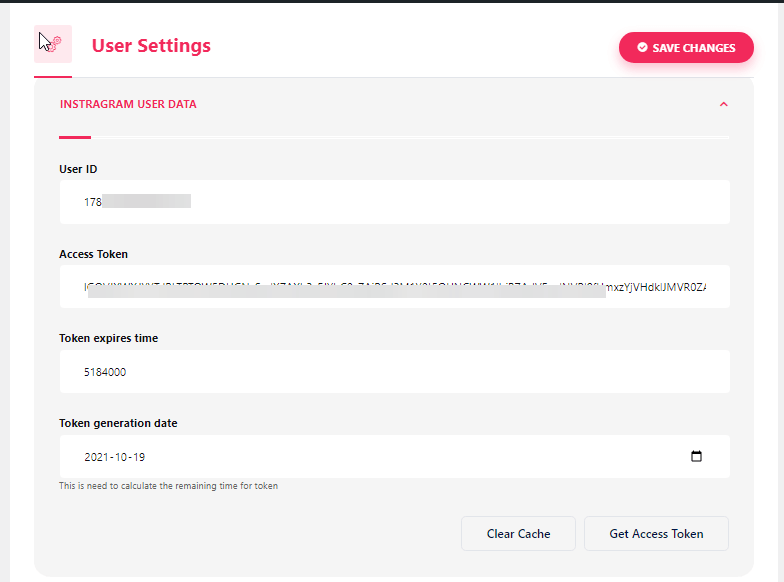
Nota: è necessario sincronizzare i dati prima che il token scada.
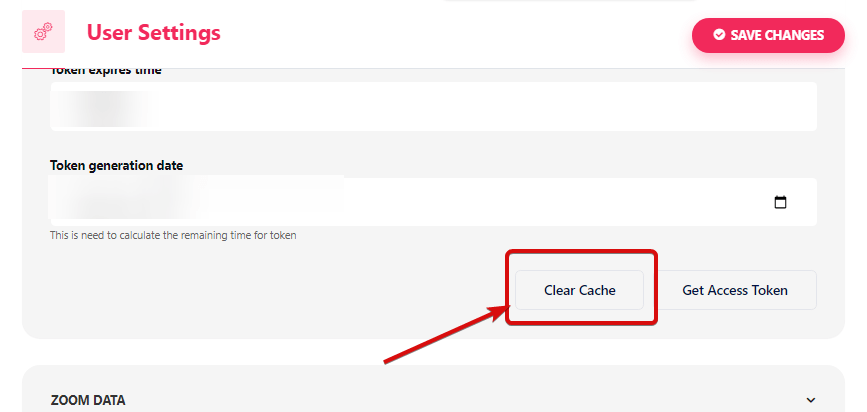
- In caso di problemi relativi alla sincronizzazione dei dati, è sufficiente fare clic su Cancella cache.
- Passaggio => 5: Vai a Elementor=> Cerca Alimentazione di Instagram=> Proprio così Trascina e rilascia il campo.
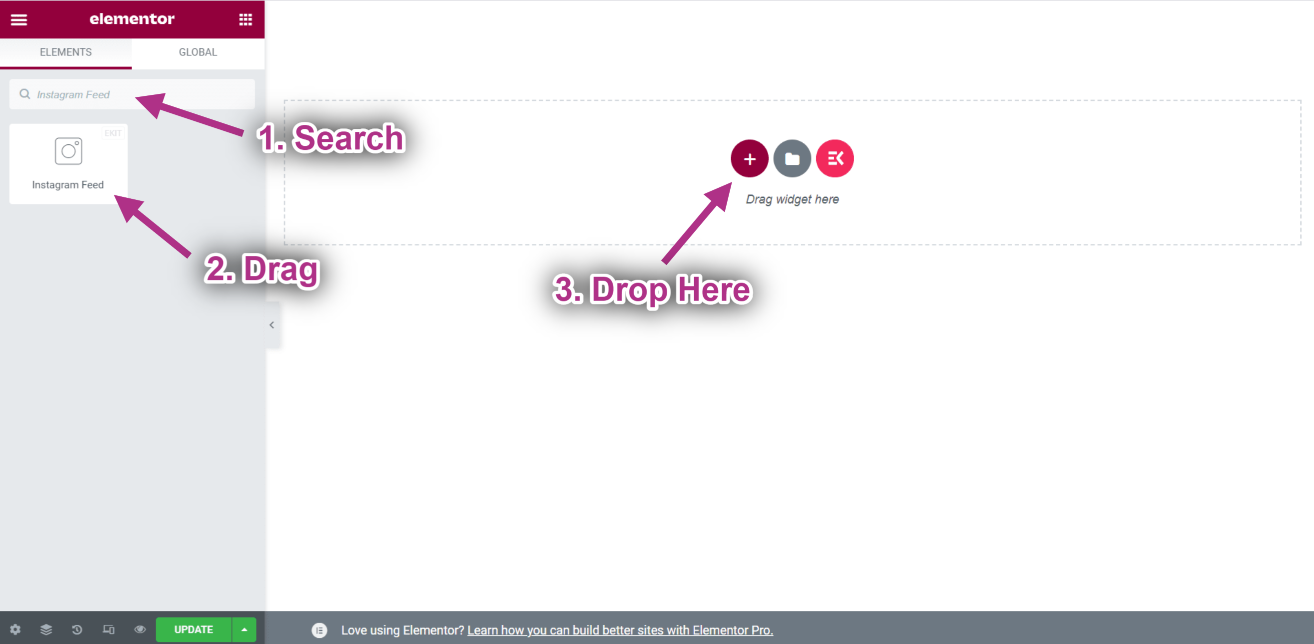
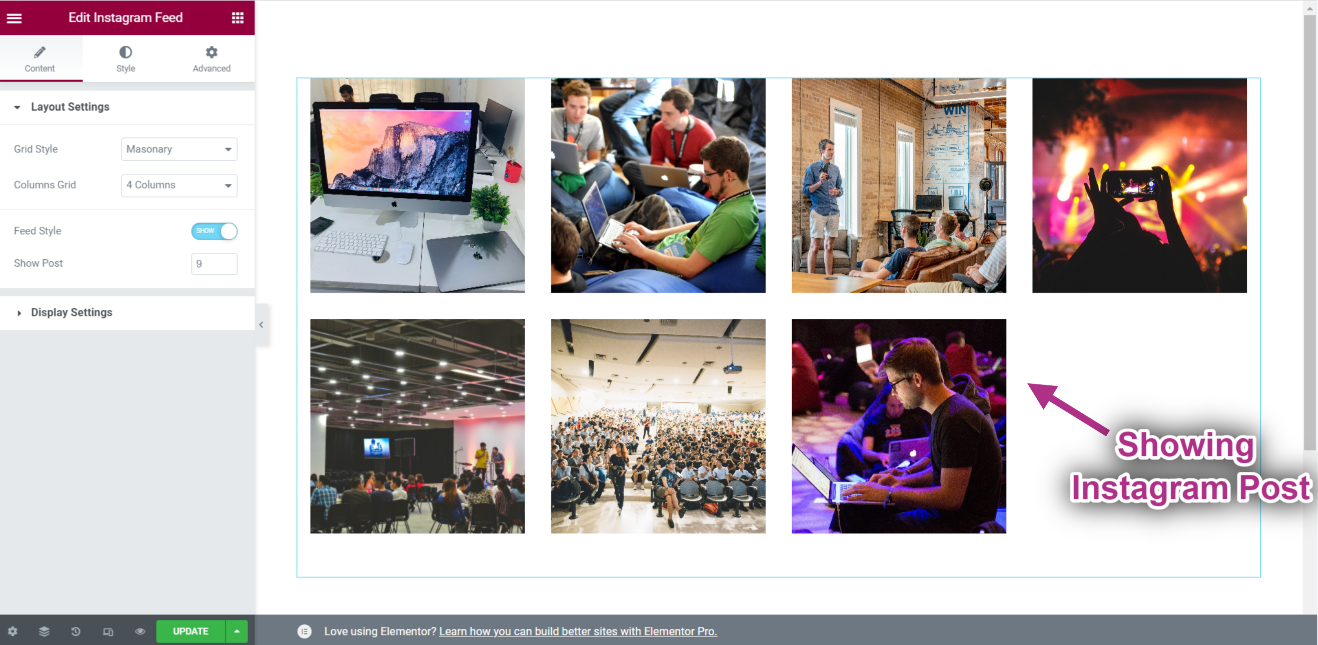
- Ora puoi vedere il tuo post di Instagram sul widget del feed di Instagram.