Want to show social media information on your sites so visitors can easily connect with you, like and follow your profiles? With ElementsKit, you can customize social media icons relevant to your overall website design.
Step 1- Add Social Media Widget #
- Use an existing page or insert a new one and enable the Elementor.
- Use the search box in the widgets sidebar to find the “Social Media” widget.
- Drag and drop the widget.
Step 2- Choose Icon Style #
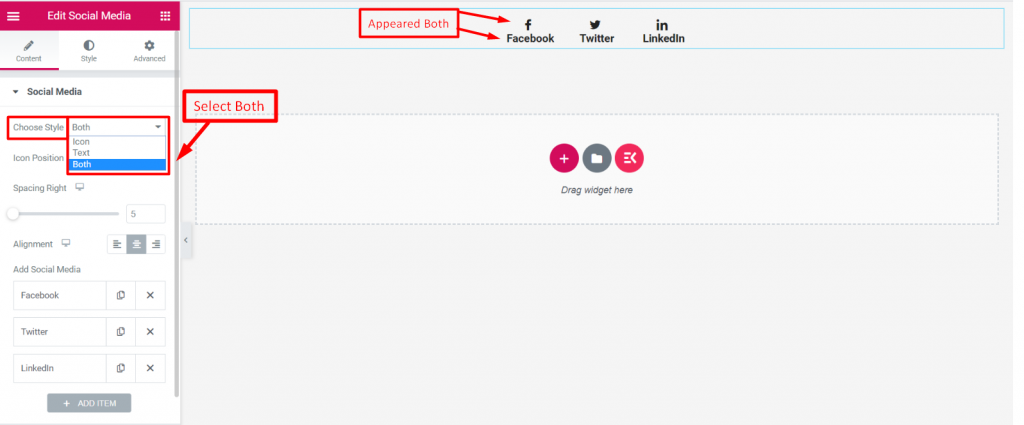
- You can choose icon style between Icon & Text or show both. If the “Both” option is selected, the following two settings will reveal:
- Icon Position: Set icon position before or after text.
- Spacing Left: Set the spacing between the text and the icon.

Step 3- Set Social Media Icon Position #

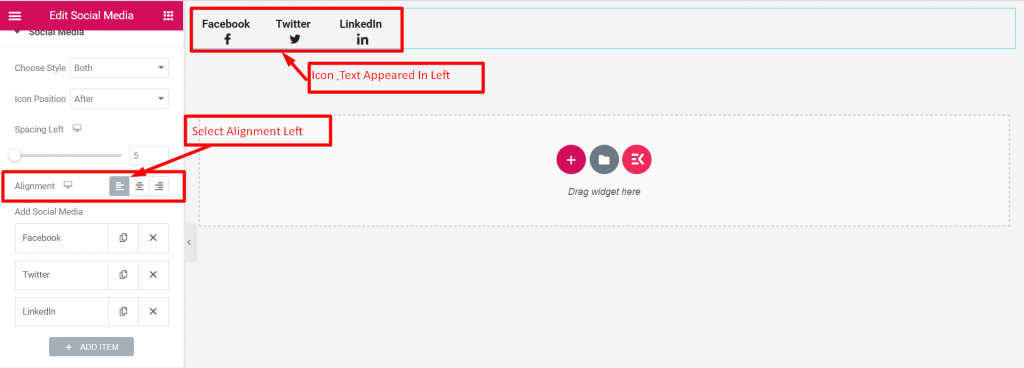
Use the “Alignment” option to define your social icon placements. (Left, Center, Right)
Step 4- Add Social Media Icons #

- This widget automatically loads with three popular social icons: Facebook, Twitter, & Linkedin.
- Keep them or delete them as your wish.
- You can add more social icons using the “+Add Item” button.
Tip: If you want multiple social icons with the same design, you just need to customize one and copy it. Then, modify the icon and label only.
Step 5- Customize Social Media Icons #

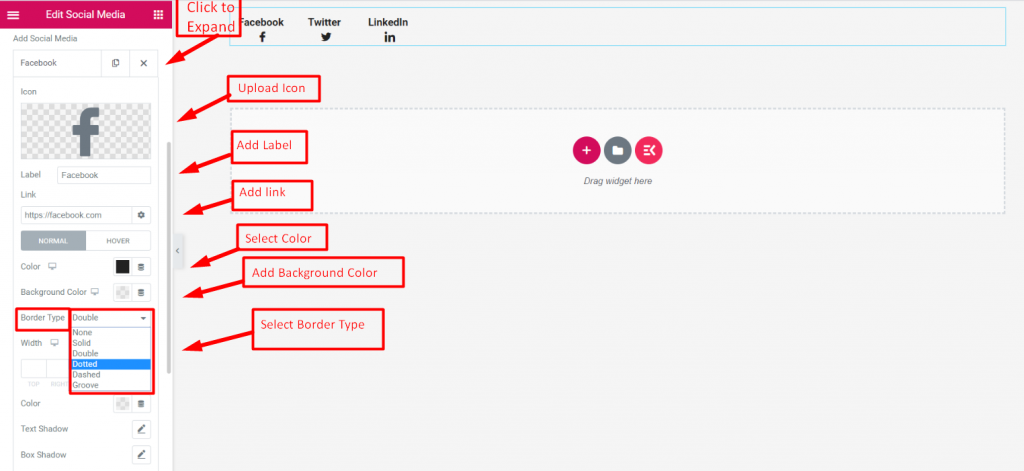
- Click on any social media icons and it will expand with various customizing features.
- Using them, you can add other social media icons.
- Icon: Insert an icon from the icon library or upload an SVG file of your icon.
- Label: Add or edit text for the social icon label.
- Link: Add social media URLs that will follow after clicking on the icon or text. Also, click the setting option it opens up the following settings:
- Check the “Open in new window” box to open the URL on a new browser tab.
- Check the “Add nofollow” box to not pass authority to that social site.
- Use the “Custom Attributes” box to set custom attributes for the link elements.
Next, the following features are available for both Normal and Hover modes.
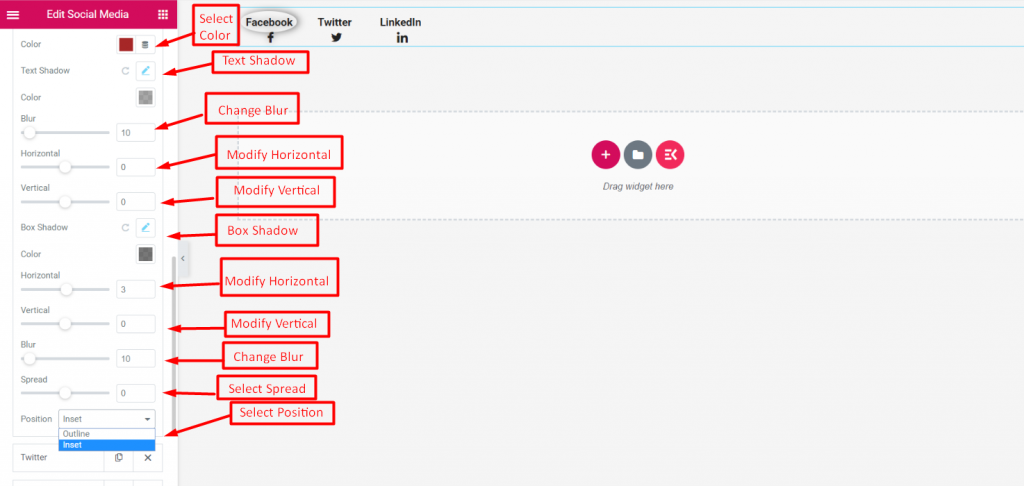
- Color: Choose a color for the social icon & text.
- Background Color: Select the color for social icon & text background.
- Border Type: Set a border for the social icon & text. If you select a border other than the “Default” option, you will see the next two settings:
- Width: Define the width of the border.
- Color: Select a color for the border.
- Text Shadow: Add & control text shadow with settings like Color, Blur, Horizontal, and Vertical.
- Box Shadow: Give shadow to the box and apply controlling features like Color, Blur, Horizontal, Vertical, Spread, and position.
You’re done with all the feature settings. Now, you know to display your social media profiles on Elementor’s website. It will help you to boost your overall marketing outcome.


