One page scroll enables you to create a single-page layout and let you scroll the entire page at a time. The one-page layout contains all the sections that typically a website contains like Home, Products/Services, Contact Us, About Us, etc.
You can shift to each of these sections by the scroller on the page. With the ElementsKit, you can set up one page scroll for Elementor in your WordPress site. Besides, ElementsKit also offers one page scroll website templates that are fully responsive.
Without further ado, let’s take a look at how to set up one page scroll for Elementor.
Get Started #
You can easily create one page scroll website by following the following steps:
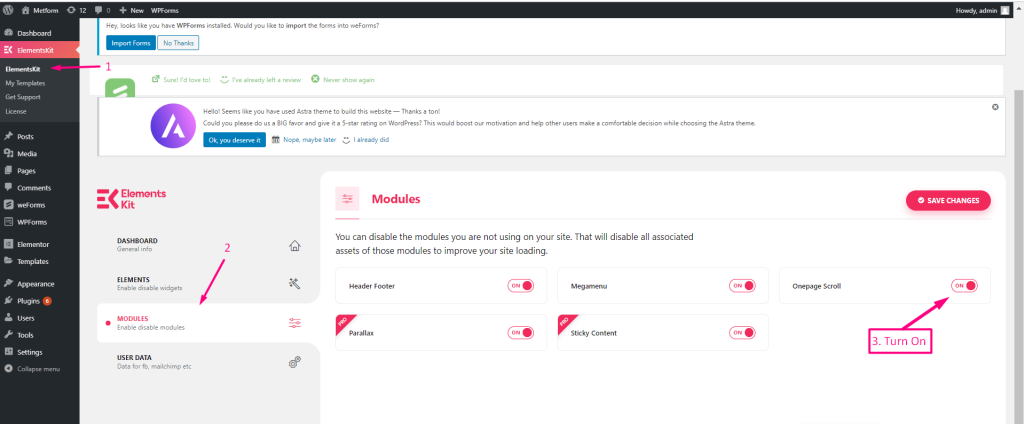
Step 1: Enable one page scroll module to create single page scrolling website. #
Make sure One Page Scroll module is ON from ElementsKit → MODULES
Step 2: Customize One Page Scroll #
- Click on the Setting Icon for adding one page scroll.
- Enable One Page Scroll

3. Select your Navigation Style from the Drop-Down to add one page scroll website.

- Select Navigation Position for your single page scrolling website.
- Set Offset
- Set Navigation Spacing
- Select Color
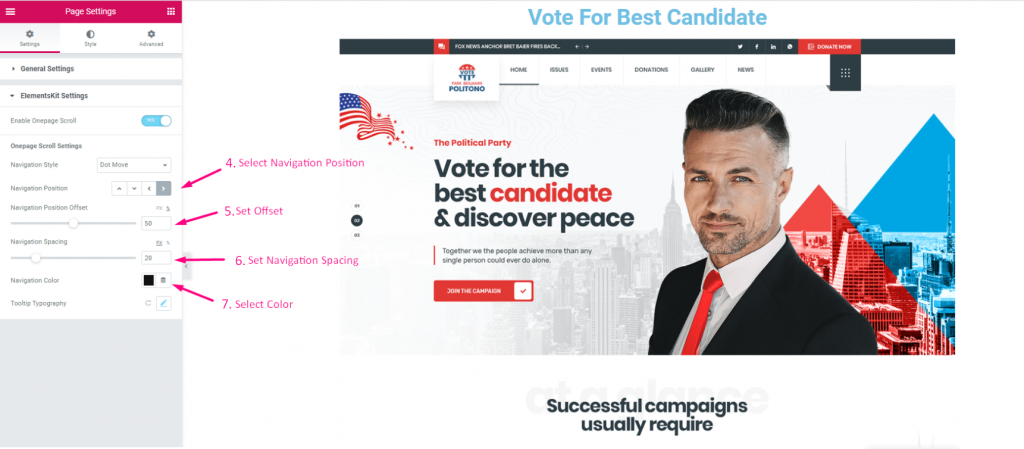
Showing the One Page Scrolling Options. Now you can Scroll by just Clicking the Dot option

Step 3: Customize the Tooltip Typography #
- Click on the Icon to Expand
- Select Family from the Drop-Down

- Set Up Size
- Select Weight

- Select Transform
- Select Style
- Select Decoration
- Set Line-Height
- Select Letter-Spacing

This is how you can create a one page scroll for Elementor with ElementsKit easily and smoothly. Setting up a one page scroll improves the user experience as well. Besides, you will find one page scroll WordPress theme through which you can create a responsive single page scrolling website.
Get ElementsKit now 👇


