WordPress users may need a mouse cursor module to enhance the user experience on their website. ElementsKit has brought a module for you named Mouse Cursor. It will help you to add visual effects and texts or change its shape. Different cursor patterns make the website more engaging and interactive for visitors.
Using Mouse Cursor Module #
Let’s learn how our Mouse Cursor works. Before that, don’t forget to install ElemenstKit Pro on your WordPress dashboard.
STEP-1 #
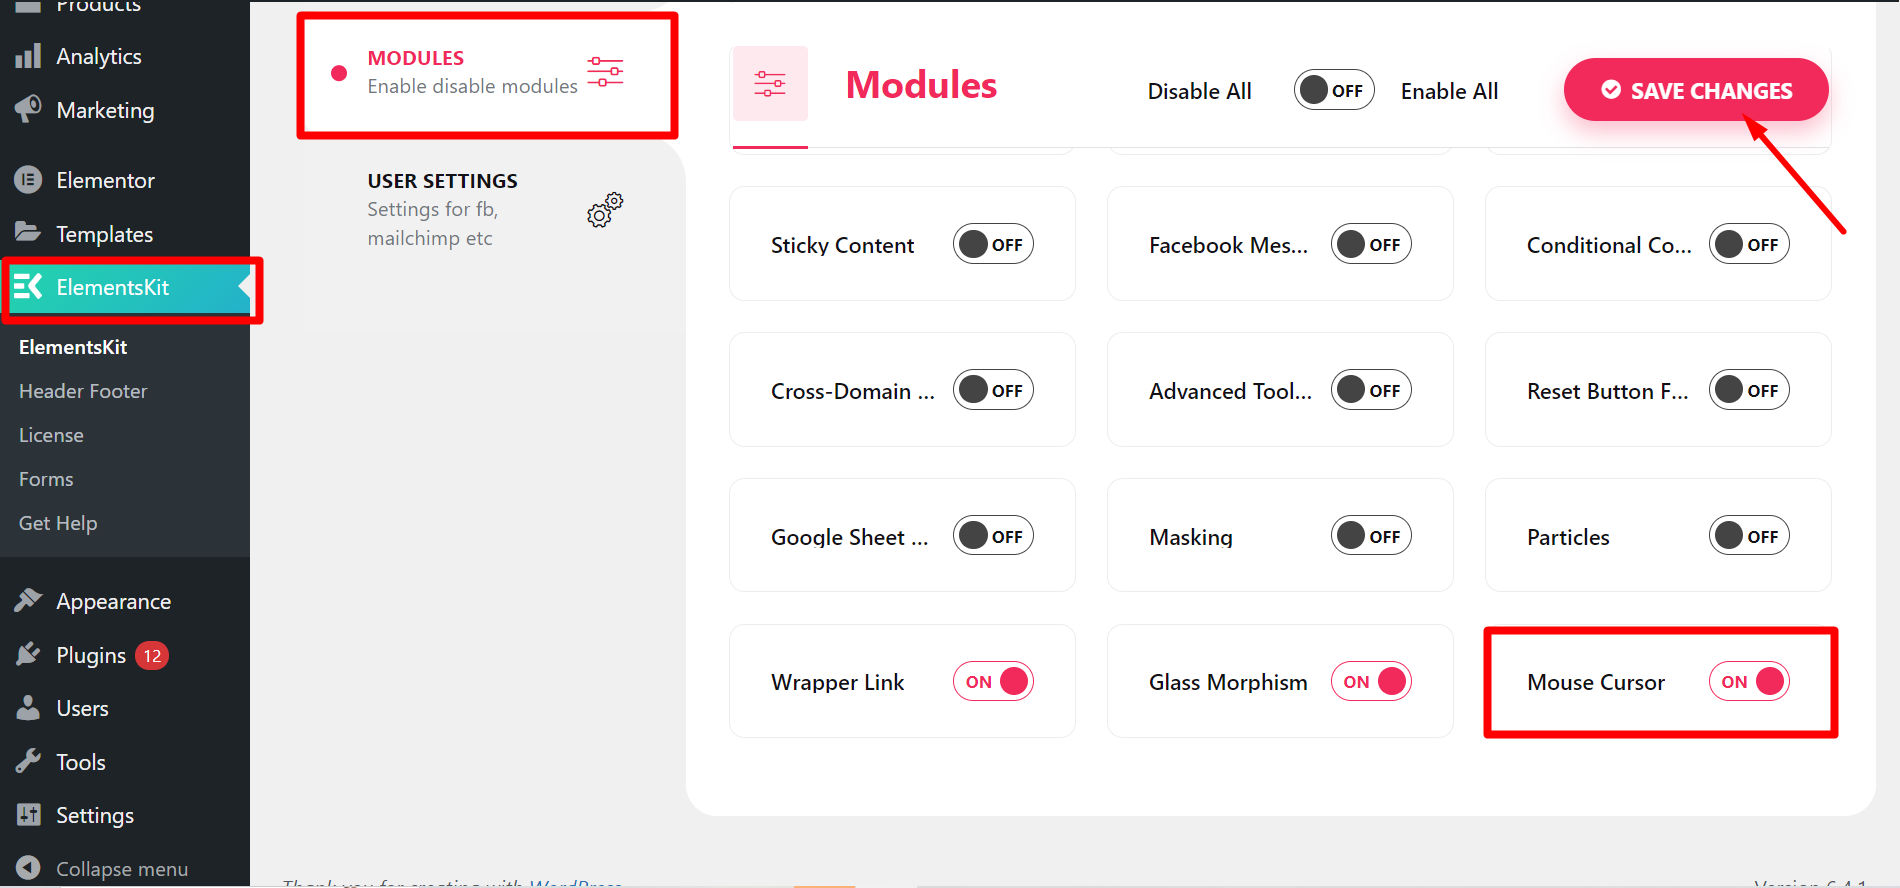
Go to ElementsKit from your WordPress dashboard -> Move to Modules -> Find Mouse Cursor module and turn it ON -> Click Save Changes
STEP-2 #
Open any page or post where you want to apply the mouse cursor and start editing with Elementor.
Now,
- Click a section where you want to use the mouse cursor
- Go to Advanced
- Find ElementsKit Mouse Cursor
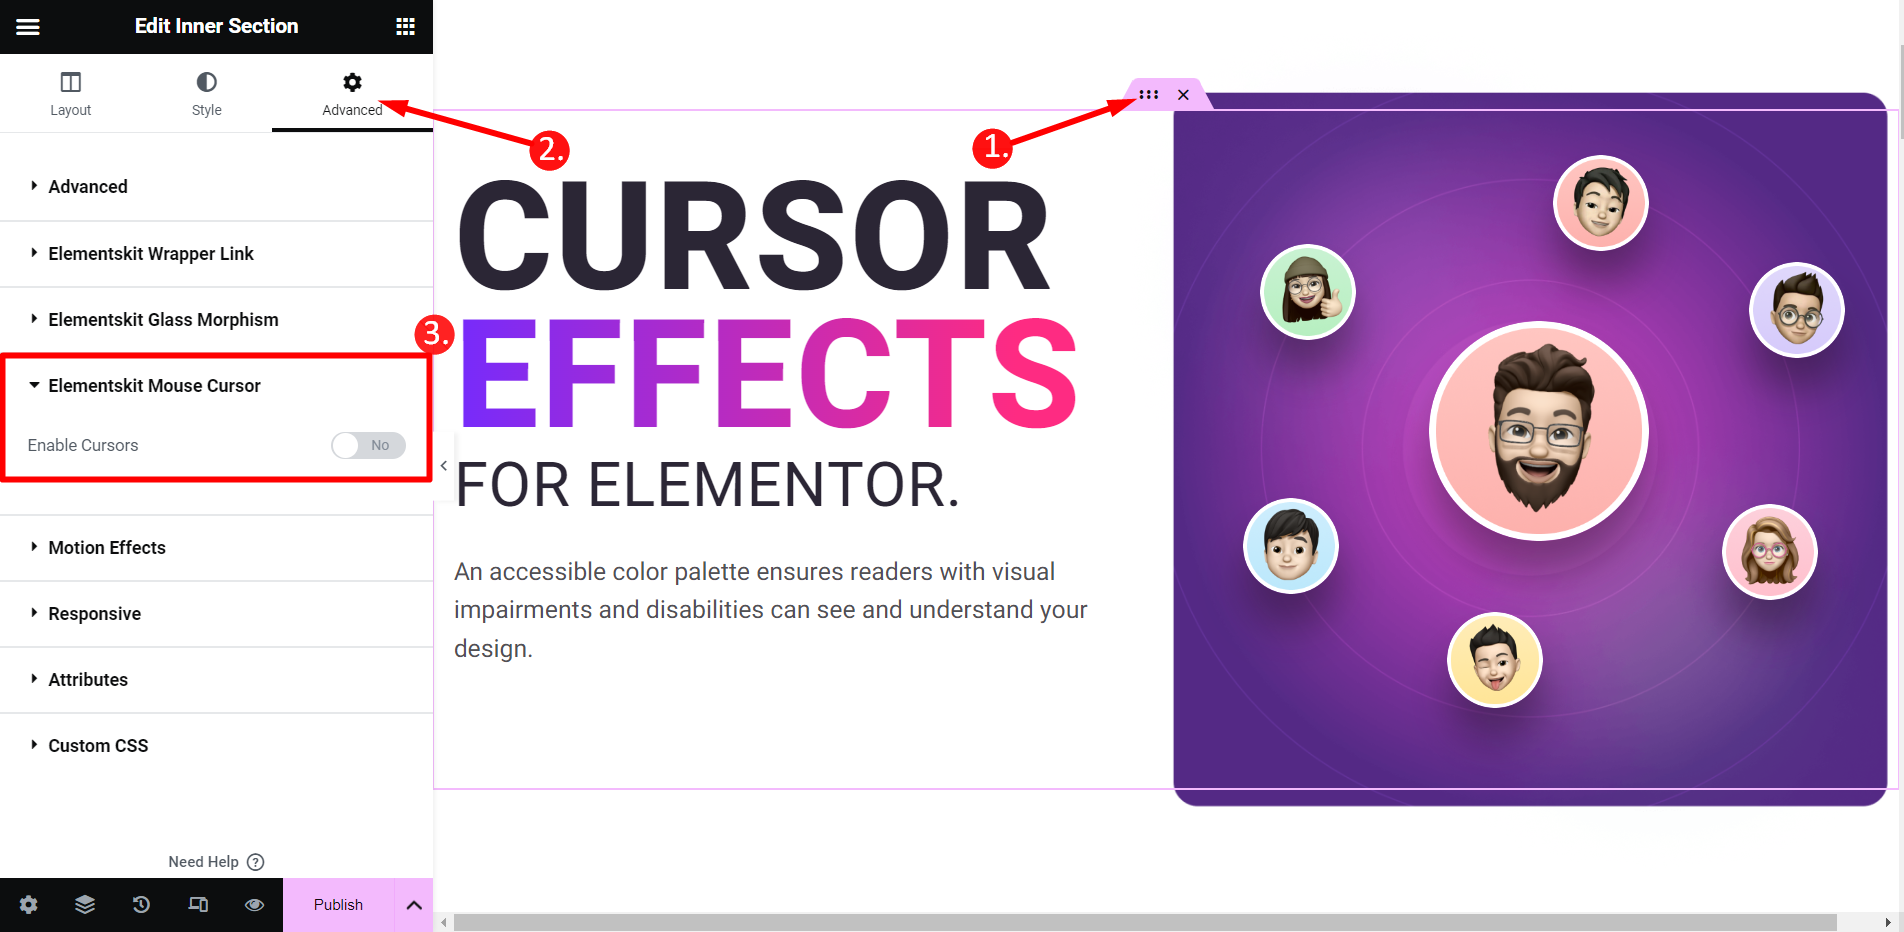
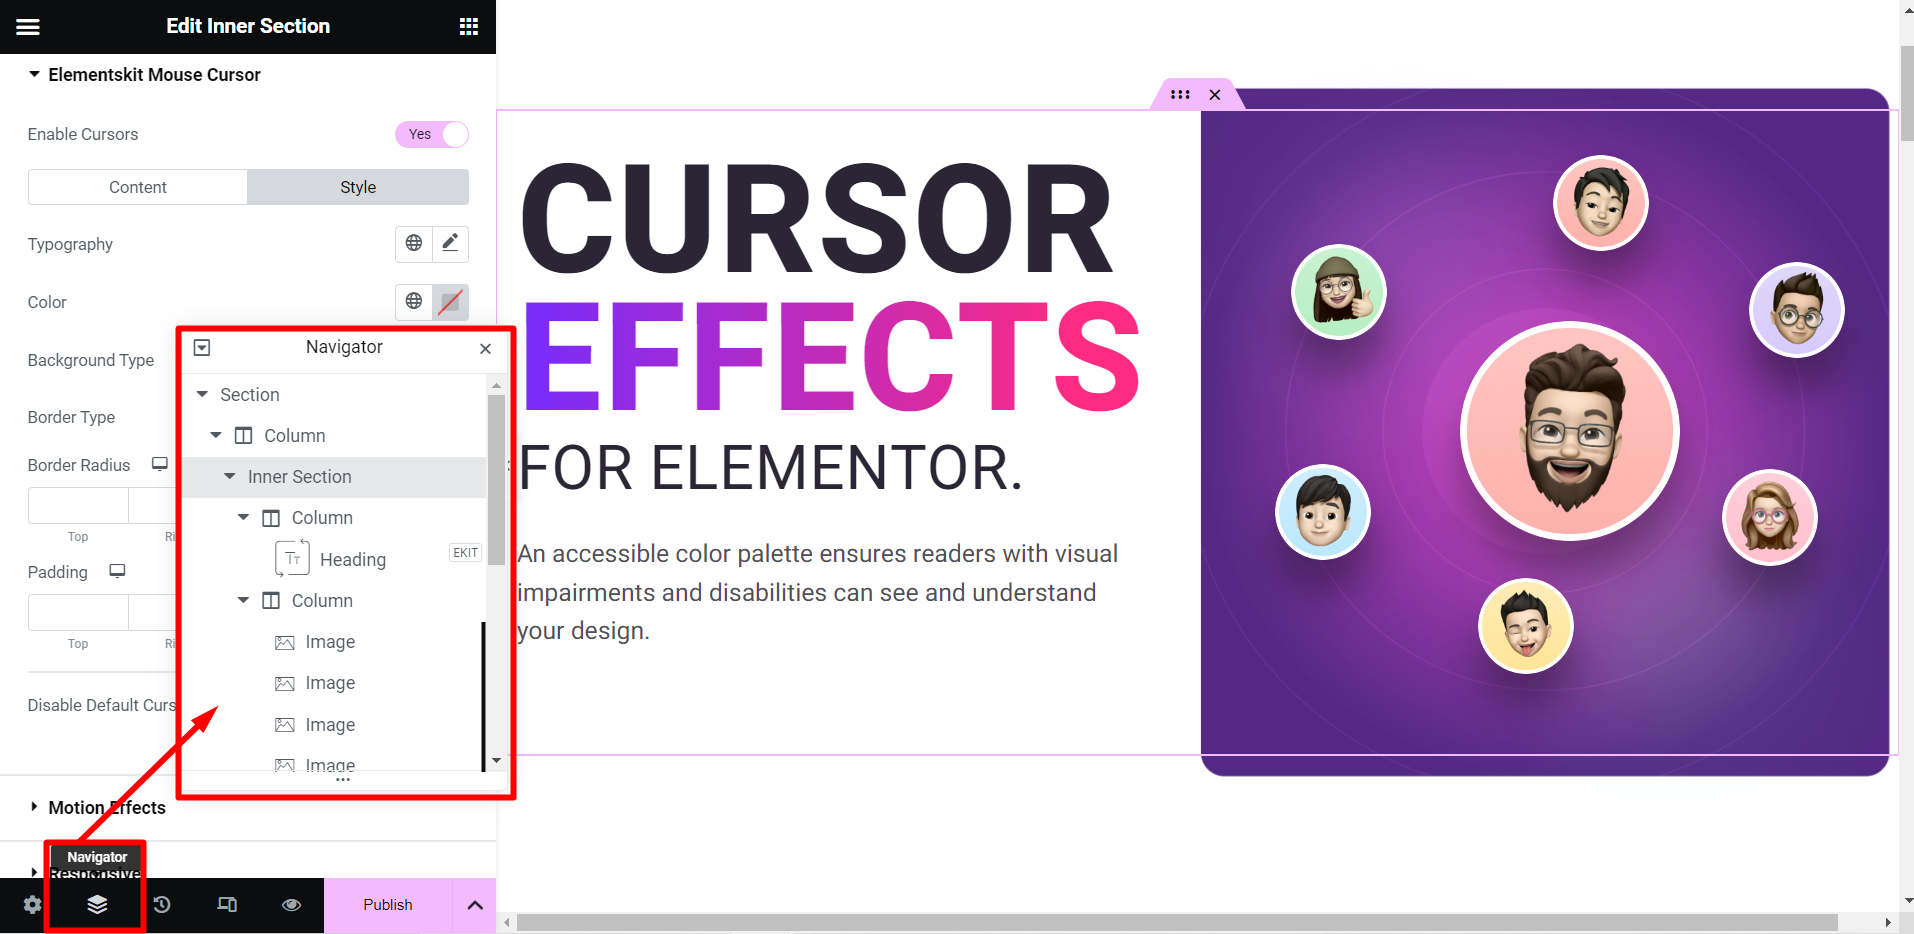
If you expand the ElementsKit Mouse Cursor you have to enable the button to Yes.
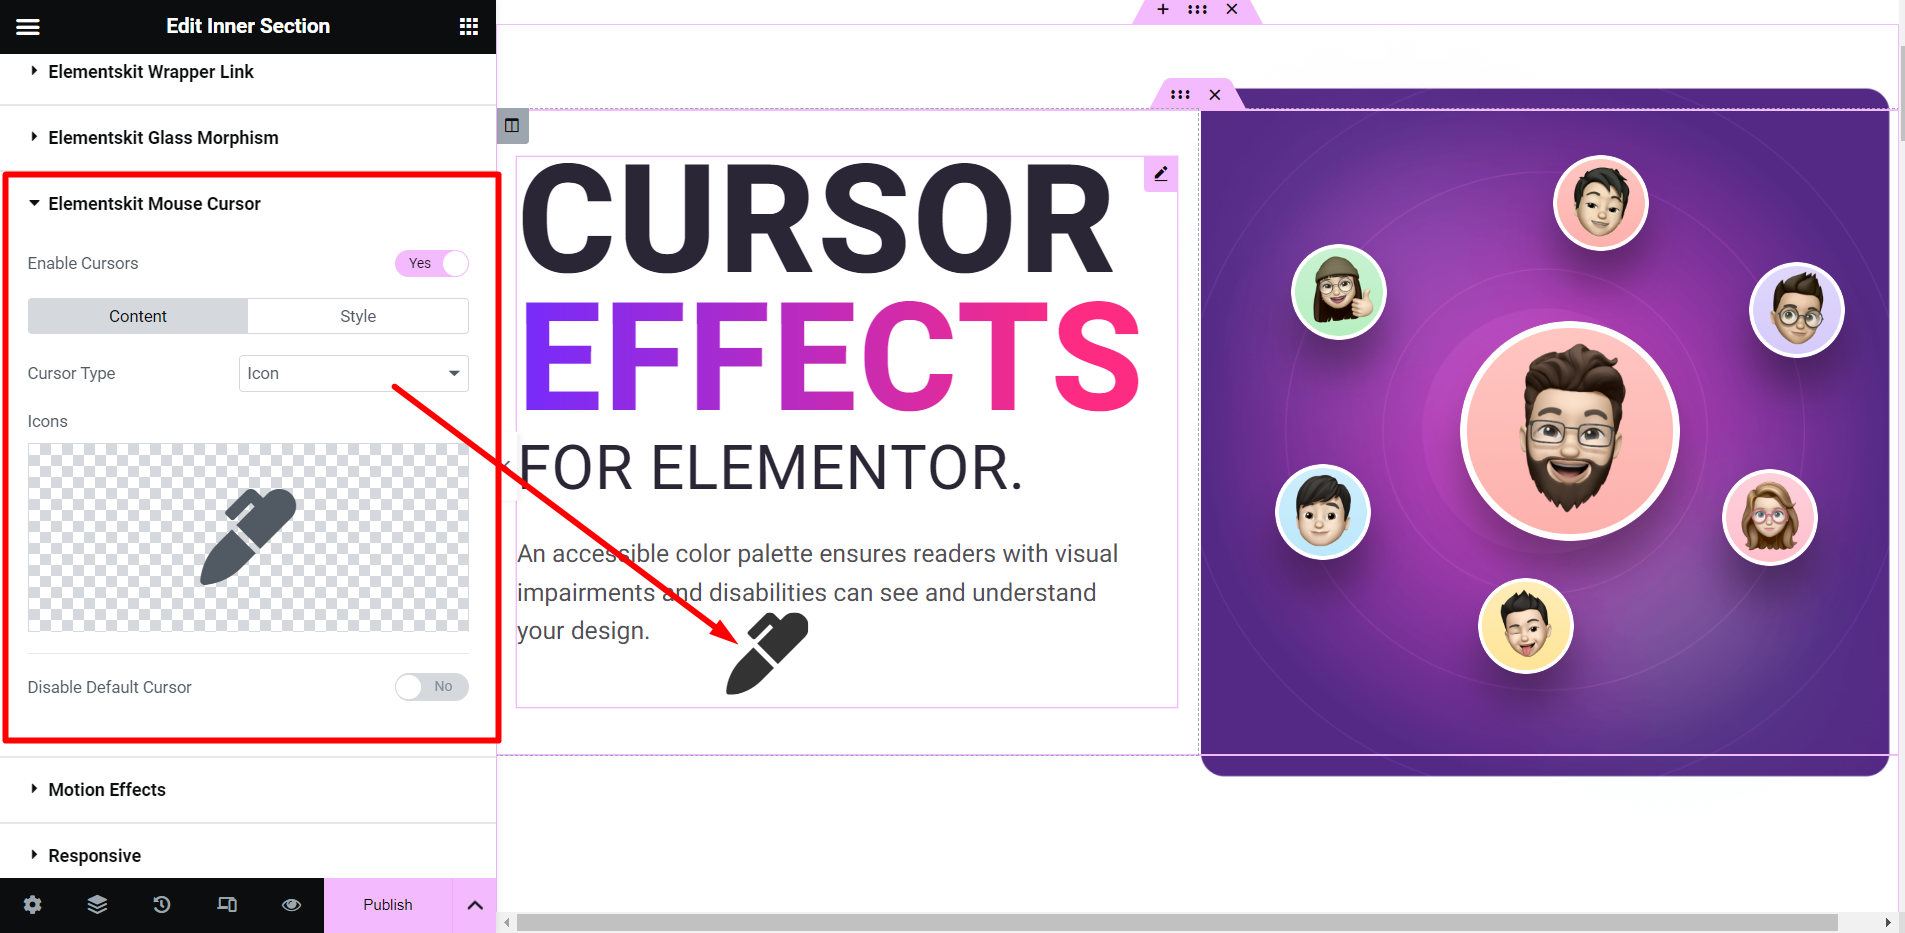
In the Content part, you can customize –
- Cursor Type – You can keep the cursor type Text, Image, or Icon.
- Text Label/Image/Icon – Depending on the cursor type you choose, this option will appear here.
Disable Default Cursor – If you want, you can disable the default cursor using this button.
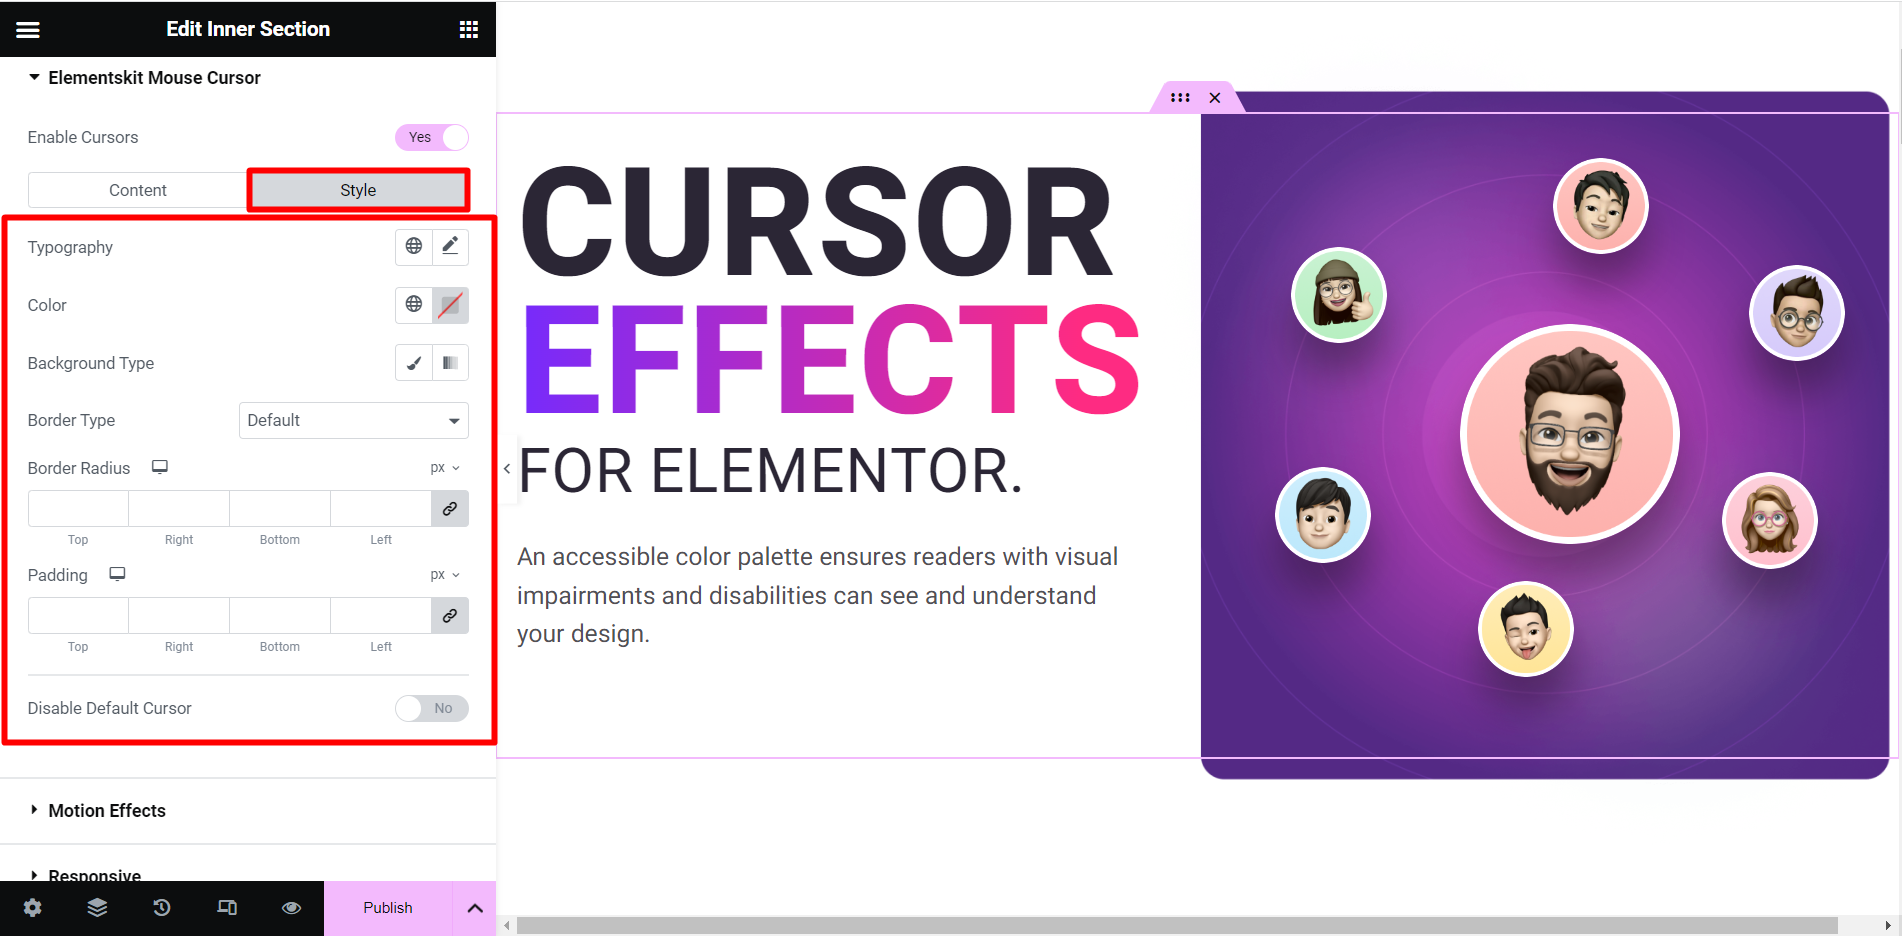
In the Style part, you can find many styling options to style a cursor. For example, you can change typography, color, border type, border radius, padding, and so on. Based on the cursor type you have chosen, you will get these options here.
However, you can use a nice-looking mouse cursor for any section, column, image, etc. Just click the Navigator button and find in which area you want to customize the mouse cursor.
STEP-3: Check the Output #
Here is our output, have a look at the creative mouse cursors we have made ✌️
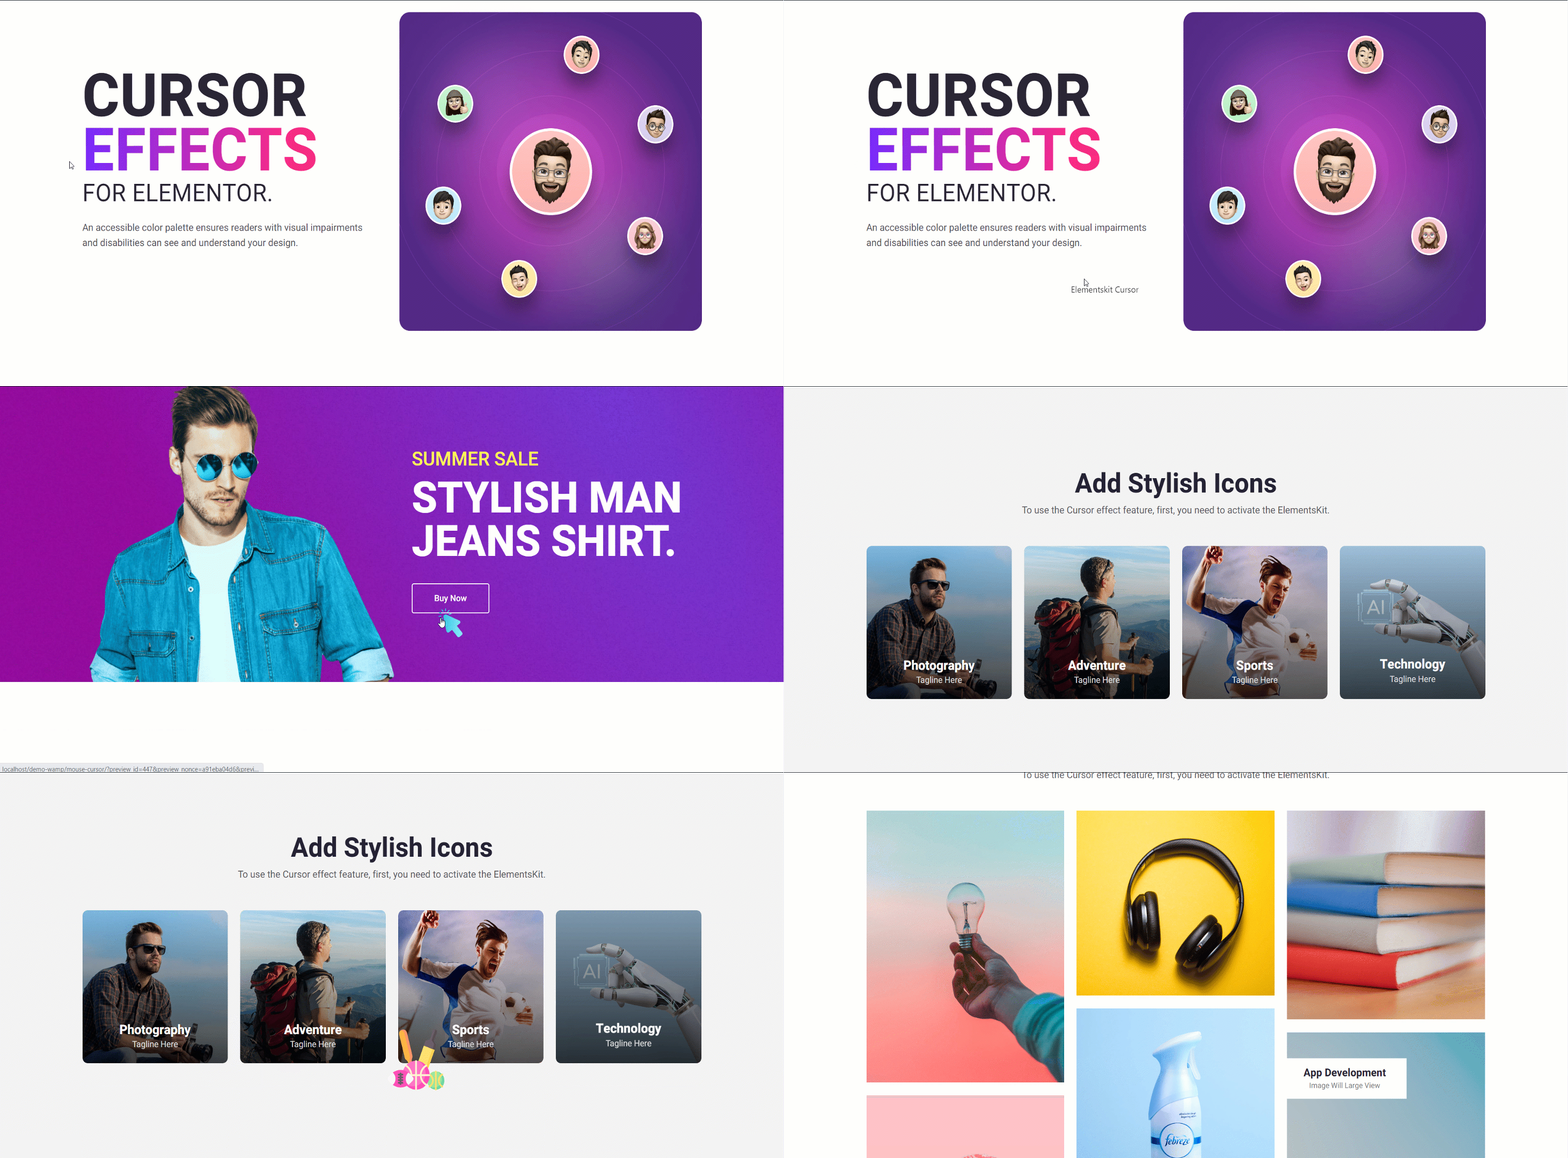
Isn’t it nice and easy? Now you can also customize the appearance of the mouse cursor quickly and grab viewers’ attention.


