A tab widget eases the process of reading a load of texts without scrolling a long page. It is a simple and effective way to hold visitors to stay longer on your website. We are presenting you such an updated tab widget with different look elements. You can style your Elementor Tab widget according to your design needs.
Let’s know how to add tabs to WordPress. The widget-adding process and customization are flexible. Follow the steps below.
How to add tabs to WordPress #
Navigate to: Your Dashboard -> Choose or create a New page -> Edit with ELementsKit -> Search Tab widget
Now, drag and drop the widget and start editing. In the Content section, you will find option to edit Tab –
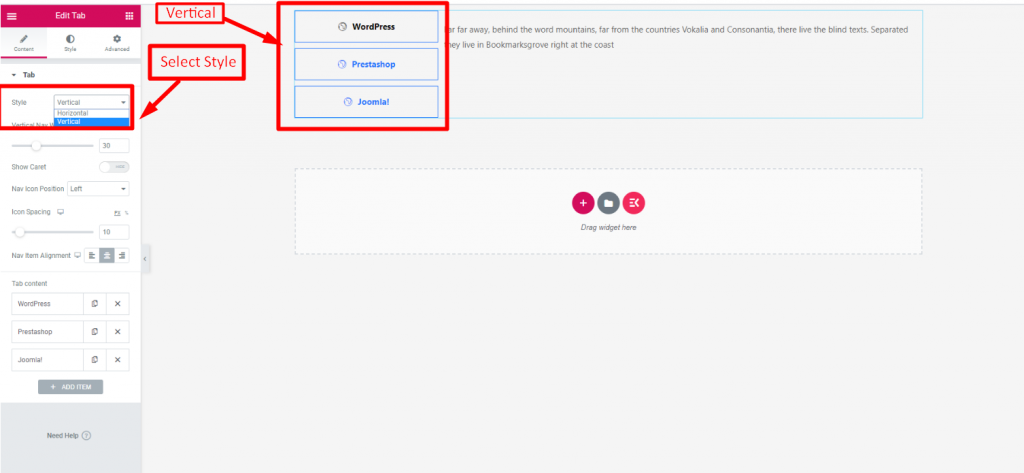
Style #
Select Style Horizontally or Vertically
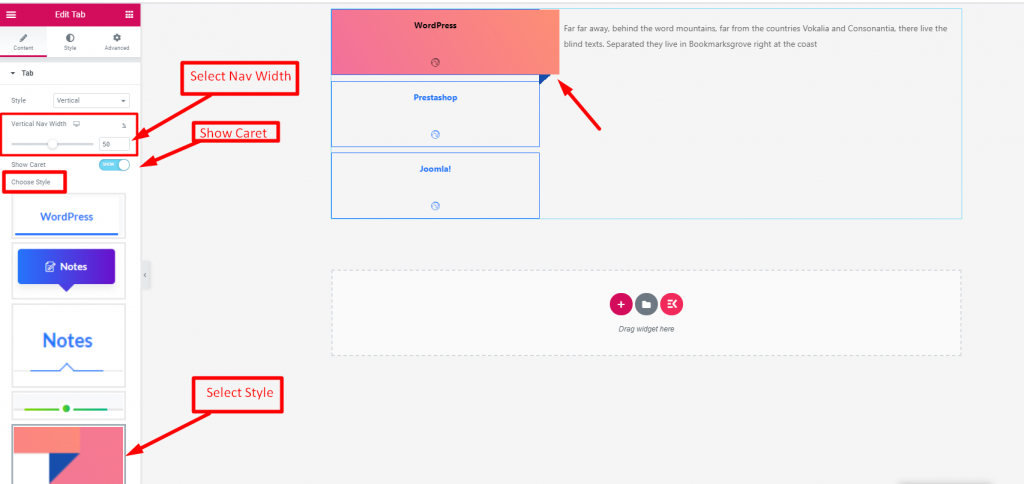
Vertical Nav Width #
- Select Vertical Nav Width
- Enable Show Caret
- Select Style
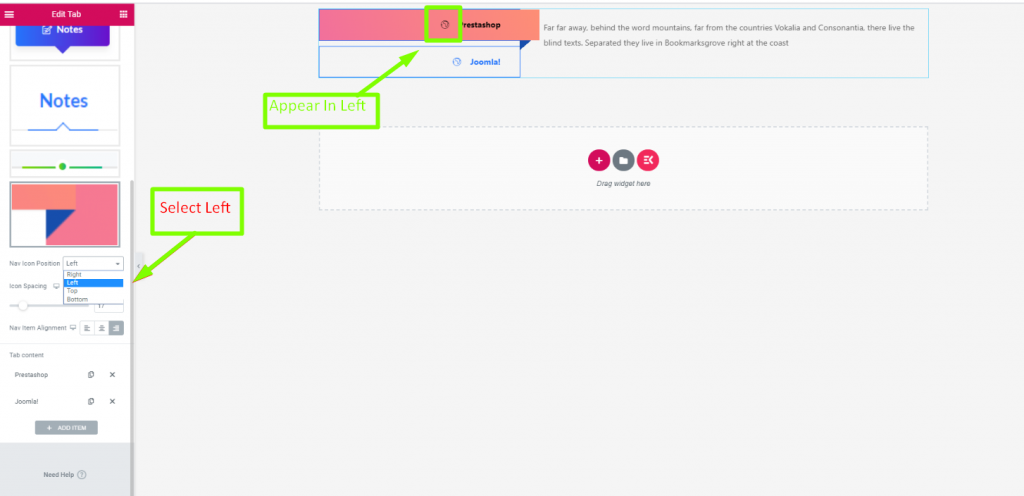
Nav Icon Position #
Select Position: Right, Left, Top or Bottom
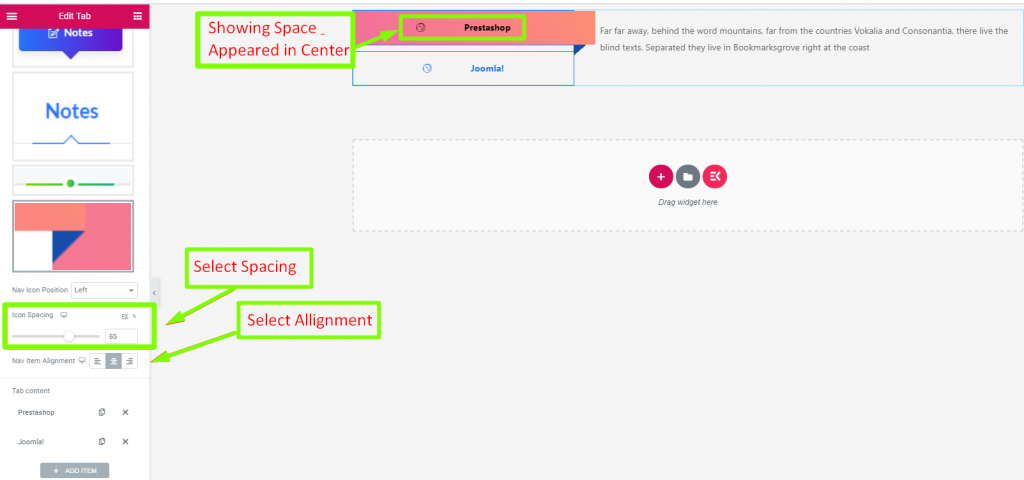
Icon Spacing #
- Provide Spacing
- Select Alignment: Left, Right or Center
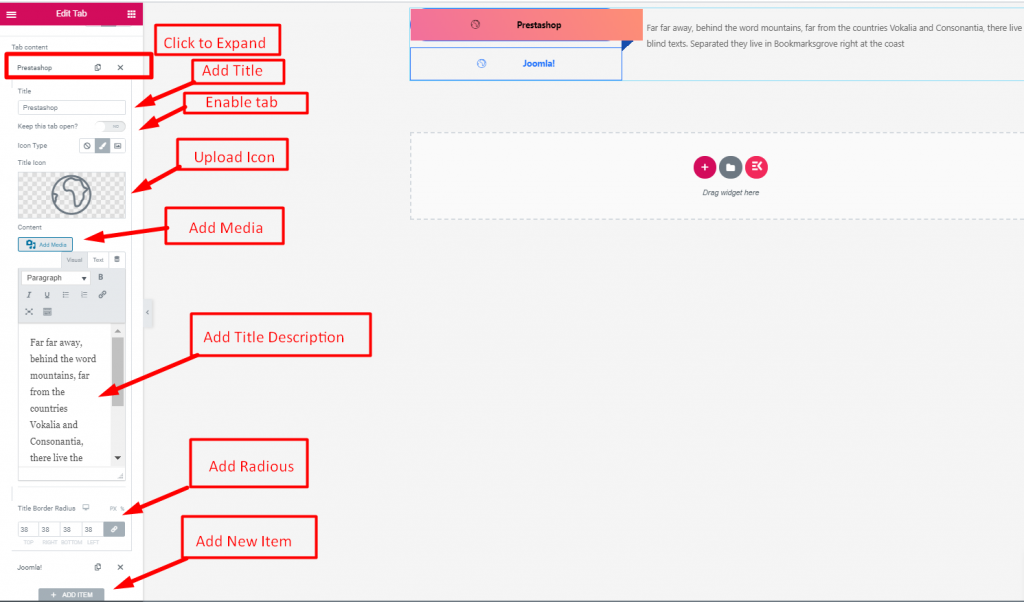
Tab Content #
- Click On the Content to Expand
- Add or Edit Title
- Show or hide Title Description
- Upload Icon
- Add Media
- Add or Edit the Description
- Title Border Radius
- Add More Item
To add any information you want in separate tabs this tab widget is super easy to use and design. So, you can hold your readers with this easy-to-read presentation method. Add a tab widget today to your WordPress site.


