Can’t decide how to showcase or create an elegant layout for your blog post? ElementsKit’s Post grid widget is the perfect solution.
You can create fully responsive 2-grid, 3-grid, and 4-grid layouts using this post-grid widget. Also, you can customize them for the compatibility with Elementor page builder. It will provide greater consistency as well as make it easier to explore your WordPress website by the user.
✨✨ Required Plugins:
👉👉Elementor: Download Elementor
👉👉ElementsKit: Download ElementsKit
3 Steps to Create Post Grid Using ElementsKit #
Step 1 – Select ElementsKit Post Grid #
- Create a new page or open an existing page and open it with Elementor.
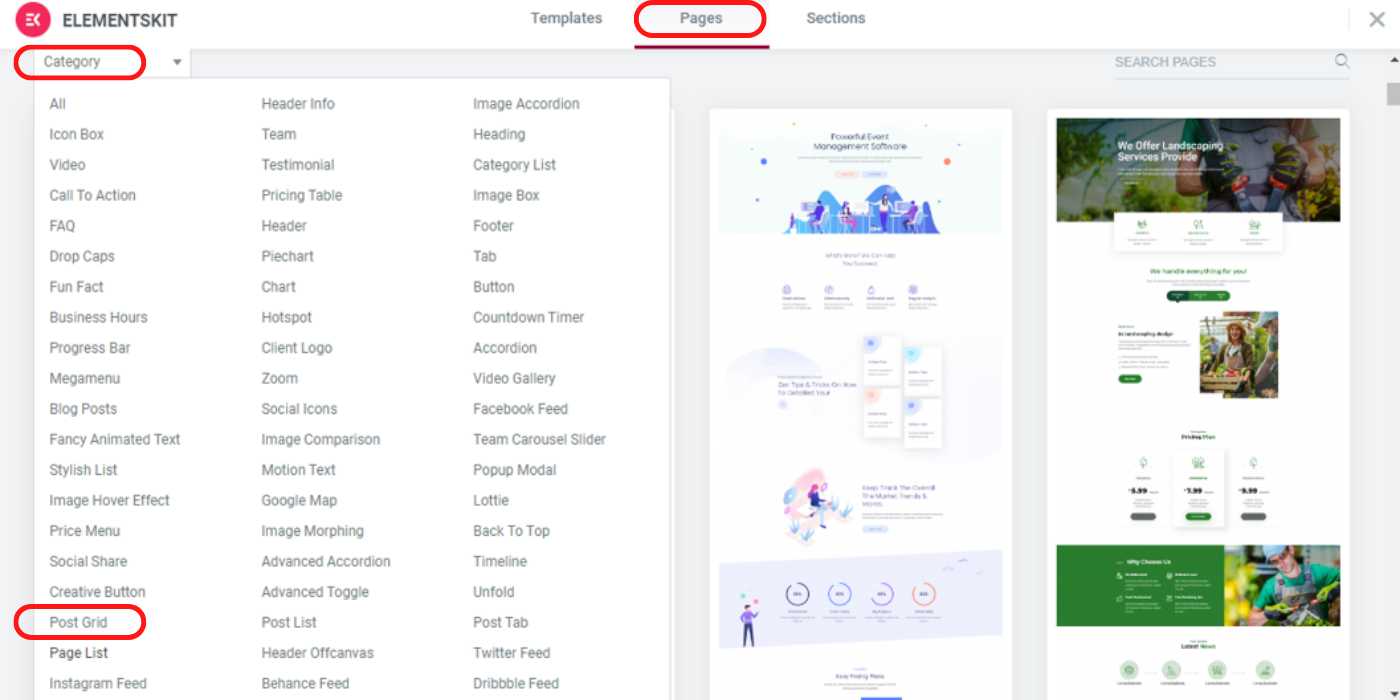
- Select “ElementsKit“.
- Select the “Post Grid” from the category

Step 2 – Insert the Post Grid Style #
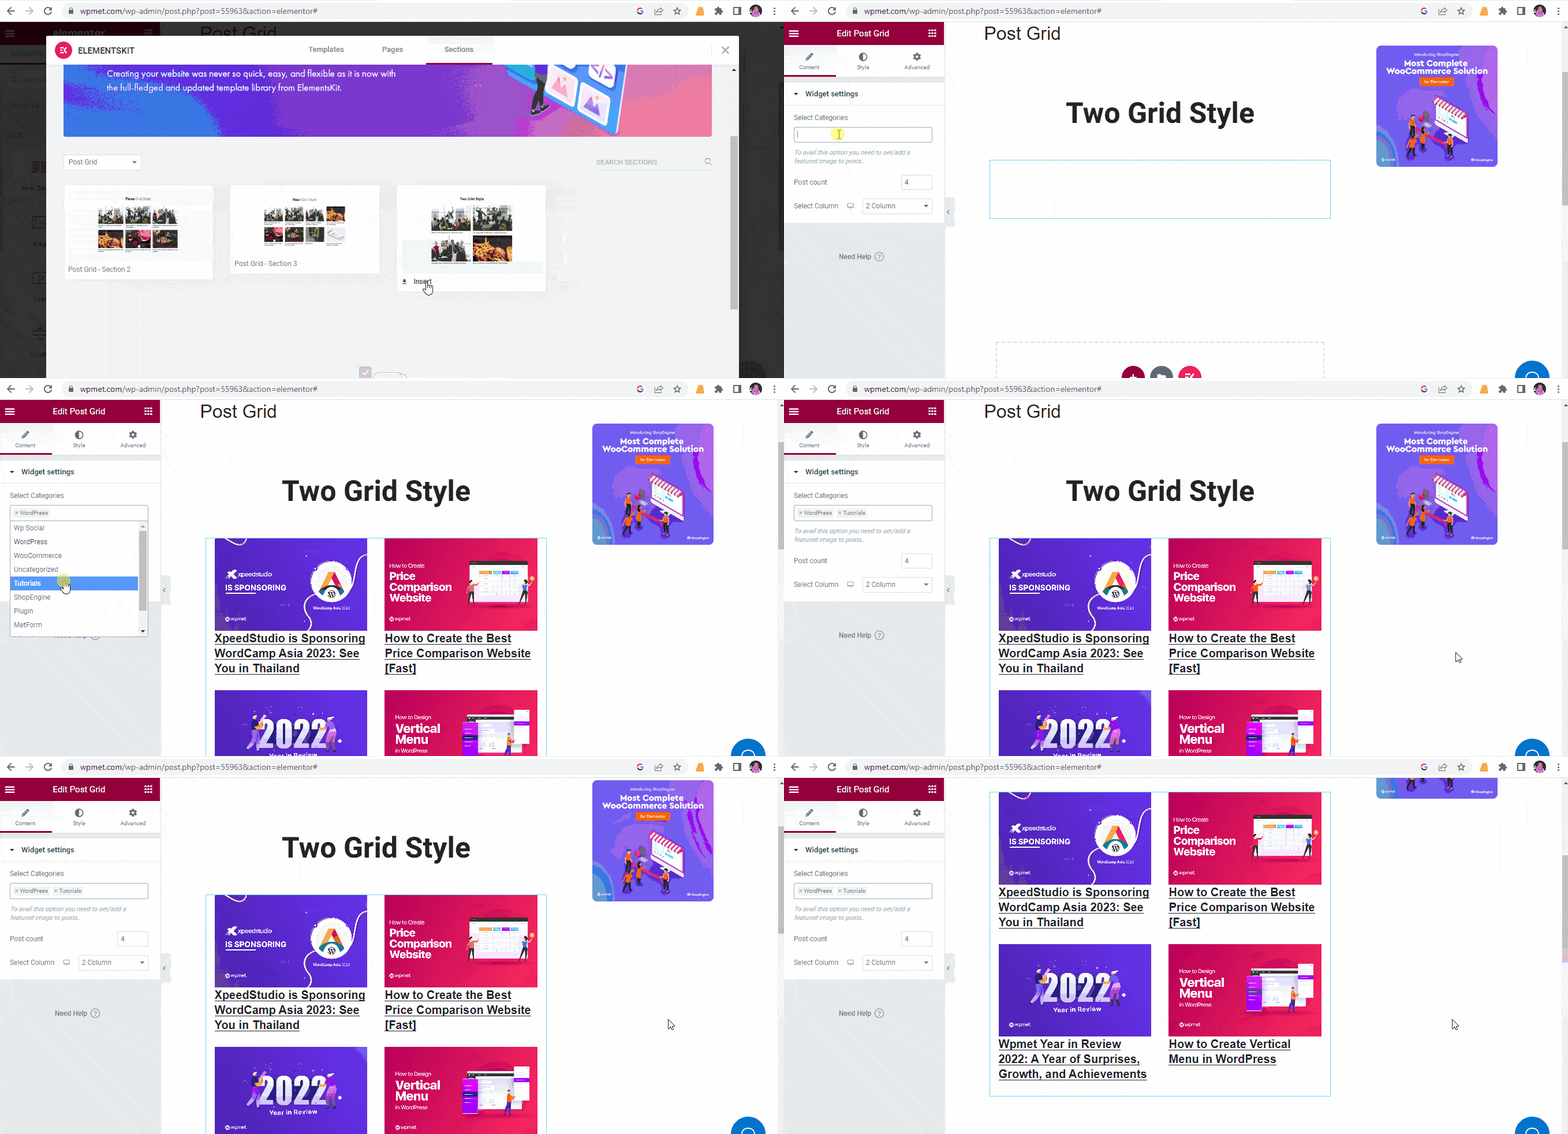
- You will see the 2-grid, 3-grid, and 4-grid style layouts in the section.
- Insert the style you want from these 3 styles. You can also use multiple sections using different layout styles for the same page.
- Select one or multiple “Categories” from the widget settings.

Step 3 – Beautify the Post Grid Layout #
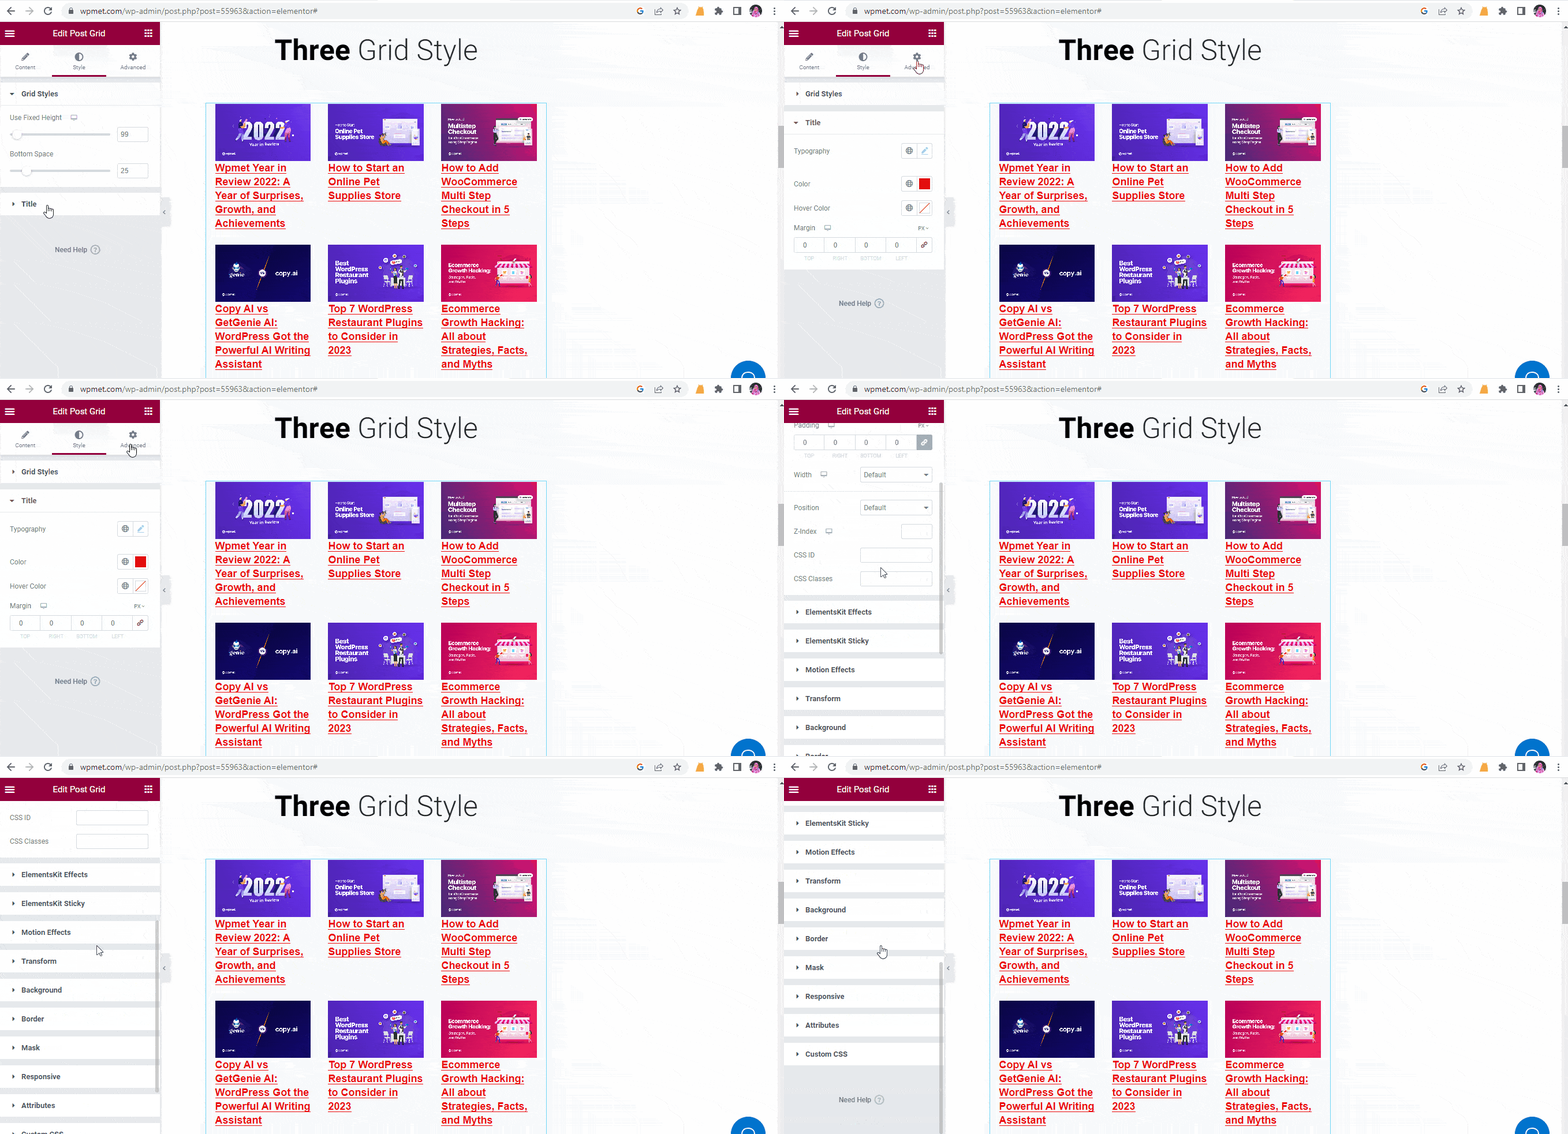
- Set the perfect width and bottom space from the grid “Style” settings
- Reset the title margin to 0 or a positive value to avoid overlap of the featured images and titles
- You can also change the typography, color, and hover color
- You can modify the layout of the grid such as margin, padding, width, motion effects, responsiveness, attributes, custom CSS and many more from the “Advanced” settings.
- Click on “Update”, and you will see your blogs in the selected post grid style.

Hopefully, now you can rearrange and showcase your WordPress website posts using the post grid widget. Overall, it will make your website more elegant, dynamic, and user-friendly.


