


You can design particular sections of different pages with ElementsKit module Particles. This is a new and pro feature of ElementsKit. This cool feature is made professionally and is simple to learn. Now you can style your WordPress site with beautiful backgrounds by customizing each section as you want.
Let’s see how the ElementsKit Particles module works-
Utilizing ElementsKit Particles Module #
Firstly, you must install ElementsKit pro and turn on the Particles module. Afterward, you can start customizing the feature.
Particles Module #
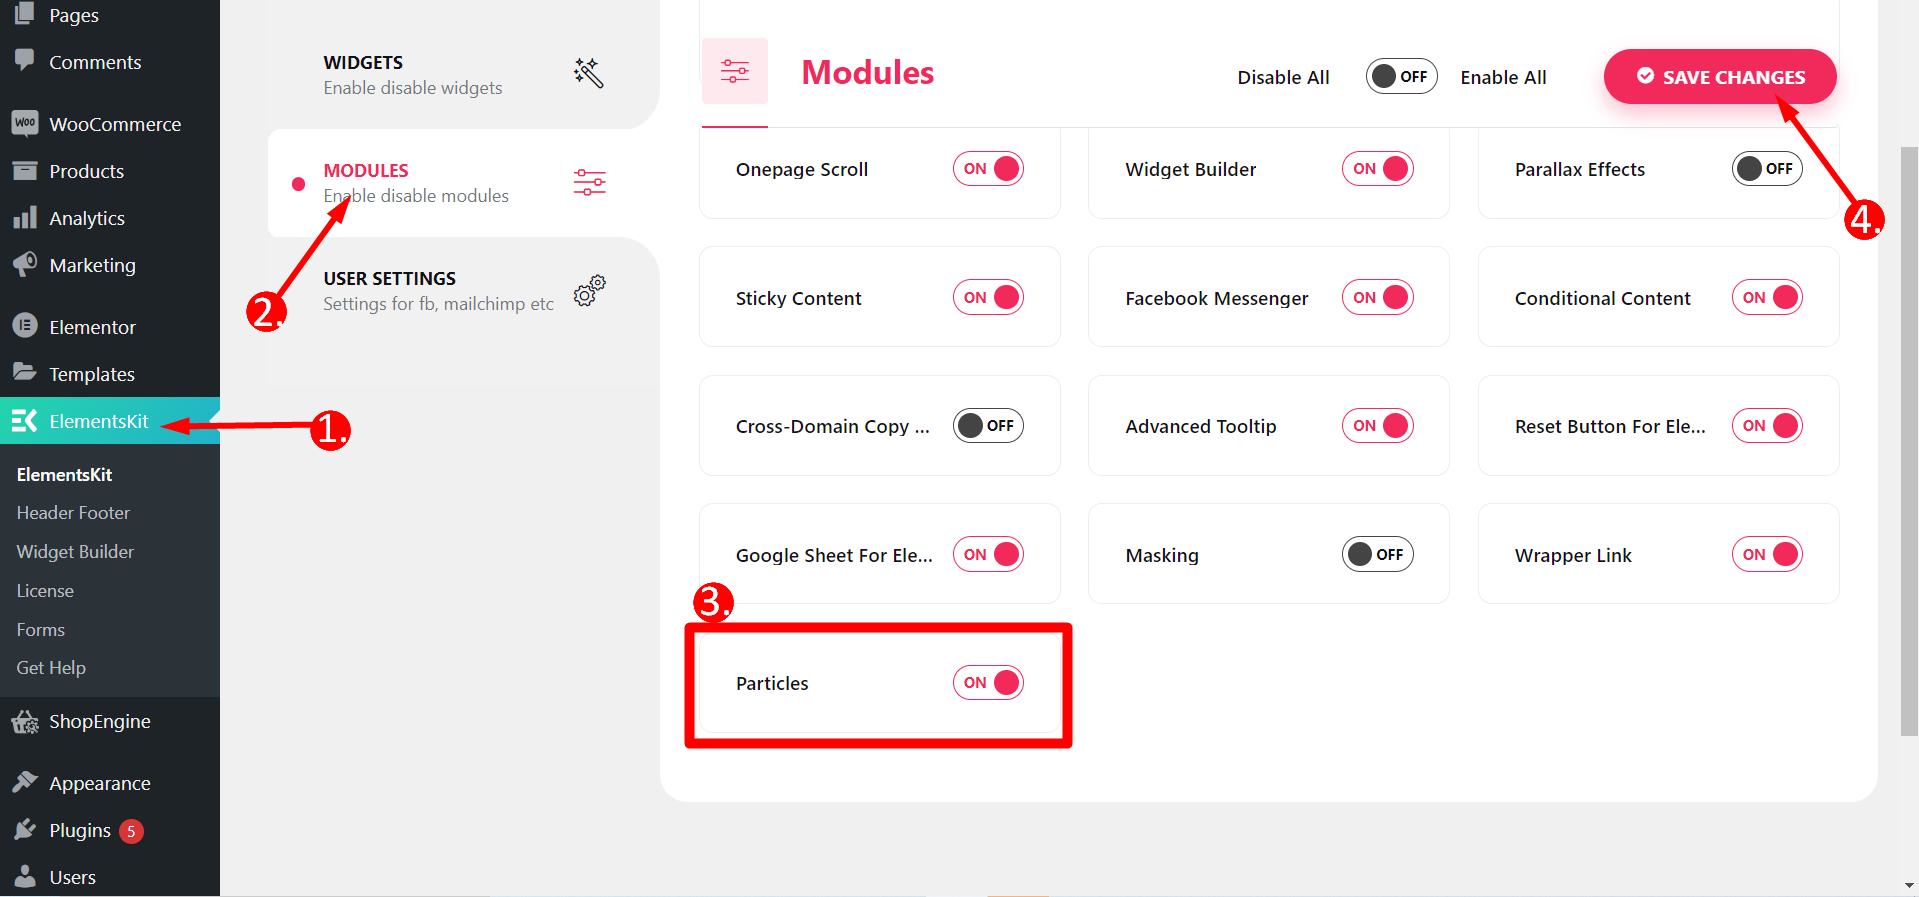
To utilize the feature you have to turn on the module first. Go to your WordPress Dashboard -> 1. Find ElementsKit -> 2. Go to Modules -> 3. Find Particles -> 4. Save Changes
Edit Page with Elementor #
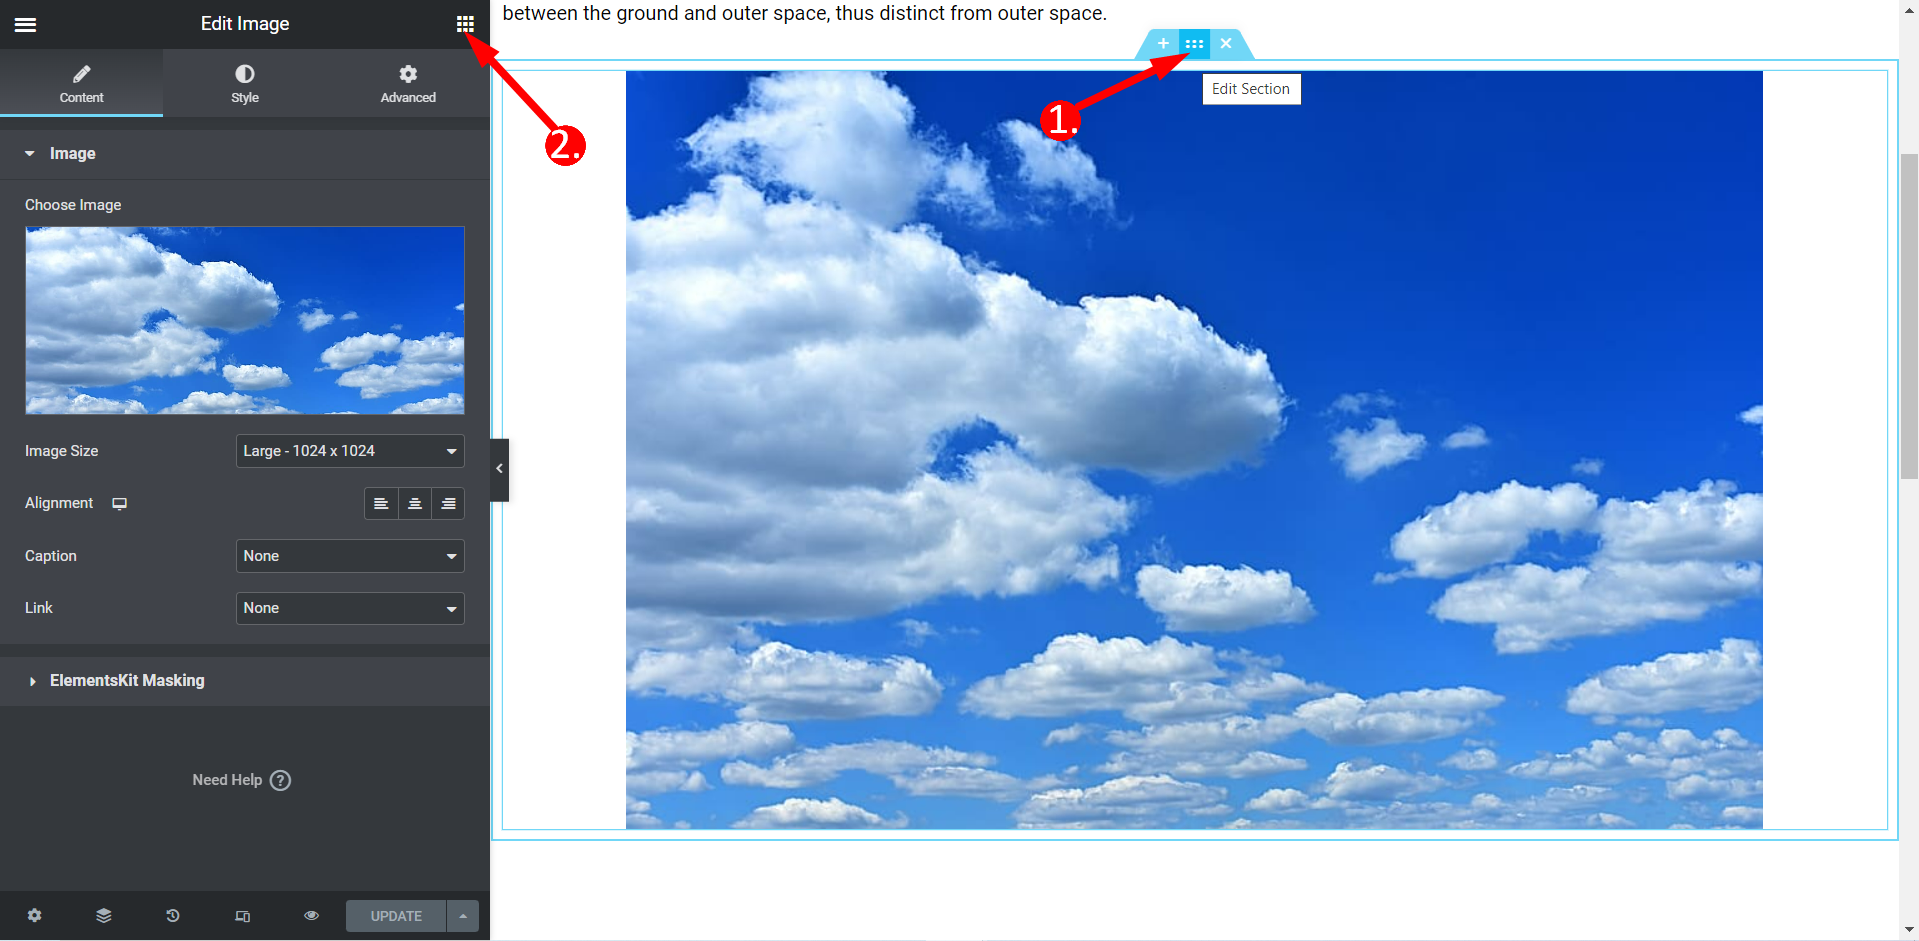
Now, you have to choose any page that you want to design. Or, you can also create a new page and then edit with Elementor.
- Select any section of the page and Click Edit Section
- Go to Advanced
Enabling ElementsKit Particles #
Find the ElementsKit Particles feature bar and press the switch to YES.
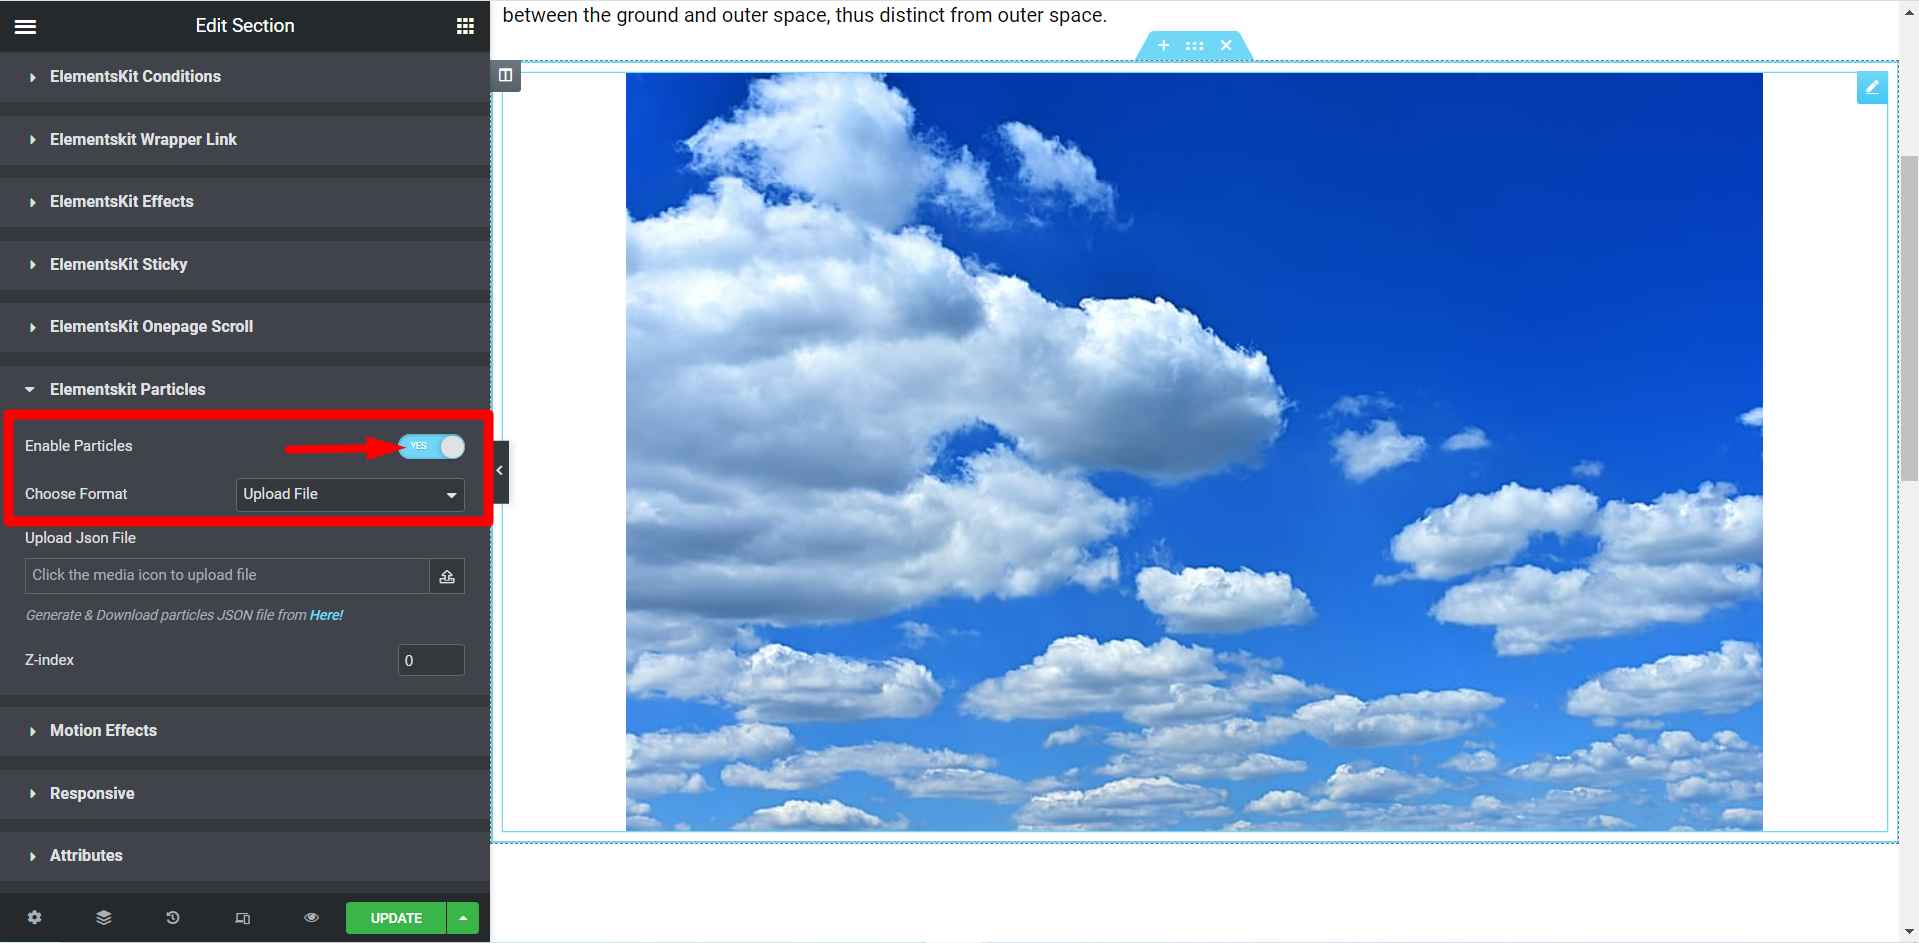
Choosing Format #
There are three formats – Preset, Upload File, and Enter Json Code.

Choose Format– Preset #
There are five styles for Preset format – Default, NASA, Bubble, Snow, and Nayan. All the styles give different effects.

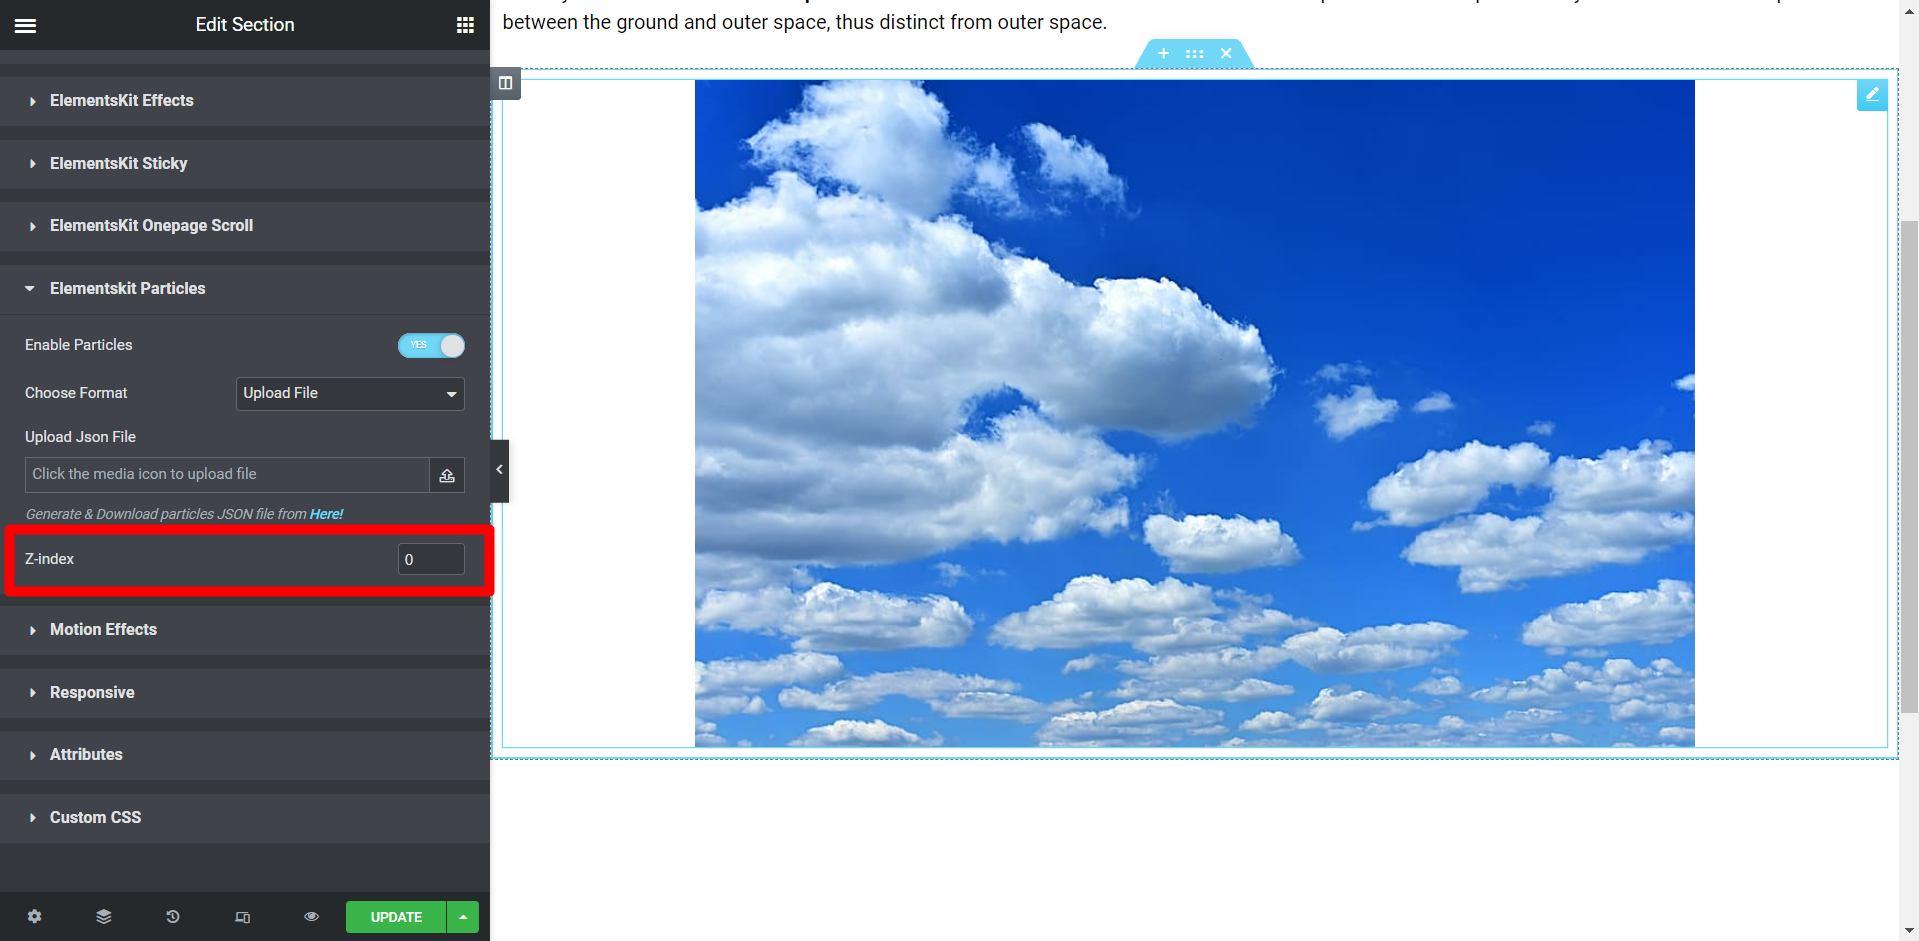
Choose Format- Upload File #
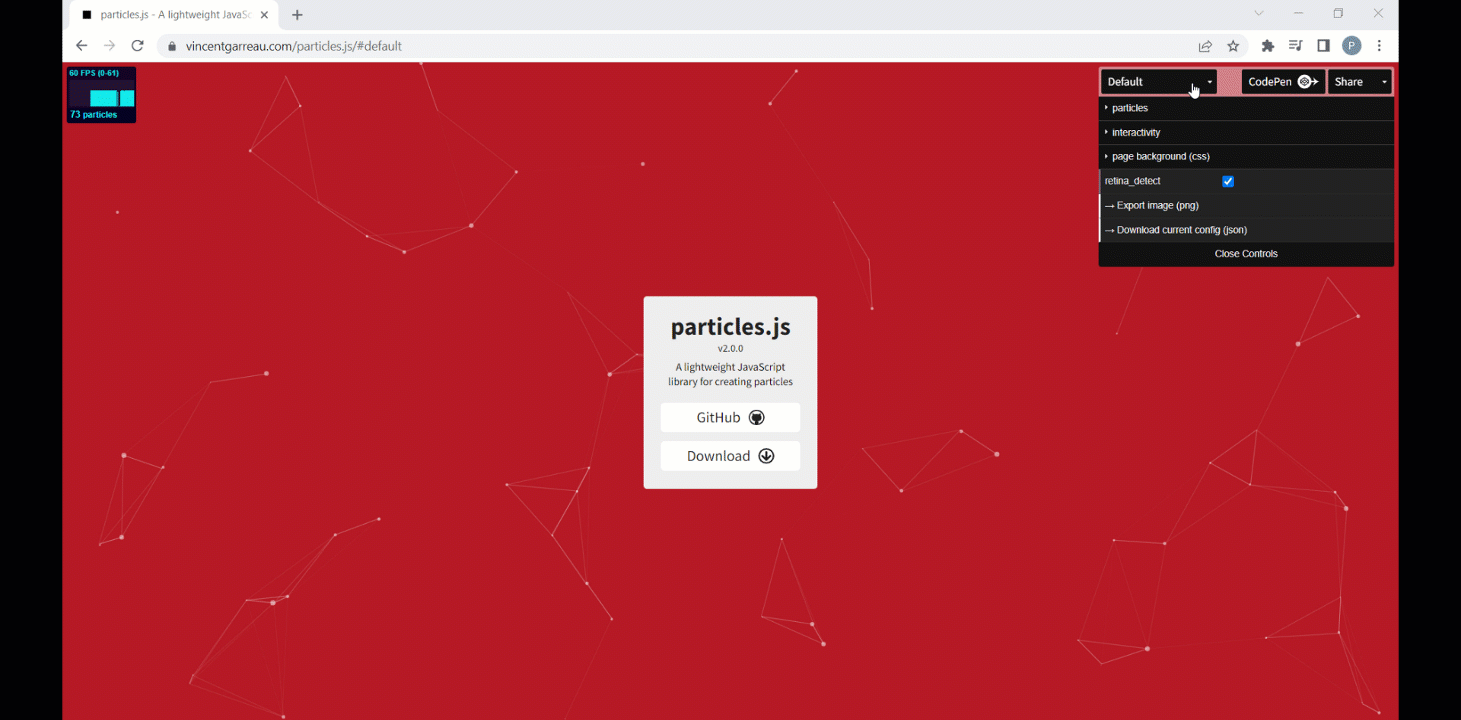
- You have to generate a JSON file. By clicking the link you can do this process easily.
- Next upload the file in the field named Upload Json File.

Downloading JSON File
The above link will take you to this site where you can customize your sections using particles according to your choices. After customization you can download current config (JSON).
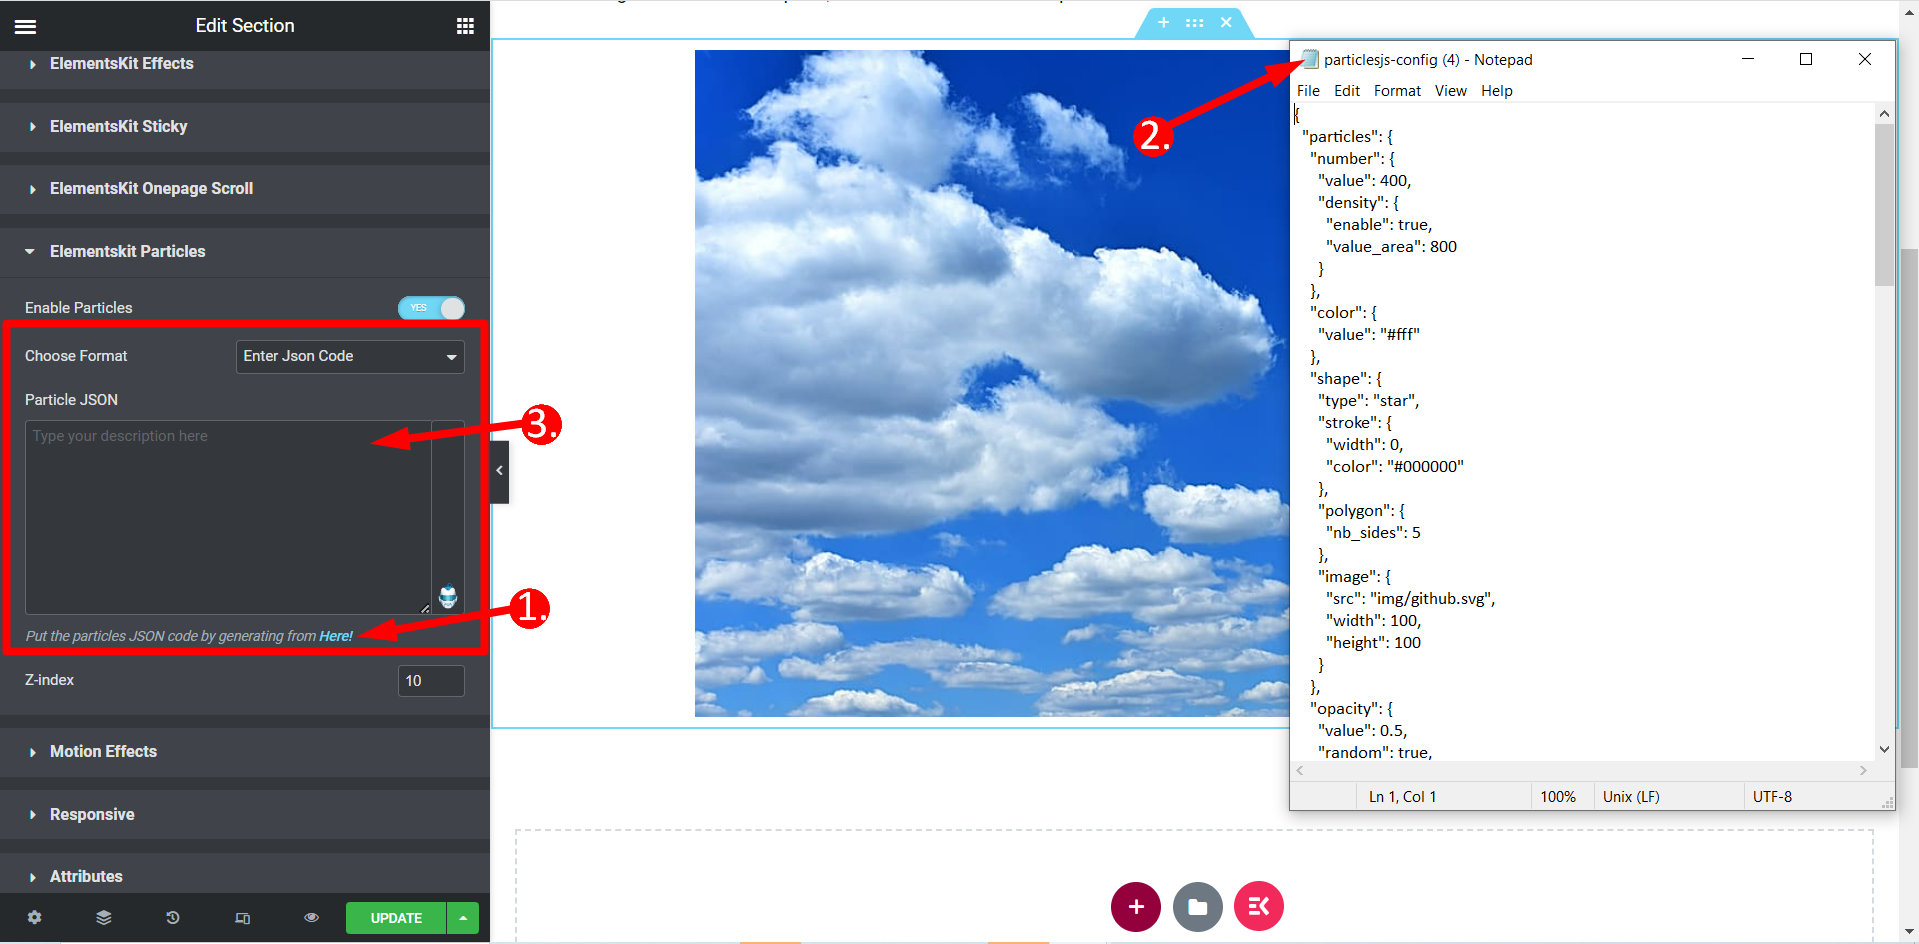
Choose Format- Enter Json Code #
- You need to generate a JSON file first, the process is just the same as before.
- Open the downloaded file in any editor or simply with the notepad and copy the code.
- Finally, paste the code in the field named Particle JSON.
Z-Index #
Here you have to set a value to position the particles according to your needs.
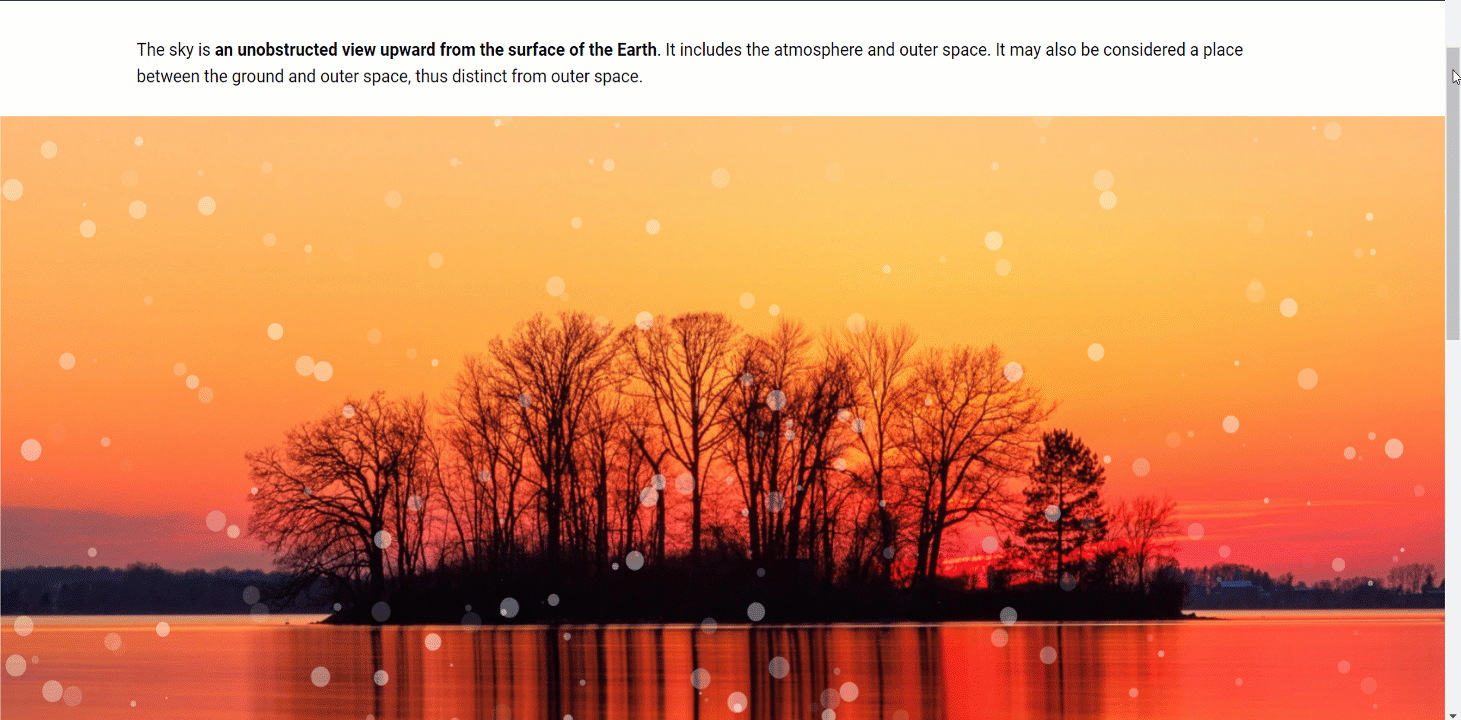
Final Output #
This is the final output based on our customization –
So, this is the process of working with the particles feature. Customization is easy and you can change your site look within a short time experimenting these different particle backgrounds.
Quick Recap
Here’s a quick recap of how we added those eye-catching particle effects on WordPress websites:
Tools Used: Elementor & ElementsKit Elementor Addon
✅ Install and activate the ElementsKit Particle Module
✅ Start editing the part of your website where you want to apply the particle effects.
✅ ElementsKit offers three ways to add a particle effect: choose a preset, upload a file, or enter a JSON.
✅ Use the Z-index for an accurate particle effect.
✅ Save your design, preview it, and publish.
Following this ElementsKit Particle Module, you can add an interactive & animated experience for visitors.


