Getting Started #
The Dribbble Widget allows you to display your latest Dribbble shots on your WordPress sites. It helps designers to gain inspiration, feedback, community, and jobs. Here’s a comprehensive article to explain every method in detail. Follow the step-by-step process to connect the Dribbble.
Watch our video guide:
Or, just follow the step by step process:
Generate Dribble Access Token #
You will need a Access Token to Connect your Dribbble.
- Step=>1: Go to Elementskit-> Elements-> Make sure that your Dribbble Feed is Active-> Save
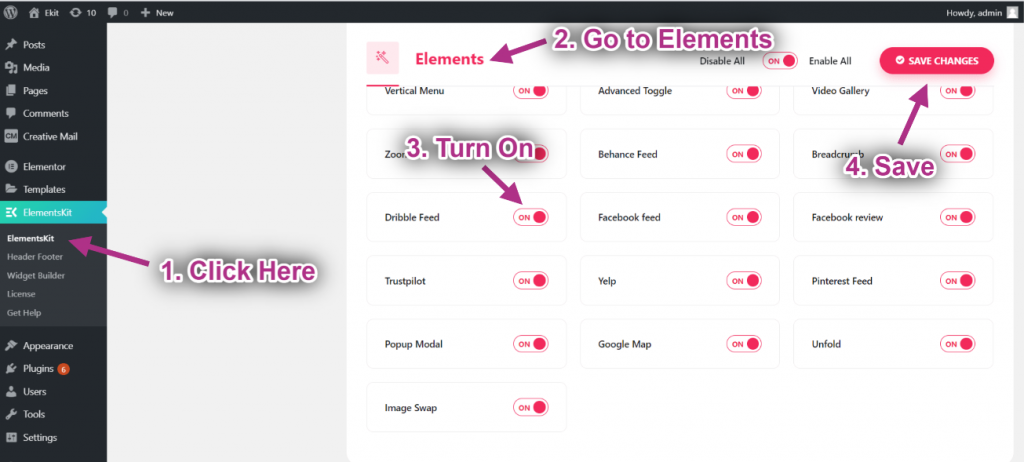
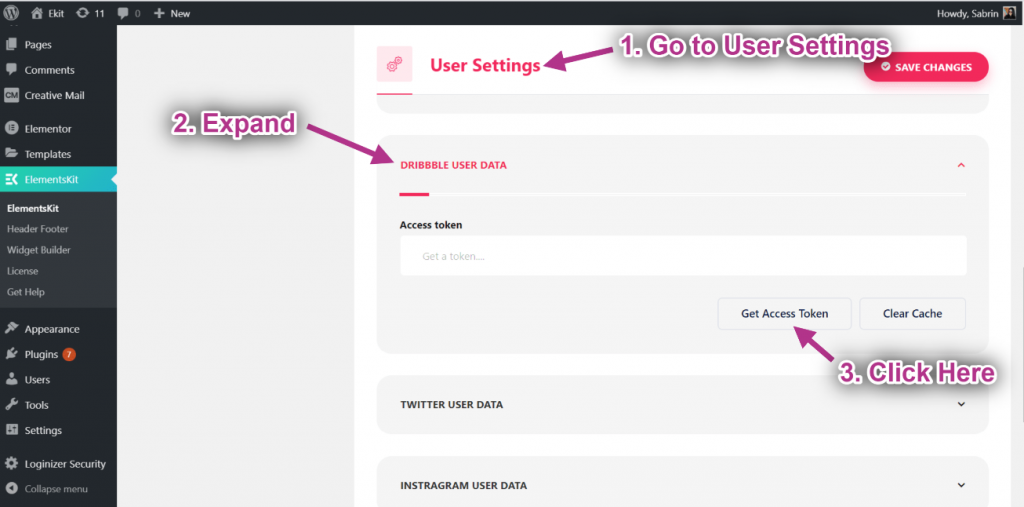
- Step=>2: Go to User data=> Click on the Dribbble User Data to Expand-> Now Click on Get Access Token.
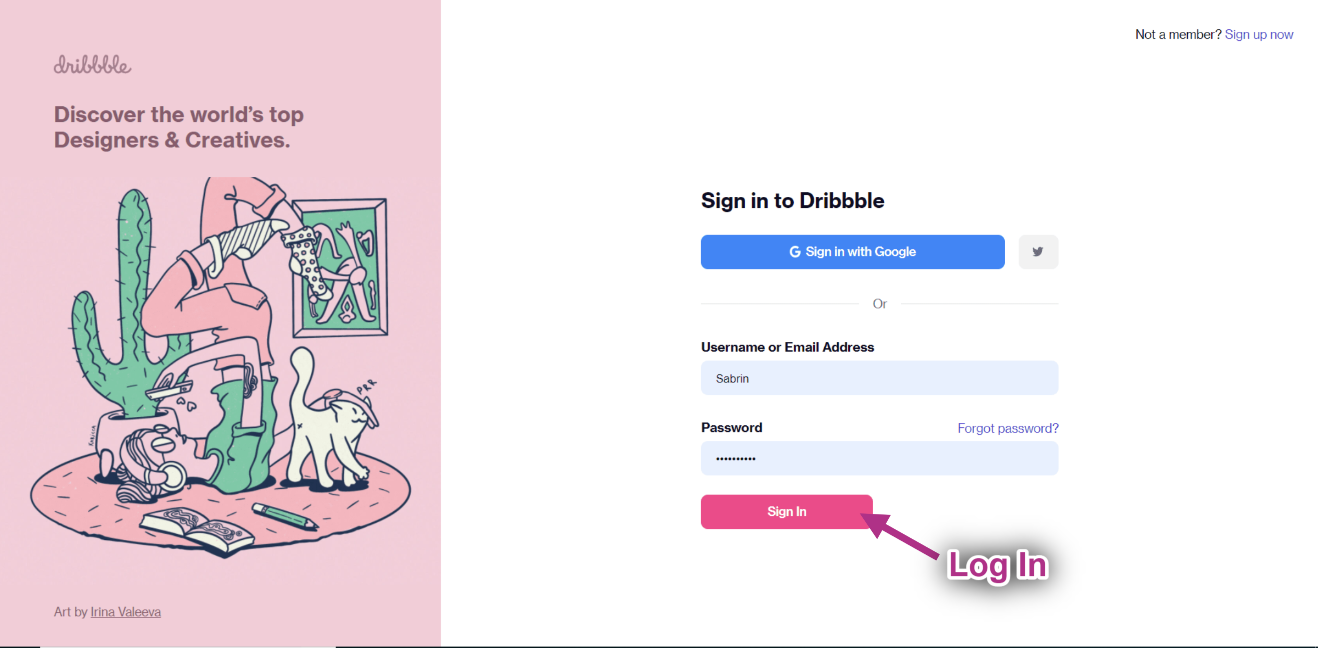
- Step=>3: Enter your Dribbble Account Credentials and click on Sign In.
- Step=>4: Click on Authorize.
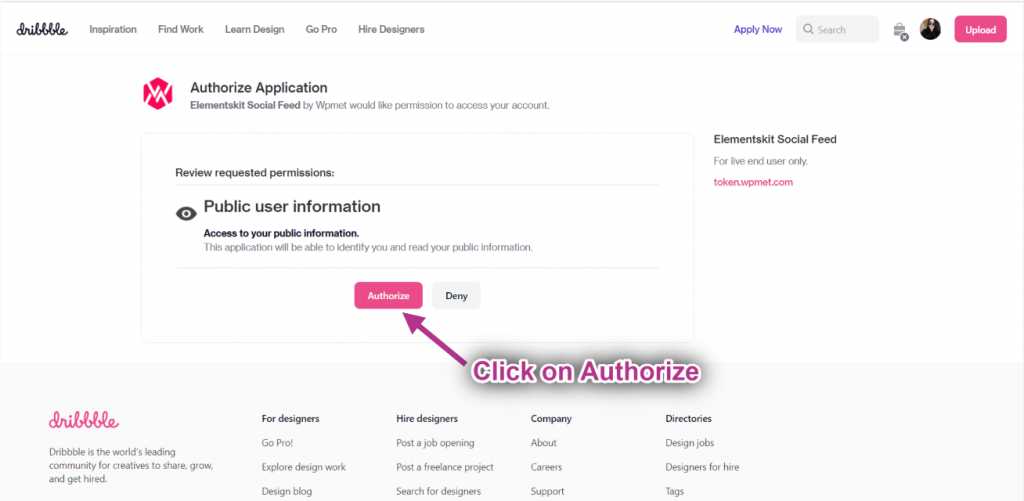
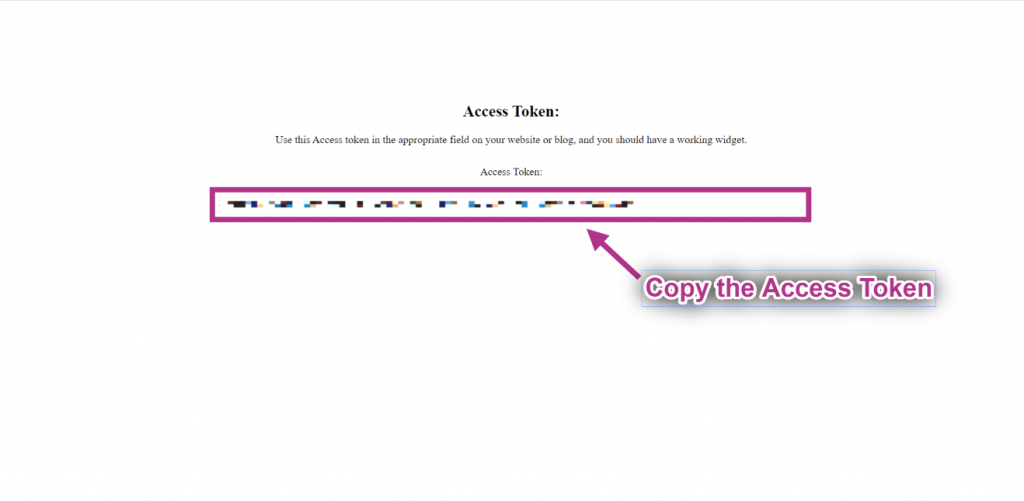
- Step=>5: Here is your Dribbble Access Token. Copy them.
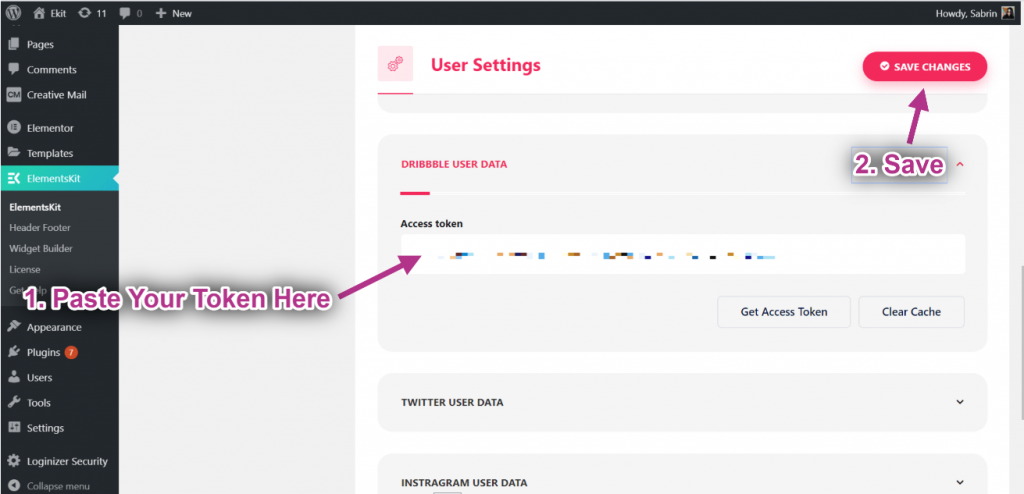
- Step=>6: Paste the Access Token on the selected area->Save Changes.
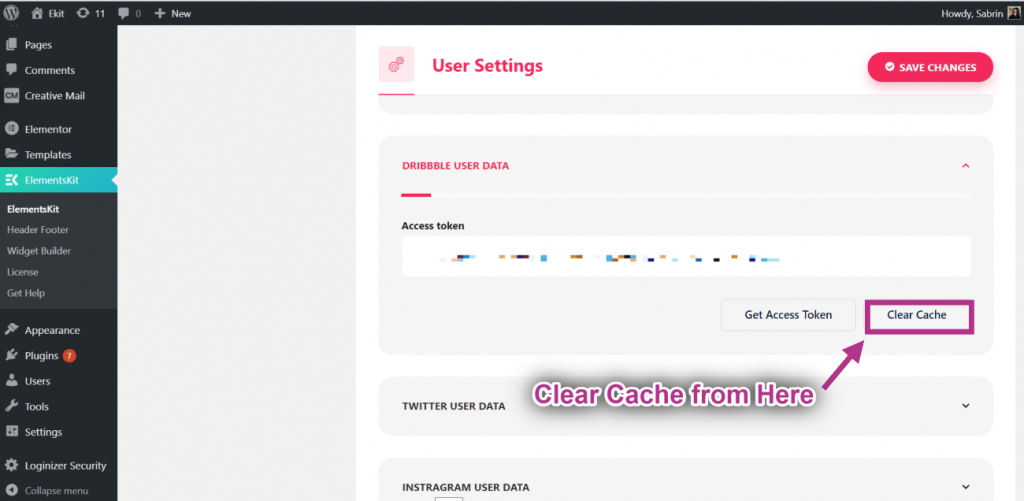
- If you face any issue regarding syncing the data, just click on clear cache.
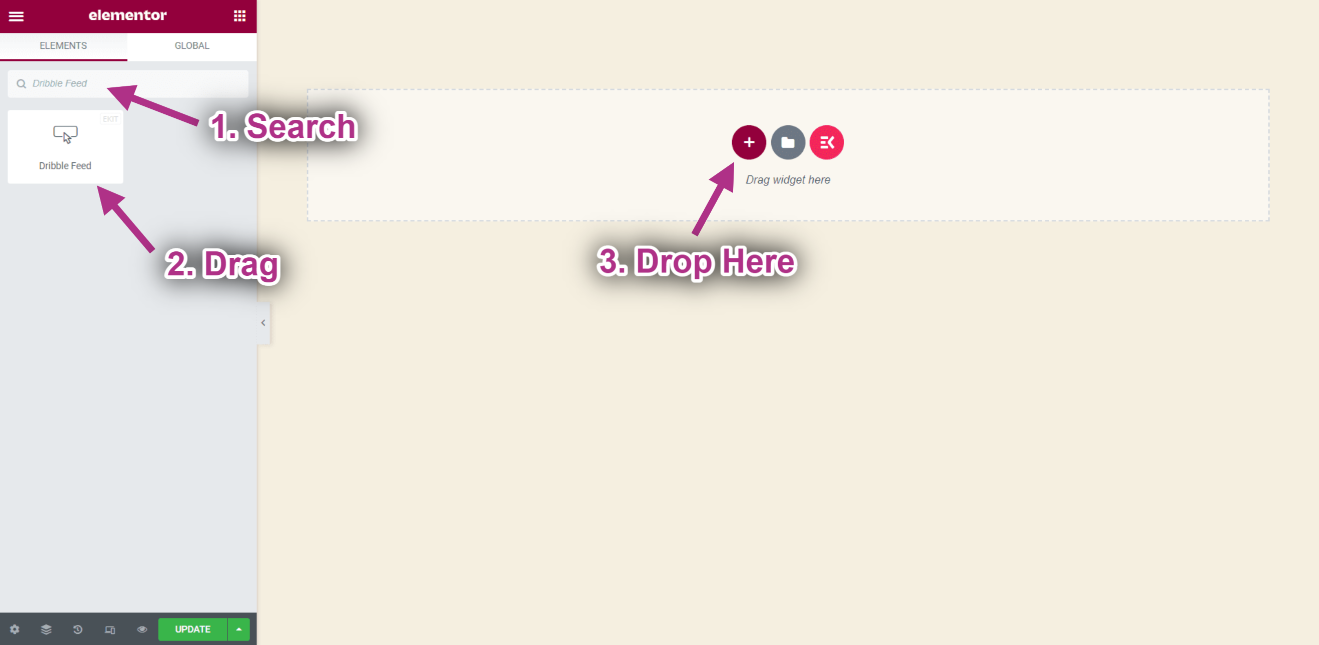
- Step=>7: Now search for Dribble Feed-> Drag the widget-> Drop on the selected area.
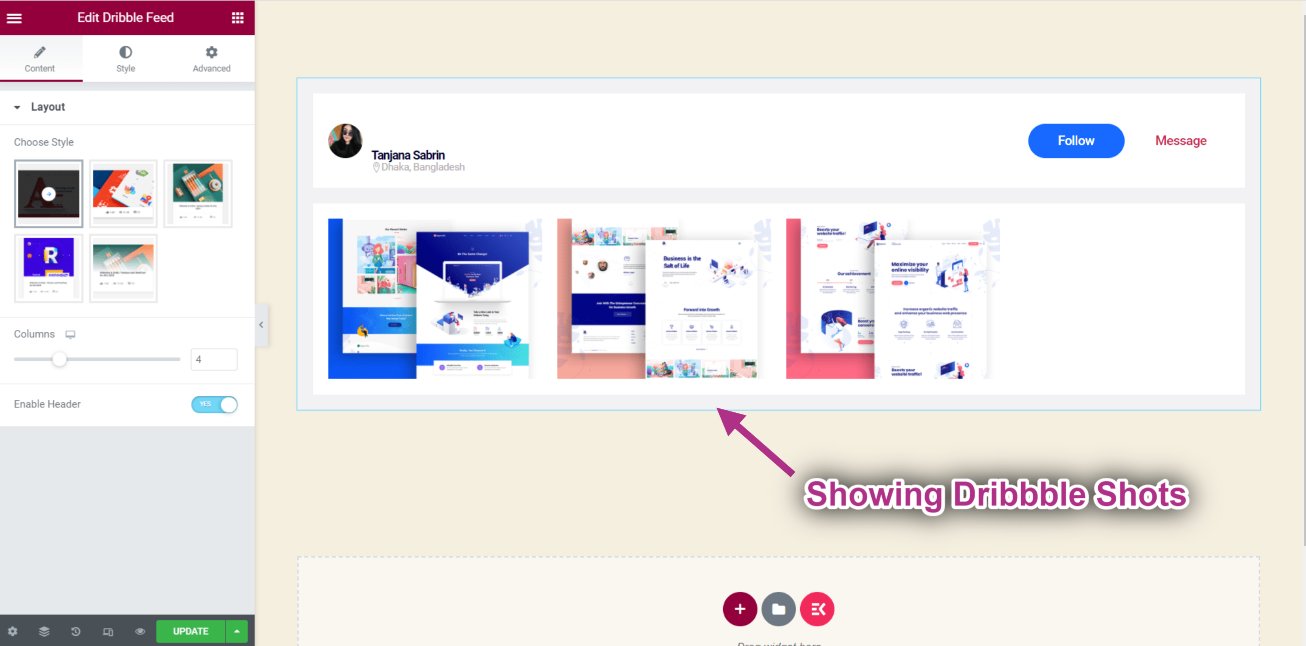
- Now you can see your Dribbble Shots on your Dribbble feed widget.
Customize Dribble Feed #
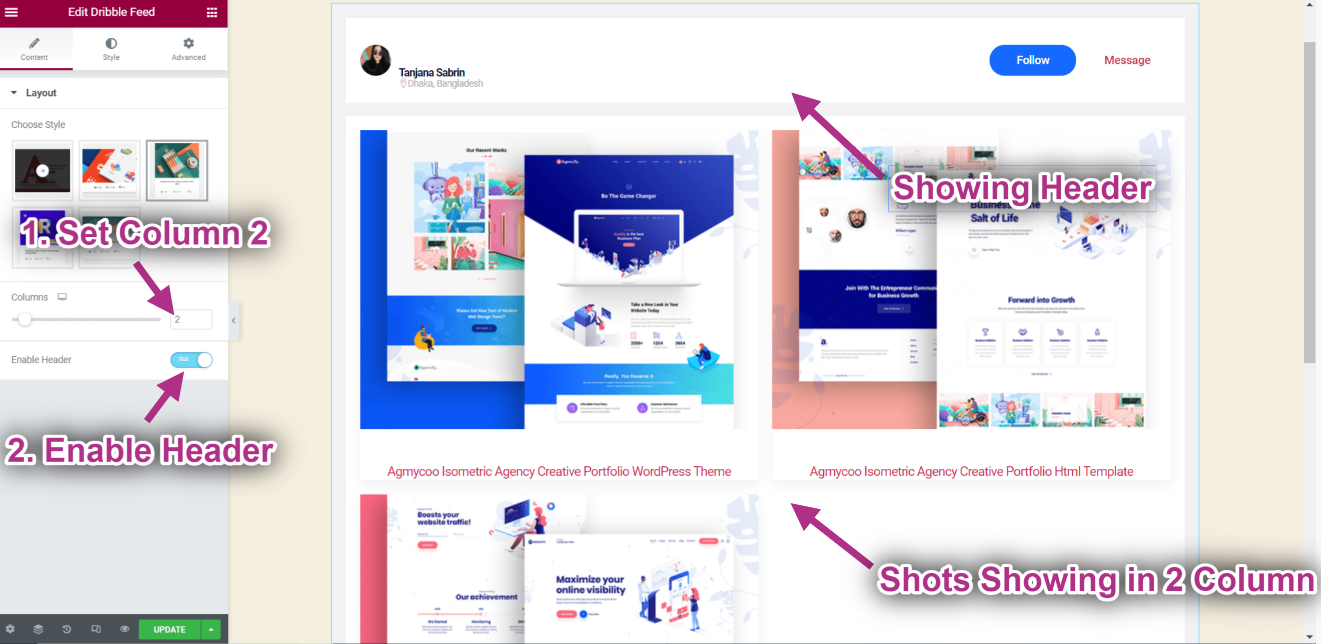
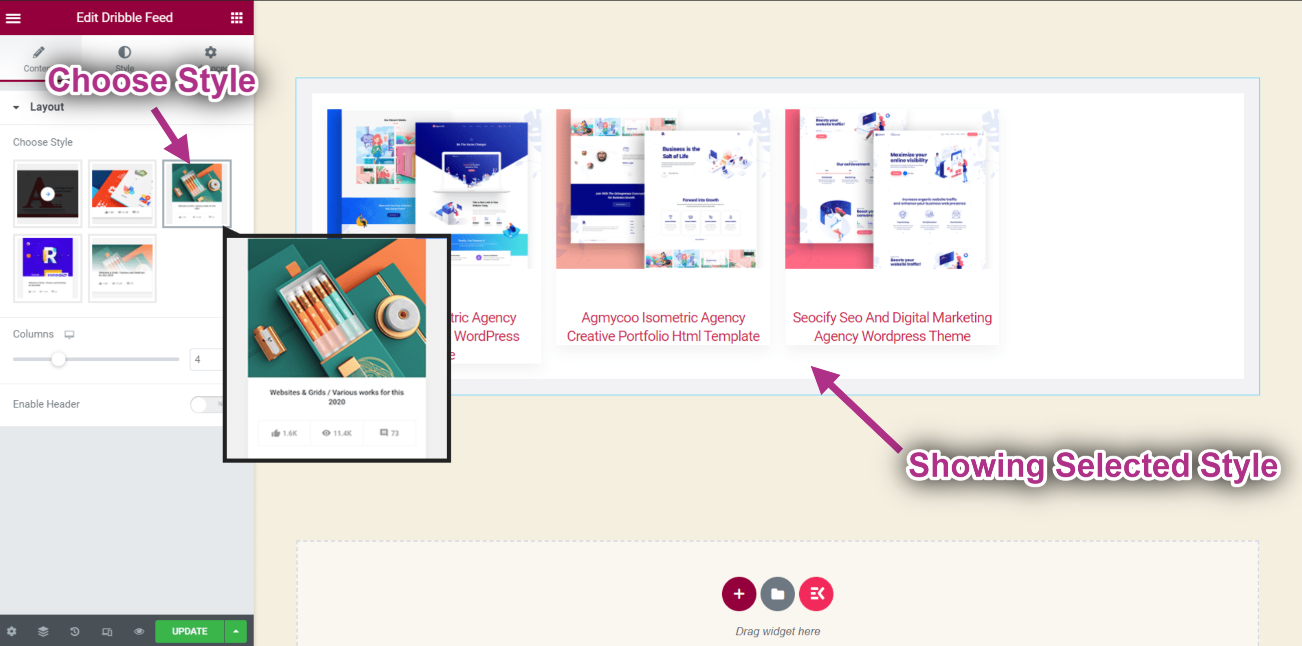
- Choose your Style from the Layout.
- You can see your selected style showing.
- Set Column: 2.
- Enable Header.
- You can see the header on the top and shots are showing in 2 columns.
