A button widget allows building standard buttons and inserting important Link URLs you want. Users click buttons to get more familiar with a website. We have brought a modern and quick button widget to design responsive buttons in Elementor. You can trigger any actions with our widget with just a couple of clicks. It is customizable and a simple widget to support you reach your business goals.
This documentation will educate you on how to add button widget in Elementor on your WordPress website. Follow the simple steps below.
How to Add Button in Elementor #
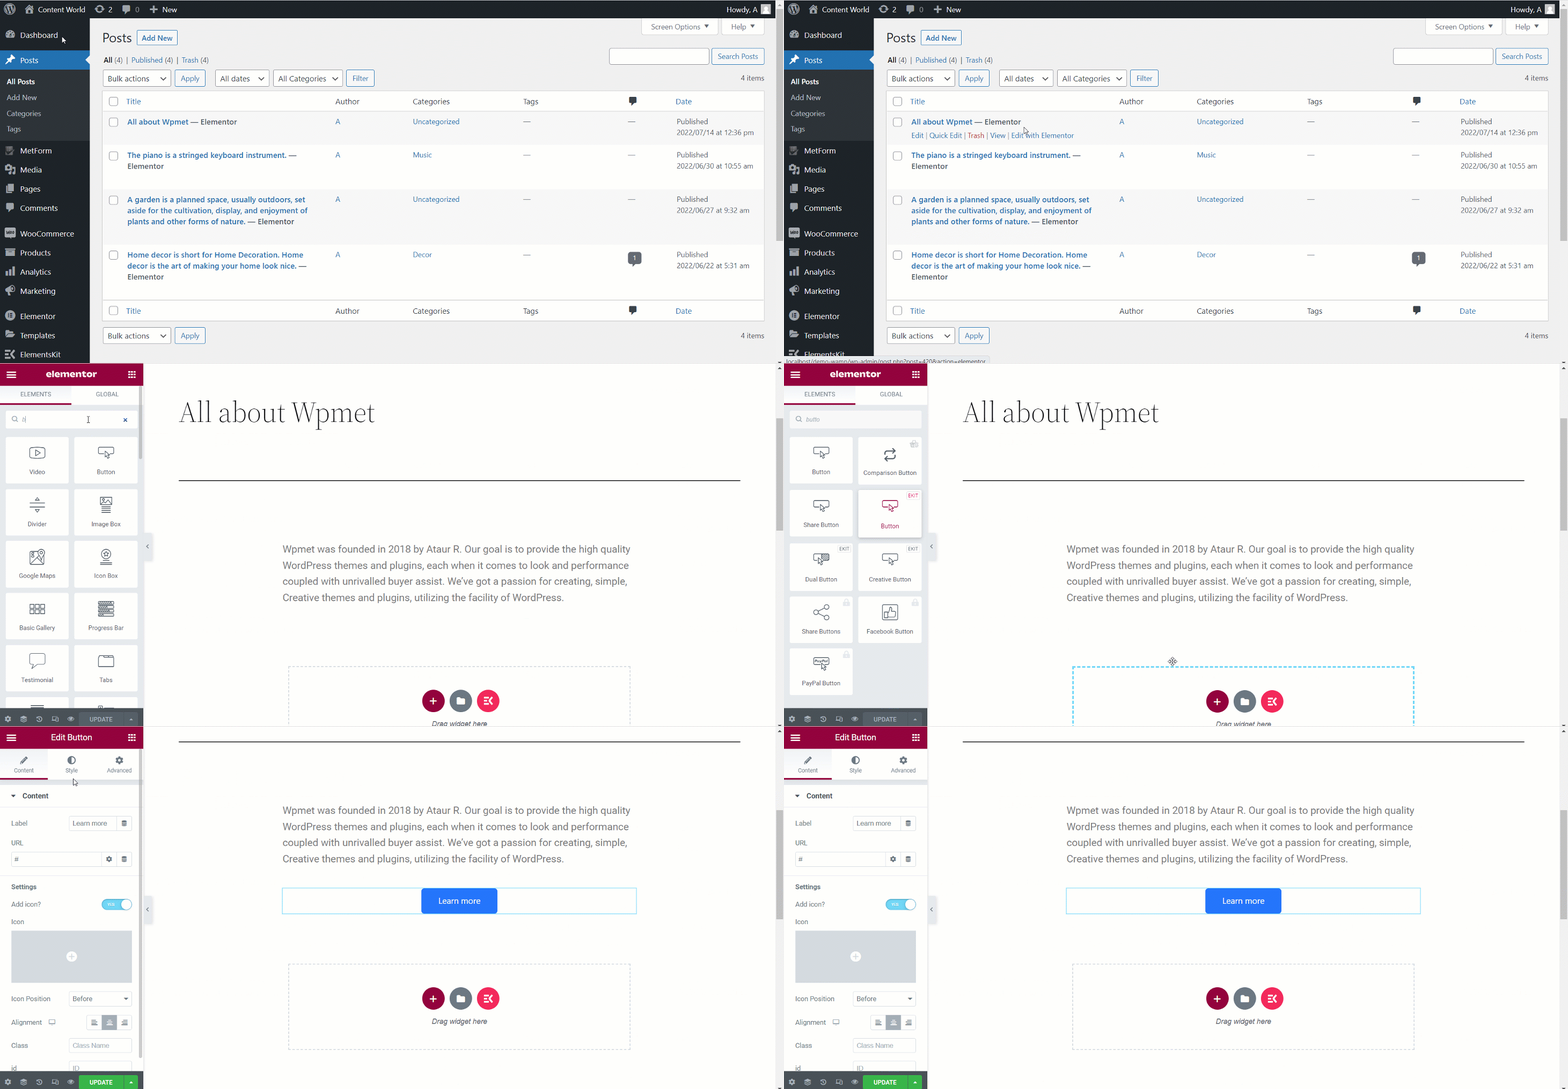
Navigate to: Your Dashboard -> Click any old post/page or create New one -> Edit with Elementor -> Search Button Widget

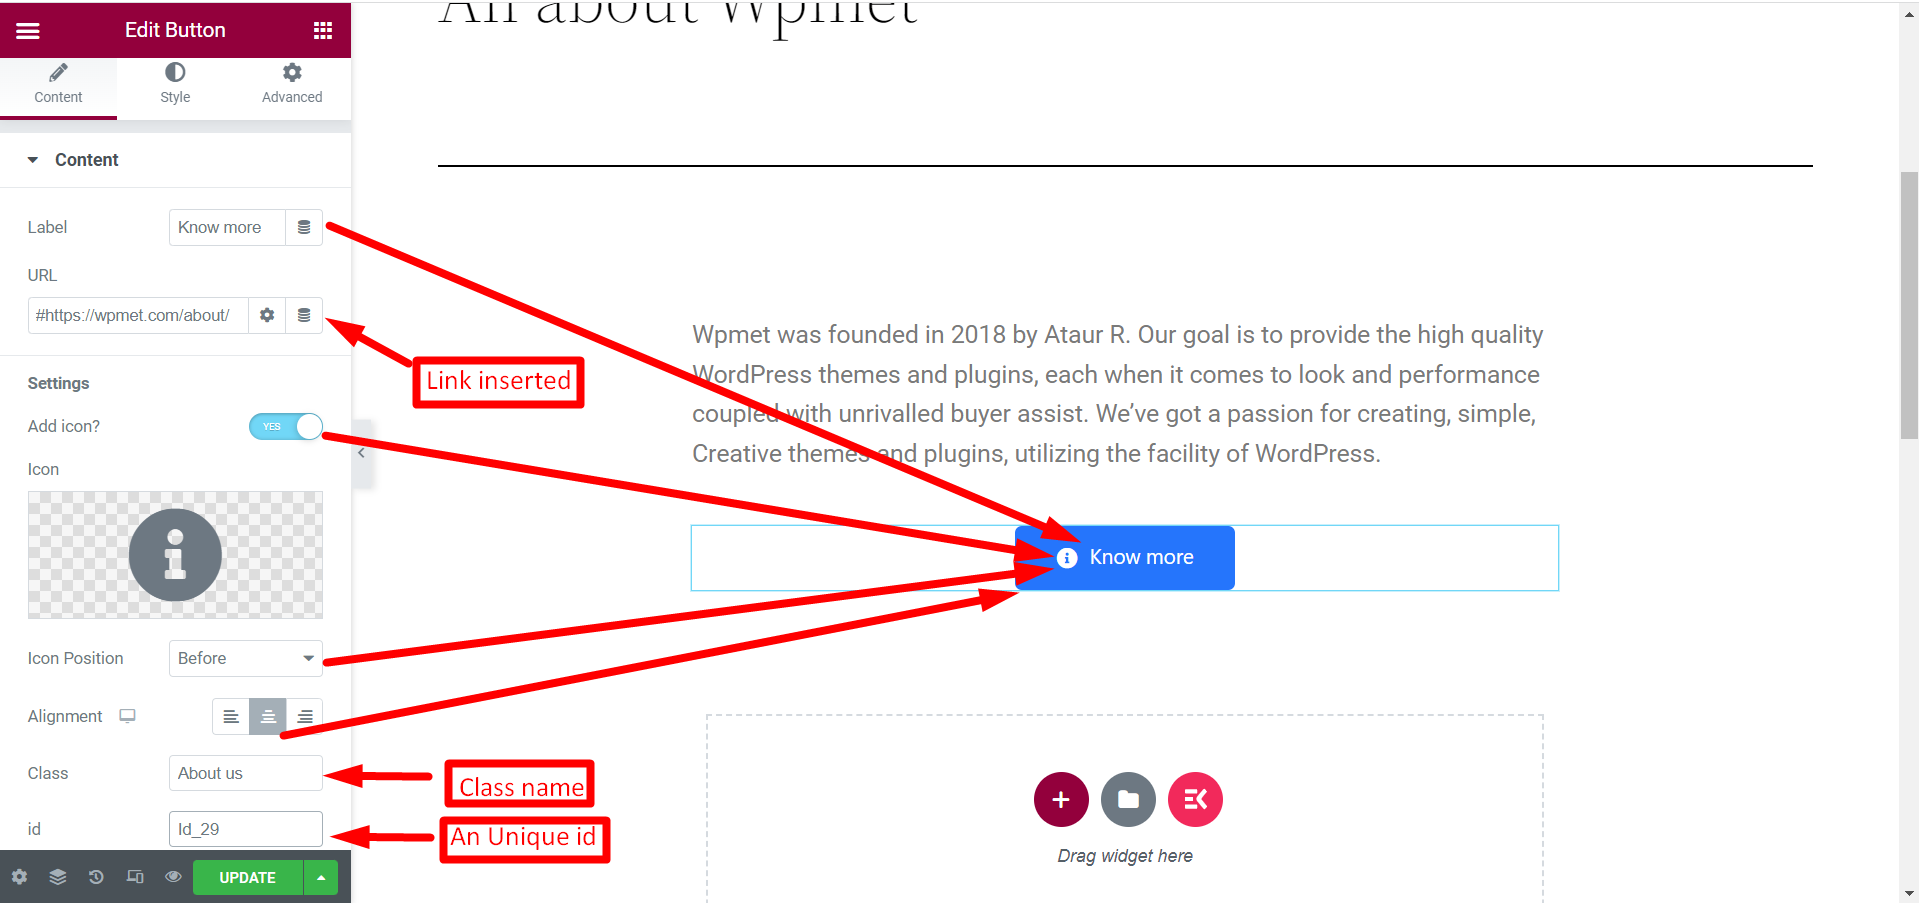
Editing options in the Content section are:
- Label: Add or Edit Button Text.
- URL: Provide URL link. You can set Open in new window or Add nofollow.
- Add icon: Set YES if you want to add an icon otherwise NO.
- Icon: Upload Button an icon from Icon library or you can upload from your own library.
- Select Icon Position: You can put the icon before or after the text.
- Class Name: Write a class name in the field.
- ID: Fill up the field, it must be unique.

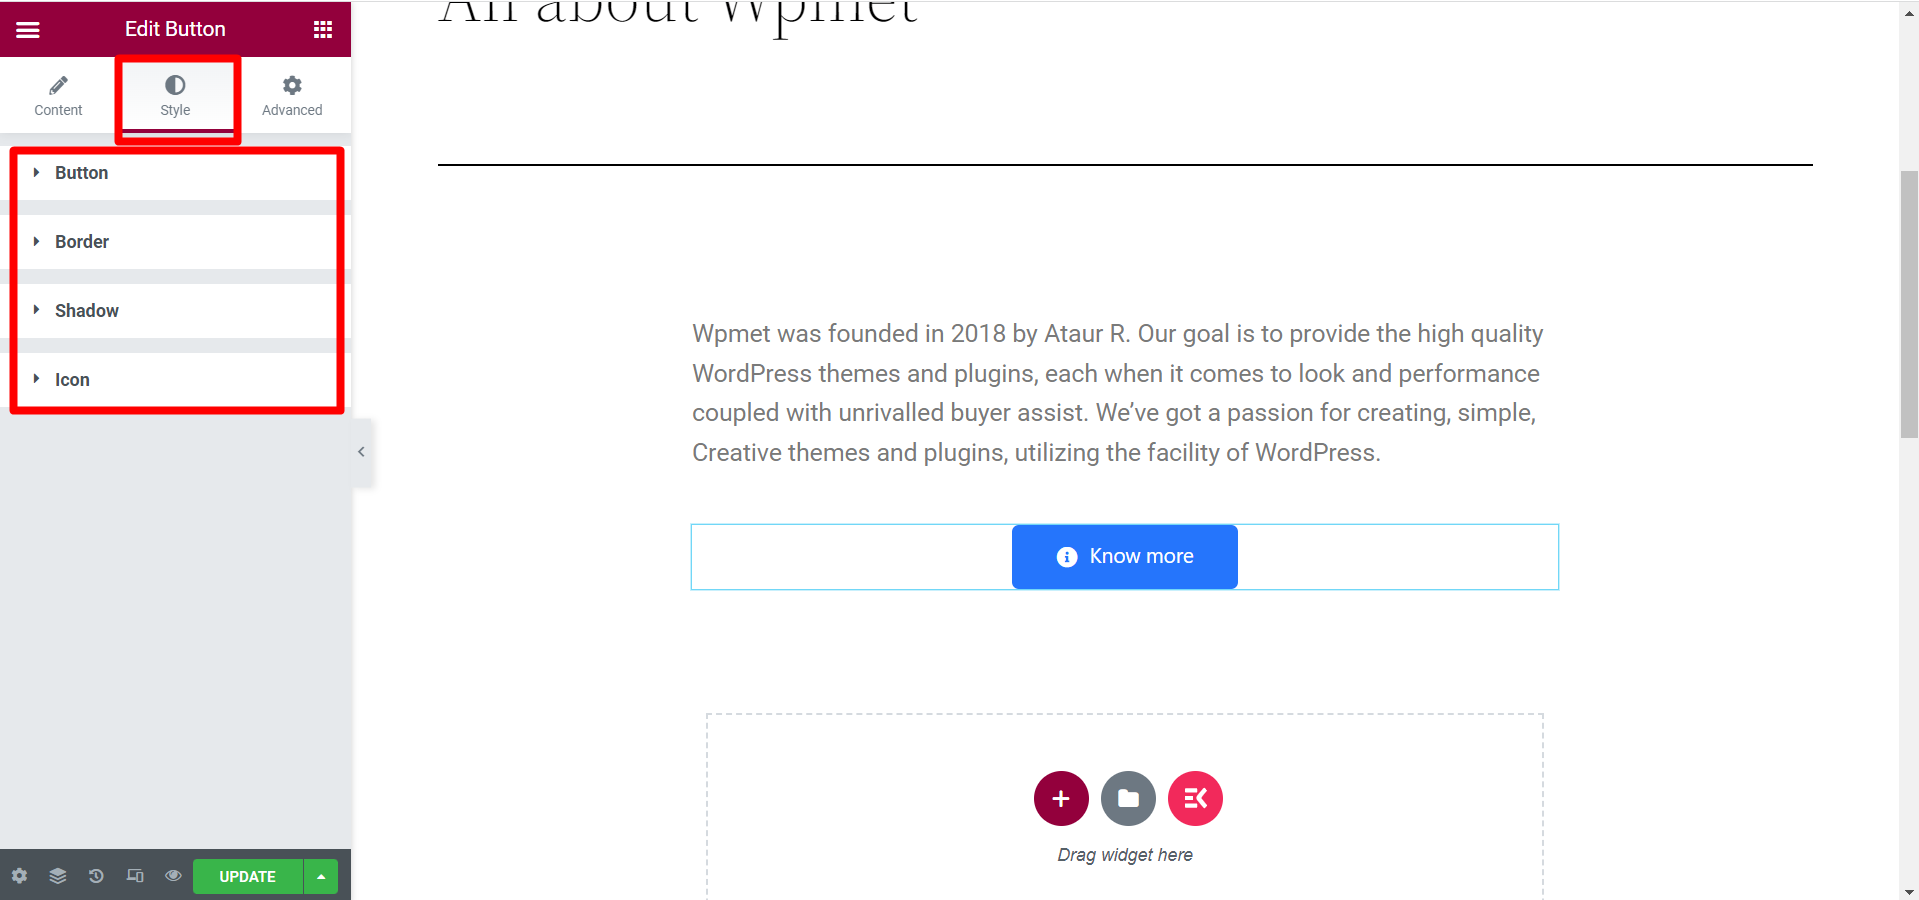
Editing options in the Style section has four criteria, you click to expand each one. Those are:
- Button: Here you can edit width, padding, typography, color, etc. for the button.
- Border: To style the button edit its border type, color, and radius.
- Shadow: Edit the button box shadow if you need.
- Icon: According to your choice change icon size, spacing, and position.

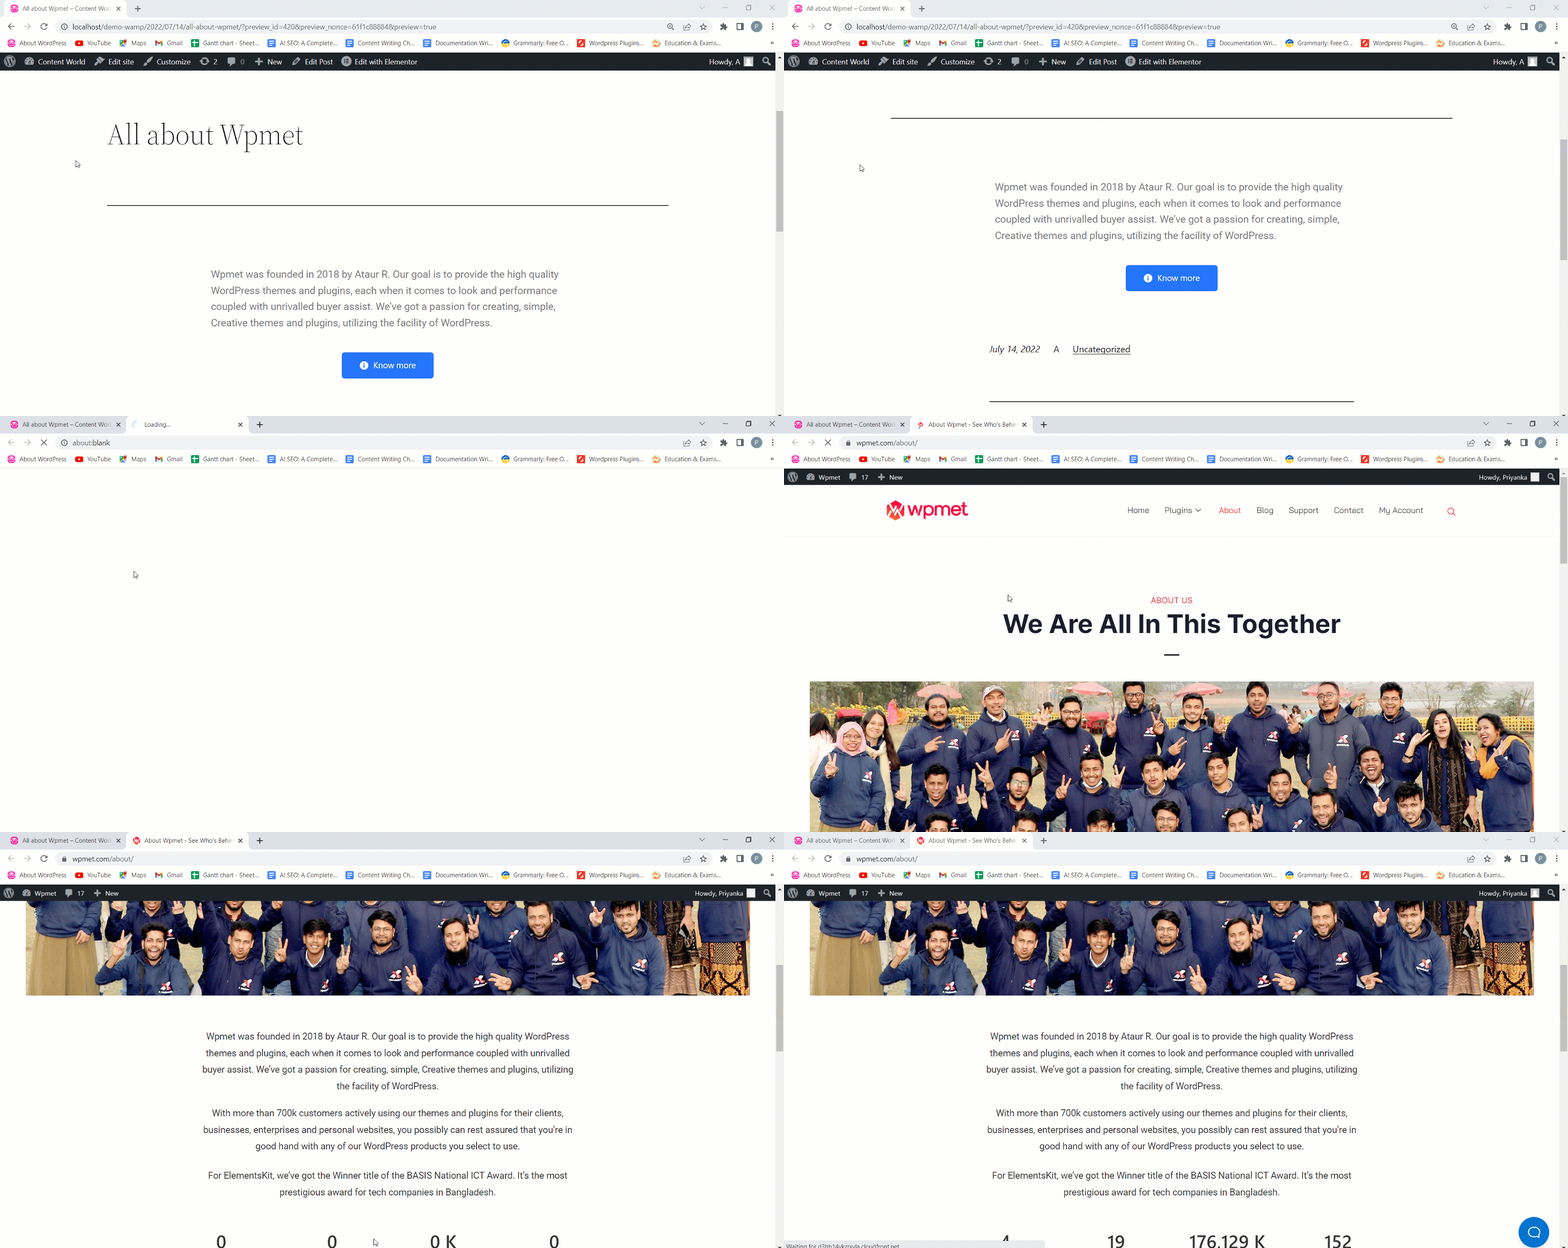
After finishing all the editing, click Update. From the front end, it will look like this-

So, you saw the edit options contain all the required choices to style a button. Just search and drop the widget and customize it simply. Using this widget you can make the call to action more effective.


