An Advanced Tab Widget is equipped with essential and modern elements. With an advanced tab widget, you can create tabs and put different contents. And, there are facilities to design contents with nested tab elements. You can also design the elements you wish to keep in each tab. So, for a well-organized tabs layout, you can simply use ElementsKit’s Advanced widget.
But how to style tabs in WordPress? well, this is exactly what we have discussed with all the necessary details here. Check the process below.
How to Style Tabs in WordPress #
Navigate to: Your Dashboard -> Choose or create a New page -> Edit with ELementsKit -> Search Advanced tab widget
At first, drag and drop the widget, and you can edit the options.
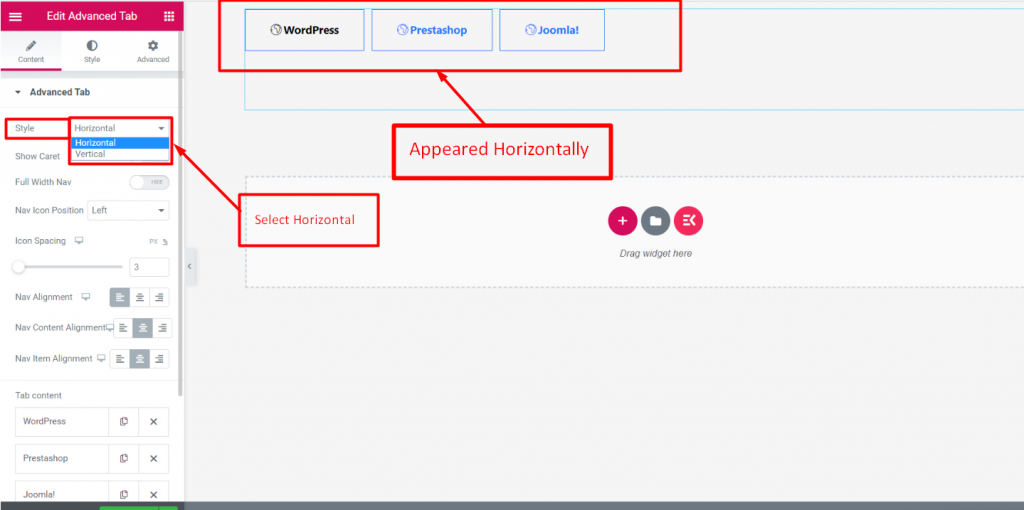
Style #
In the Content section, you will find the Style option under Advanced Tab. Select Style Horizontally or Vertically.

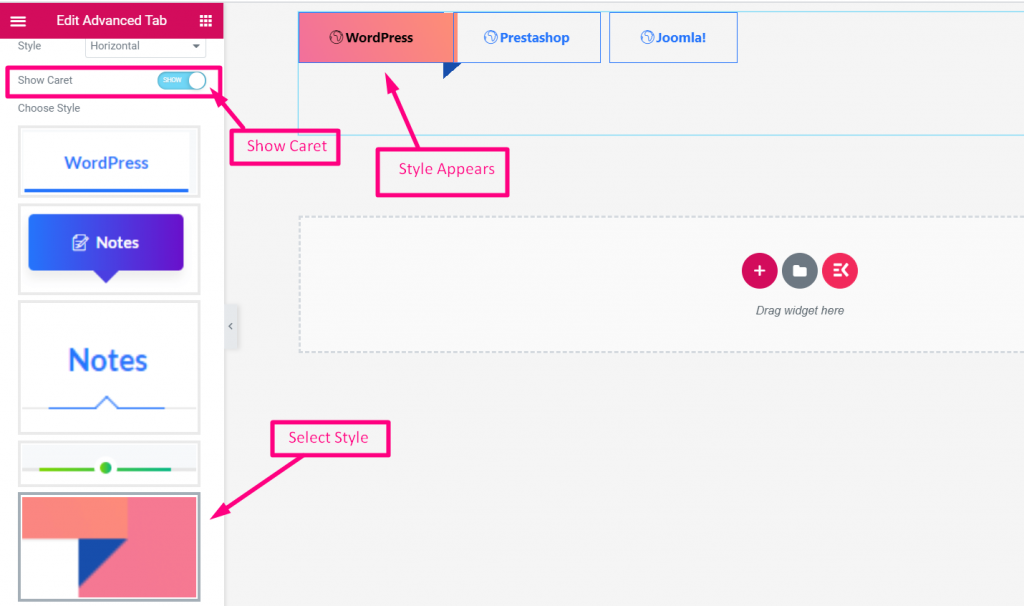
Show Caret #
- Enable Show Caret
- Select Style

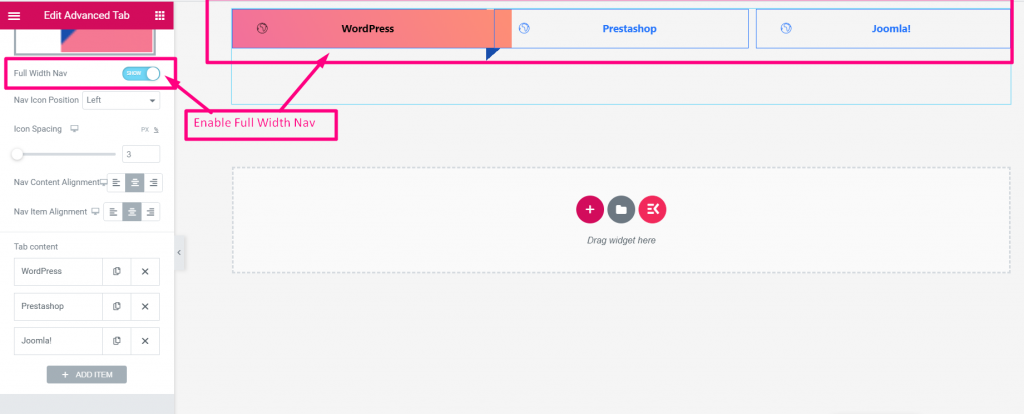
Full Width Nav #
Enable (SHOW)

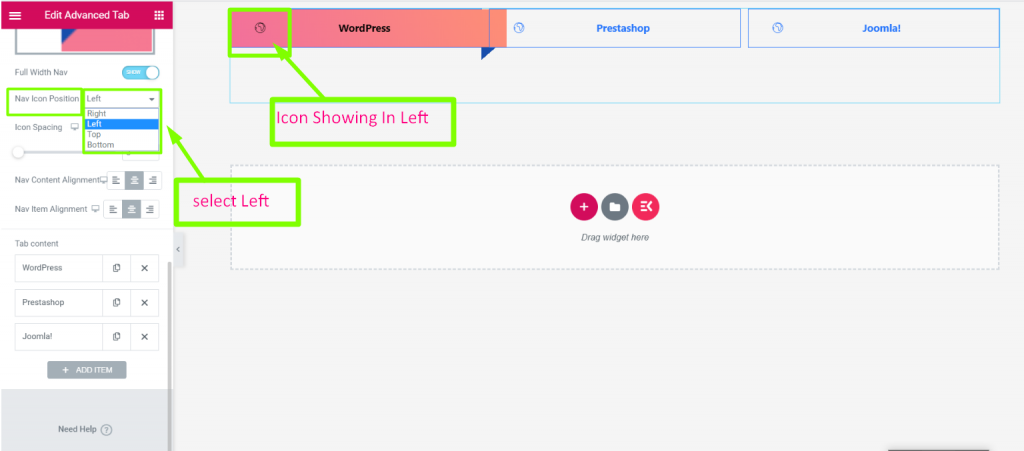
Nav Icon Position #
Select Position: Right, Left, Top or Bottom

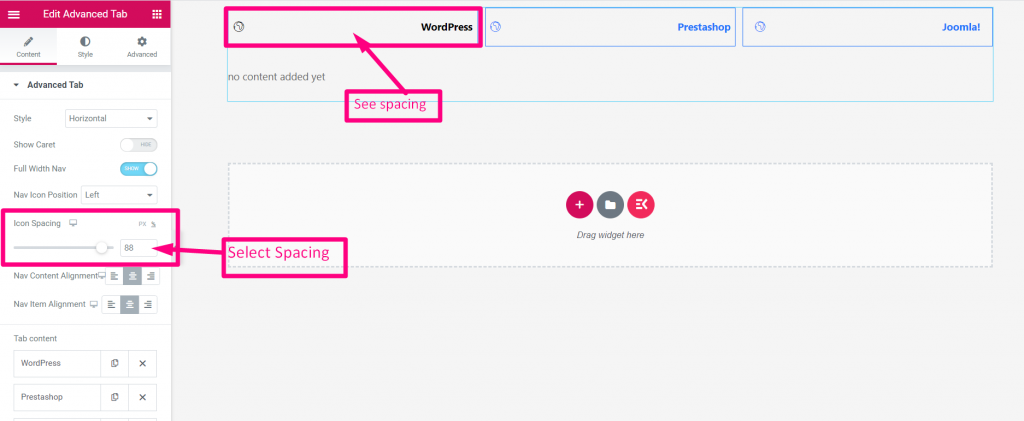
Icon Spacing #
Provide Spacing

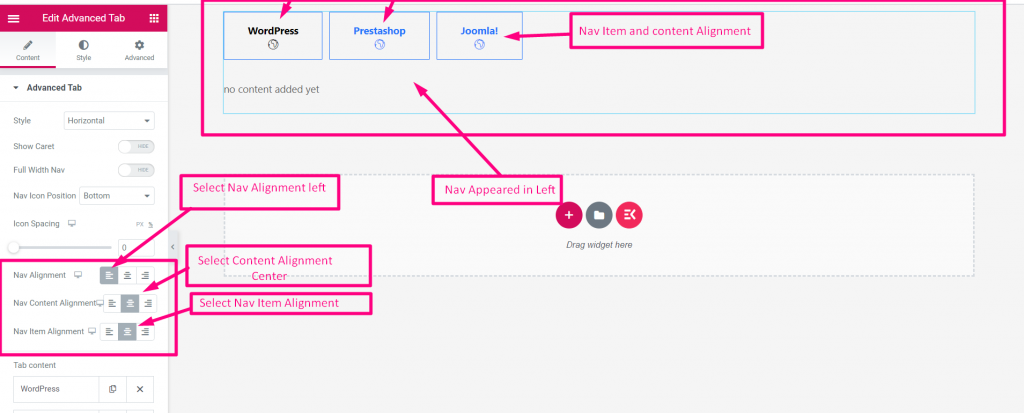
Select Alignment #
Select Alignment: Left, Right or Center

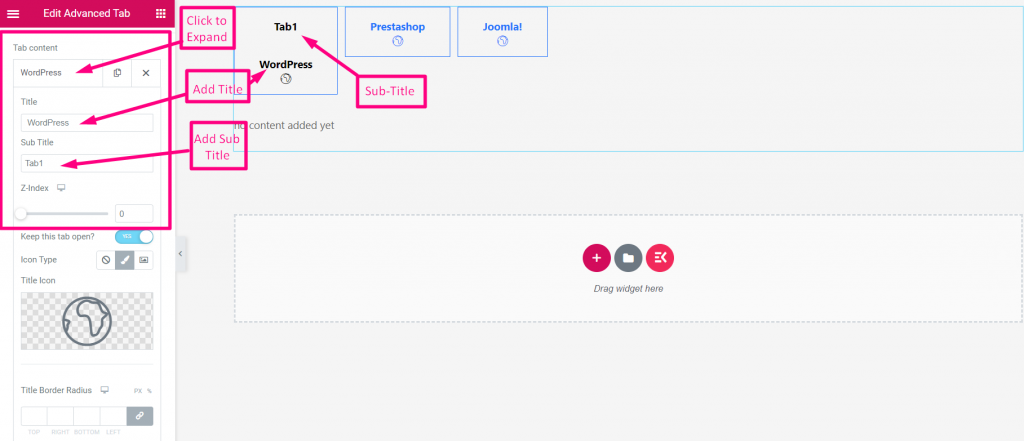
Tab Content #
- Click On the Content to Expand
- Add or Edit Title
- Add Sub-Title

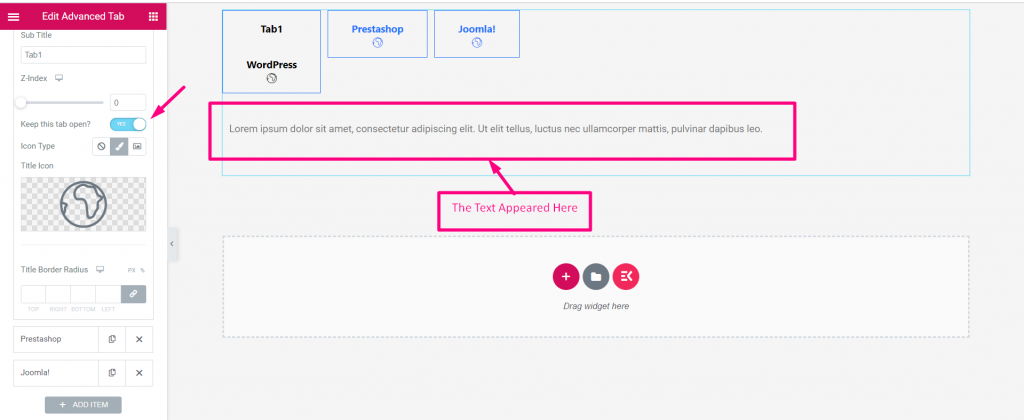
Keep this tab open? #
Add any Widget like Image text anything after the Title
- Enable “Keep this tab open” toggle
- Click on the Icon to add any widget
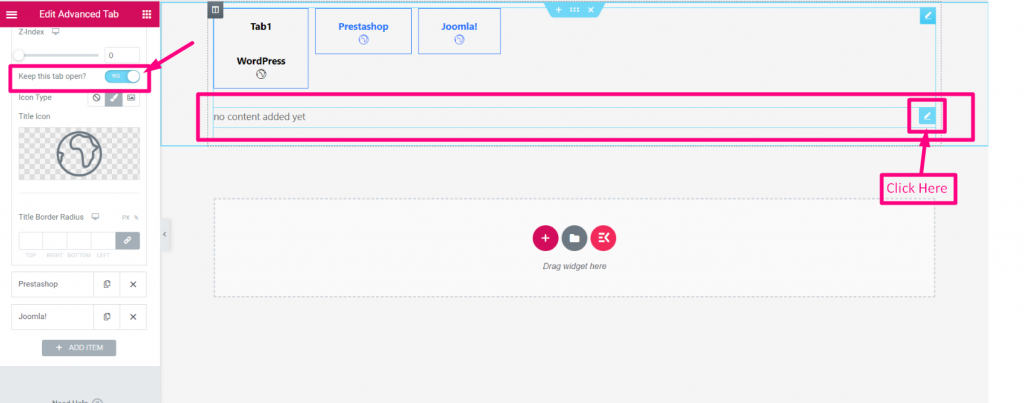

Now, search your desired widget and drop
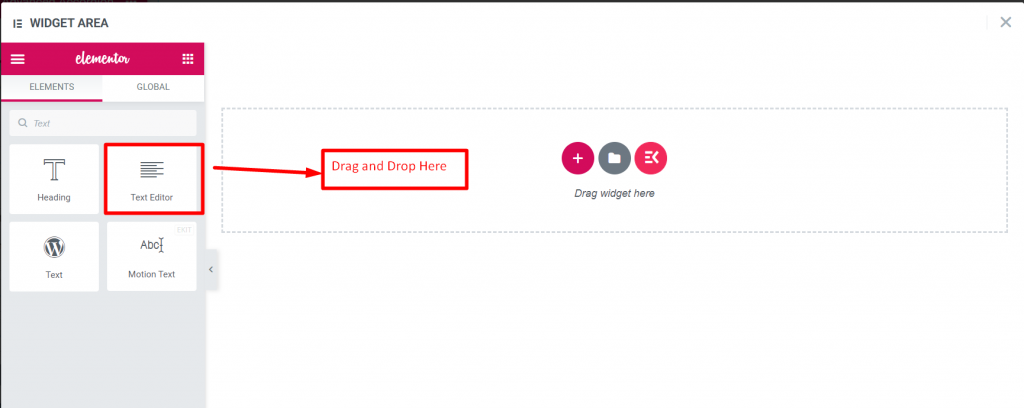

Edit the text and click update
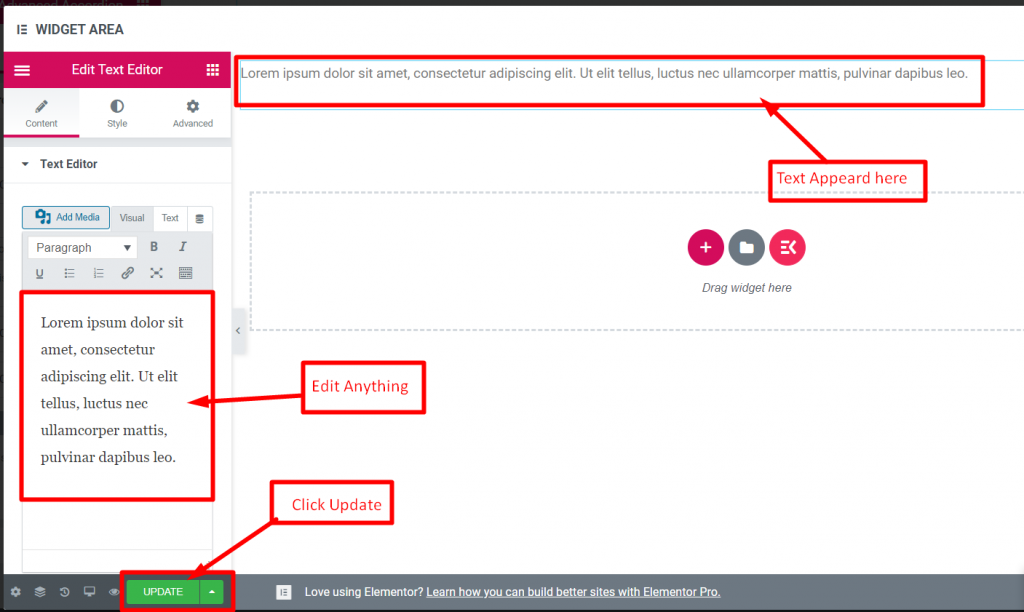

Close the window and text will appear accordingly

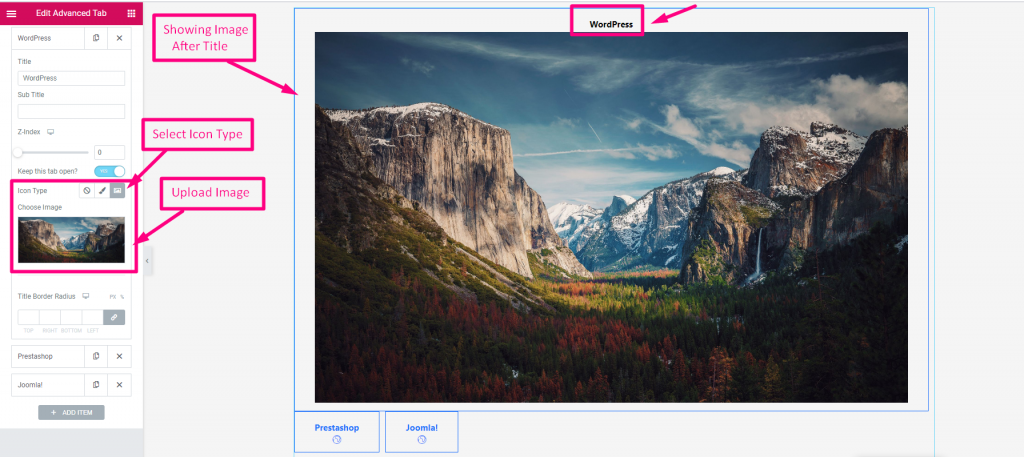
Icon Type #
- Select Icon type: None, Icon or Image
- Upload Image

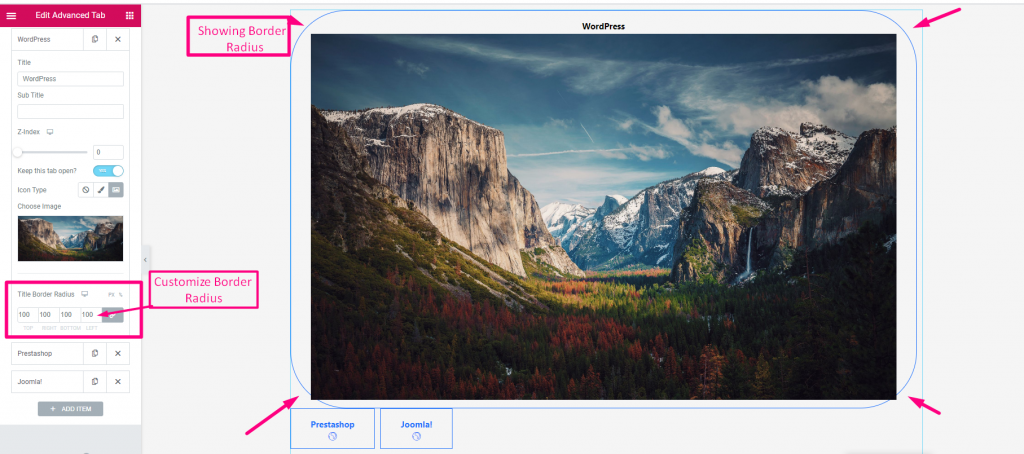
Title Border Radius #
Customize Border Radius

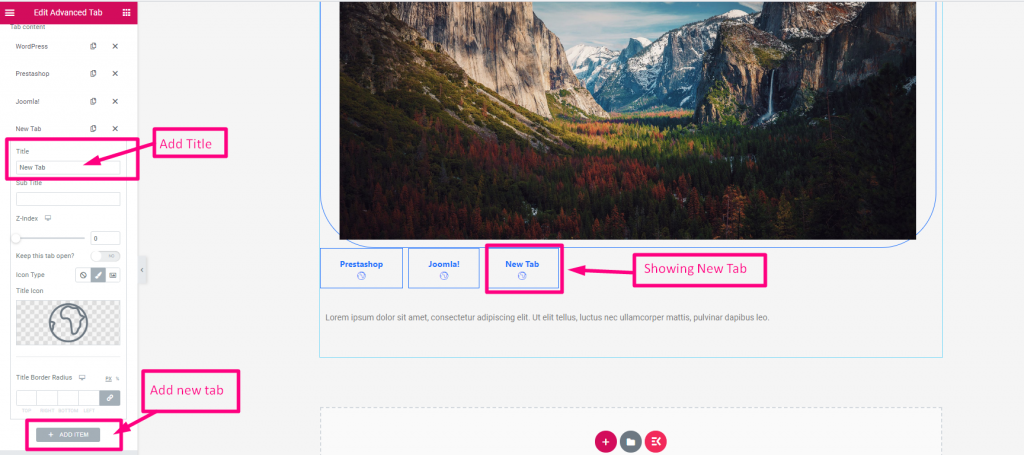
Add New Tab #

Using this advanced widget your tab customization will be more easy, fast & effective. And, flexibility will increase your sales in different ways. So, get perfect tabs using the Advanced tab widget today.


