


Through a payment gateway, your website communicates with an acquiring bank and a payment processor. Today, the PayPal payment gateway is an internationally popular name and so the gateway widget is. In our MetForm widget, we have kept dynamic currency choices as PayPal currency options.
Let’s see how you can add this powerful payment processor in WordPress and what are its functions.
WordPress PayPal Integration with MetForm #
To integrate PayPal with WordPress form, you first need to connect your WordPress site with PayPal. Then you can enable the PayPal payment for WordPress form, and finally add the PayPal widget in the form design.
Prerequisite: #
You must have the PayPal Account to integrate the Paypal payment services into MetForm.
Plugins Required: #
- Elementor: Download Plugin
- MetForm Pro: Get the plugin
👑 You need to have the MetForm Professional Plan to use this feature.
Step 1: Get PayPal Identify Token #
First, you have to generate the PayPal Identify token. To get the token:
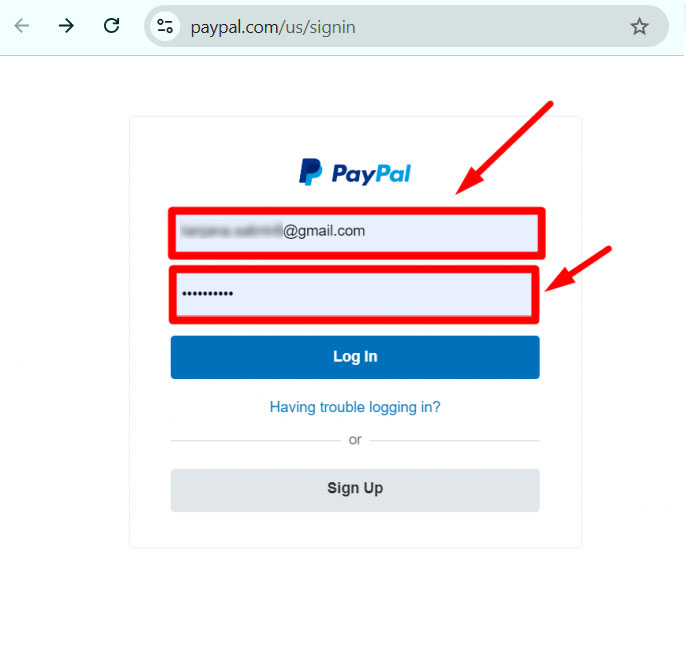
1. Create a PayPal business account and go to the URL: https://www.paypal.com/us/signin.
2. Log in with your created PayPal Email and Password.
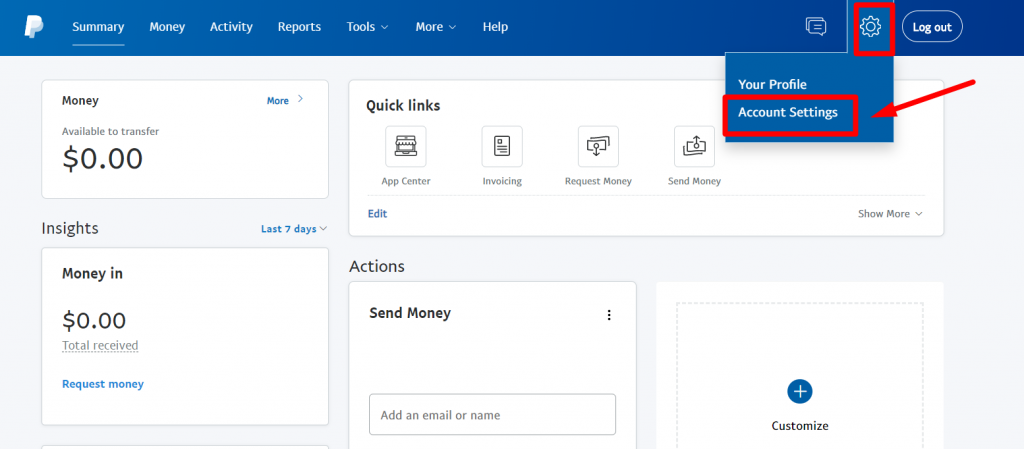
3. Access your PayPal dashboard, then navigate to Settings → Account Settings.
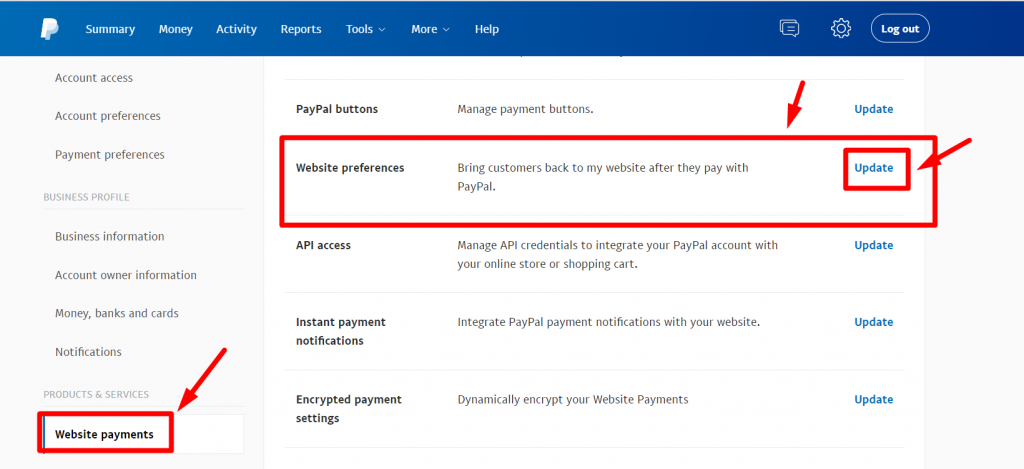
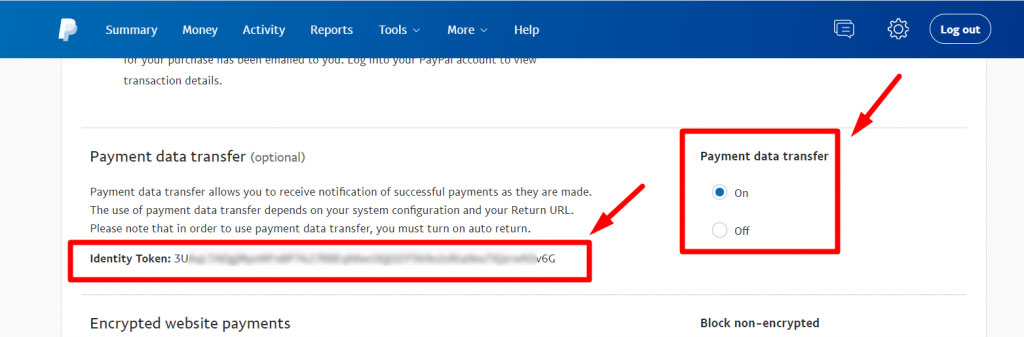
4. In account settings, go to Website payments. Then tap the Update link next to the Website preferences option.Tap the Update link next to the Website preferences option.
5. Enable the Auto return for website payments, then add your store’s thank you page link in the Return URL field.
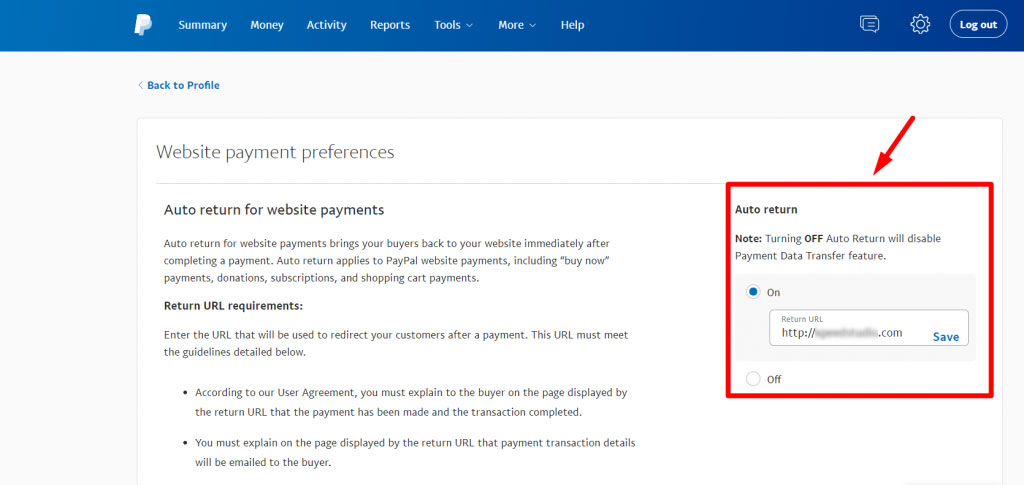
6. Enable the Payment data transfer as well. The identity token should appear at the bottom of the section.
Step 2: Add PayPal payment to WordPress #
Now you can add this PayPal Identity Token to WordPress.
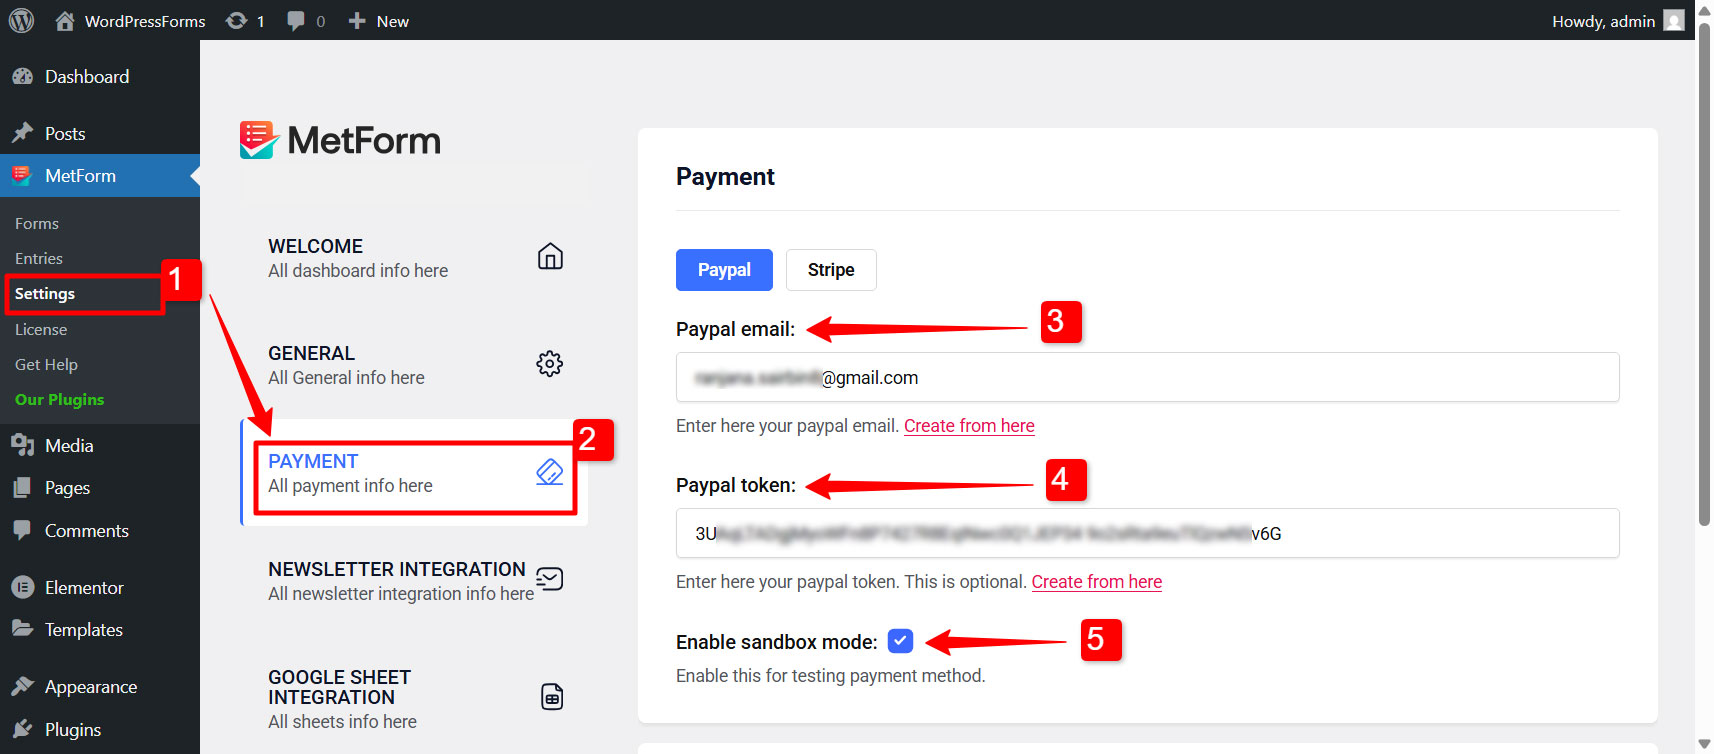
1. Navigate to MetForm → Setting from your WordPress dashboard.
2. Then go to the Payment and switch to PayPal tab.
3. Enter the same Email address that you used for your PayPal account.
4. Enter the PayPal Token that you have generated earlier.
5. Tick the checkbox for the Enable sandbox mode.
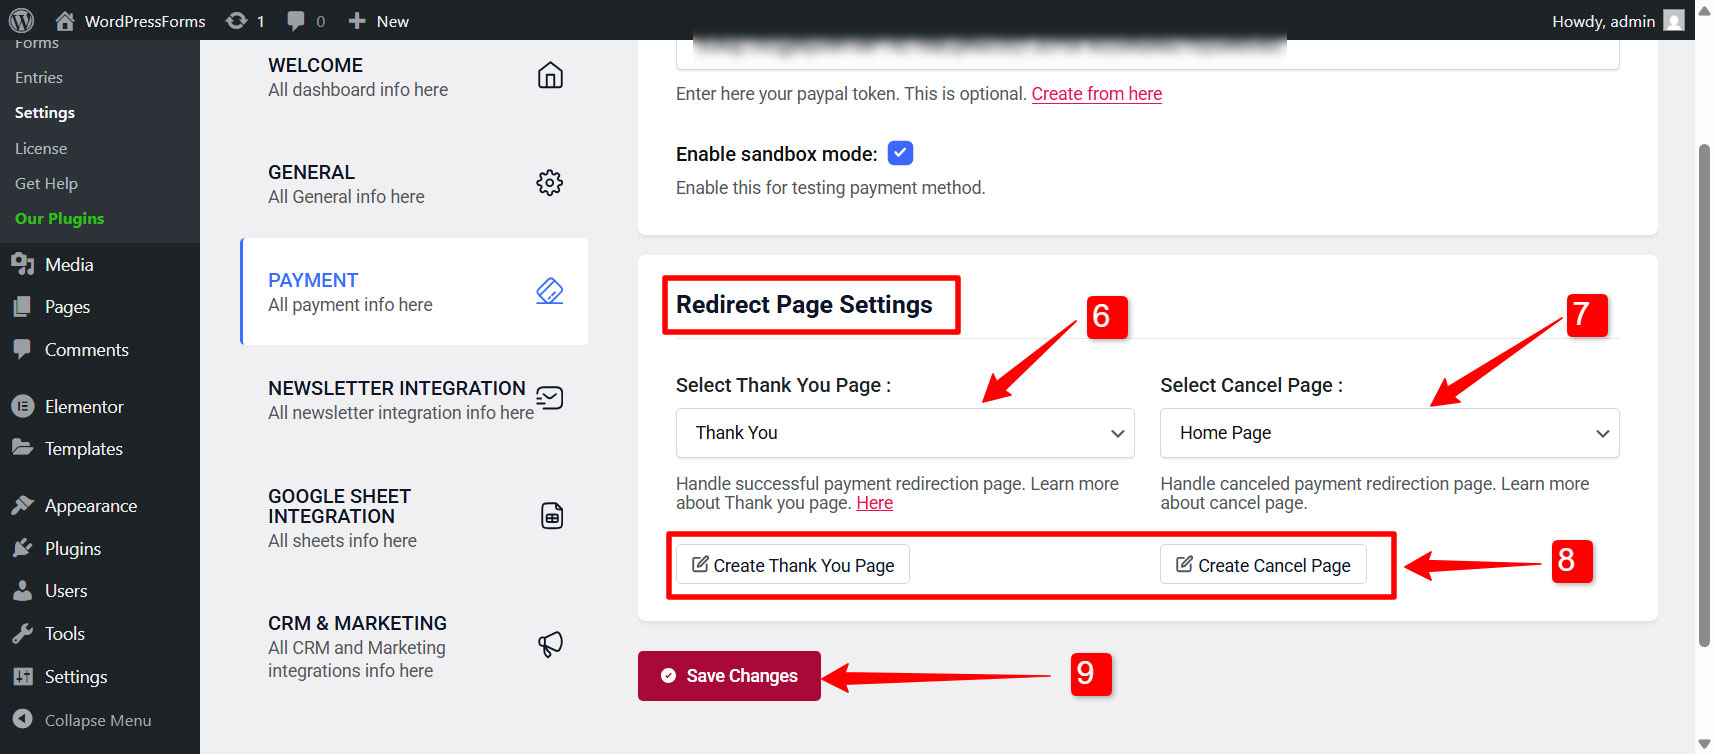
After that you can configre the redirect page settings in the same tab.
Redirect Page Settings:
You can also redirect the user after they complete their payment or cancel it. For that:
6. Select Thank You Page: From the dropdown list, select a page where the users will be redirected after they complete their payment. You can show a nice “thank you” message in that page.
7. Select Cancel Page: Choose a page where users will be redirected in case of payment cancellation.
8. If you don’t have these pages created on your WordPress site, you can create them by clicking on the “Create Thank You Page” and “Create Cancel Page” button respectively.
9. Finally click on the Save Changes button to finalize the changes. Note: The email and PayPal token won’t be saved if you don’t click on the save changes button.
Step 3: Enable PayPal payment for a WordPress form #
To enable PayPal payment for a form built with MetForm,
- Go to MetForm → Forms.
- Click on the Edit option for an individual form to open form settings.
- In Form Settings, switch to Payment tab.
- Under this tab, choose the Default currency for payment.
- Finally, enable the PayPal option.
Step 4: Add PayPal Payment Button to WordPress Form #
You can integrate PayPal payment gateway in WordPress forms as Payment Method in the input field. For that,
1. Go to MetForm → Forms and open a form created in the Elementor editor.
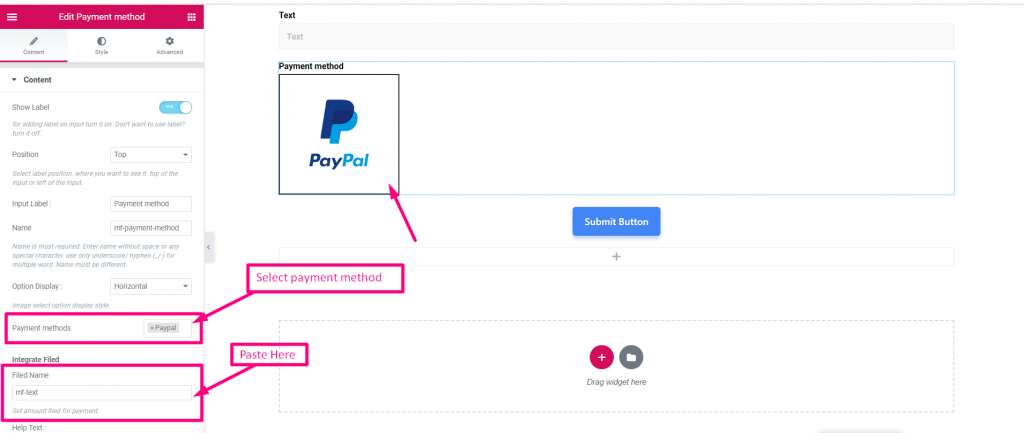
2. In the Elementor editor, search for MetForm’s Payment method widget and drag it to the design area.
3. For this widget, add PayPal in the Payment methods field.
4. Set the Default payment method to PayPal.
- Now Copy the Selected Name: Mf-Text
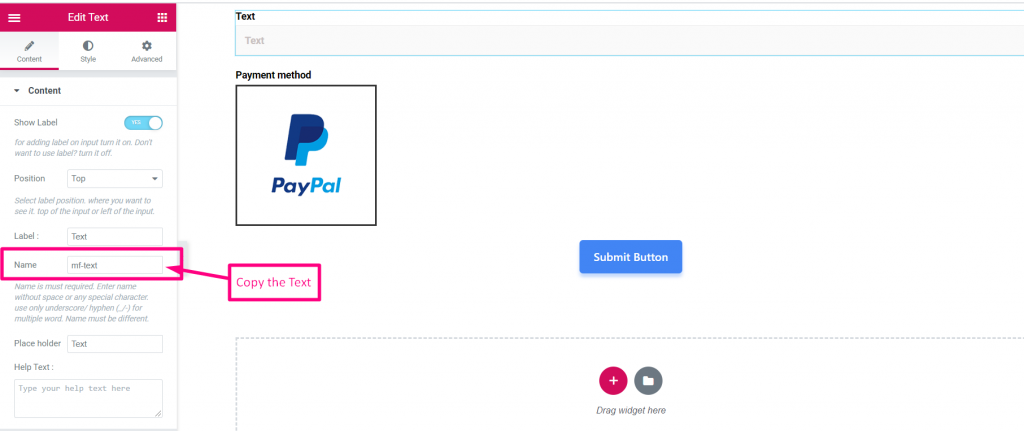
- Select Payment Method
- Paste the Text Name to the Integrated Field
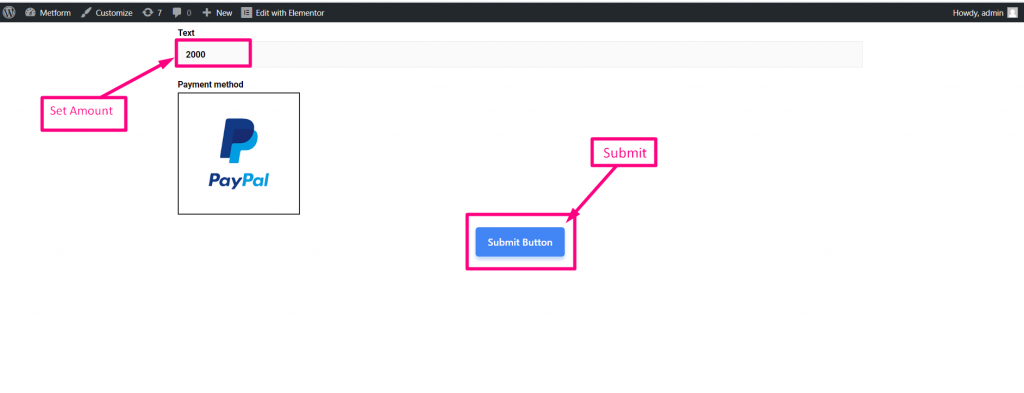
- Set Amount
- Submit
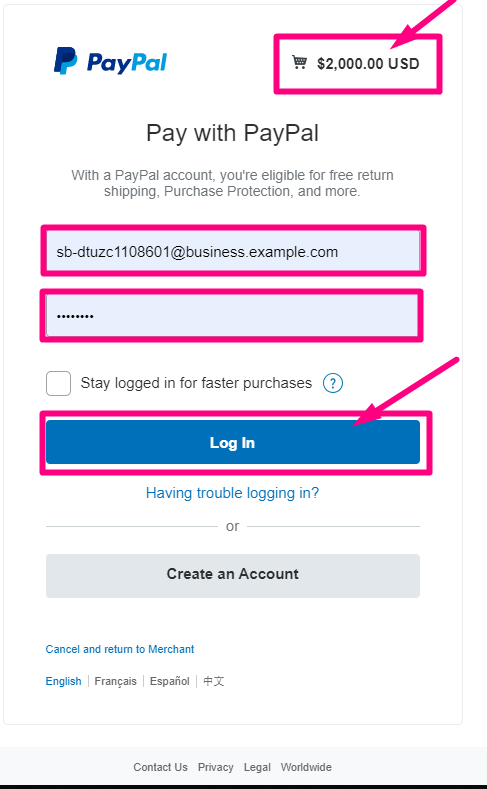
Log In with your PayPal account. The amount will be displayed in the currency you selected earlier.
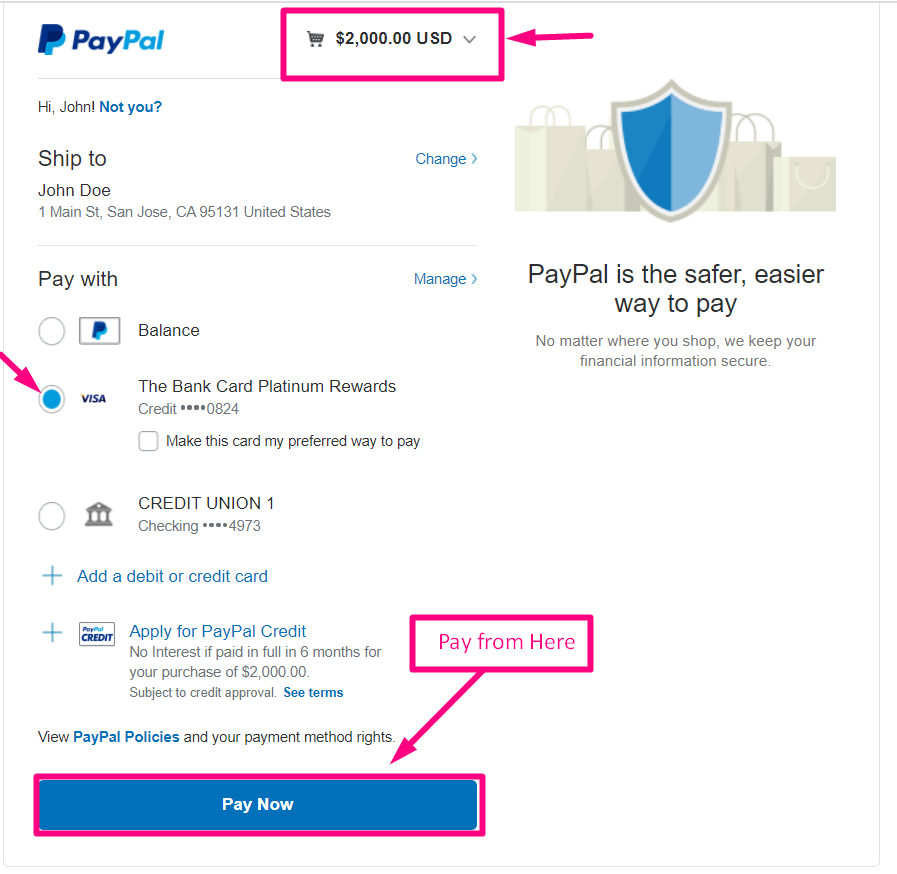
- Select your Payment Type
- Pay Now
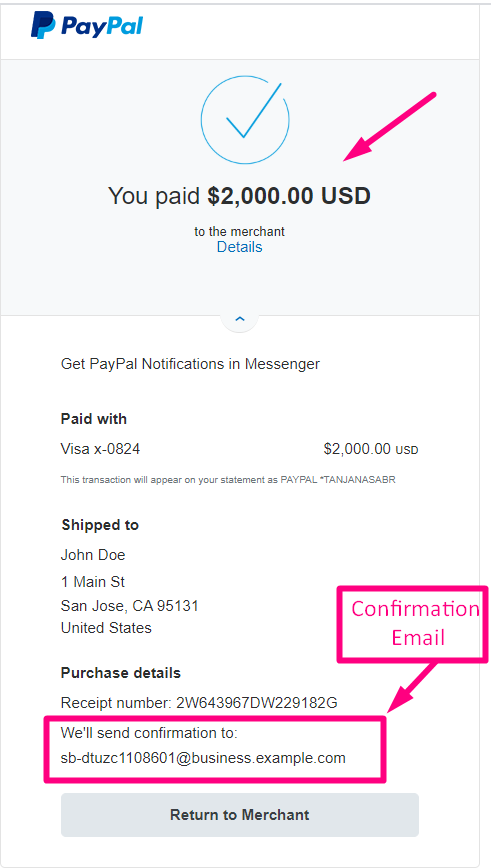
Confirmation send to your Email
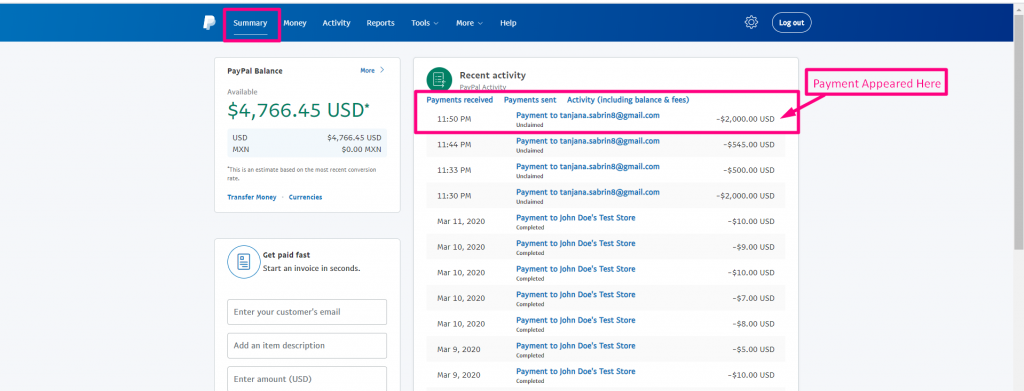
You can see the transaction appeared in the PayPal Dashboard Payment Section
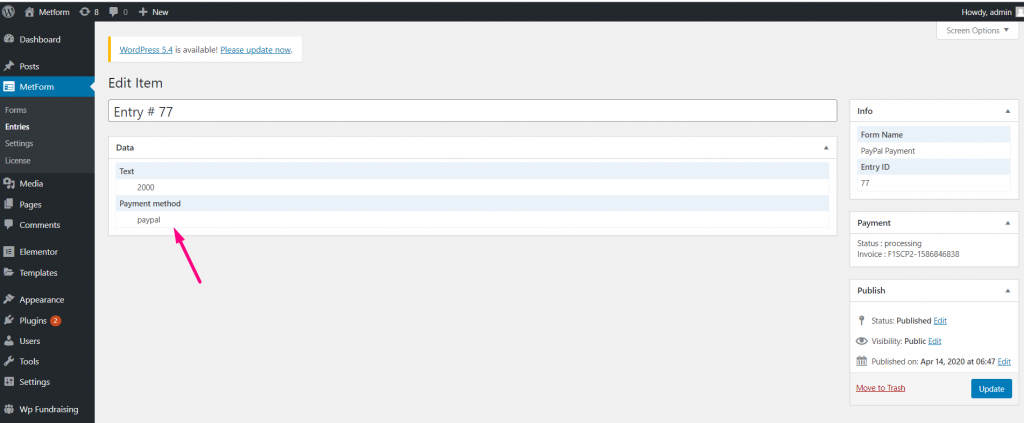
You can also View it from the Admin Panel: Metform=> Entries
PayPal is a mostly used payment gateway no doubt. So, just follow the steps of integrating PayPal payment with WordPress and make your customers feel more comfortable with the payment process. And, we hope people find the dynamic currency options flexible too.


