


MetForm offers all essential settings in the the General section of the form settings part.
Let’s explore the features.
Overview of MetForm Features #
Here we will give an overview of all the features and setting available for a WordPress form created with MetForm.
How to Create Form 👉 Follow the Video Screen-cast:
Start from your WordPress dashboard #
Once you install the MetForm plugin, a menu will be added to your dashboard. You have the following menus in the MetForm dashboard:
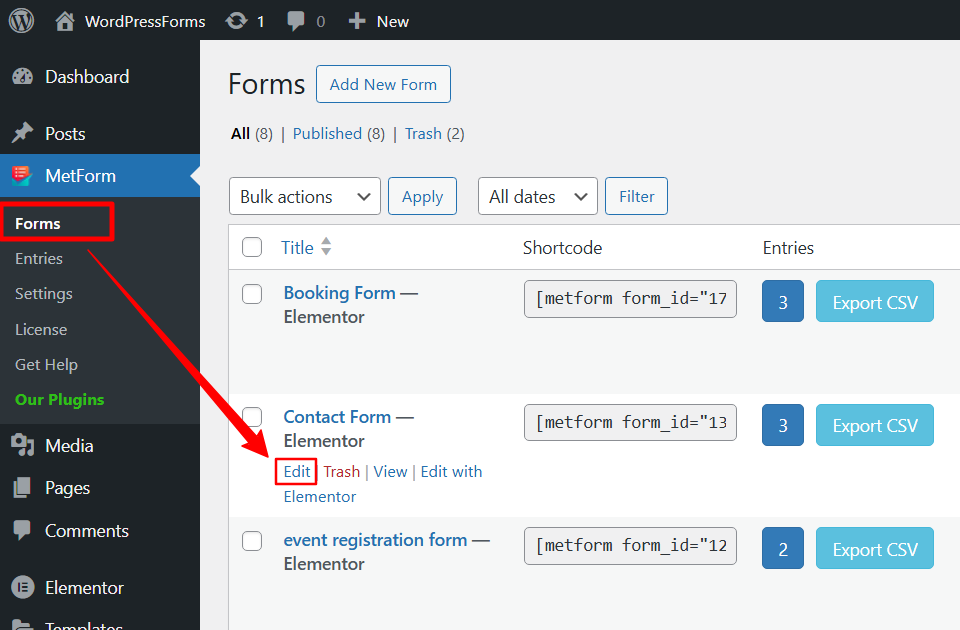
1. Forms: #
Here you can create new WordPress forms. Just click on the Add New Form in the top left corner and start creating a form with MetForm. Simply enter a form name, select form type and choose the kind of template you want. With MetForm, you can either build your form with pre-built form templates or start with a blank template.
For the detailed procedure, read this documentation to create a new form with MetForm.
Under the Forms, you will have the list of forms created with MetForm. For each form,
- Edit: You can configure the form settnigs here.
- Trash: To delete the form (move to trash).
- View: To preview, how to form will look on the user end.
- Edit with Elementor: To design and customize the form in the Elementor editor.
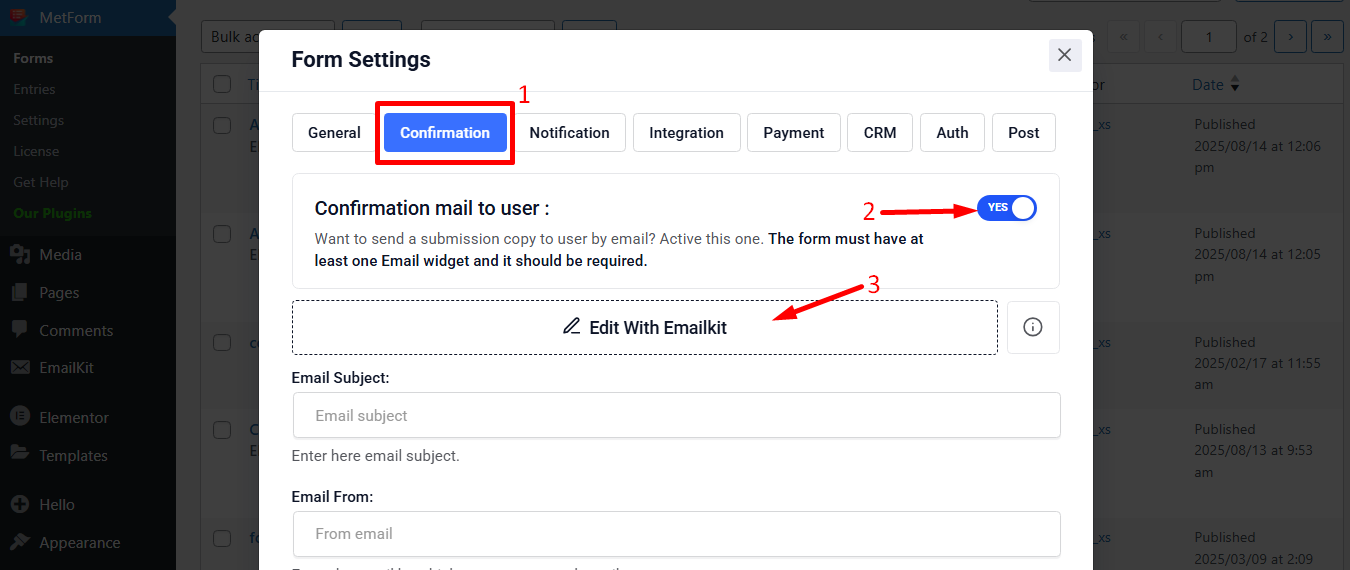
Once you click on the Edit option, you will see a Form Settings popup appearing on your screen. This settings pop-up has several tabs: General settings, Confirmation email, Notification email, Integrations, Payment gateways, CRM, etc.
- General: For the general settings, you can add form Title and Success Message. You can also enable the following options: Show Quiz Summary, Required Login, Capture User Browser Data, Store Entries, Limit Total Entries, Stop Vertical Scrolling, and Redirect To.
To explore these settings in detail, please read the documentation for MetForm General Settings.
- Confirmation Email: You can send a confirmation email when an user submits a form with a copy of that form that they have submitted. To set up the confirmation email, enter the Email Subject, Email address to send from, Email address to send, and Thank You message. You can also custmize the confirmation email desing with EmailKit.
Here is the detailed documentation to set up confirmation email.
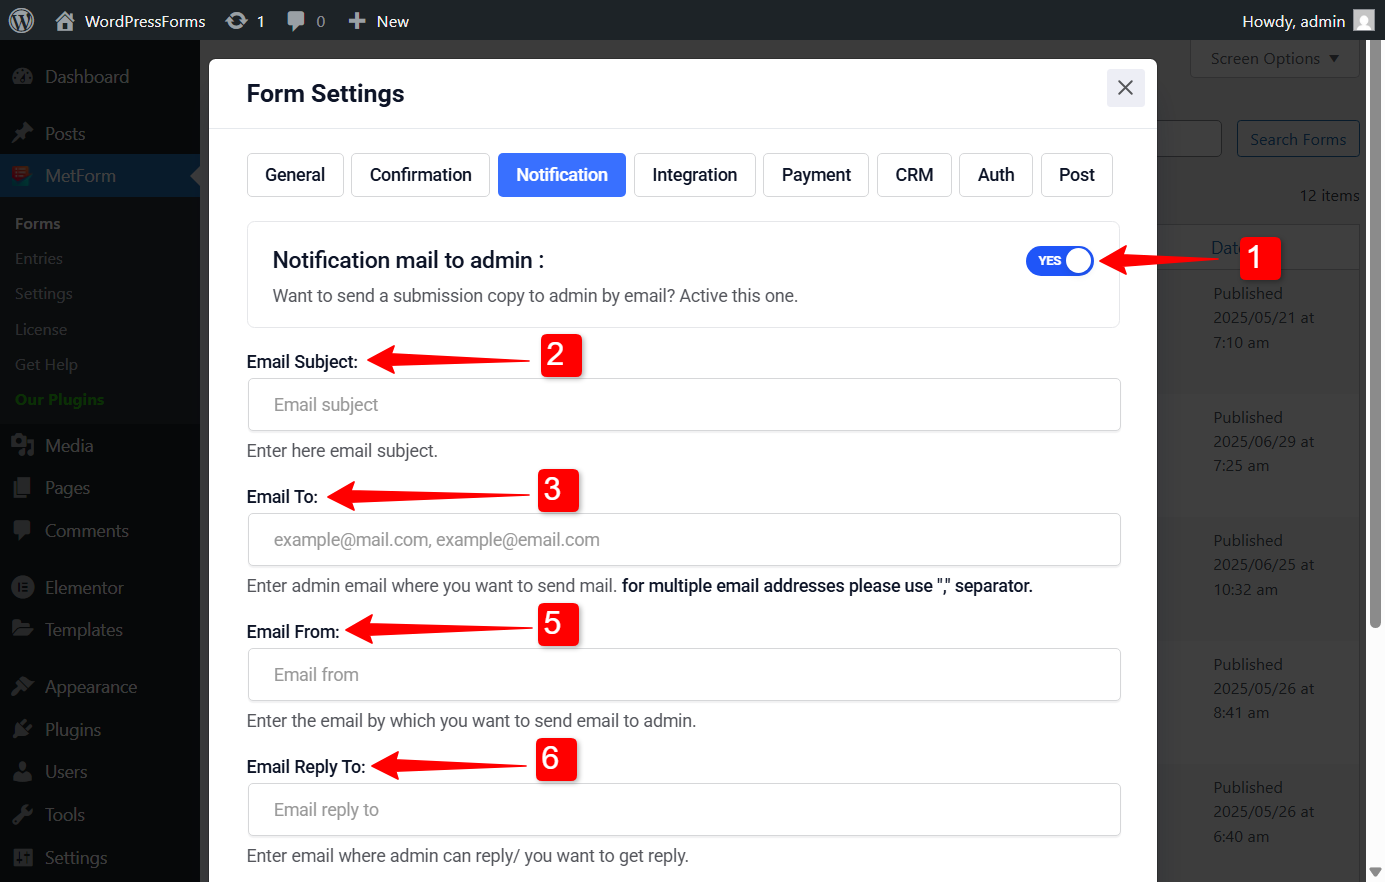
- Notification Email: When a user submits a form you can send a notification email to the admin with a submission copy. Set up the email with email subject, admin email to send the notification, Email address to send from, an email address where admin can reply to, and an admin note.
Under the Integration tab, you have the following integrations availbe for your WordPress forms.
- HubSpot
- REST API
- Mailchimp
- Google Sheet
- MailPoet
- Aweber
- ConvertKit
- GetResponse
- ActiveCampaign
- Zapier
- Slack
- SMS Integrations (Twilio)
We have individual documentations for each of the integrations. Please read the documentations linked here to learn how to configure the integrations for MetForm.
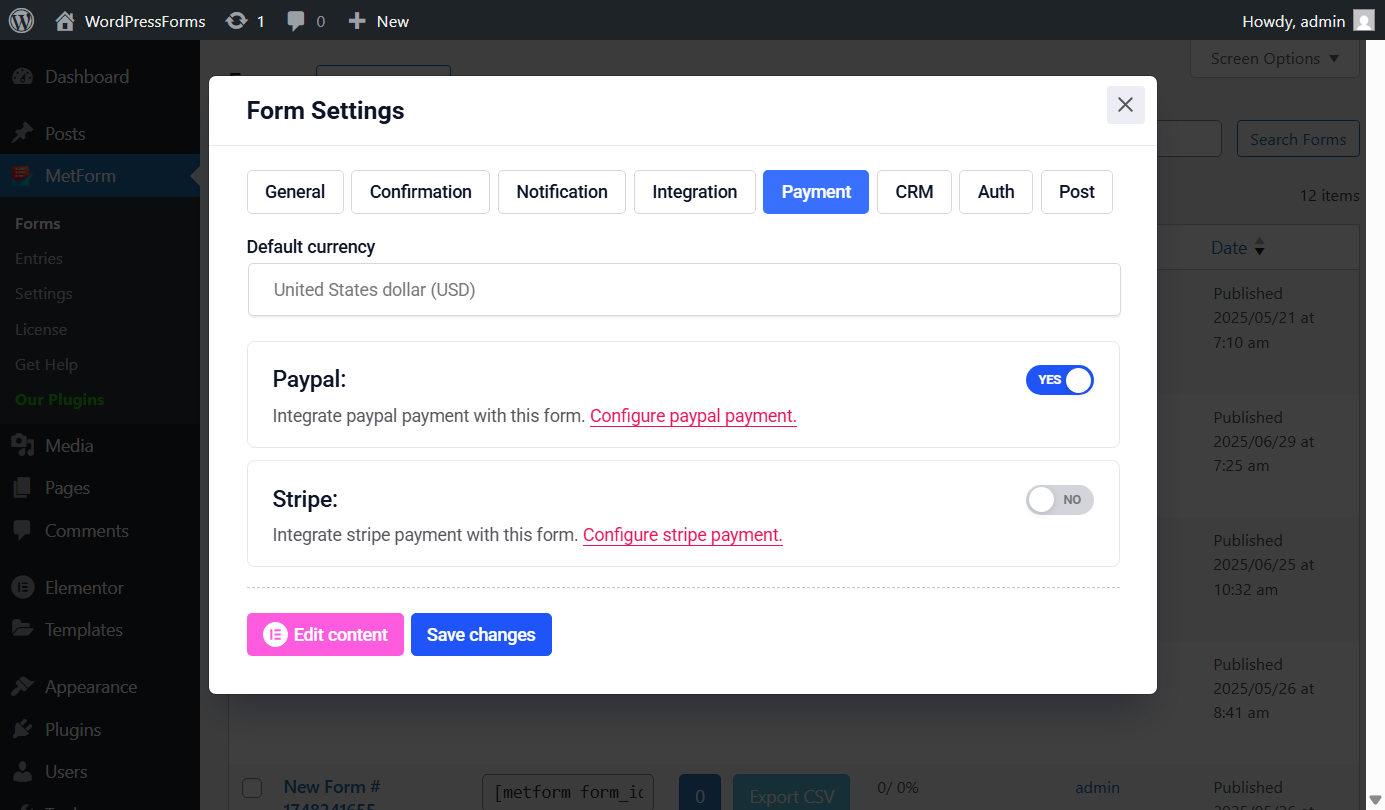
- Payment: With MetForm, you can add payment options in the WordPress form. Select the default currency and use one of the following payment gateways:
- PayPal: Configure PayPal payment method in WordPress forms (documentation).
- Stripe: Configure Stripe payment method in WordPress forms (documentation).
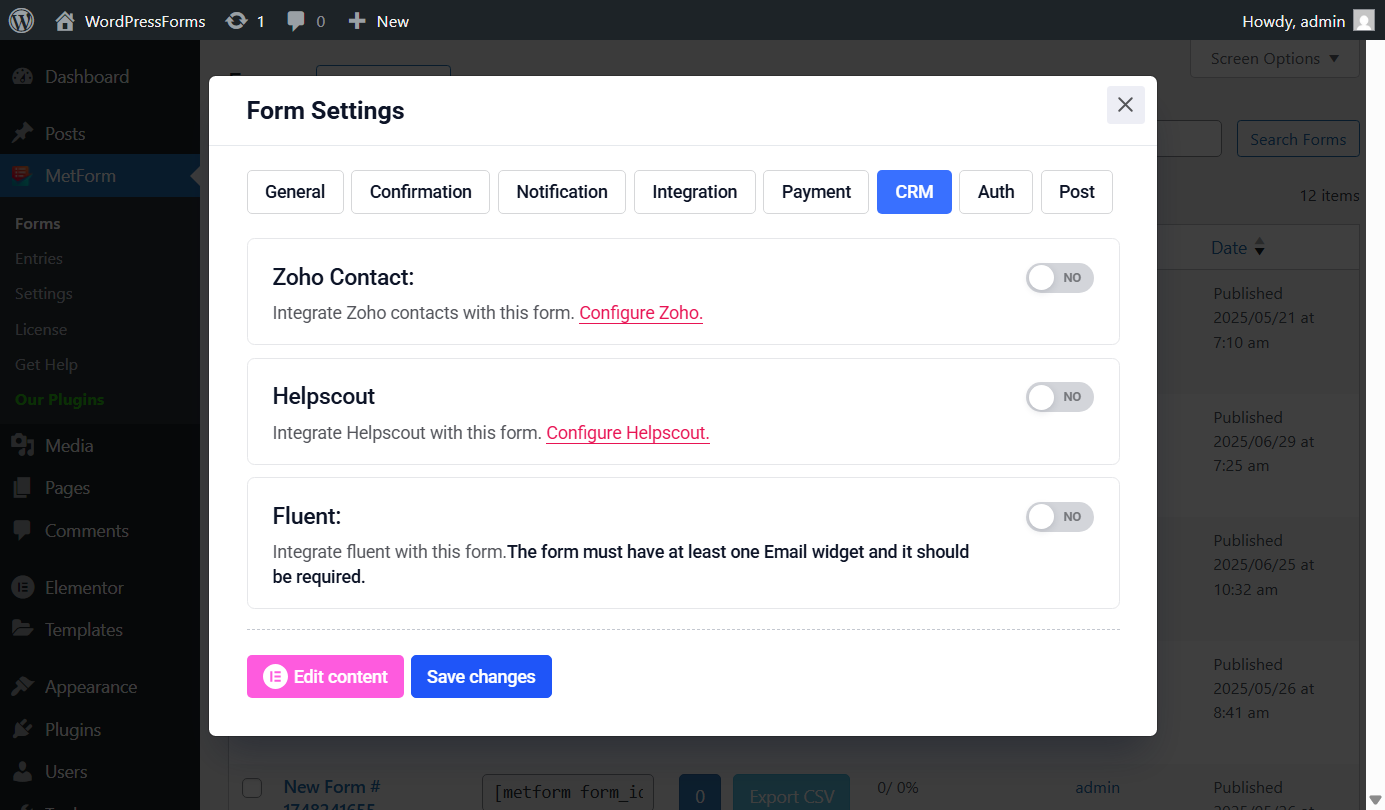
- CRM integrations: You have the following CRM integrations with MetForm: Zoho Contact (documentation), HelpScout (documentation), and FluentCRM (documentation).
- Auth integration: You can add the user authentication system in your WordPress form with login/ registration. Enable the Login authentication and set the fields such as Username and Password. Similarly for Registration, enable the option and add the essential fields like Username, User Email, and User Role. (Read the documentation).

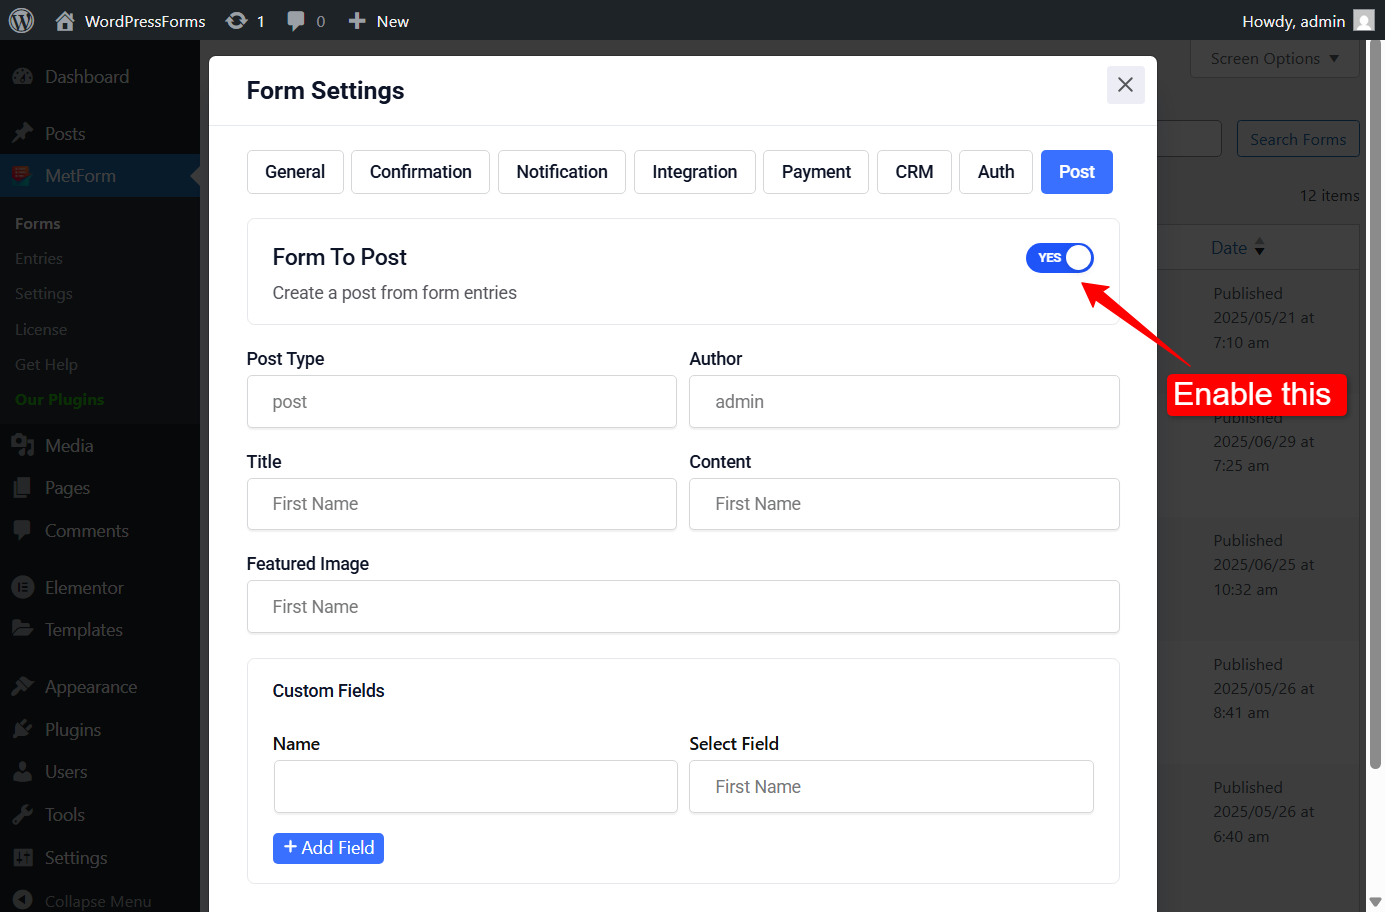
Create Post from MetForm: Under the Post tab, you can create posts from the WordPress form entries. Once you enable the option, select Post Type, Author, Title, Content, and Feature Image for the post. You can also add custom fields for the post.
Read the documentation to create a post form MetForm.
2. Entries #
Every form submitted by the users is saved under MetForm → Entries in your WordPress dashboard. From there, you’ll see a complete list of all submissions, where you can view the data, make quick edits, and download the data in CSV format. Plus, if you ever need a copy, you can easily export the submitted data as a PDF.
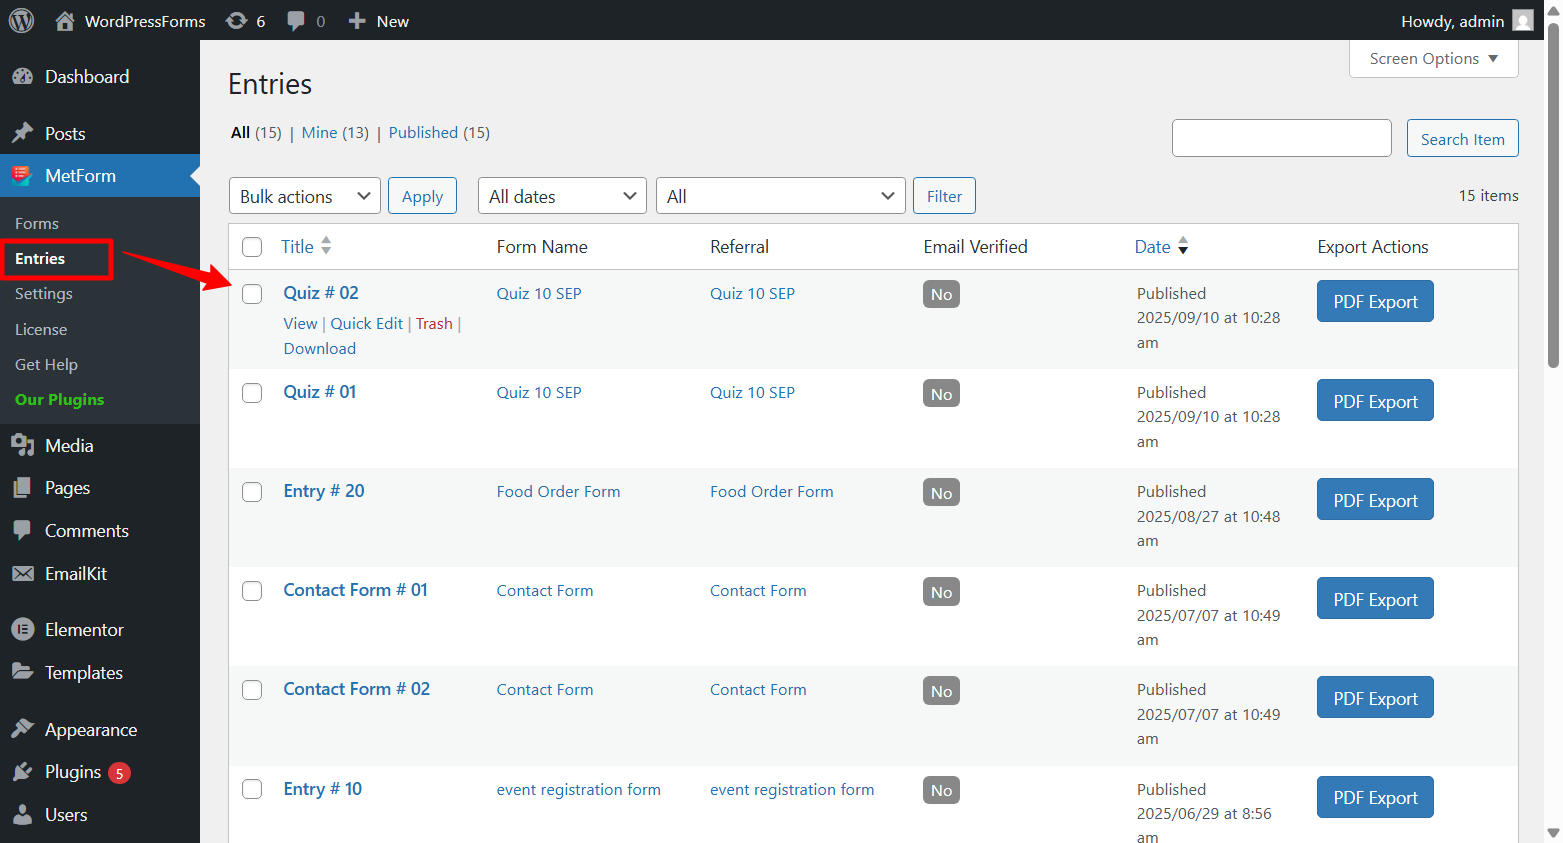
For each form, you can quickly check who submitted what, keep track of responses, and view all the details your visitors or customers shared.
Read the full documentation for MetForm Entries.
Get MetForm now 👇


