GutenKit Pro is an expansion of the free plugin. It is recommended to have GutenKit free version before you start activating GutenKit Pro on your website. Follow this doc to learn how to install the GutenKit free version from the WordPress repository.
How to Purchase, Install, and Activate GutenKit Pro #
Prerequisites:
Install and activate the lite plugin 👉 GutenKit
Follow the steps below to learn how to purchase, install, and activate GutenKit Pro.
Step 1: Purchasing GutenKit Pro #
To purchase the GutenKit Pro plugin, you need to visit the GutenKit pricing page. Once, you’re there, follow the below ways:
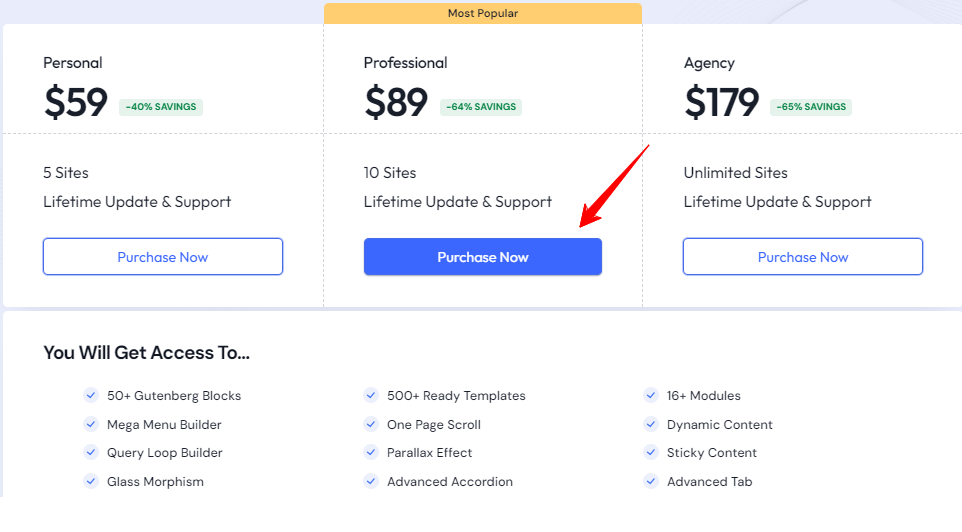
- Select your pricing plan and hit the Purchase Now button.
- Doing this will take you to the checkout page.
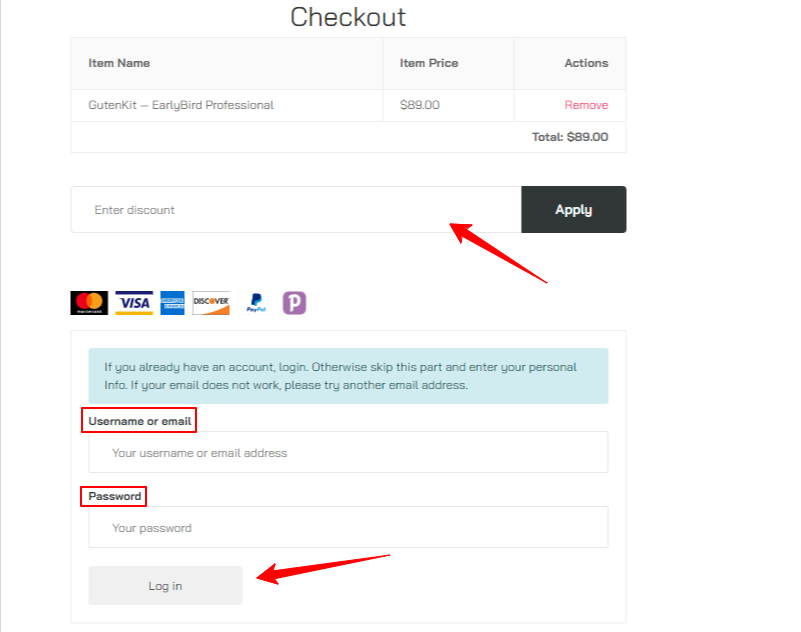
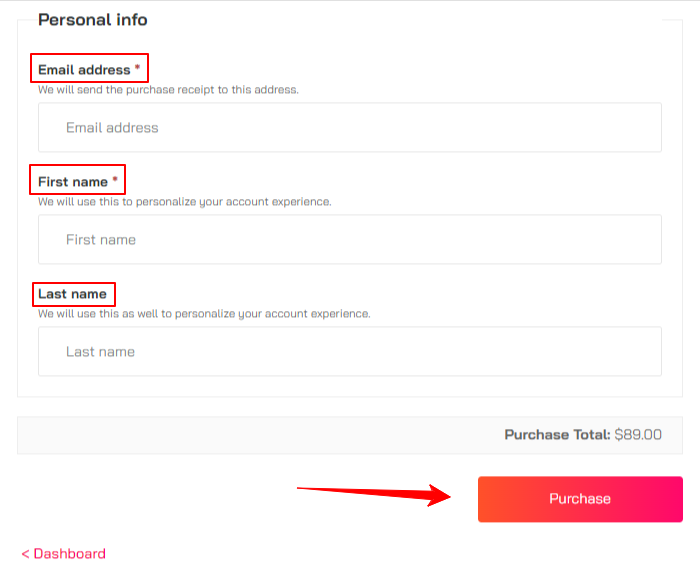
Here, you can apply any discount code if you have one. And, you have to submit some other personal details to make the payment. After filling up the payment details, hit the Purchase button.
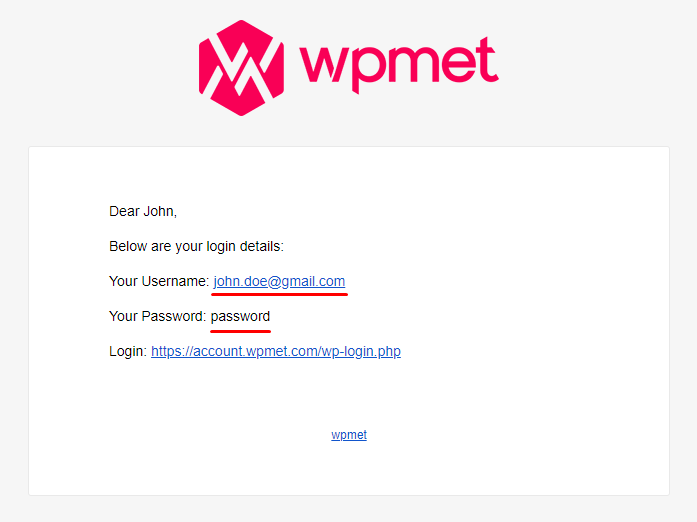
Next, an email will be sent to your inbox as soon as the payment is made.
The email includes the login details of the Wpmet account and a download link to the GutenKit plugin.
Step 2: Downloading GutenKit Pro #
To download the GutenKit Pro plugin, you need to visit your account dashboard. For this:
Step 2: How to download the plugin #
Use the login URL from the email to sign in to your Wpmet account. You can also just log in directly through our website.
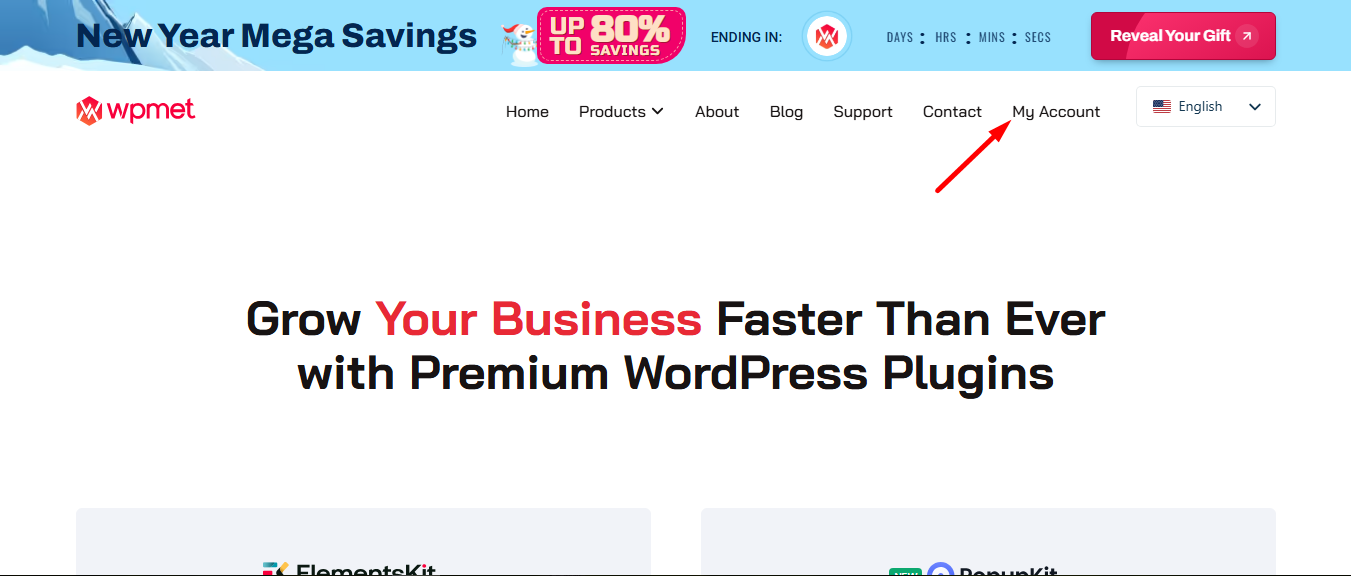
Taking you to your dashboard now.
Go to Downloads and choose the GutenKit to start your download.
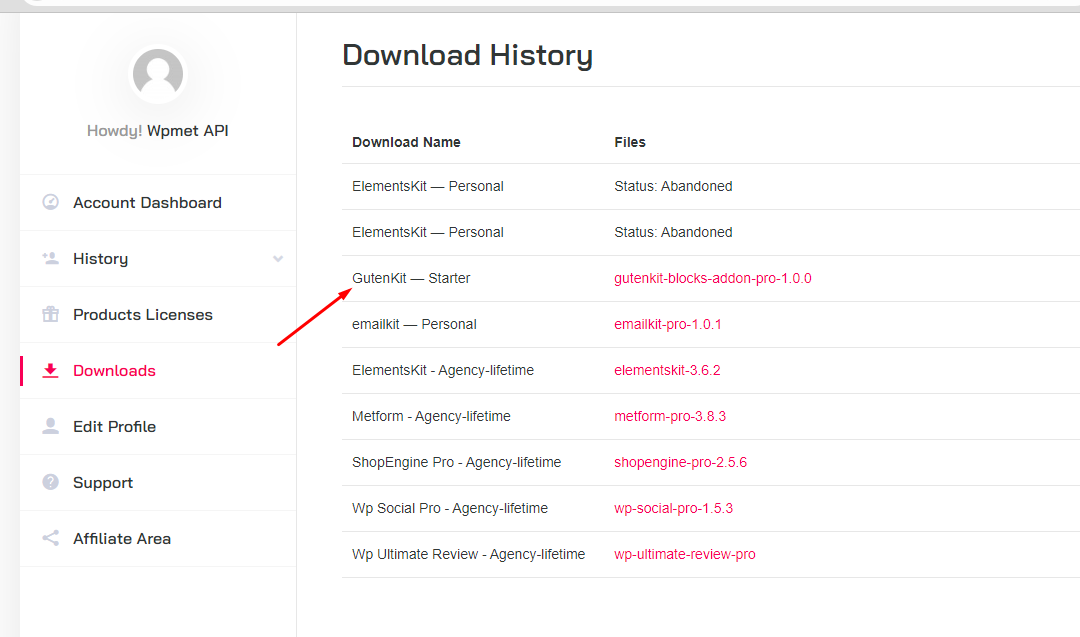
That’s it. You’ve successfully downloaded the GutenKit Pro version.
Step 3: Installing GutenKit Pro #
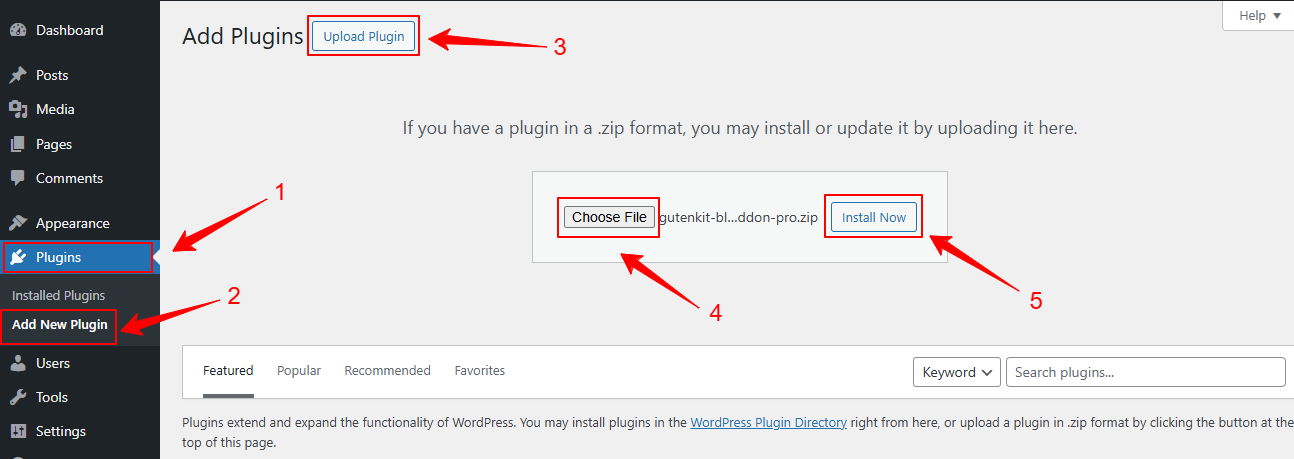
Now, you need to upload and activate the GutenKit Pro plugin. Go to your WordPress website dashboard.
- Go to Plugins
- Click Add New
- Then, click the Upload Plugin option from the top of the page
- Upload the GutenKit Pro files
- Hit the Install Now button
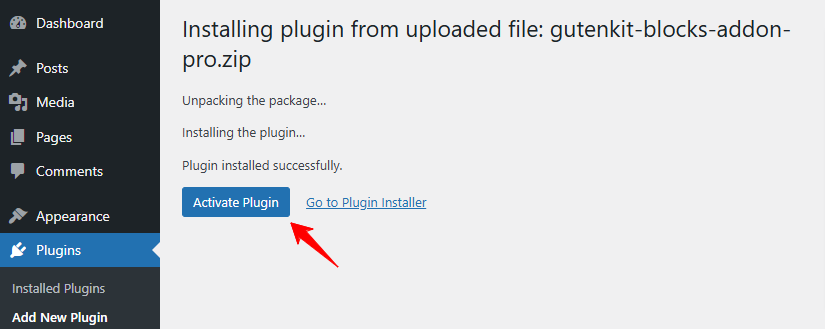
The next page will let you activate the plugin by clicking the Activate Plugin button.
Step 4: Activating GutenKit Pro License #
Go back to your Wpmet account, click Product Licenses, pick GutenKit Pro, and add your site’s domain.
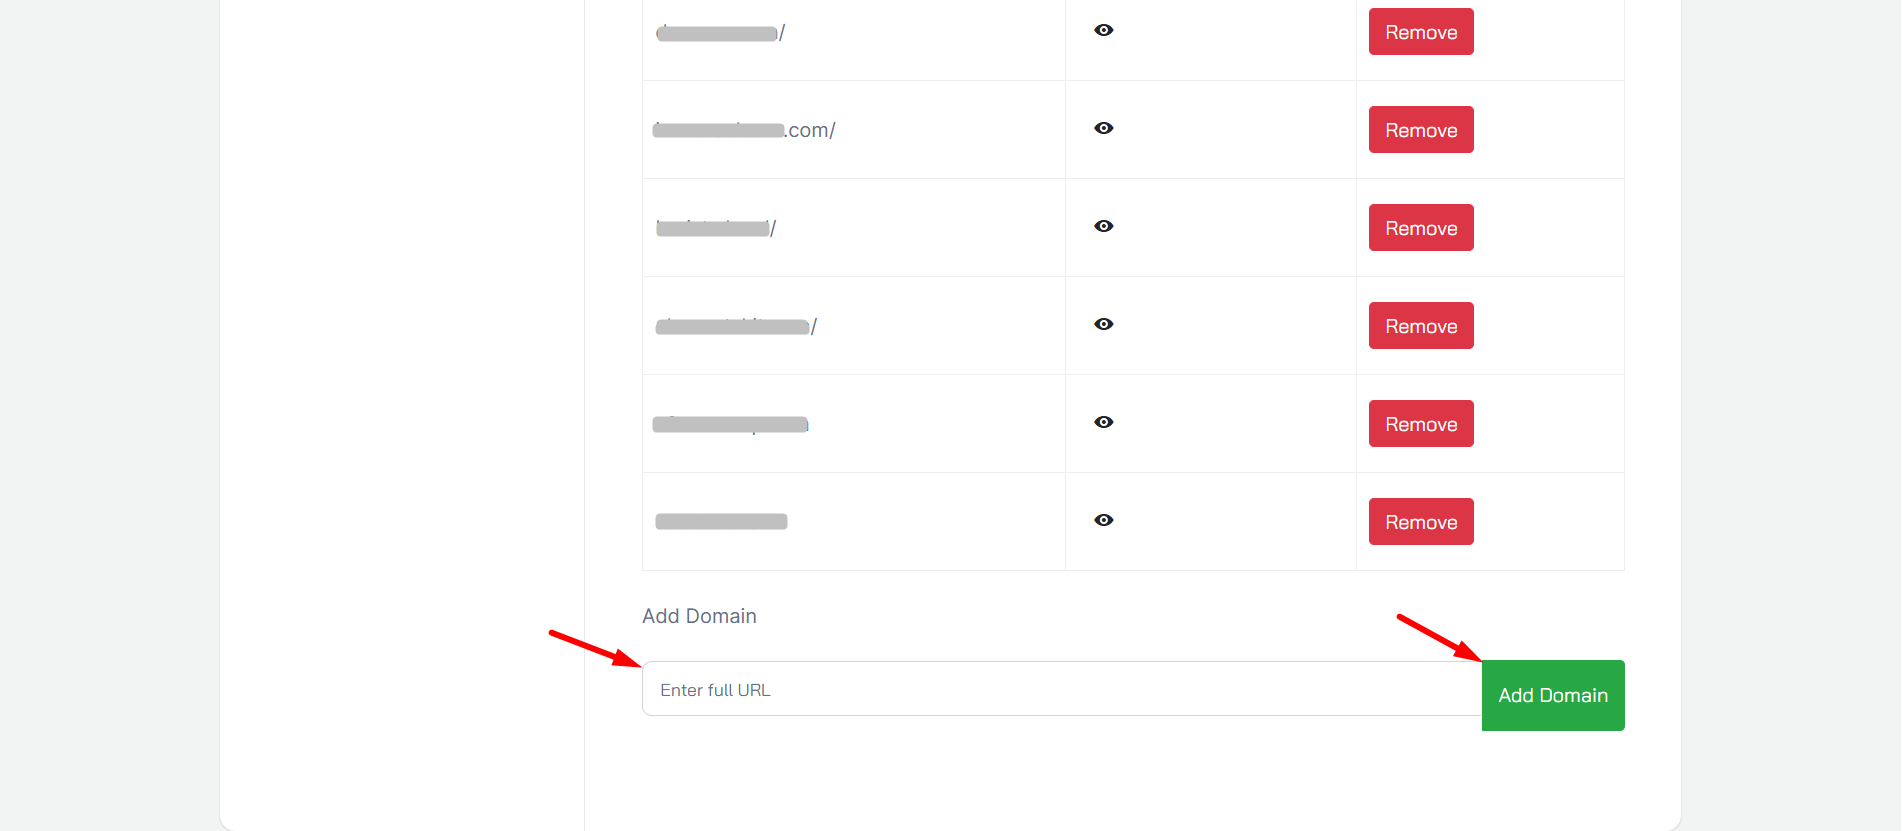
Step 5: Activate the license key on your WordPress #
After that, we’ll log in to the WordPress admin dashboard.
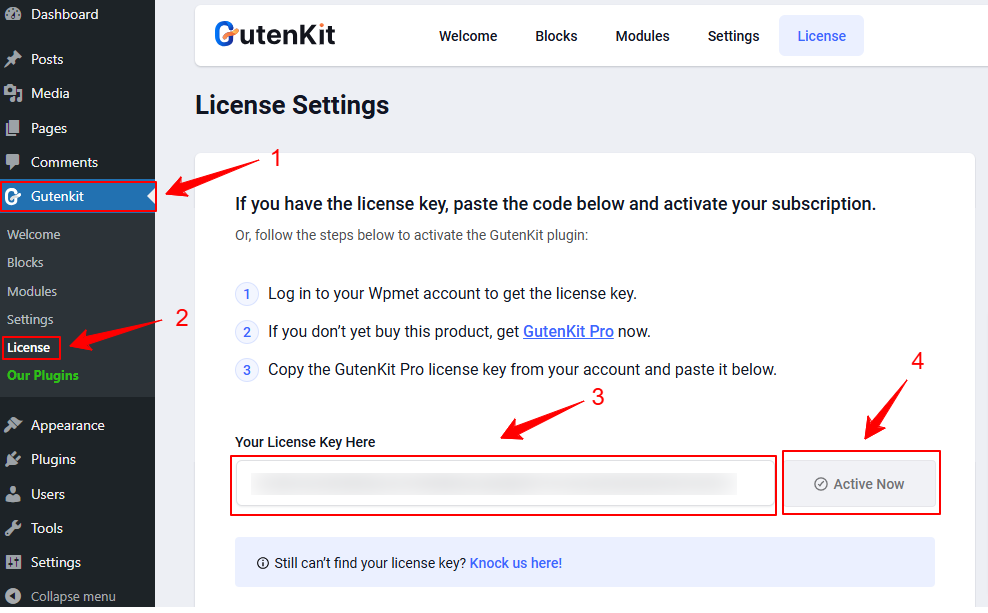
- Find GutenKit
- Click License
- Now, you need to paste the license key copied earlier
- Finally, click the Activate Now button. Now, you can access all the GutenKit pro features on your website.
This is how, you can easily purchase, install, and activate the GutenKit Pro license key.


