


Lists are a great way to show off your service types, product features, key achievements, and other important information in a listing structure. With the GutenKit Stylish List block, you can customize a stylish list with extensive features that look great on all devices.
This documentation will provide you with a step-by-step guide on how to create and customize a beautiful stylish list on your Gutenberg website.
How to Use GutenKit Stylish List Block? #
Follow the steps described below to quickly add a stylish list block on the Gutenberg website using the GutenKit Stylish list block. Note that, this is a premium Gutenberg block, so you need to have installed both installed Gutenberg free and pro version.
Step 1: Add GutenKit Stylish List Block #
From your WordPress dashboard, start to edit a page or post with the block editor. Look for the “+” icon in the editor screen and click it to reveal the block menu. Search for the GutenKit Stylish List block then drag & drop it to the editor dashboard.
Step 2: Configure List Items #
First things first, you have to add and set your list item. Under the Content Tab,
Stylish List:
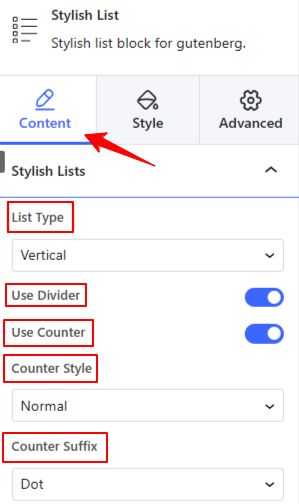
- List Type: Choose a list type between vertical or horizontal to show the list up or down.
- Use Divider: Enable this toggle button to add a divider between the lists.
- Use Counter: Activate this button to open the following options:
- Counter Style: Choose from 7 different counter lists from the dropdown.
- Counter Suffix: Add a dot, bracket, or colon after the list counter and you can also choose to show none.
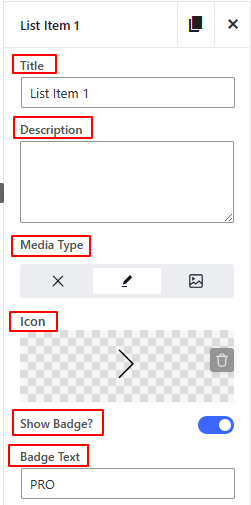
- List Settings: This block automatically loads with 3 lists, click the cross button to remove or hit the copy button to add a new one. Further, you can separately customize list items by clicking on any of them.
- Title & Description: Enter text content for title & description.
- Media Type: Show icon or image with list items, also you can choose none.
- Show Badge: Enable this toggle button to open up settings to type badge text and customize it.
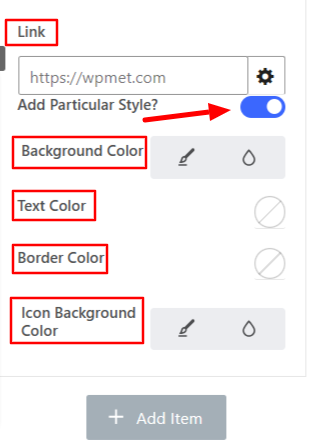
Add Particular Style: Activating this toggle button will give you access to controlling some particular feature of a list item. Like: text or border color.
Step 3: Set Animation Style #
Animation: Under this option, you will control all the animation effects for the stylish list block.
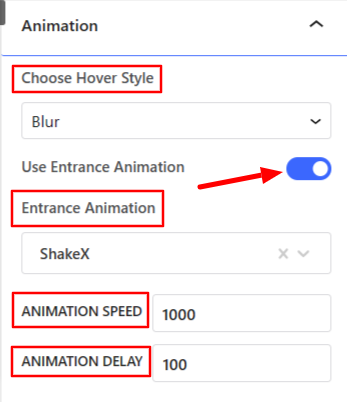
- Choose Hover Style: Beautify the hover effect by selecting blur or slider options.
- Use Entrance Animation: Turn on this option to reveal the following options:
- Entrance Animation: Select an animation effect when the list item is displayed to the visitors for the first time.
- Animation Speed & Delay: Set animation speed & delay.
Step 4: Style List Item #
Now, come to the Style Tab here you will adjust the position and customization of the list item.
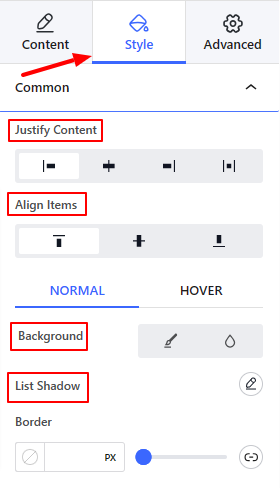
Common:
- Justify Content: Set the horizontal alignment of list items.
- Align Items: Define the vertical alignment of list items.
- Background: Select a background type for the list items.
- List Shadow: Add shadow effects for the list items.
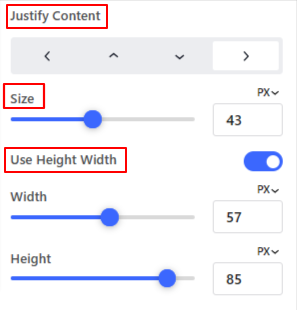
Icon Image:
- Justify Content: Set the position of the icon around the list item.
- Size: Use this slider to define the size of the icon.
- Use Height Width: Enable this option to add height/width around the icon.
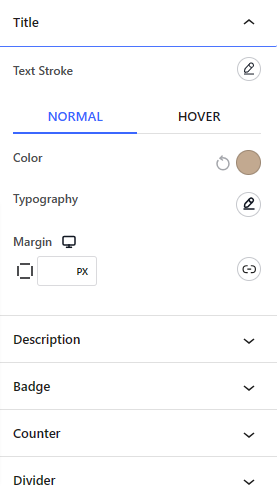
Title
- Text Stroke: Decorate your text with an outline around the text.
From the Style Tab, you will also customize the description text, badge, counter, and divider as well.
At this stage, just go to the live page to see if the stylish list appears correctly. That’s it!
We hope this article has helped you learn how to add and style a stunning feature list from your Gutenberg block editor dashboard on your WordPress website.


