Dynamically show content on your website with a visual query loop builder for Gutenberg. It allows users to visually design layouts in WordPress that display dynamic content from the website, like blog posts, custom post types, and also pages.
GutenKit has brought the Query Builder block in Gutenberg editor with extended capabilities.
Let’s see how the block works.
Prerequisite #
To use the advanced query builder in Gutenberg, you need to install GutenKit Pro plugin in your WordPress website.
GutenKit Query Loop Builder #
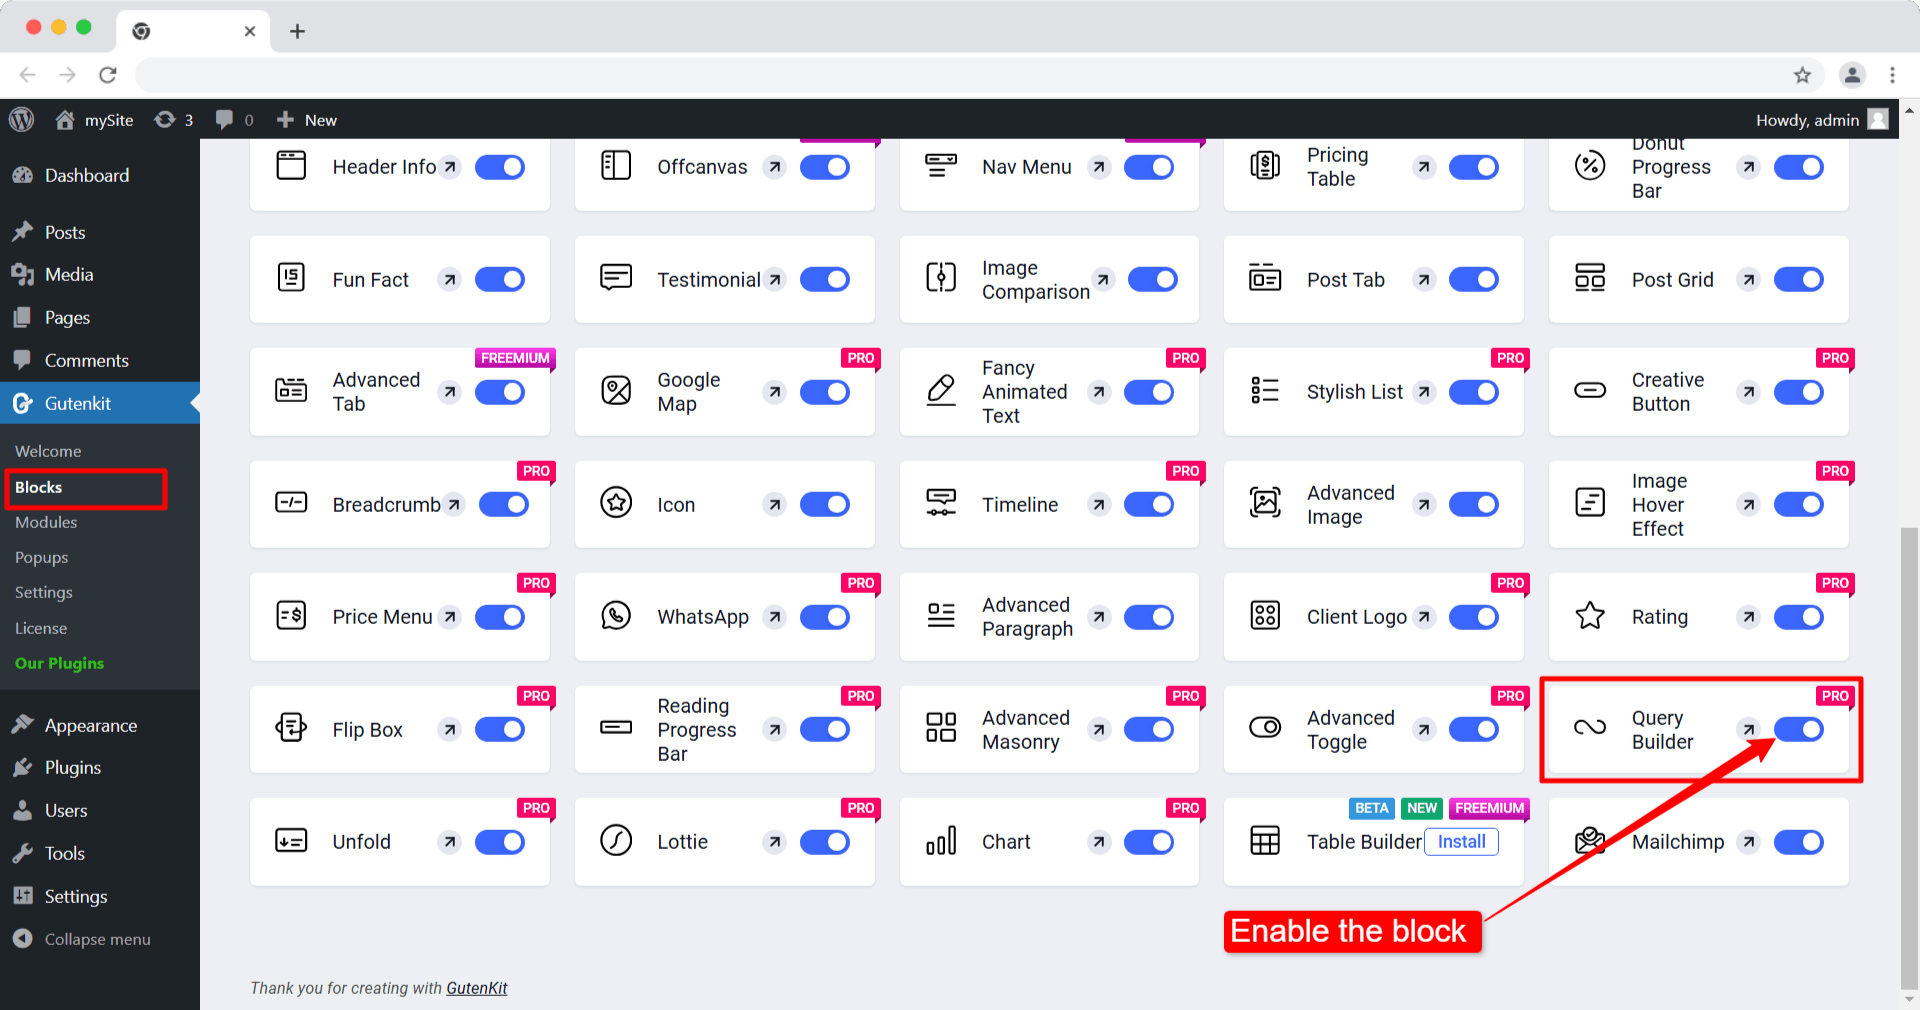
After installing the GutenKit Pro plugin, you need to enable the Query Builder block.
- Navigate to GutenKit -> Blocks.
- Find the Query Builder block from the list.
- Turn the toggle button on to enable the block.

Add the Query Builder block to editor #
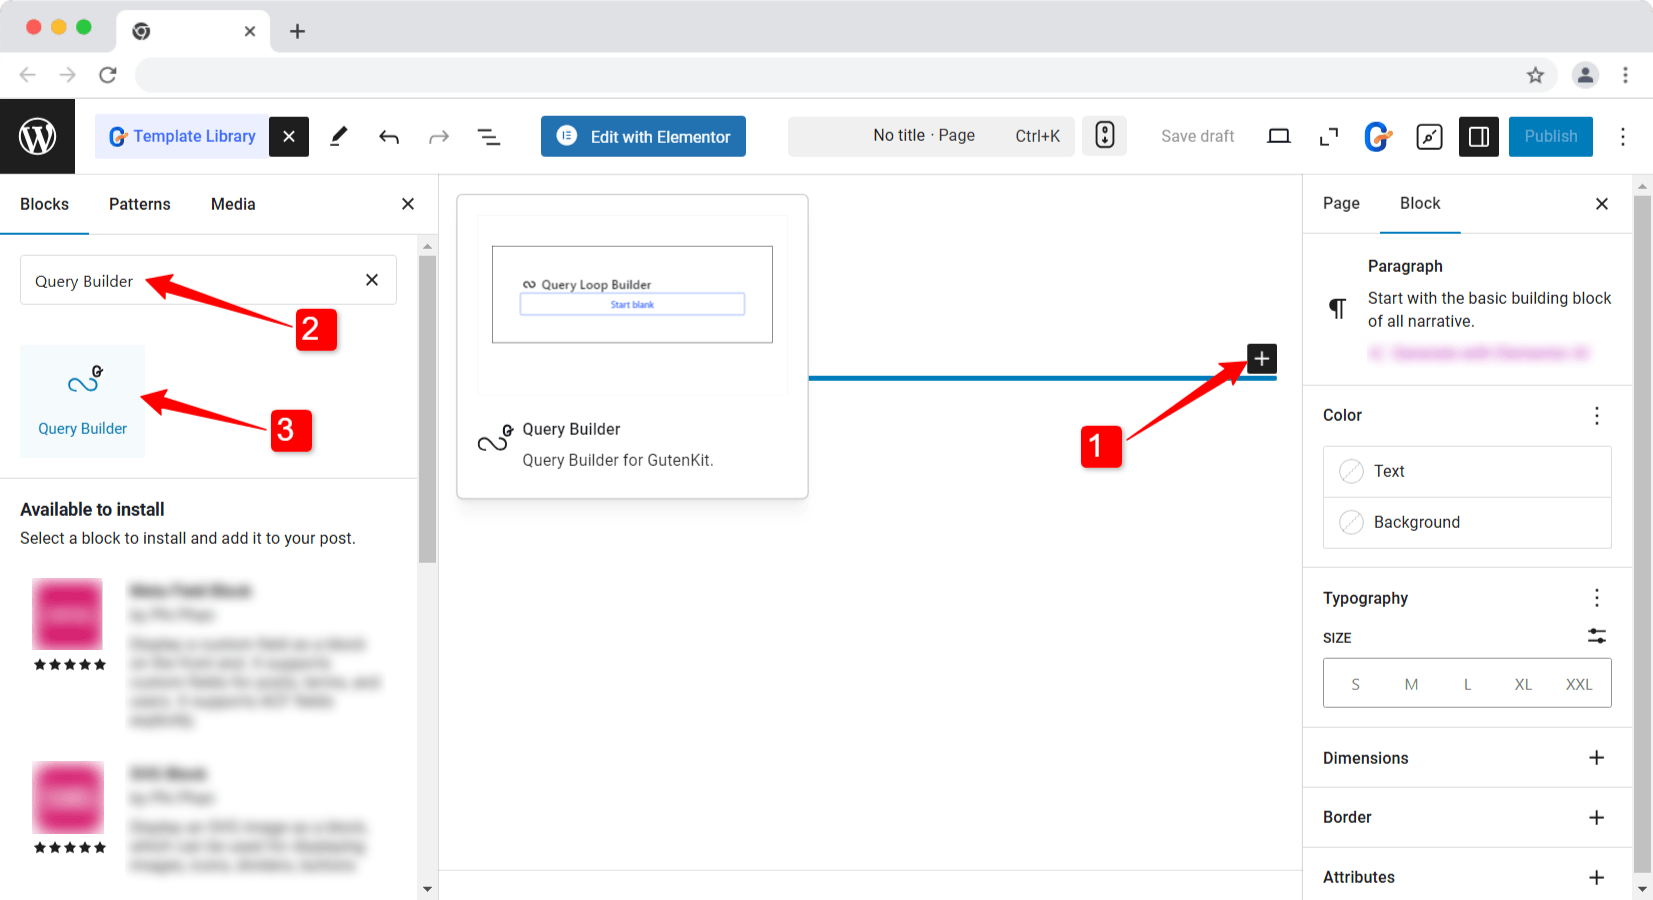
From your WordPress dashboard open the page/post where you want to use the Query Builder.
Now search and simply click/drag and drop the GutenKit Query Builder block.

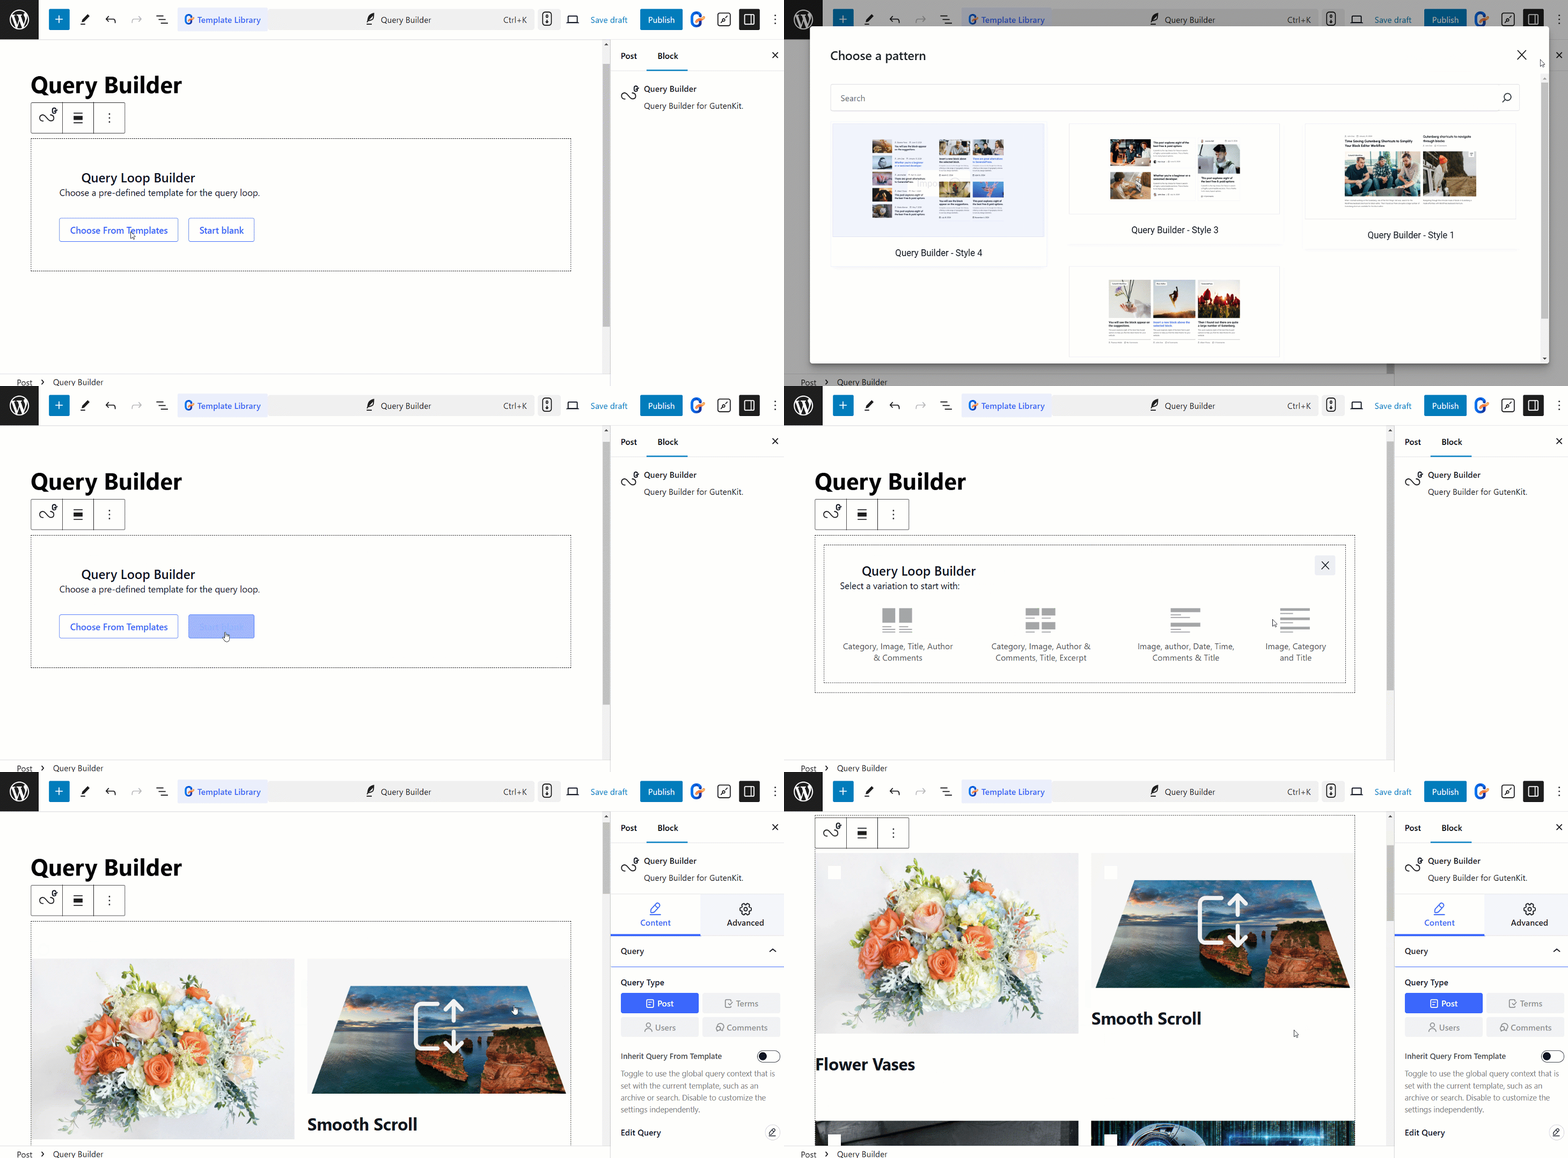
Choose a pre define blank template for the query loop from the variations.

Editing content part #
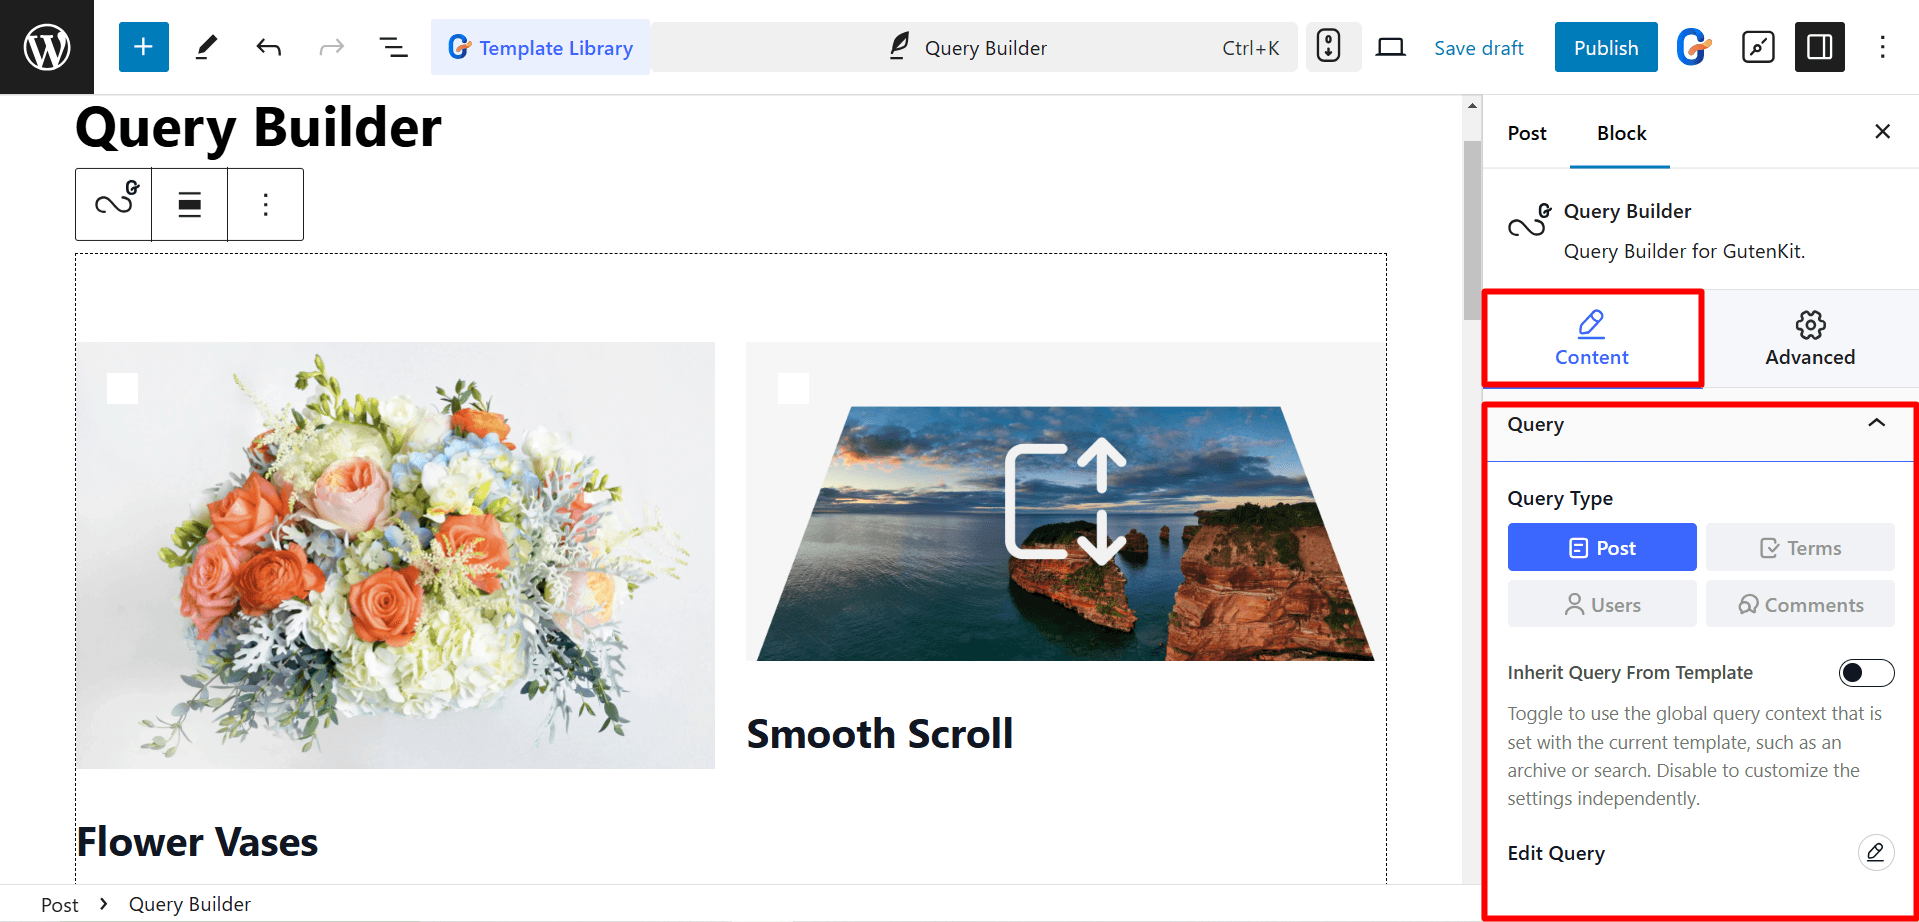
After expanding the Query tab, you’ll see –
- Query Type: Here, you can select the post type as post.
- Inherit Query From Template: You can use the global query context by enabling this toggle button. Otherwise, disable the option to customize the settings independently.
- Edit Query: If you disable “Inherit Query From Template” you can menually edit the queries with several query filters, available in Query Post Editor.

Query Post Editor (Query Filters) #
When you click on the Edit Query option, you can customize the queries with filters like Post query, Taxonomy query, Meta query, Date query, and more. Let’s break them down step by step:
☑️ Posts #
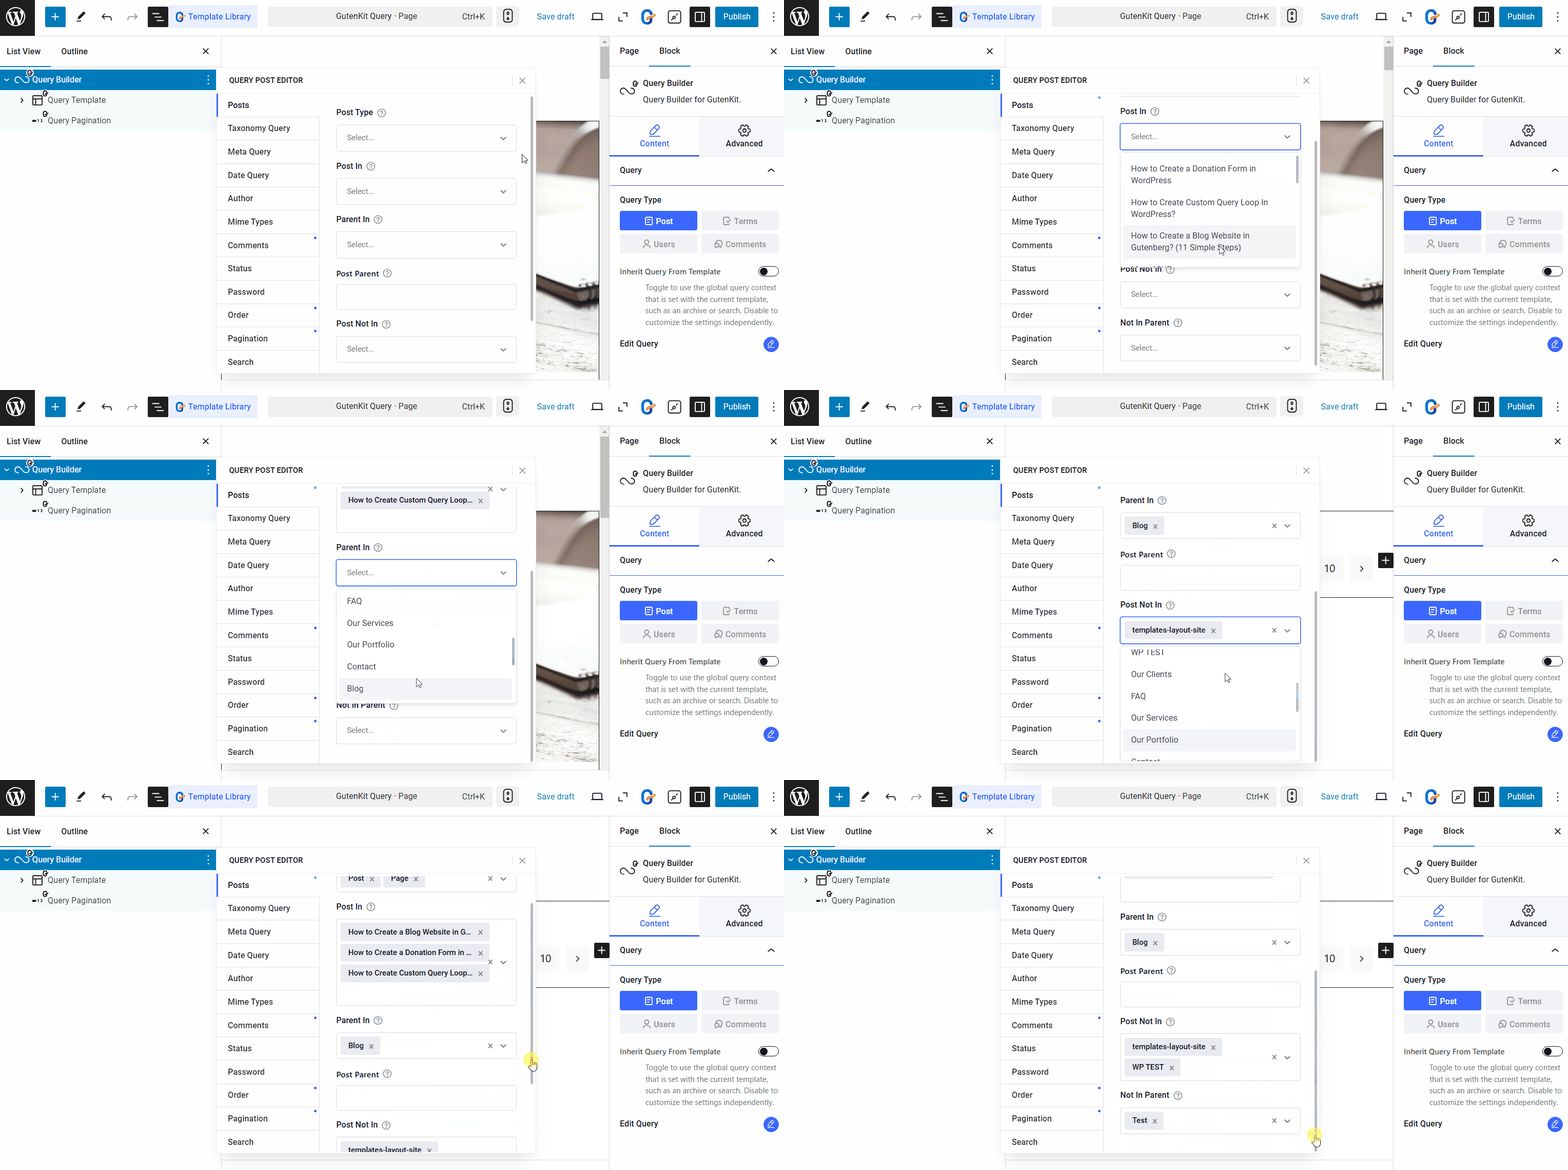
You can customize the post queries with the following controls.
- Post Type: Select what kind of content you want to show. You can show Posts, Pages, Media, or any custom post type with the query builder.
- Post In: After selecting the post type, if you want to show some specific content (e.g. specific post, page, or other content) you can include them under the ‘Post In’ field.
- Parent In: For the pages, you can show pages under specific parent pages.
- Post Parent: To show the pages under specific parents.
- Post Not In: In case you want to exclude specific posts or pages, you can list them under the ‘Post Not In’ field.
- Not in Parent: To exclude specific parent pages from showing them in the query loop.

☑️ Taxonomy #
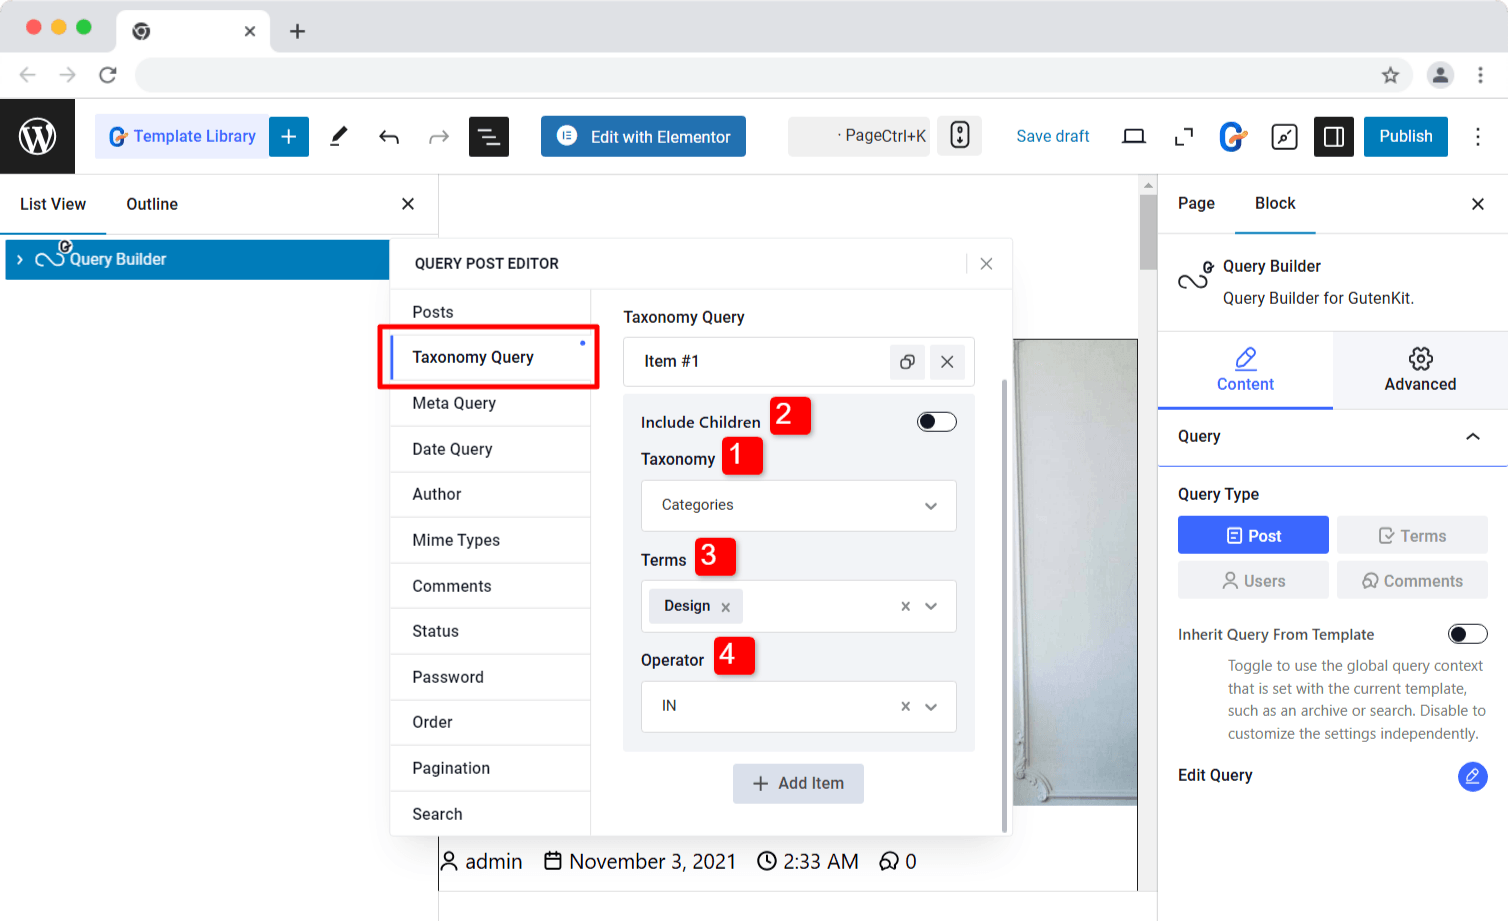
With GutenKit Query Builder block, you can add multiple taxonomy queries and set their relation using AND-OR logic. By clicking on the ‘+ Add Item‘ button you can you can add taxonomy queries.
For each taxonomy item you have the following options:
- Taxonomy: Select the taxonomy such as Categories, Tags, Groups, and others.
- Include Children: Show the posts under children taxonomies, such as child categories or tags.
- Terms: Based on the taxonomy you can choose their terms. For example, if you choose ‘Categories’ as taxonomy, you can choose specific categories.
- Operator: Operator defines the relation between the taxonomy terms. (To make it easier to understand, we will use “Categories” as an example and explain how the operators work based on this.)
- IN: To display posts that belong to any of the selected categories.
- NOT IN: To exclude the posts under the selected categories.
- AND: Shows only the posts that belong to all the selected categories simultaneously.
- EXISTS: To show posts that exist in at least one of the selected categories.
- NOT EXISTS: To display posts that do not exist in any of the selected categories.

All of these operators work the same for other taxonomies like tags, tabs, or any other custom category.
Relations:
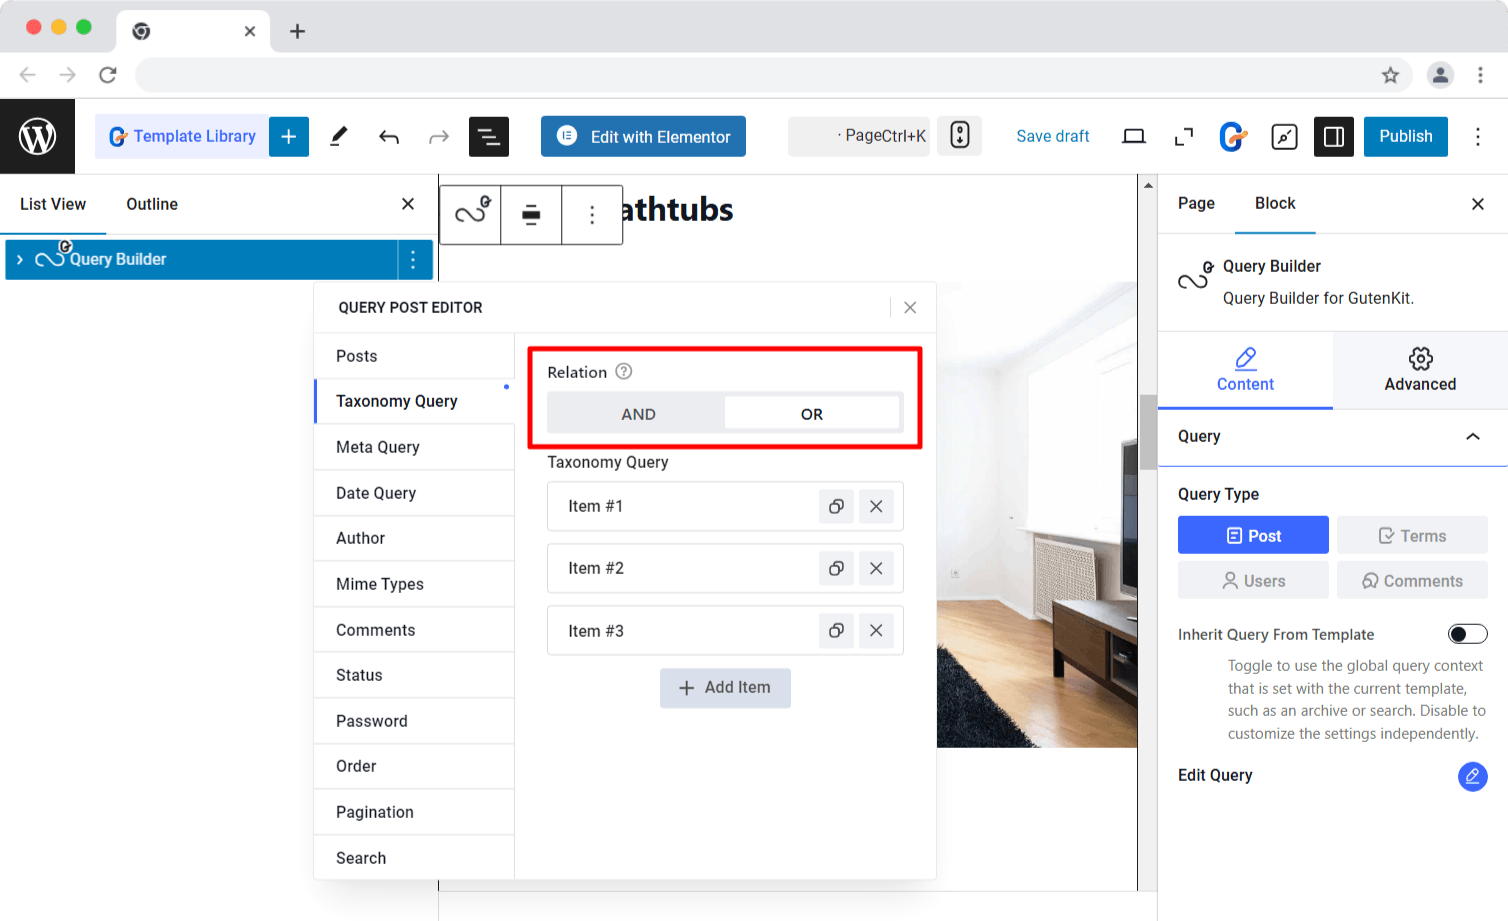
As mentioned earlier, you can add multiple items for taxonomy queries and define their relationship using the Relation operator.
- AND: The post will appear in the query loop only if it meets the conditions of all specified taxonomy items.
- OR: The post will appear in the query loop if it meets the condition of at least one specified taxonomy item.

☑️ Meta Query #
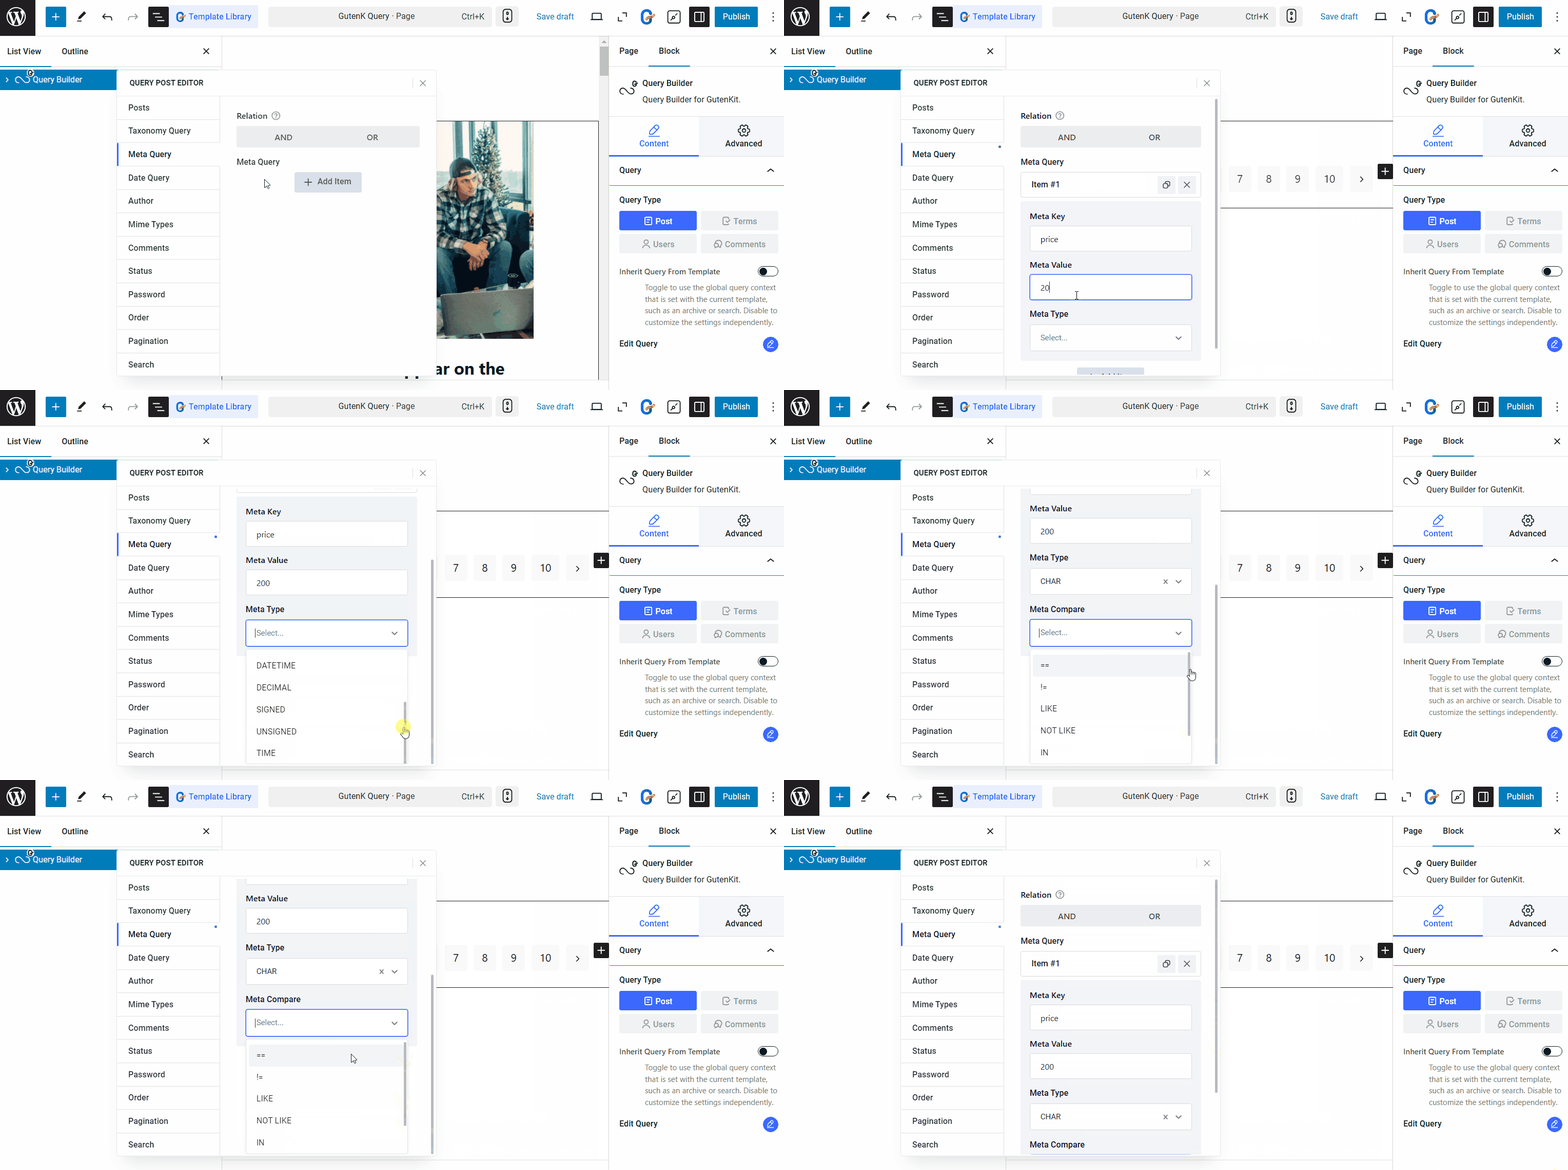
GutenKit’s Query Builder also supports custom meta fields. Just add a meta key and meta value, choose a comparison operator, and define the meta type to display posts based on custom metadata.
To add meta query, you can start by clicking on the ‘+ Add Item‘ button. After that,
- Meta Key
- Meta Value
- Meta Type
- Meta Compare

☑️ Date Query #
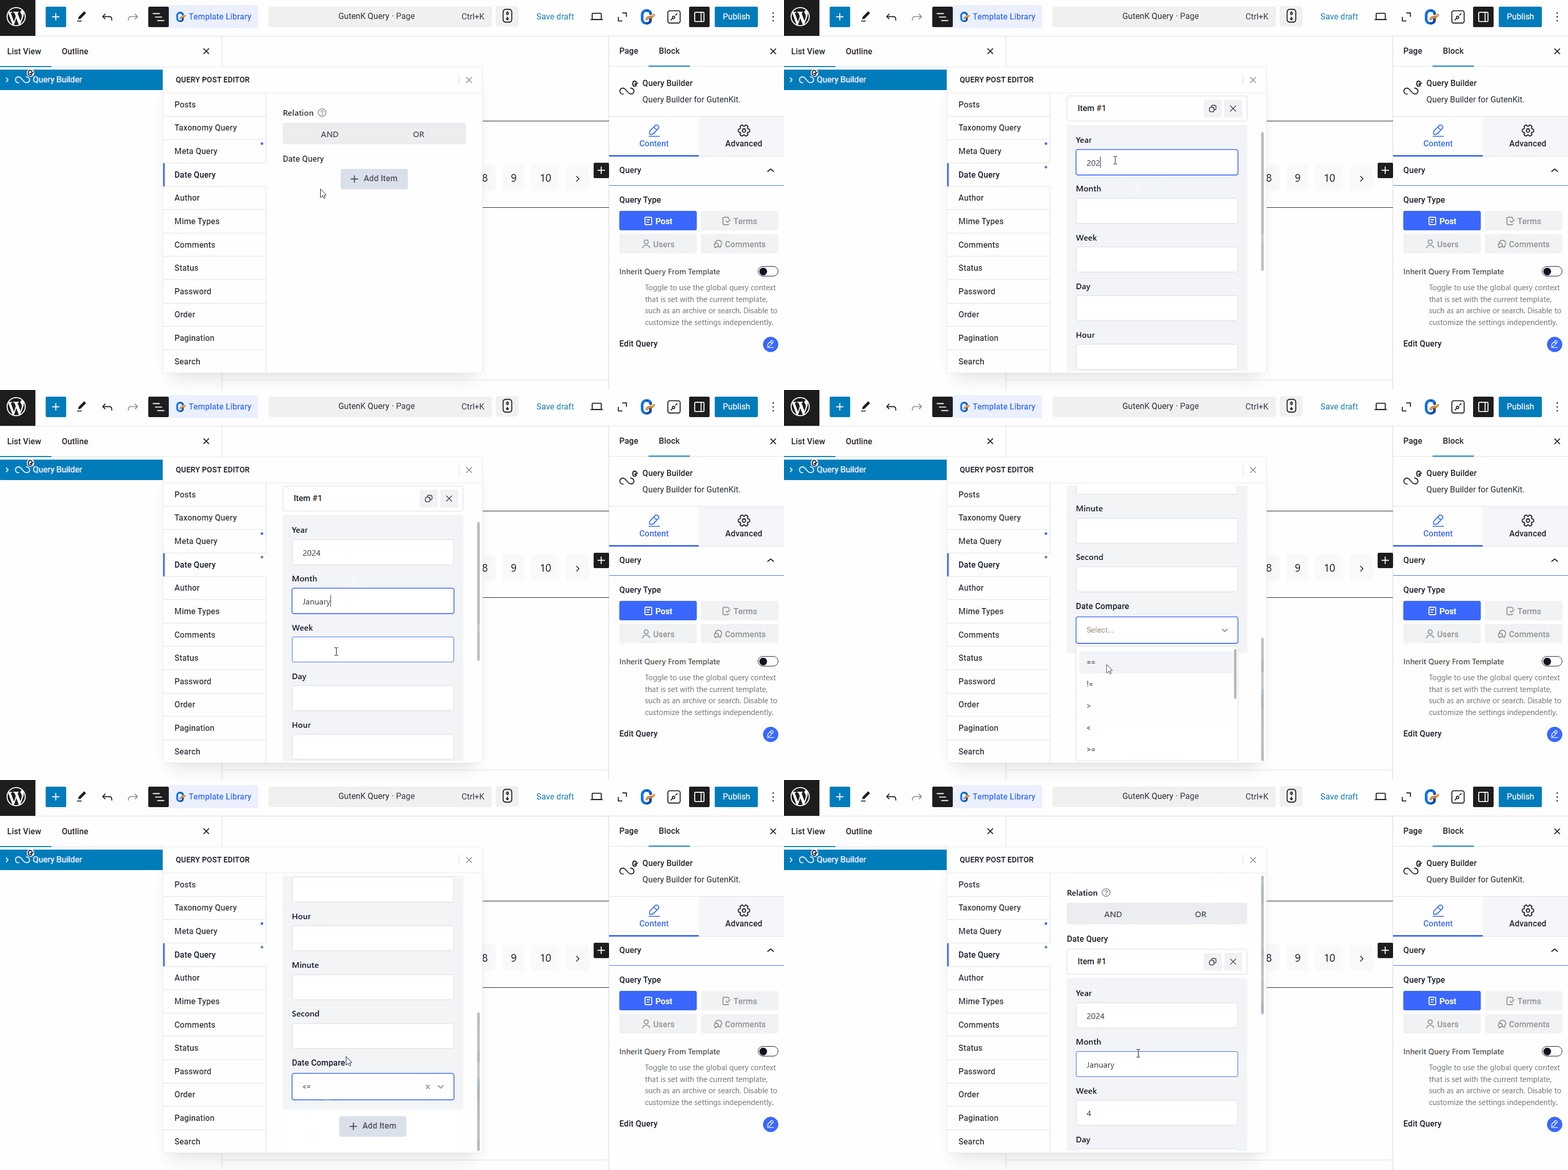
Move to the next tab to filter posts by Date with the following options:
- Year
- Month
- Week
- Day
- Hour
- Minute
- Second
Plus, you can set up comparisons between the queries.
- Date Compare: Set the operator to decide how the action will occur for the given date. For example, if you select the == operation, that means only the post published on the given date will be shown. Again, if you select the <= operator, this means the post published on or before that given date will be shown on the query loop.

☑️ Author #
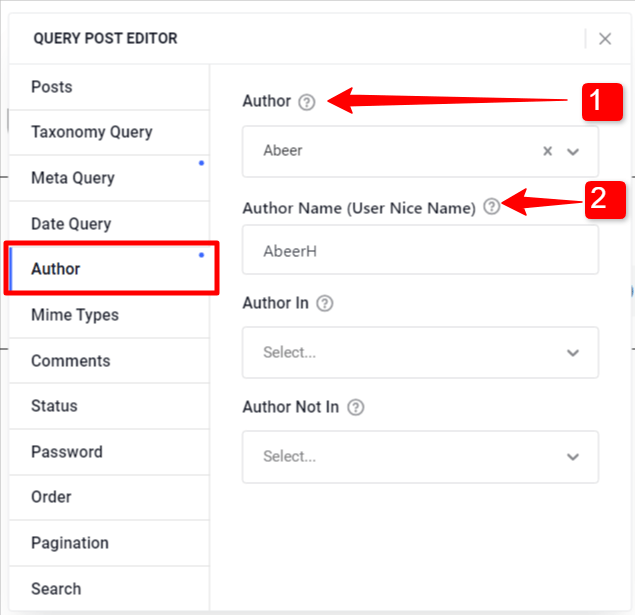
Highlight posts by specific authors. You can show posts from a single author or multiple selected authors.
1. Author: Select a single author to show his/her post on the web page.
2. Author Name (User Nice Name): You can enter a display name for that author you have just selected.

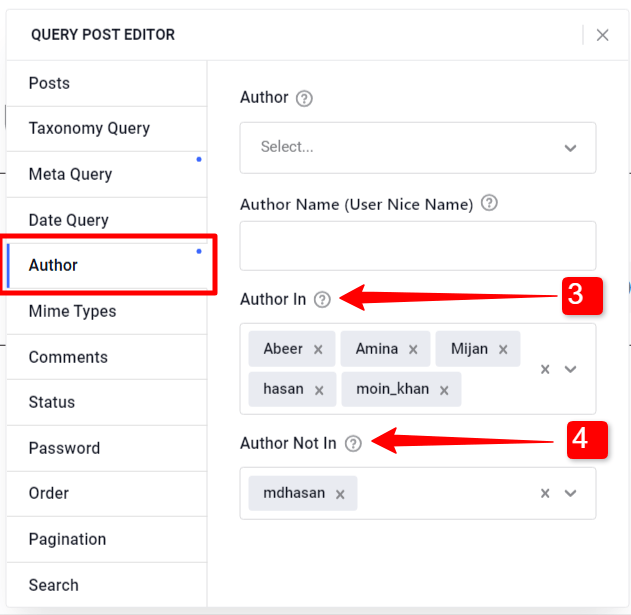

3. Author In: Otherwise, you can show posts from multiple authors by selecting authors in this field.
4. Author Not In: You can hide posts from specific authors by adding their names in this field.
☑️ Mime Types #
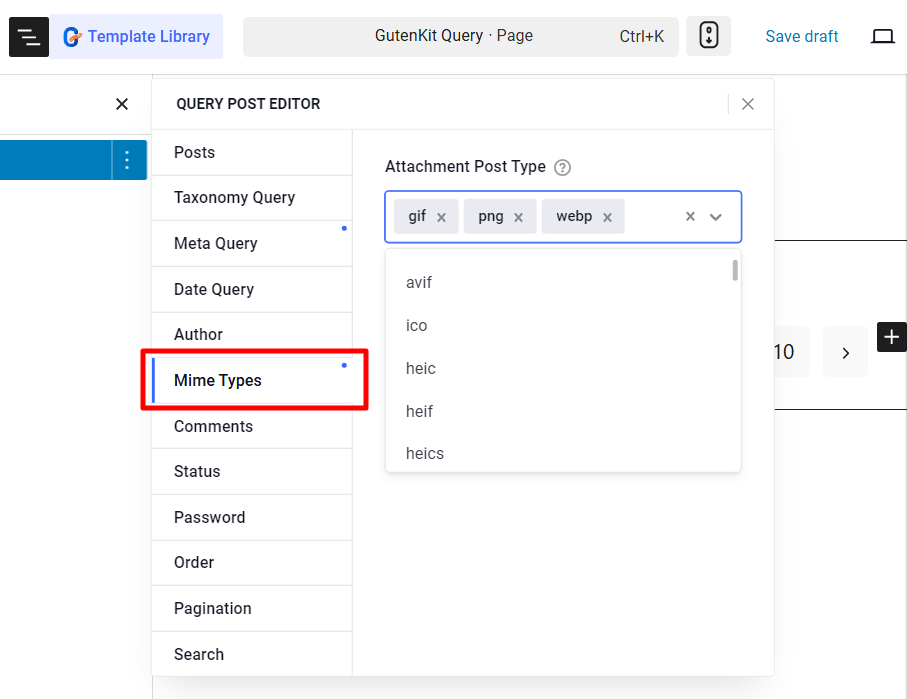
With GutenKit Query Loop Builder block you can show posts with specific types of media files. Under “Mime Types” you can select the media file type from the 90+ given options.
For example, if you select the ‘webp’ type, every post that has a ‘webp’ file will be shown on the query loop. The same goes for other mime types as well.

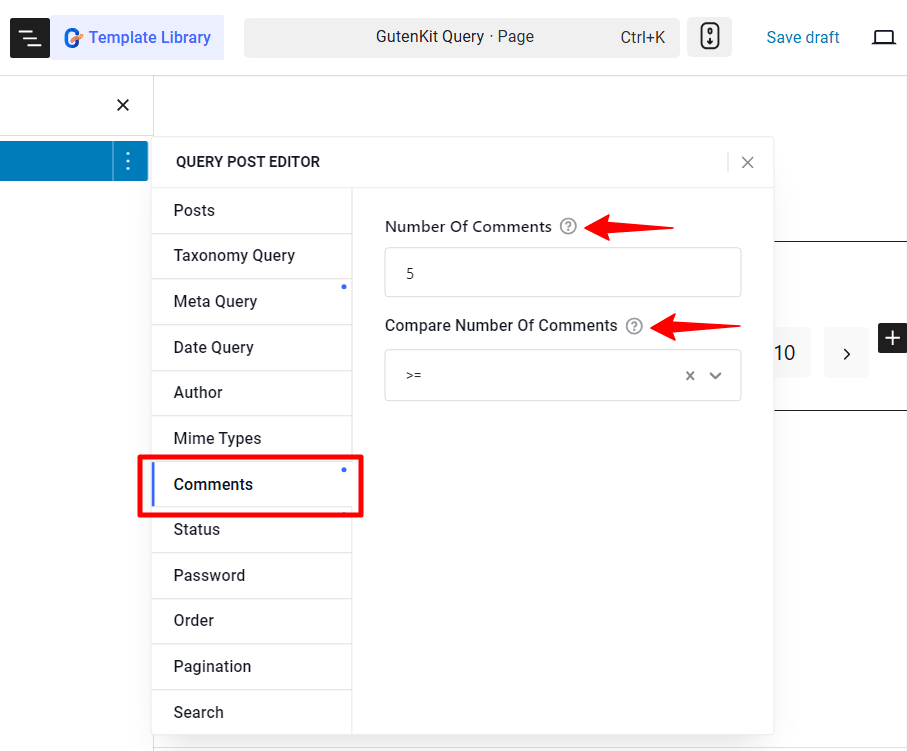
☑️ Comments #
Posts can also be shown based on the number of comments they have. Just set the comment count (Number of Comments) and adjust the conditions in the ‘Compare Number of Comments‘ field.
For example, if you set the number of comments to 5, and select the >= as operator (compare number of comments), the posts that have more than 5 comments will be on display.

☑️ Status #
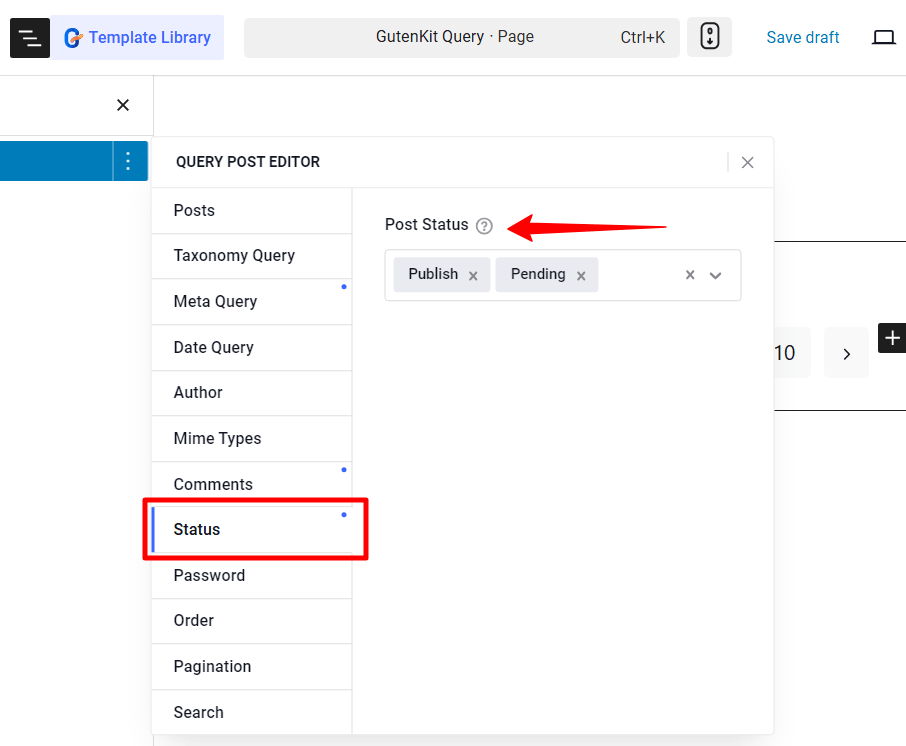
Next up, control the post-visibility based on their status. This means whether you want to show the published posts, pending posts, or posts that will be published in future.
GutenKit’s Query Builder block for Gutenberg has the following post status available:
Publish, Pending, Draft, Future, Private, Trash, or Any status.

☑️ Password #
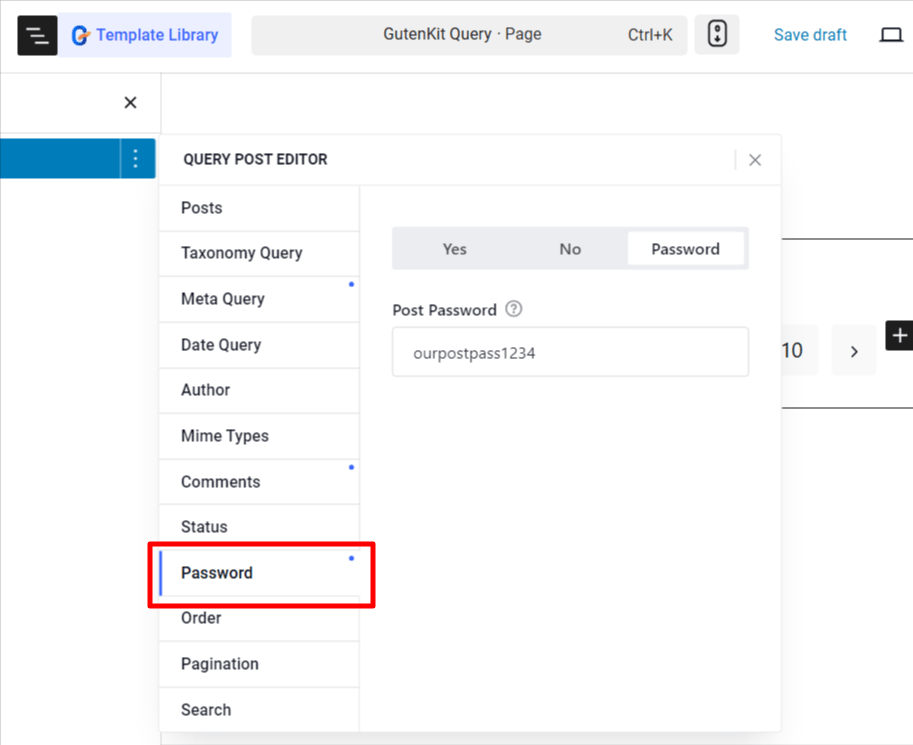
Filter password-protected posts:
- Yes: Show all password-protected posts.
- No: Display only non-password-protected posts.
- Password: Display posts with a specific password.

☑️ Order #
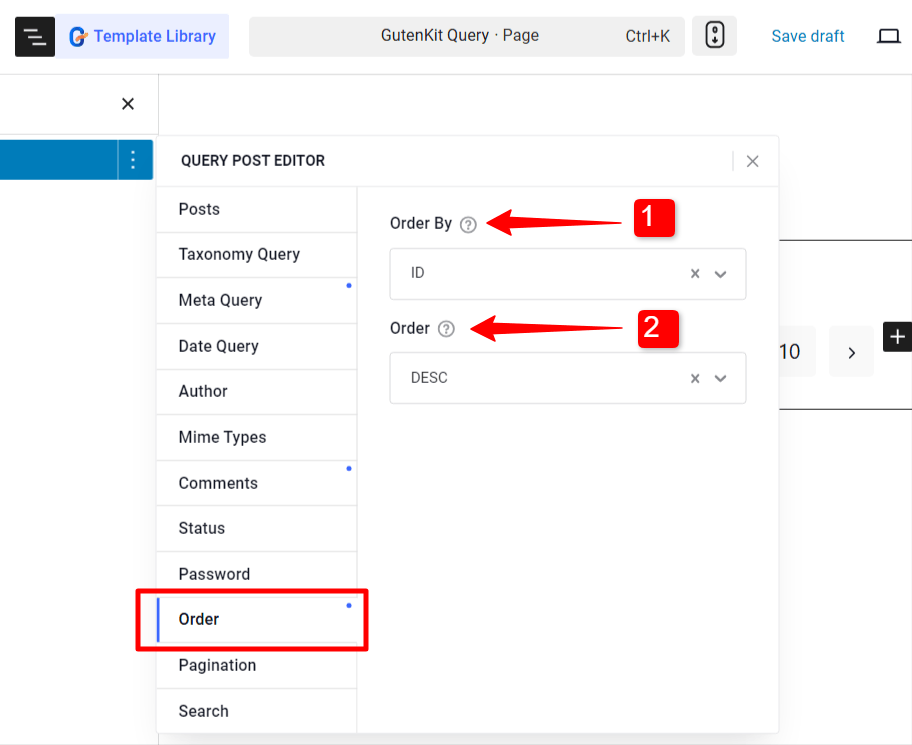
When it comes to ordering post, you have options to sort by Post ID, Author, Title, or Name, in ascending or descending order.
- Order By: Sort posts by post ID, Author, Title, name, or none.
- Order: Choose ascending or descending order.

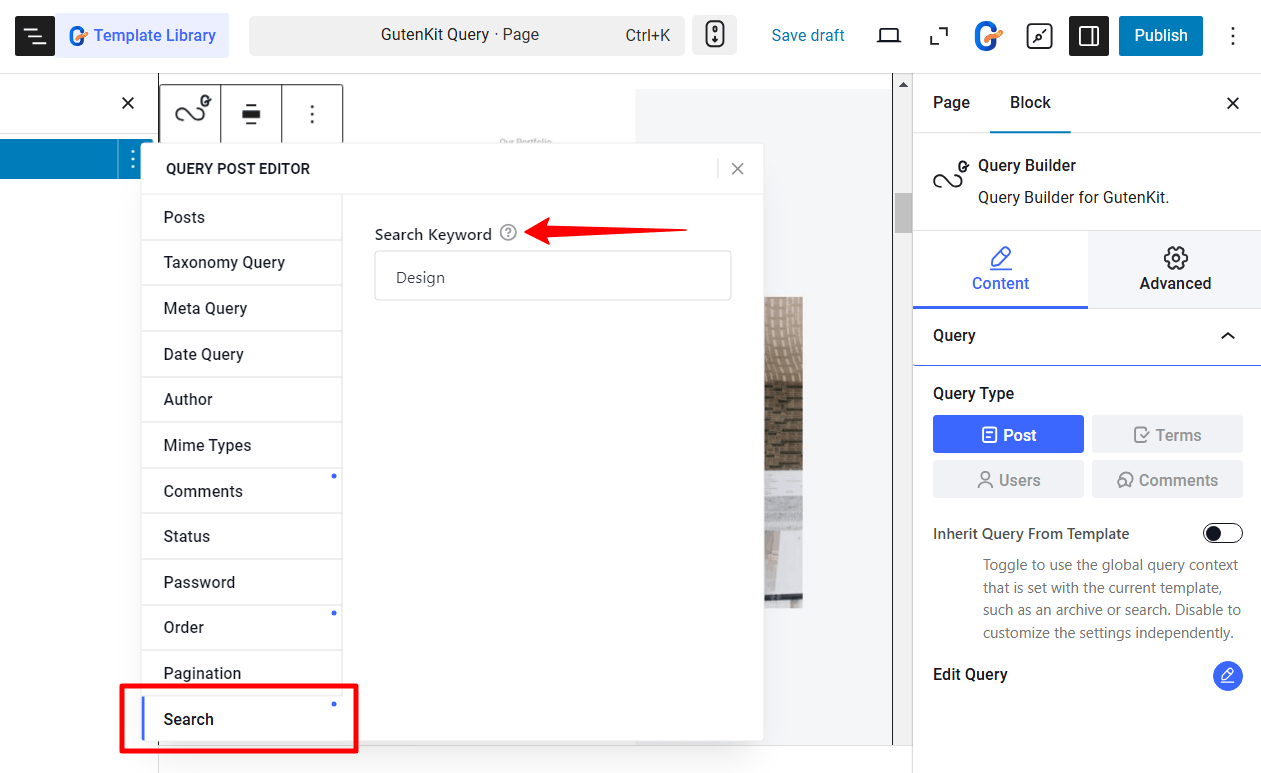
☑️ Search #
Simply show posts that have a specific search keyword in them, by adding that Keyword under the Search tab.

☑️ Pagination #
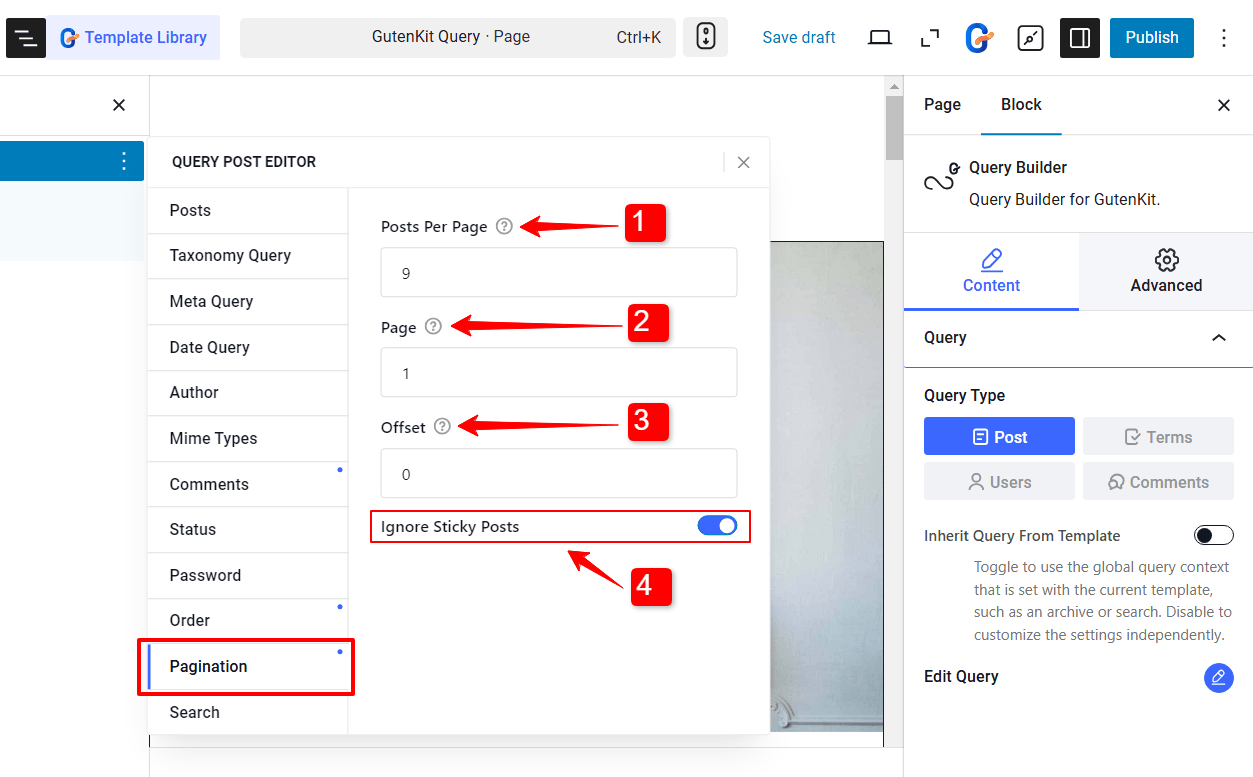
Configure the pagination for the query loop.
- Posts Per Page: Decide the number of post to show on a single page.
- Page: Set which page to start from.
- Offset: Select the default page number in pagination.
- Ignore Sticky Posts: By enabling this option you can hide the WordPress sticky post.

After you are done with editing query post filters, you can move on to customizing the appearance of the query template.


