GutenKit extends the power of your default WordPress Block Editor by adding new functionalities with no coding hurdles. This Gutenberg plugin has a wide range of blocks, bringing new possibilities to style and design your website.
Read this documentation to learn about how to get started with GutenKit. We’re going to give an entire overview of this plugin.
How to Install the GutenKit Plugin? #
Start from your WordPress dashboard, then:
- Navigate to Plugin > Add New.
- Use the search box to get “GutenKit”
- Install & activate it.
That’s it, you’re all set to go!
How to Add GutenKit Blocks? #
Once you have installed the GutenKit plugin, go ahead and add a page or post where you would like to add the GutentKit blocks.

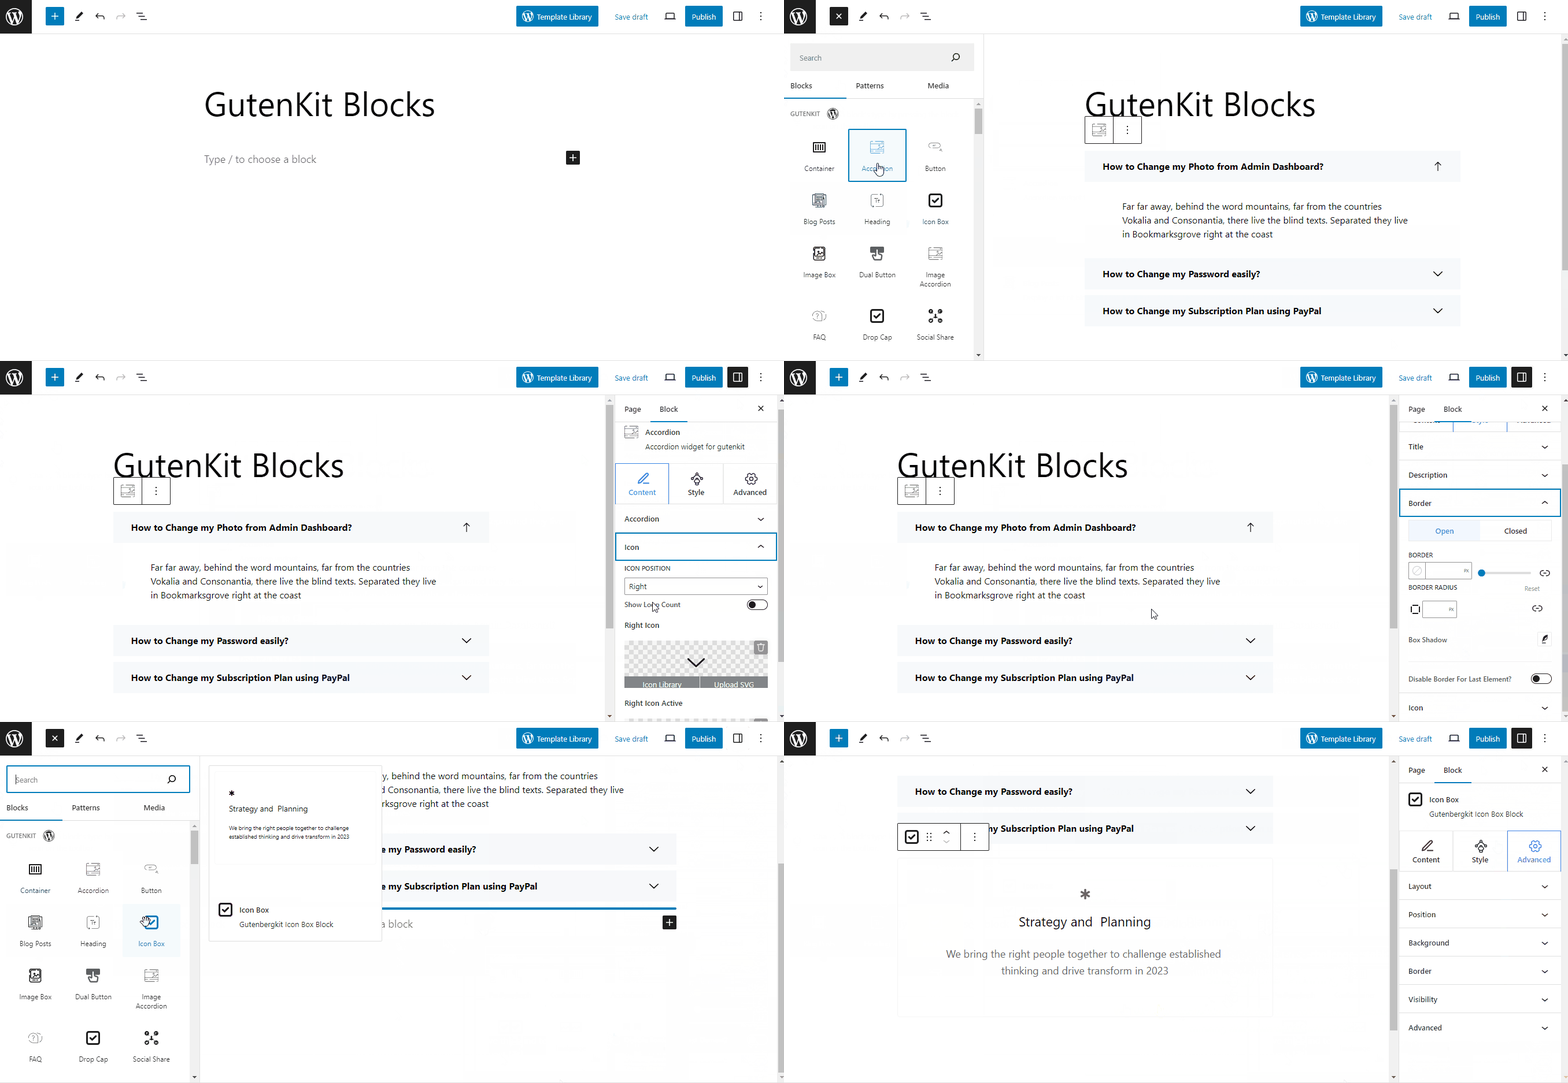
- Click the “+” icon from the top left of the editor screen to reveal a range of block elements to design your website.
- Hover over any of them to see a preview.
- Click on any block to add or you can also drag and drop.
- So, insert them as your needs.
How to Configure GutenKit Blocks Settings? #
- Click on any block to open its settings.
- It will open the block settings in the right sidebar.
- Each block settings has three different tabs:
- Content: From here, you can add content (Text, image, video, icon), insert links, adjust alignment, set show/hide settings, and many more.
- Style: This tab includes all the style settings like choosing background types, selecting colors, styling typography, adding margins & padding, modifying borders, etc.
- Advance: Under this tab, you will get control of the padding, margin, and Z-index of layout. You can also define the position, modify the background style, and set the border of the entire layout. Also, it allows you to control visibility according to device type.
Now you know how to add the GutenKit plugin and its blocks. Also, you’ve learned about the overview of block settings. It’s time to try the blocks yourself and create your dream website design.


