EmailKit integrates with MetForm to customize the form confirmation email.
When you create a WordPress form with MetForm, it can send an automated confirmation email to the user on each form submission. With the integration, you can now customize this email with EmailKit.
Nødvendige plugins:
- EmailKit: Download plugin [To customize email for one single form]
- EmailKit Pro: Hent plugin'et [To customize email for flere former]
Since this is an integration with MetForm, you will also need to have the MetForm plugin installed and activated på din hjemmeside.
Step 1: Create a form with MetForm #
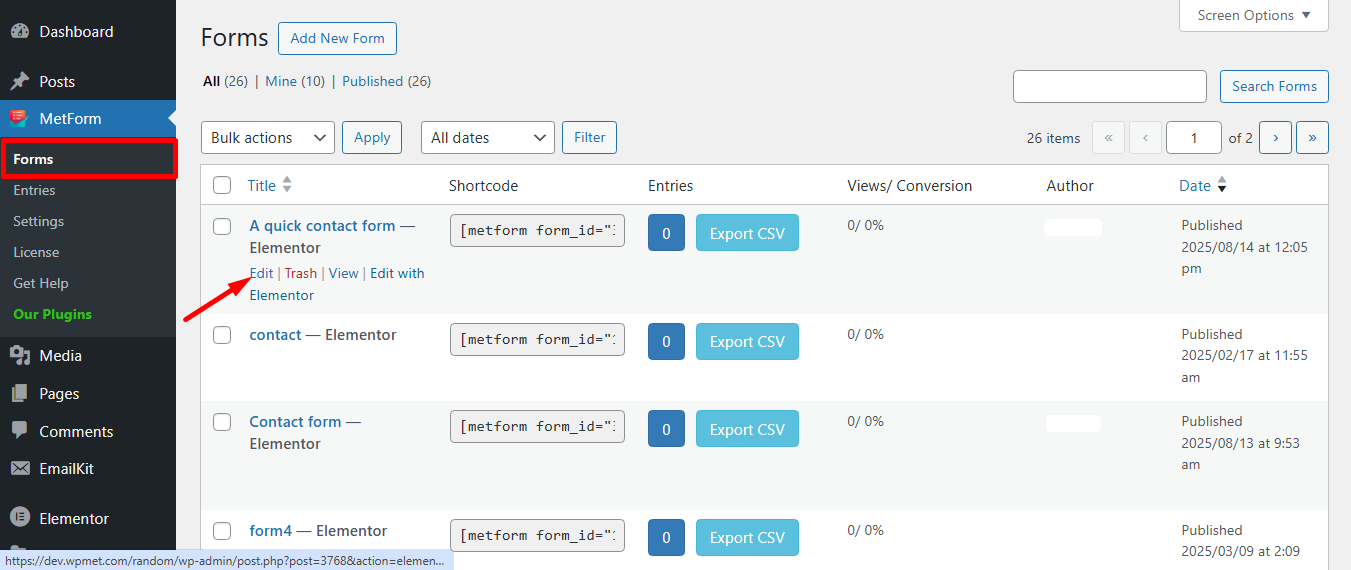
First of all, create a form using MetForm and publish it. To create a new form check out this: documentation for creating forms with MetForm. Then you have to edit the form.
Or, you can also edit any existing form.
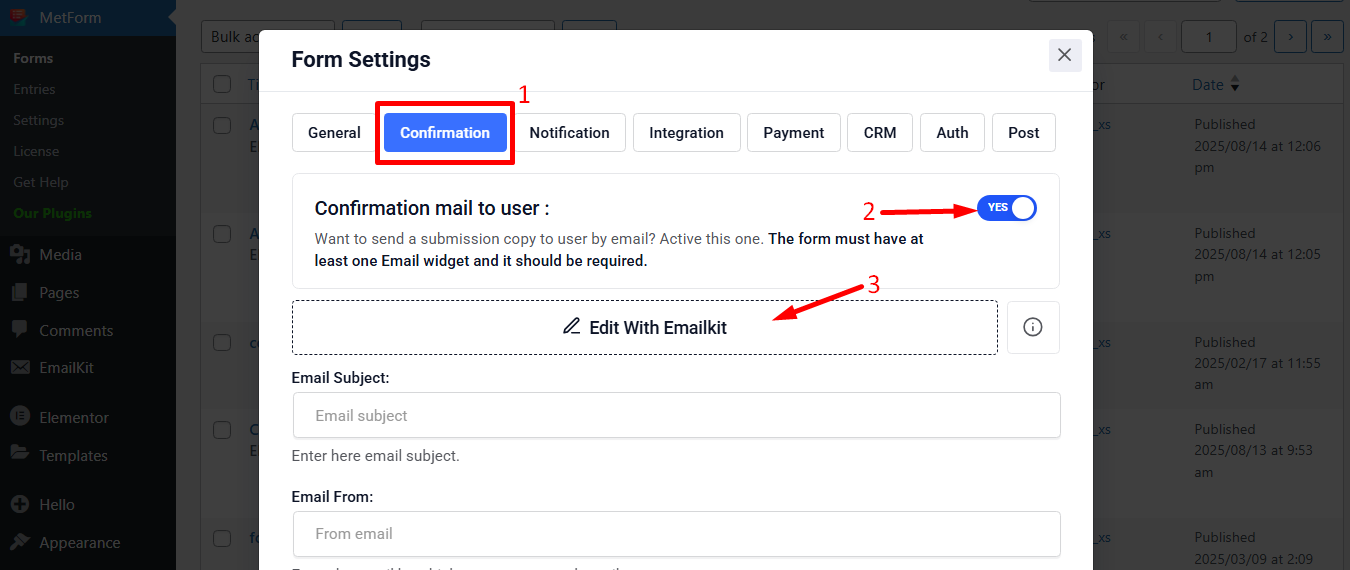
Efter at have klikket på Edit option, Form Settings window will be appeared:
- Flyt til Confirmation tab
- Aktiver Bekræftelsesmail til bruger
- Klik på Edit With EmailKit
Step 2: Add a new email template for form confirmation #
Now you have to add a new email template for the form confirmation email. For that,
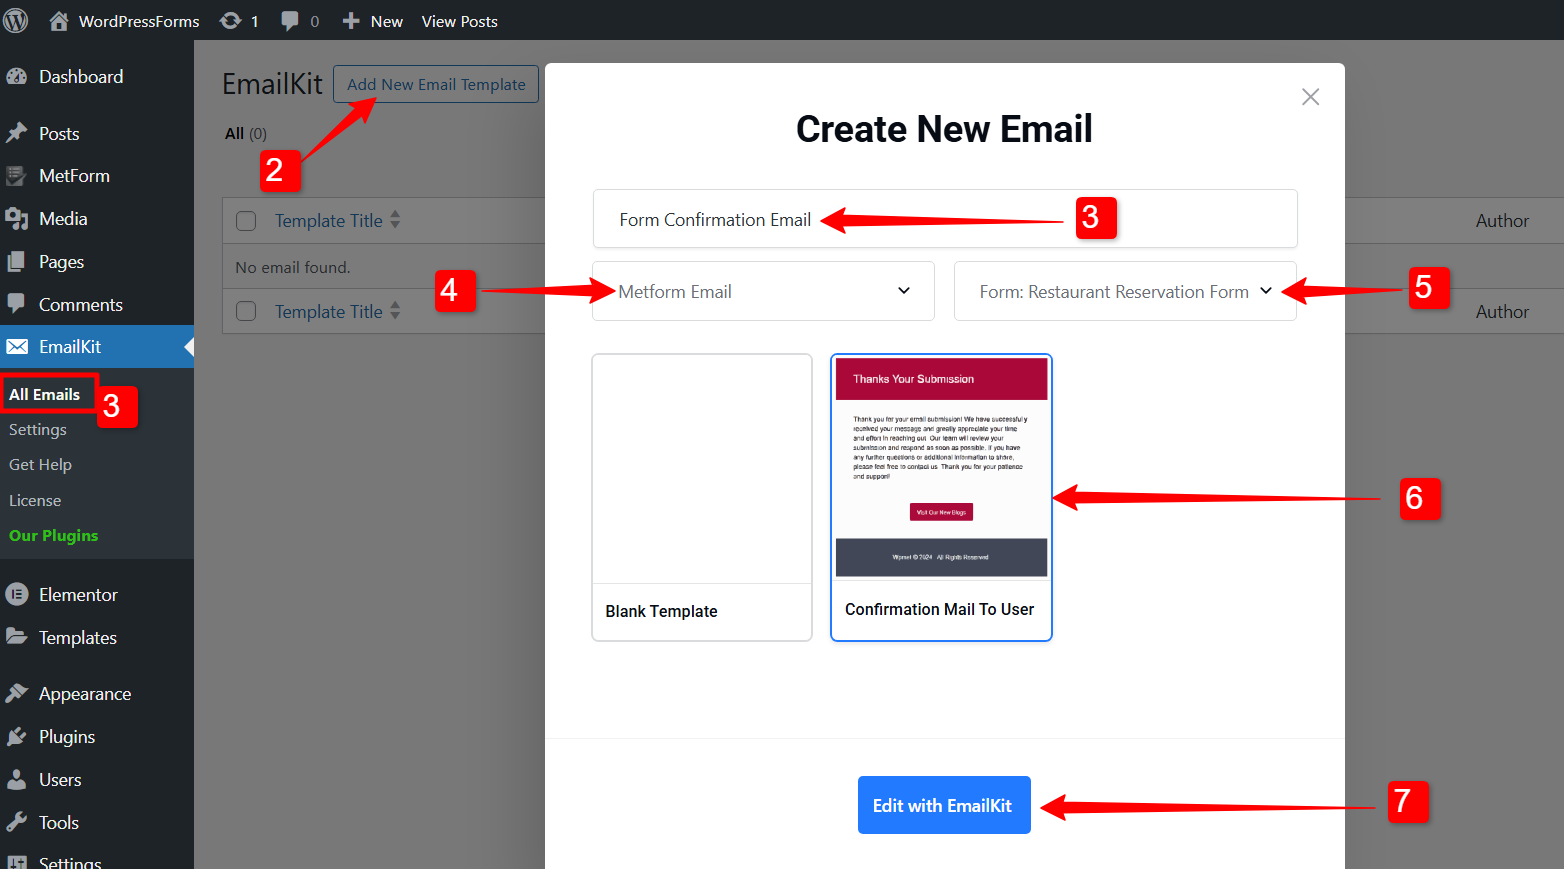
- Naviger til EmailKit → All Emails fra WordPress-dashboardet.
- Klik på Add New Email Template button there. A pop-up window will appear.
- In that window, enter Skabelonnavn.
- Indstil email type til “Metform Email”.
- Derefter, select a form created by MetForm
- Vælg en skabelon for the email. You can either choose a pre-designed one or start from scratch with a blank template.
- Klik til sidst på Rediger med EmailKit button to start customizing the email template.
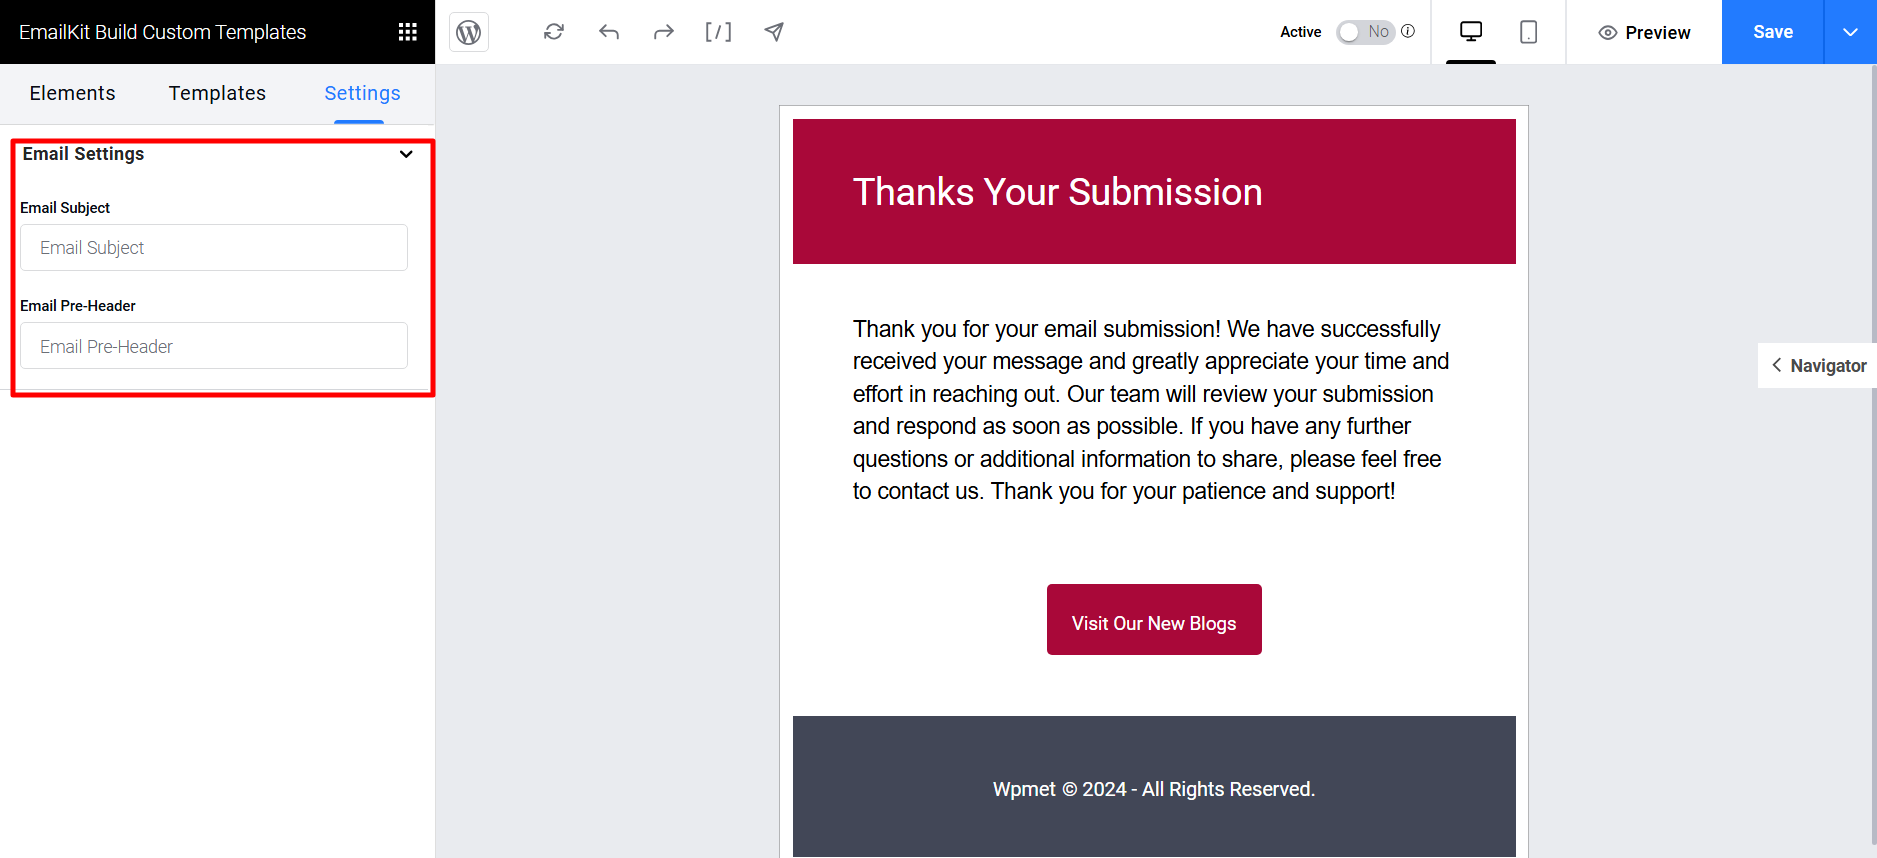
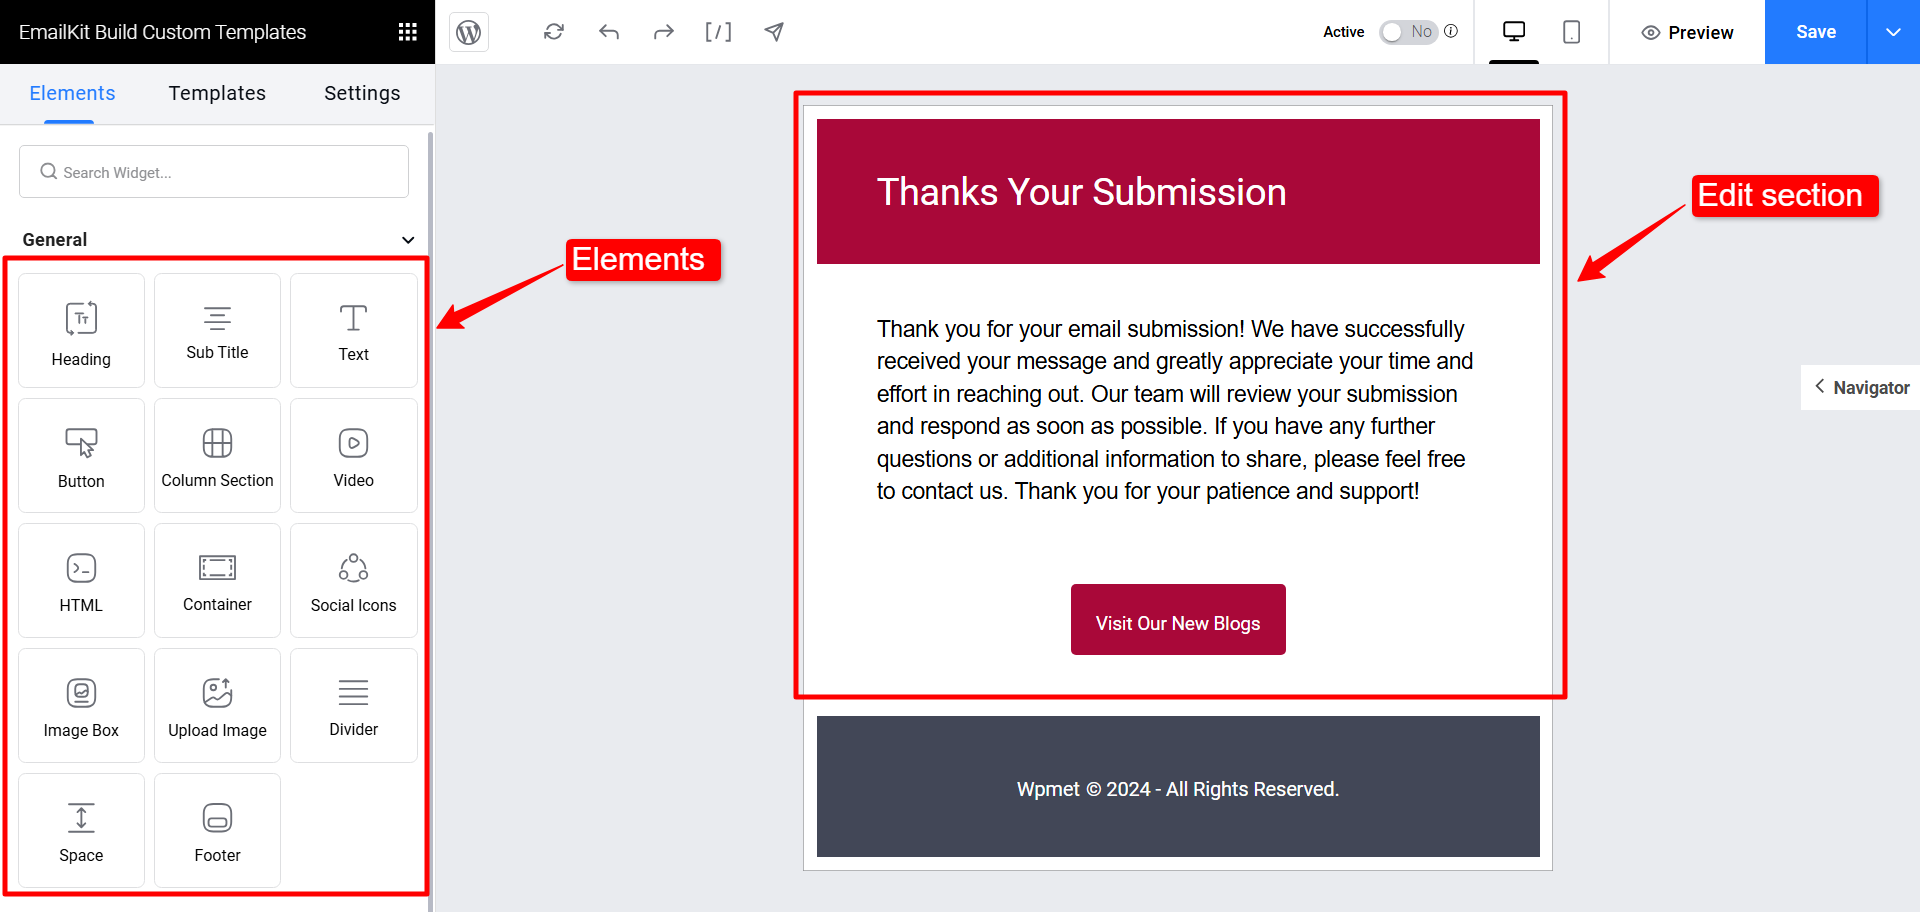
Step 3: Customize the form confirmation email template #
In the editor, you can design the form template. On the left side bar, it has the elements that you can use to build the form template. Drag and drop the elements into the edit section, where you can add and change the content of your emails.
Learn the detailed process of creating an email template in the EmailKit interface from this documentation.
I den indstillinger tab, you can enter the Email Subject and Email Pre-Header for your form confirmation email.