
 Danish
  English
  German
  Spanish
  Italian
  French
  Portuguese
  Swedish
  Polish
  Korean
  Japanese
 Brugen af glasmorfi i design er blevet mere og mere populær i de senere år. Du kan bruge et matteret glaslook til at give elementerne et interaktivt udseende. Det ElementsKit Glass Morphism modul lader dig nemt anvende glasmorfi-stilen på enhver Elementor-baseret side eller hjemmeside.
I dette indlæg lærer du, hvordan du tilføjer glasmorfismeeffekt til enhver Elementor-widget.
Sådan tilføjes glasmorfismeeffekter til enhver Elementor-widget #
Følg nedenstående trin for at få en komplet gennemgang til at bringe en glas-lignende stil til dit Elementor-websted.
Trin-1: Aktiver Glass Morphism Module #
For at komme i gang skal du manuelt aktivere Glass Morphism-modulet. Til dette, fra dit WordPress-dashboard,
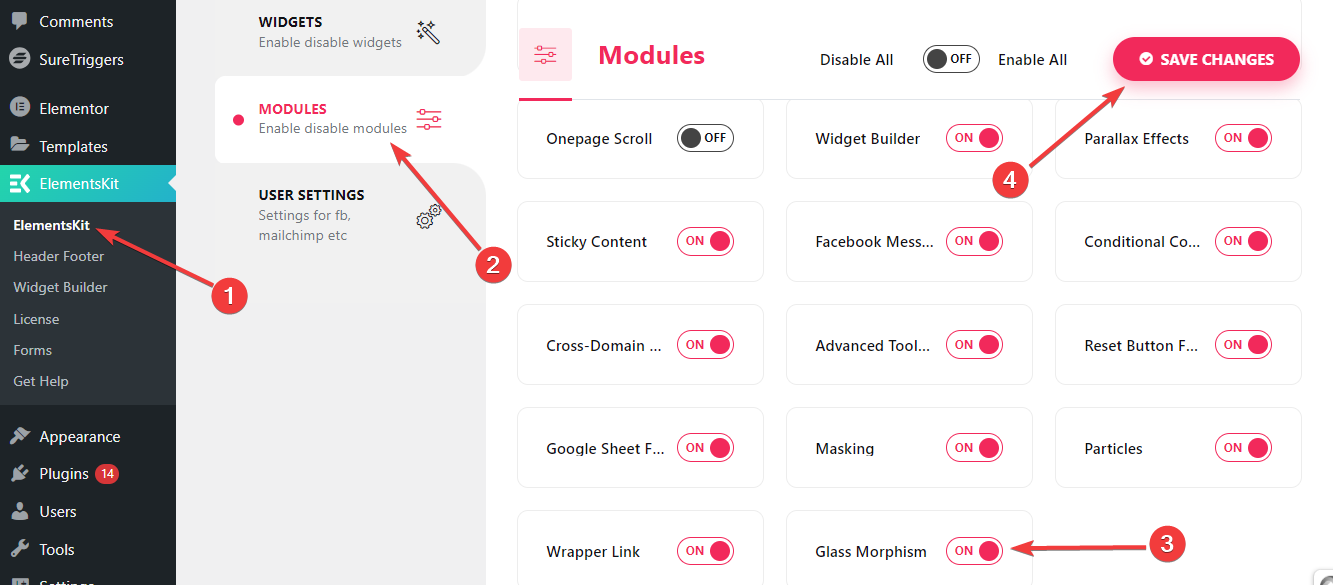
- Følge efter ElementsKit > MODULER.
- Find Glasmorfisme modul.
- Aktiver til/fra-knappen ved siden af.
- Tryk derefter på "Gem ændringer”-knappen i øverste højre hjørne.
Nu vil du se Glass Morphism-funktionen i den avancerede fane i enhver widget eller kolonne.
Trin-2: Tilføj Glass Morphism Effect #
Du kan tilføje Glass Morphism-effekter til styling af produktartikler, billedgallerier, prissektioner, sammenligninger og mange flere.
At gøre dette,
- Tilføj en hvilken som helst side eller ethvert indlæg, og rediger med Elementor.
- Indsæt derefter en kolonne eller widget.
- Gå nu til fanen Avancerede indstillinger.
- Og åbn "ElementsKit Glasmorfisme" indstillinger.
- Klik på redigeringsikonet, og det vil afsløre alle funktionerne i Glass Morphism-styling.
Lad os se, hvordan denne funktion fungerer 👇
Slør #
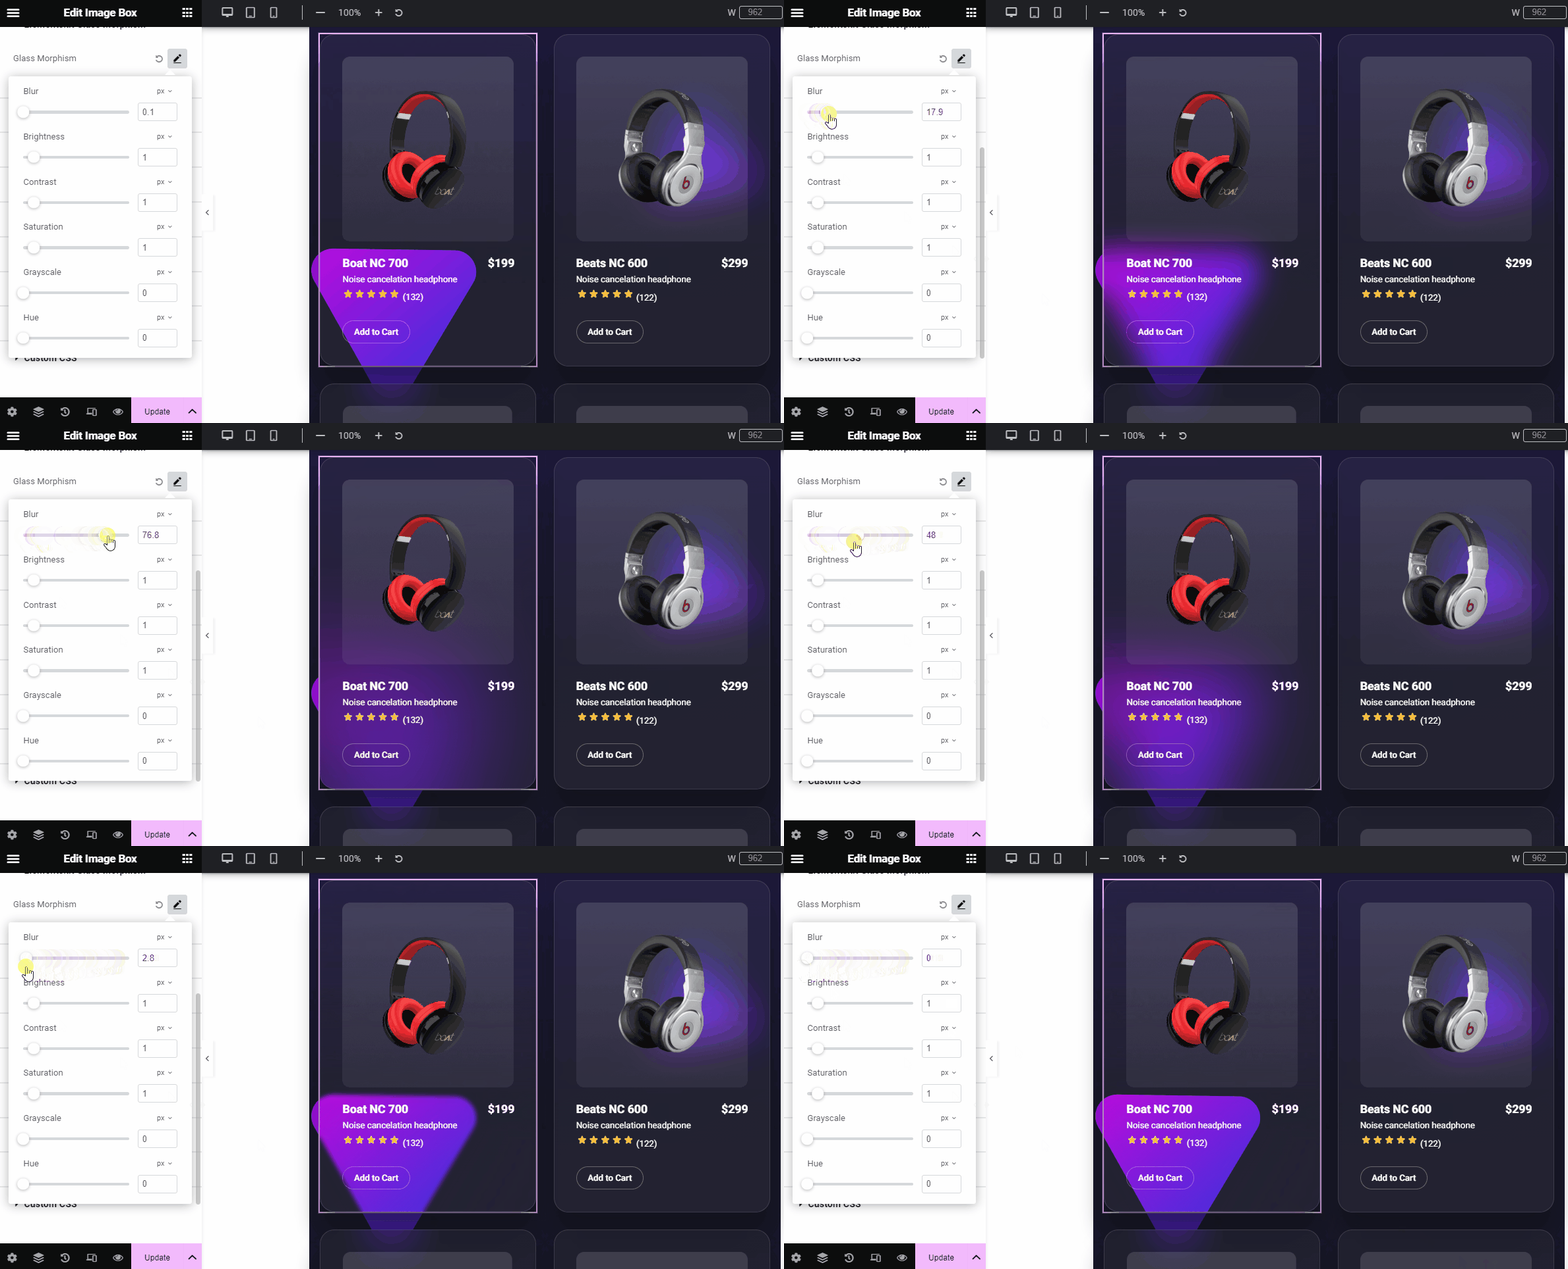
Definer en sløringsværdi afhængigt af, hvor sløret overfladen du ønsker til designet. Sløringseffekter giver dit design en glaslignende æstetik ved at tilføje farverige og gennemsigtige lag mellem designelementerne. Således viser det et flerlags udseende til designet.
Lysstyrke #
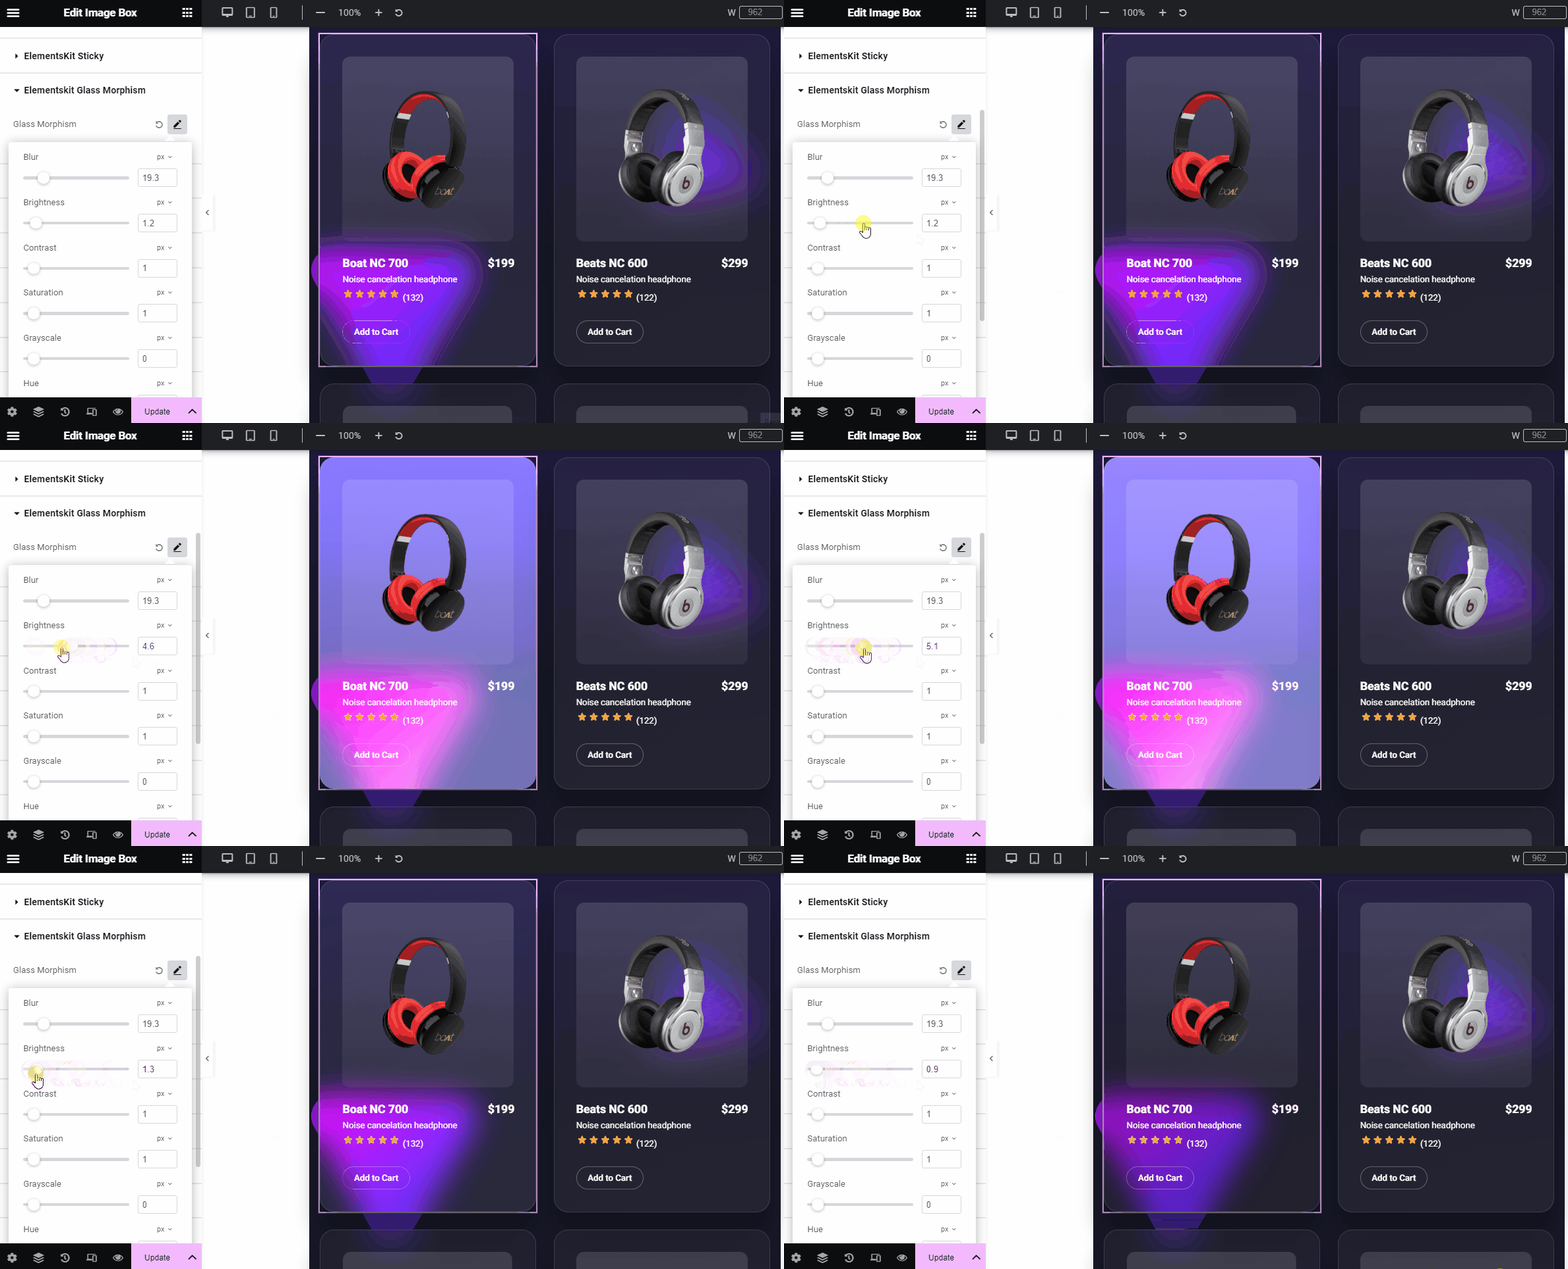
Brug skyderen eller tilføj en brugerdefineret værdi for at justere lysstyrken af glasmorfidesignet.
Kontrast #
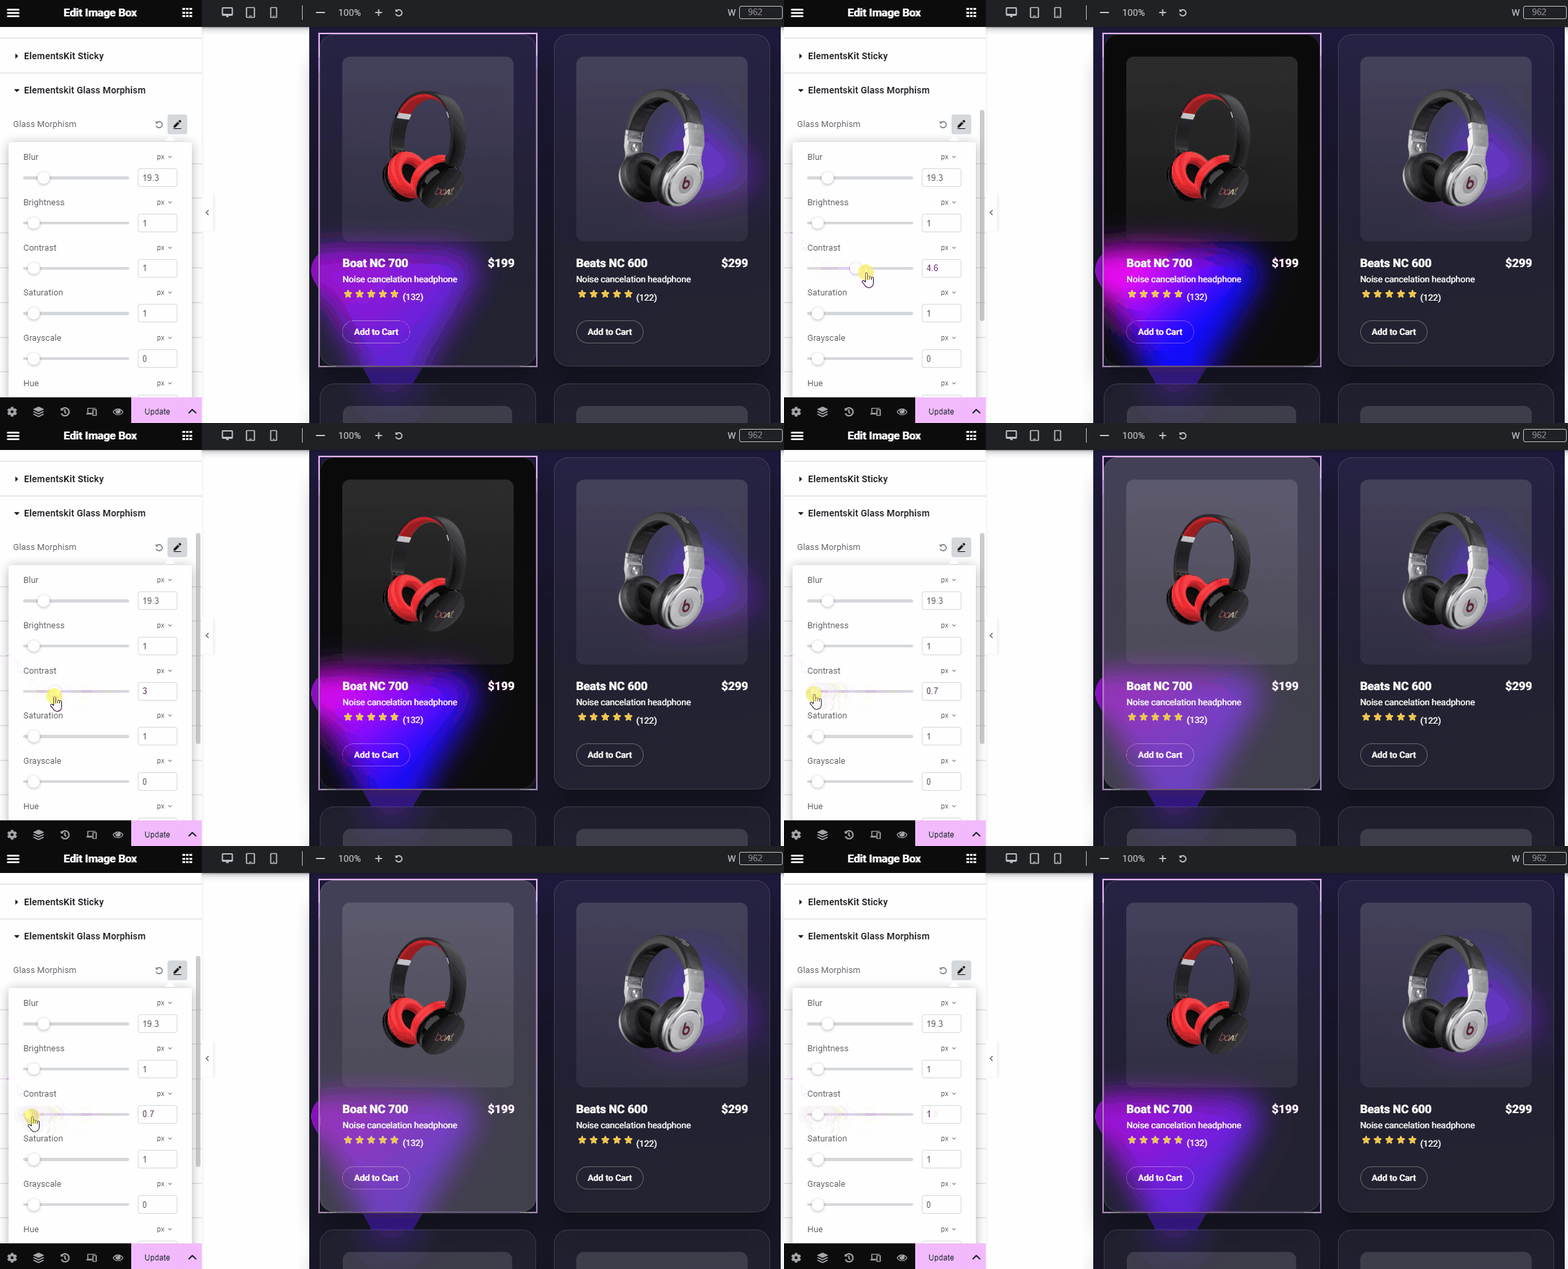
Definer graden af kontrast. Det vil hjælpe med at bevare det visuelle hierarki, mens du bruger flere designelementer samtidigt.
Mætning #
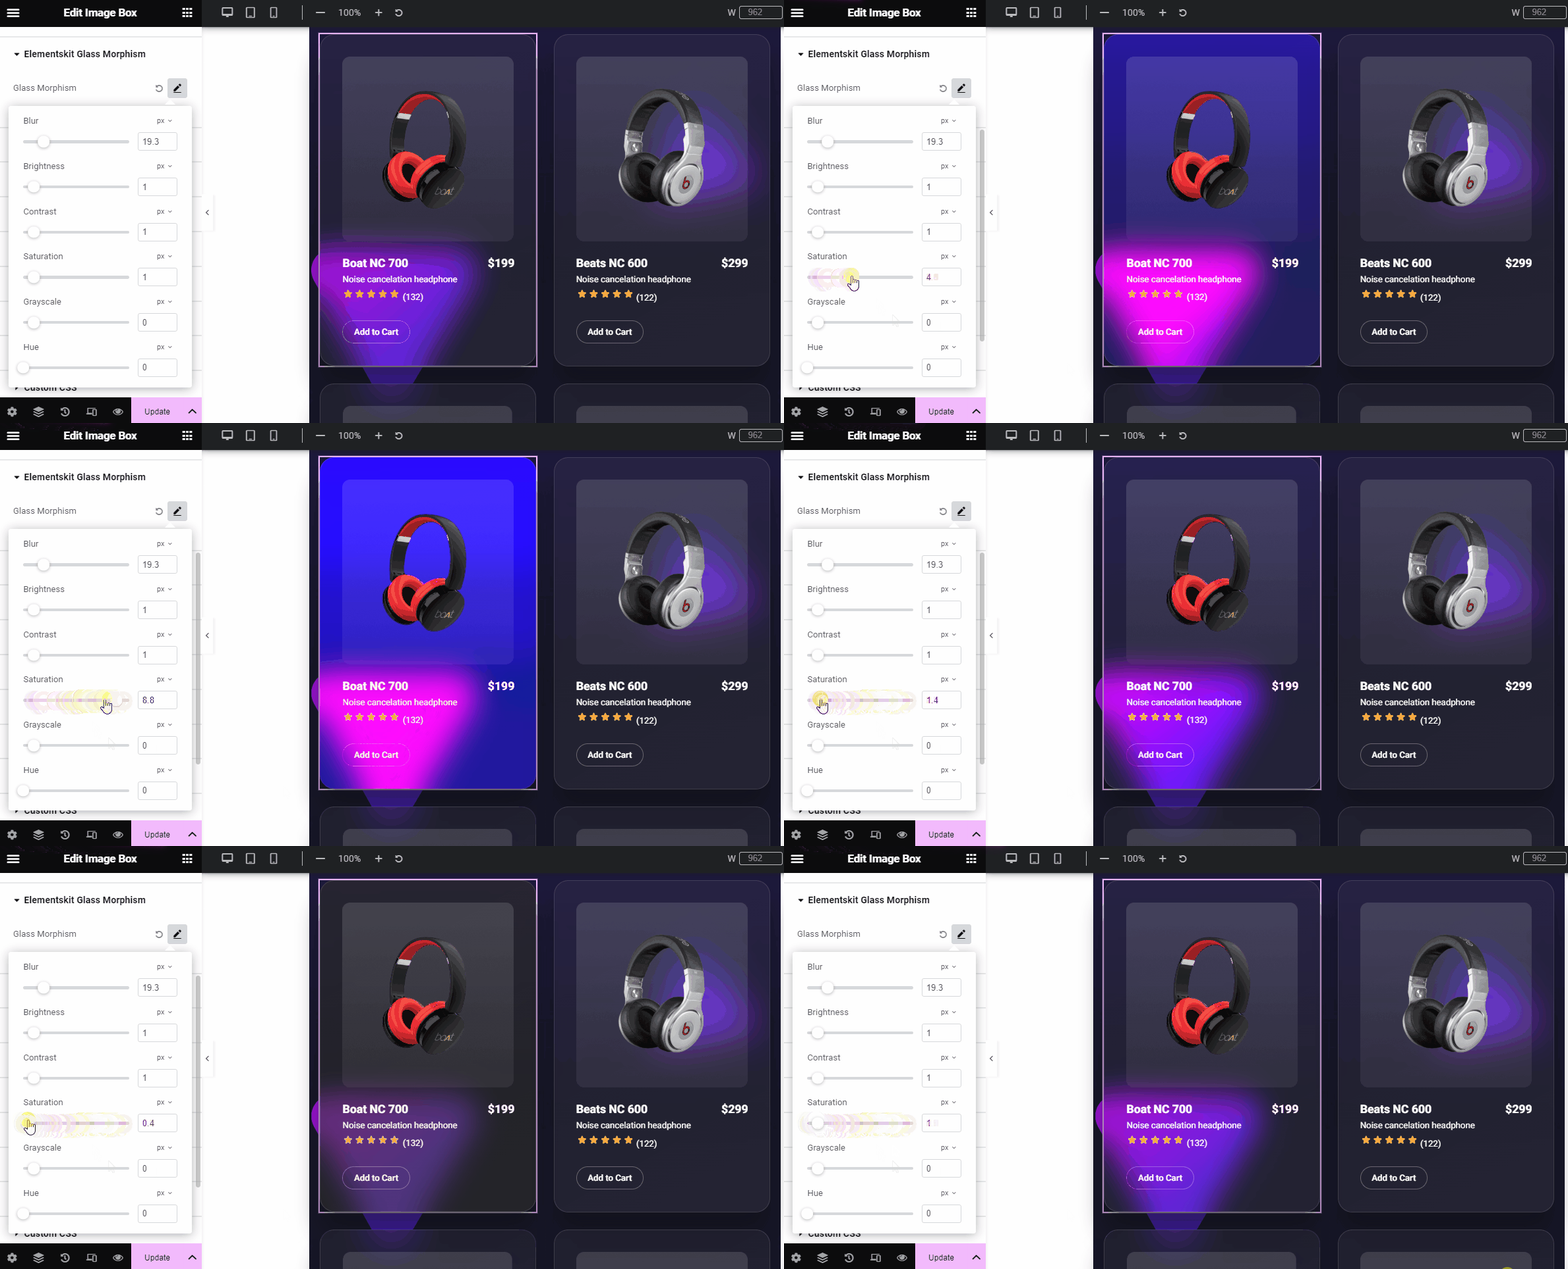
Brug denne skyder, eller giv en brugerdefineret værdi til at styre gråniveauet i elementfarven. Hvis du øger mætningsniveauet, vil det gøre din farve mere levende. Omvendt vil reduktion af mætningen få farvetonen til at blive mat.
Gråtoner #
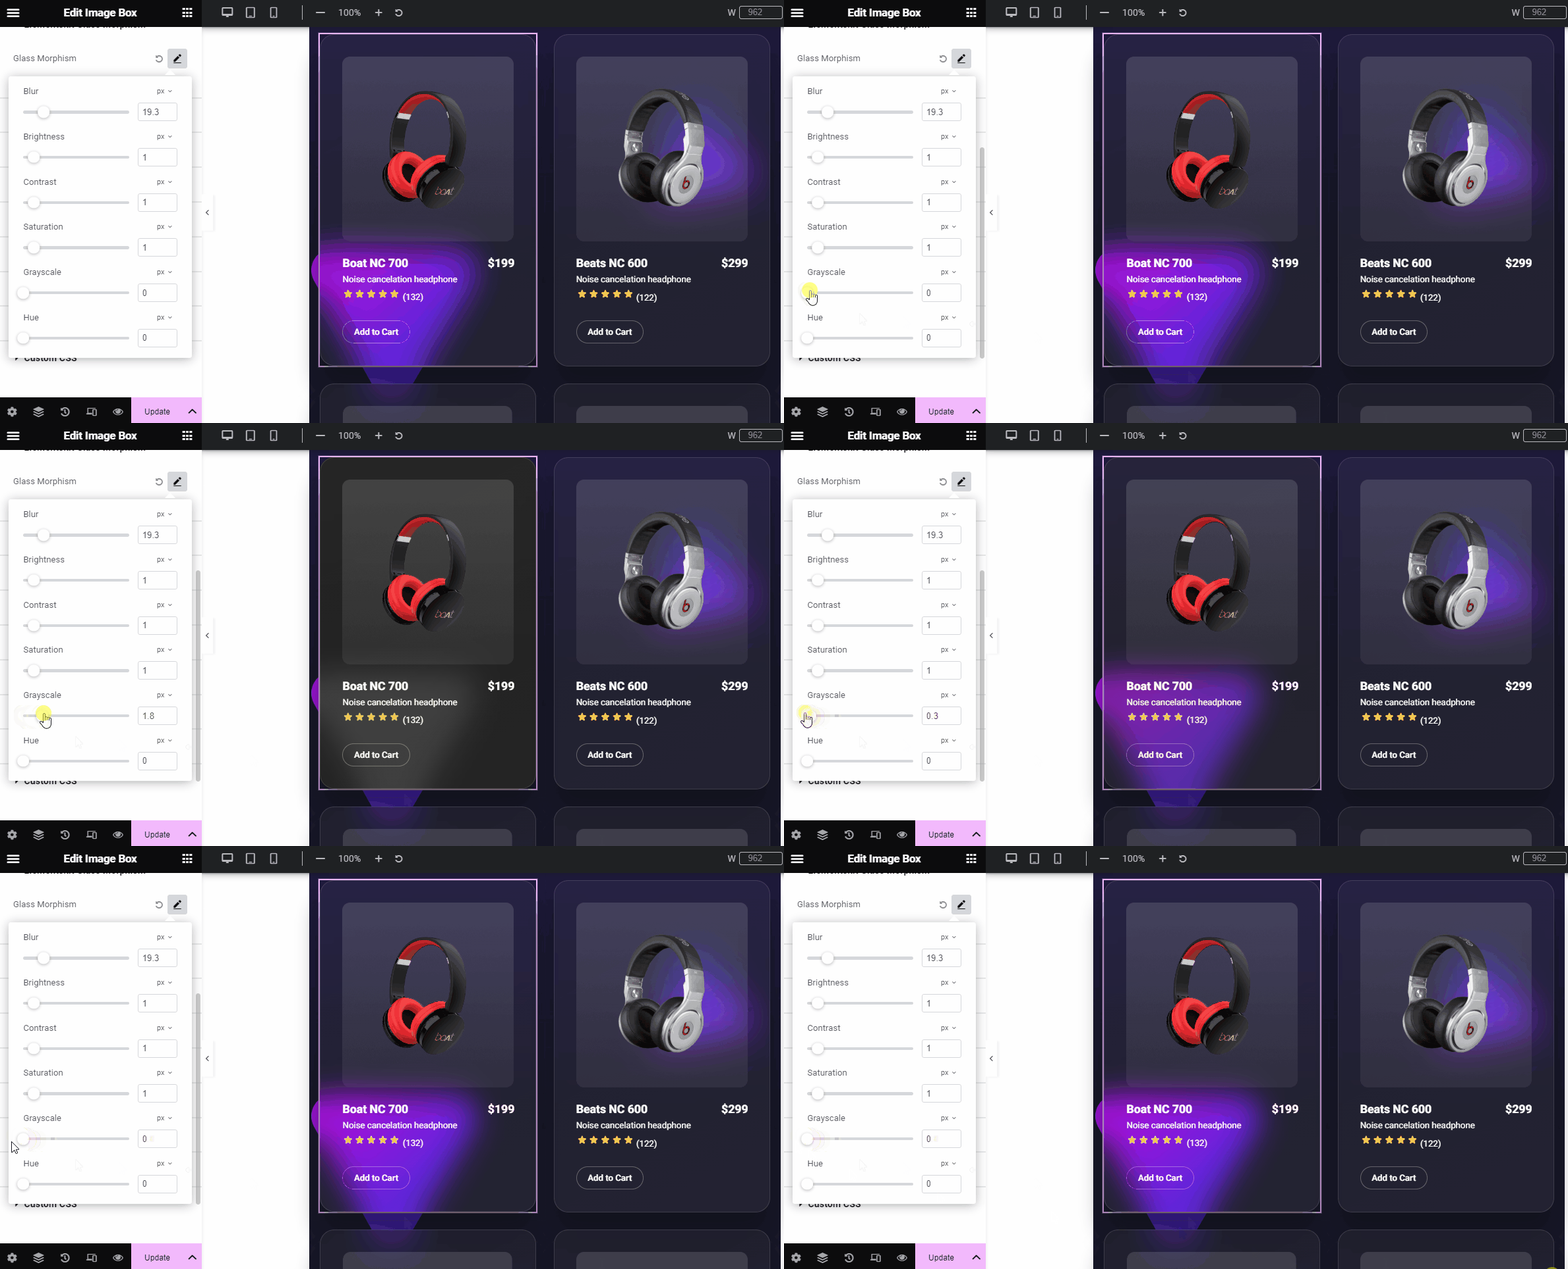
Herfra kan du anvende grå nuancer til dit design. Du bestemmer selv, hvor lyst eller mørkt designet skal være i grå nuancer. Hvis du vælger et højere område, får du den mørkeste version af designet. Hvorimod, indtastning af en lavere værdi vil bringe lysstyrke til dit design.
Hue #
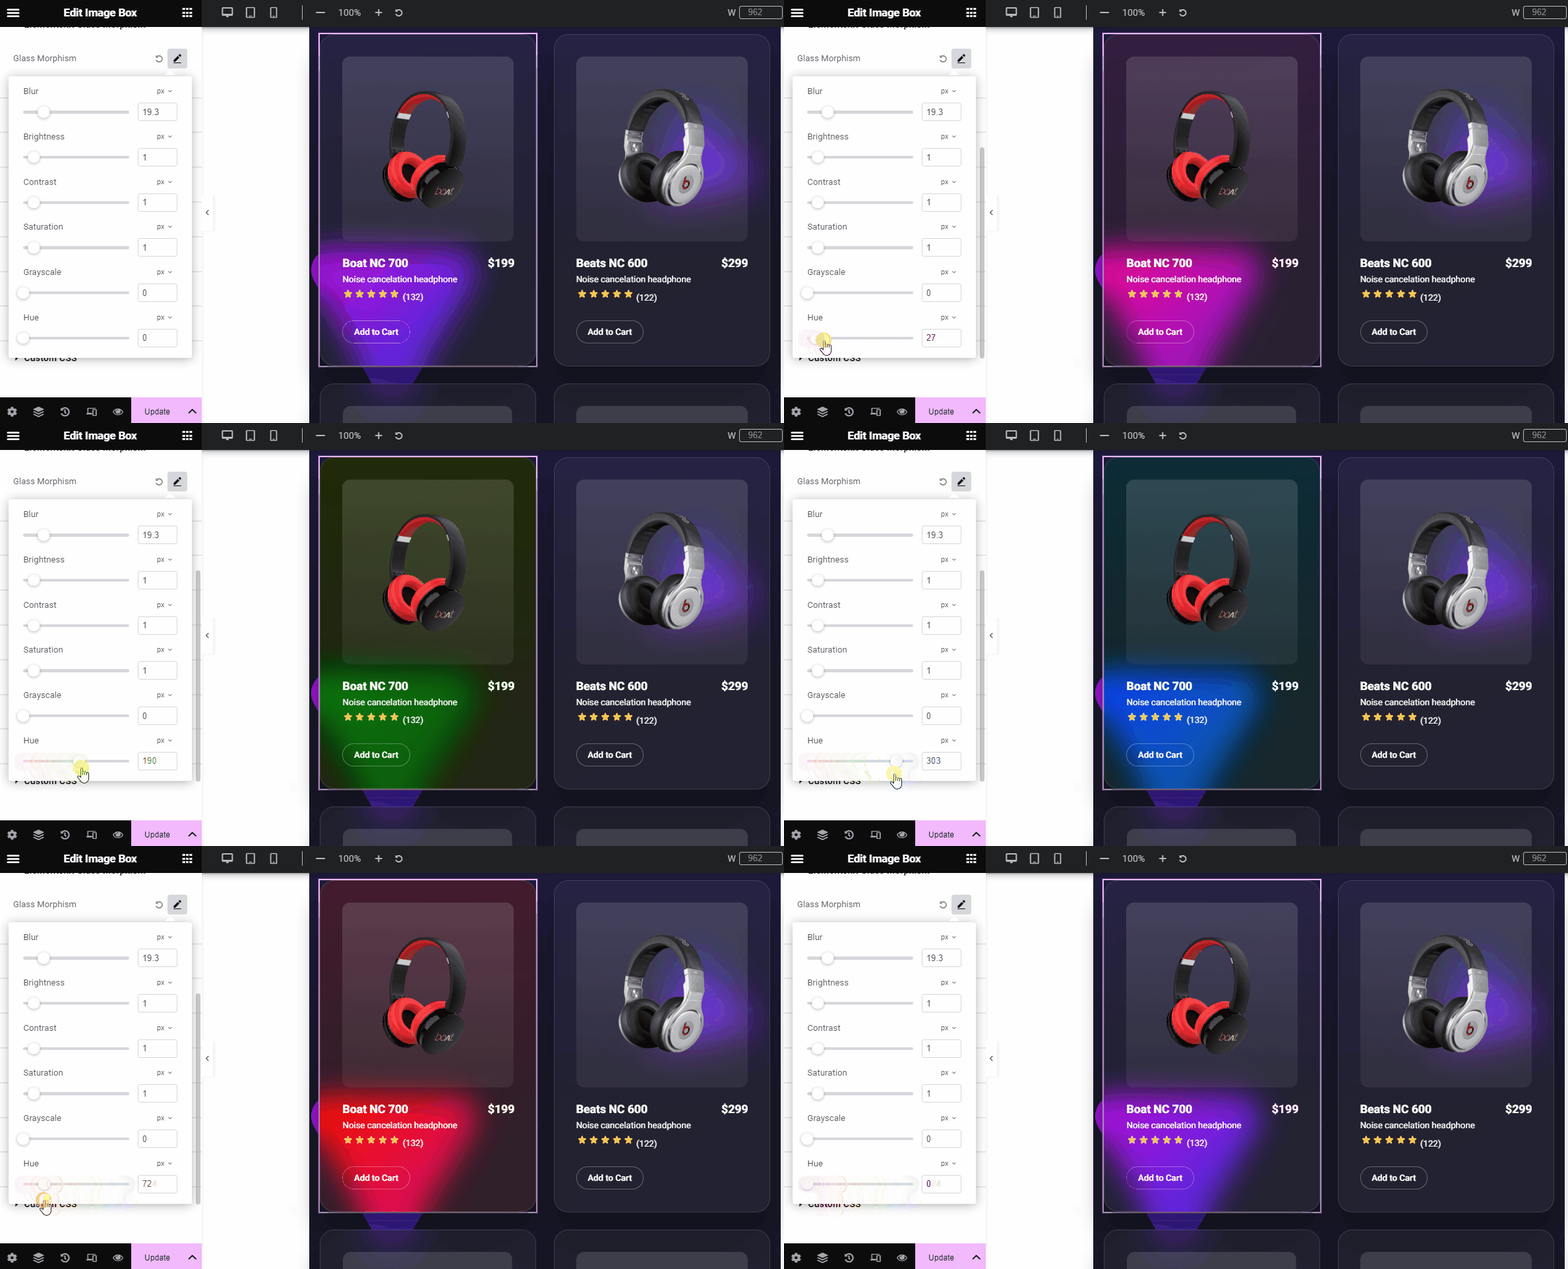
Hue er et udtryk, der bruges til at beskrive intensiteten af blandingen mellem to farver. Her ændrer du ikke hovedfarven, du justerer bare, hvor lys den er i forhold til dens tilsvarende farve.
Hvis du f.eks. tilføjer to farver som rød og pink, har dit design to nuancer. Og skyderen vil lade dig ændre intensiteten af begge farver.
Denne indstilling er baseret på et farvehjul fra 0 til 360. Her,
- 0 refererer til rød.
- 120 henviser til grøn.
- 240 henviser til blå.
Nu er det din tur. Vi har vist, hvordan man bruger alle ElelmentsKit Glass Morphism-funktionerne til at skabe et tiltalende matteret glas-look hvor som helst på Elementors hjemmeside.


