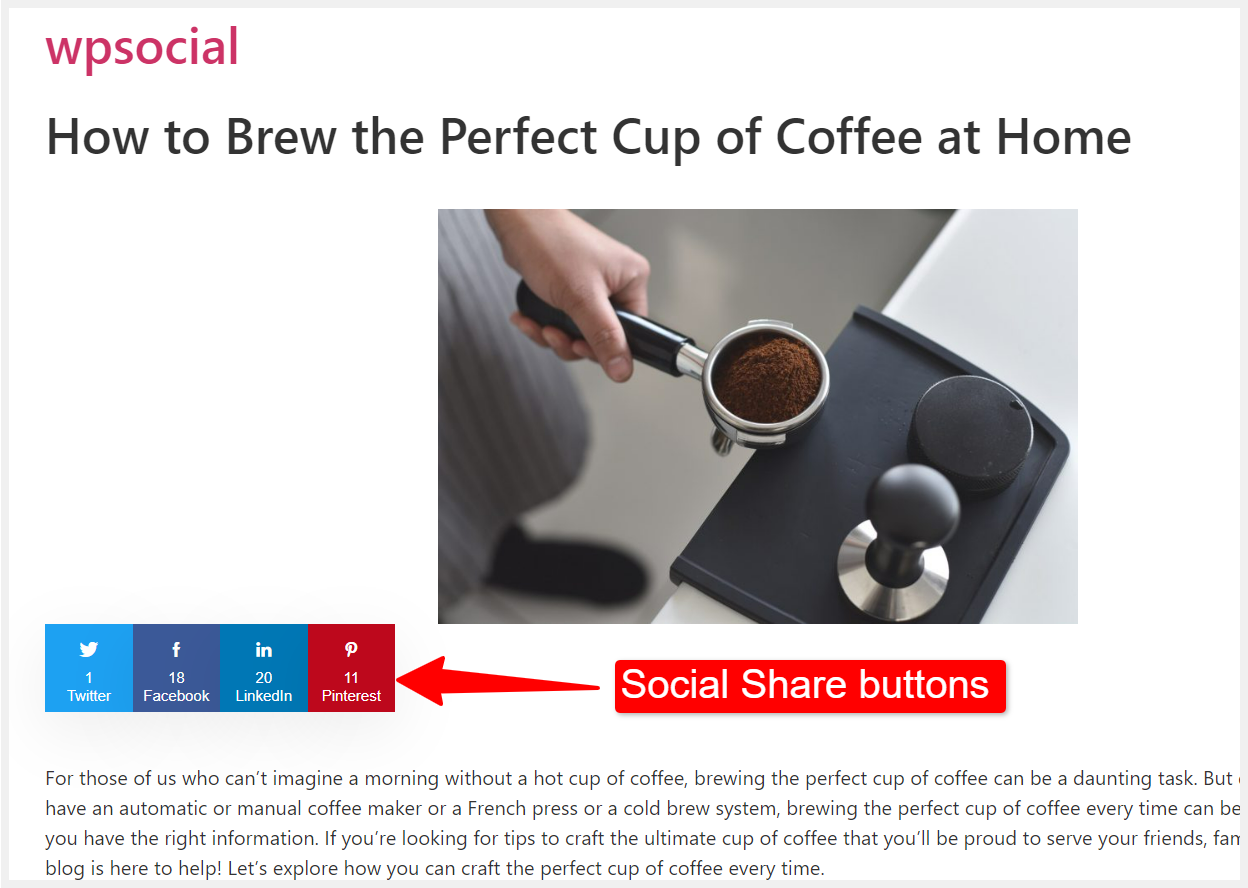
With WP Social, you can add a share option on your website content that lets the visitors/ users share the content on various social media platforms.
WP Social integrates with 14+ social media platforms including Twitter, Facebook, LinkedIn, Pinterest, and more. Your website visitors can share the web content and it will help you to reach new customers, build brand awareness, and increase conversion rates.
To add social share buttons to WordPress, log in to your website and,
Navigate to WP Social > Social Share from WordPress dashboard.
There you’ll find the following settings to configure the social share feature for your website.
Step 1: Share Settings #
In this section, you can decide to Use theme default font family. If you choose “Yes”, the share button will use the default font family of the theme installed on your website.
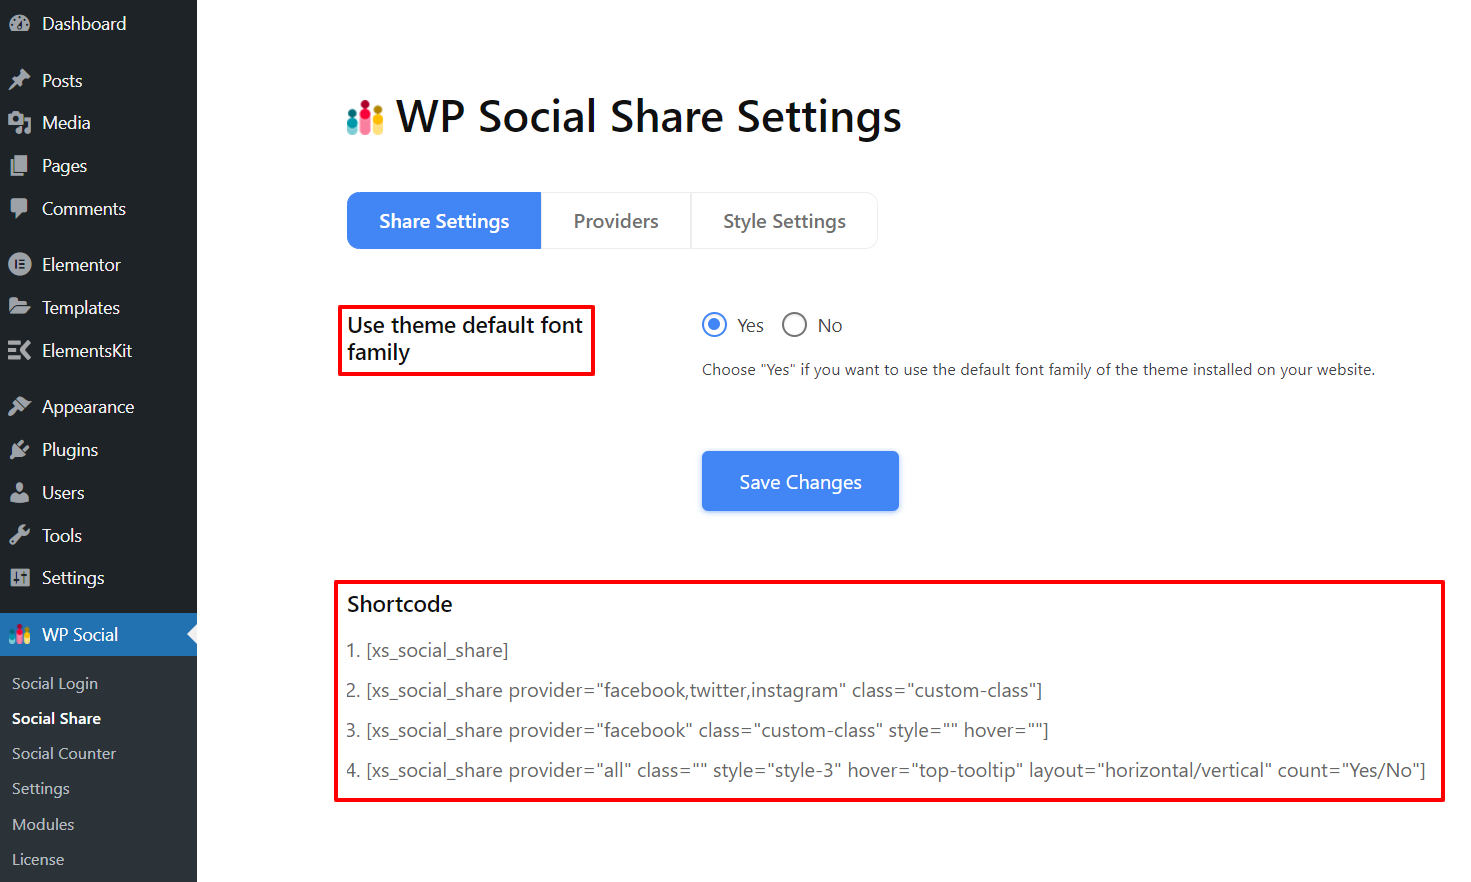
The Social Share Shortcodes are available on this page. You can copy those shortcodes can use them to add social share buttons.
Step 2: Providers #
Then move to the “Providers” tab. In this section, you can configure social media platforms (providers) and their settings for content sharing.
Enable social media platforms: #
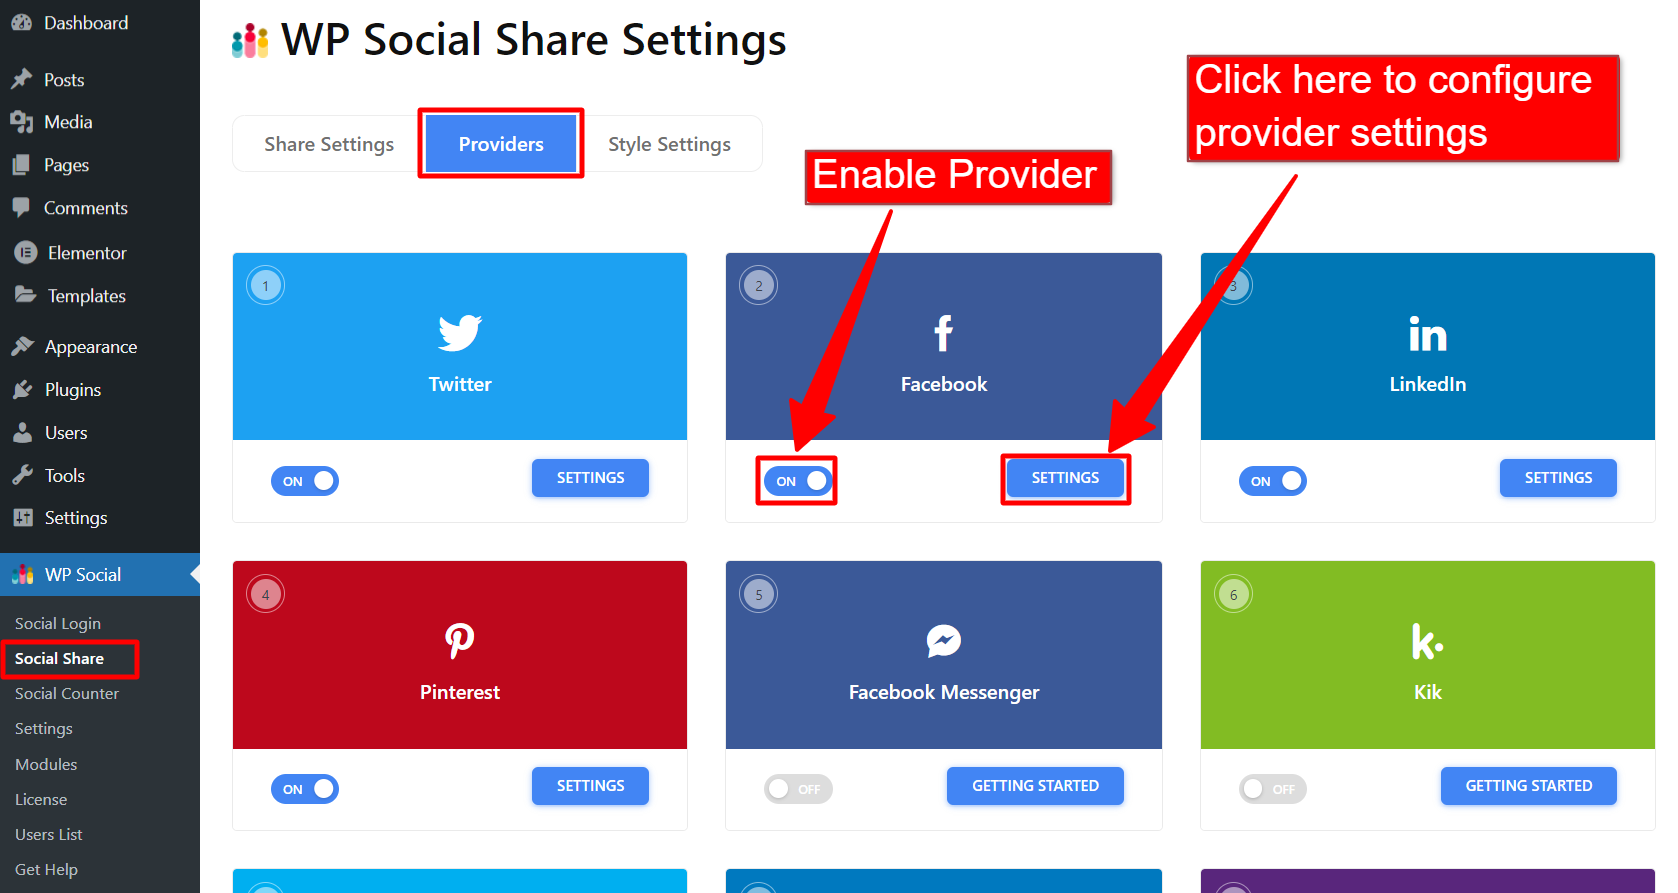
You can decide which social media platforms you want to add to your web pages for sharing content. To enable a provider, turn the toggle button to ON as shown in the image below:
Settings #
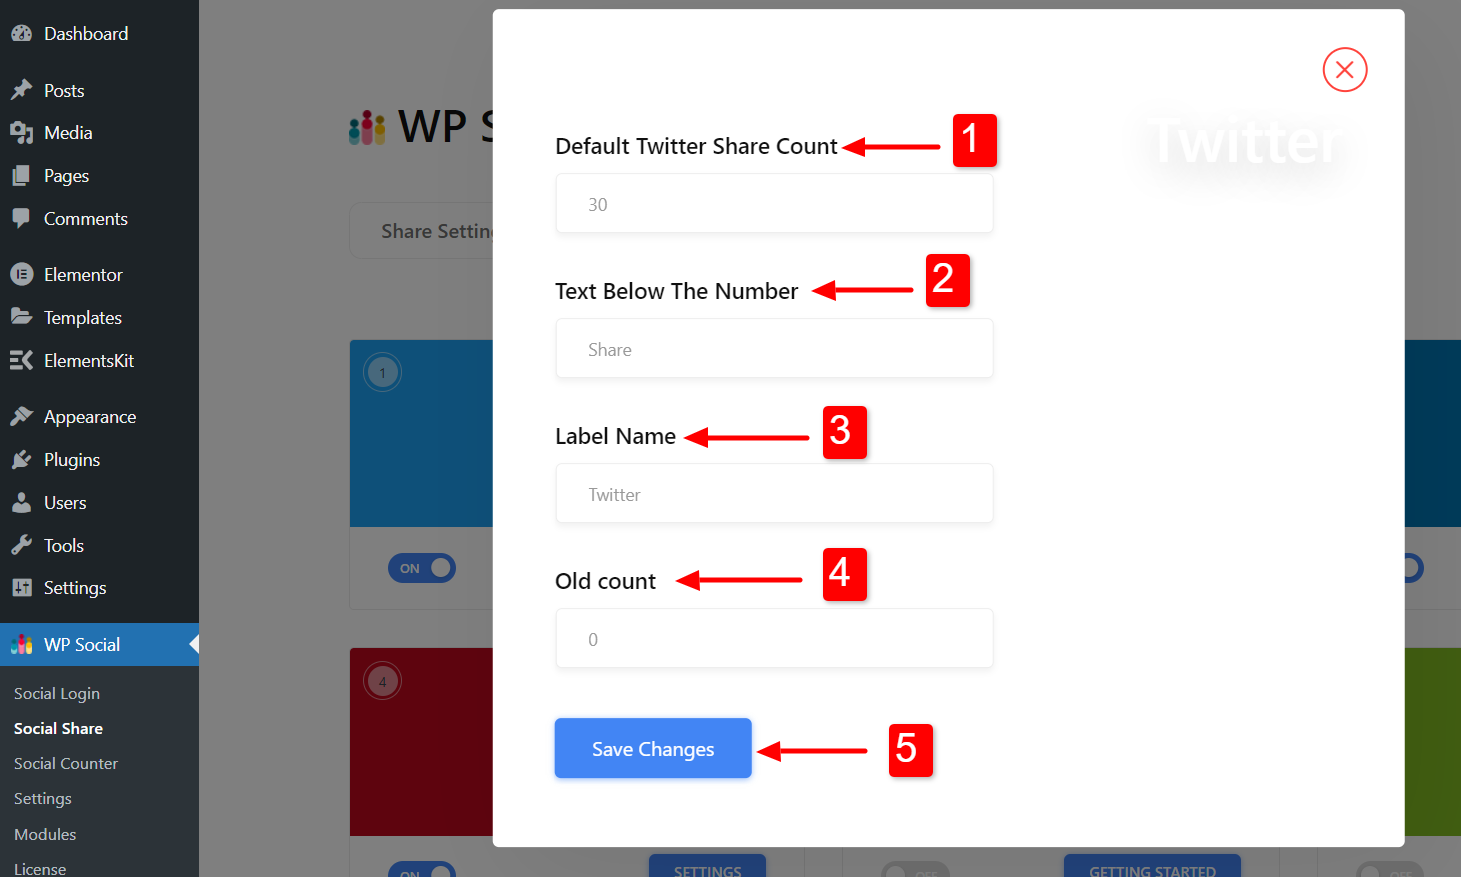
Click on the Settings button to configure a provider’s settings. Once you click the settings, a popup window will appear. In that window the following features are available:
- Default Share Count: You can set an initial value for the share count. The number you enter in this field will be displayed as a share count by default. [Note: Once the user clicks on the share button, the number will be reset and the count will start from 1.]
- Text Below The Number: You can show a text under the number count.
- Label Name: You can change the label name of the social media platforms.
- Old count: This feature is like the Default Share Count but with a difference. Once you set the initial value in this field, the share count will add up to this number. For example, if you set the number to 30, once a user clicks on the share button, the share count will be 31.
- Save Changes: Click the “Save Changes” button to finalize changes.
Step 3: Style Settings #
In the Style Settings, there are two types of styles available for share buttons.
- Primary Content: The share buttons will only appear on a specific part of the page (e.g. Start of the content, end of the content, or both the start and end of the content).
- Fixed Display: The share buttons will be sticky on the screen and always visible.
You can customize both styles individually.
Primary Content #
- Show total count: Decide whether to show the total number of share counts.
- Layout: Choose the alignment of the share buttons to be Horizontal or Vertical.
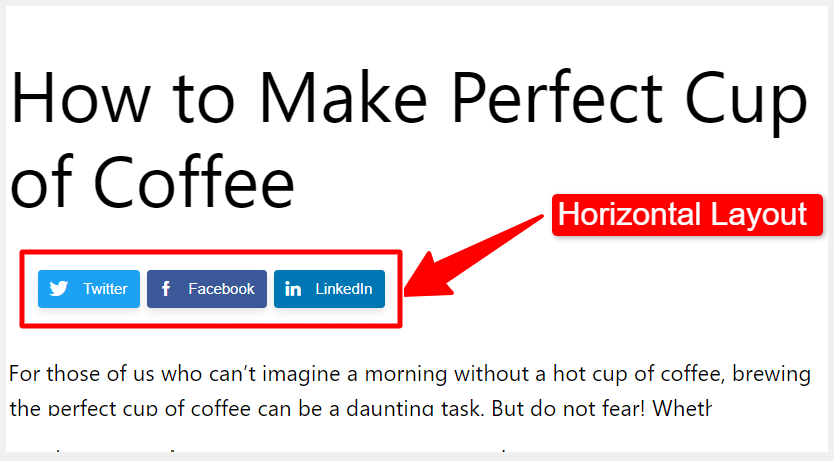
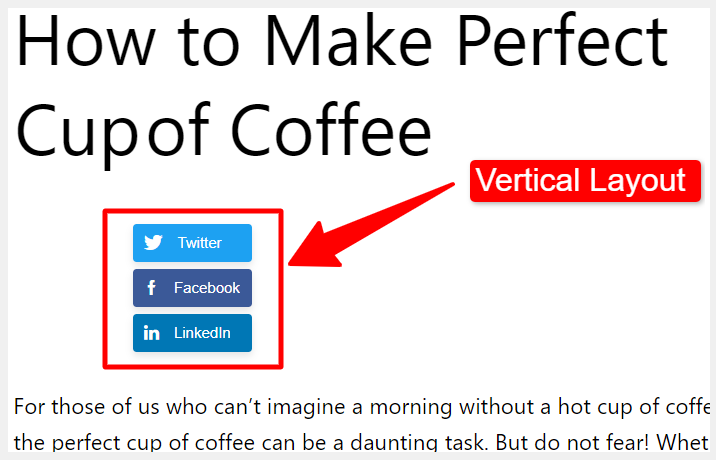
- Primary Content Position: Select the position of the share buttons.
- After Content: Show share buttons after the page content.
- Before Content: Show share buttons before the page content.
- Both: Show share buttons on both before and after the content.
- Disable: Share buttons won’t be visible. You have to use the shortcodes to show the social share button.
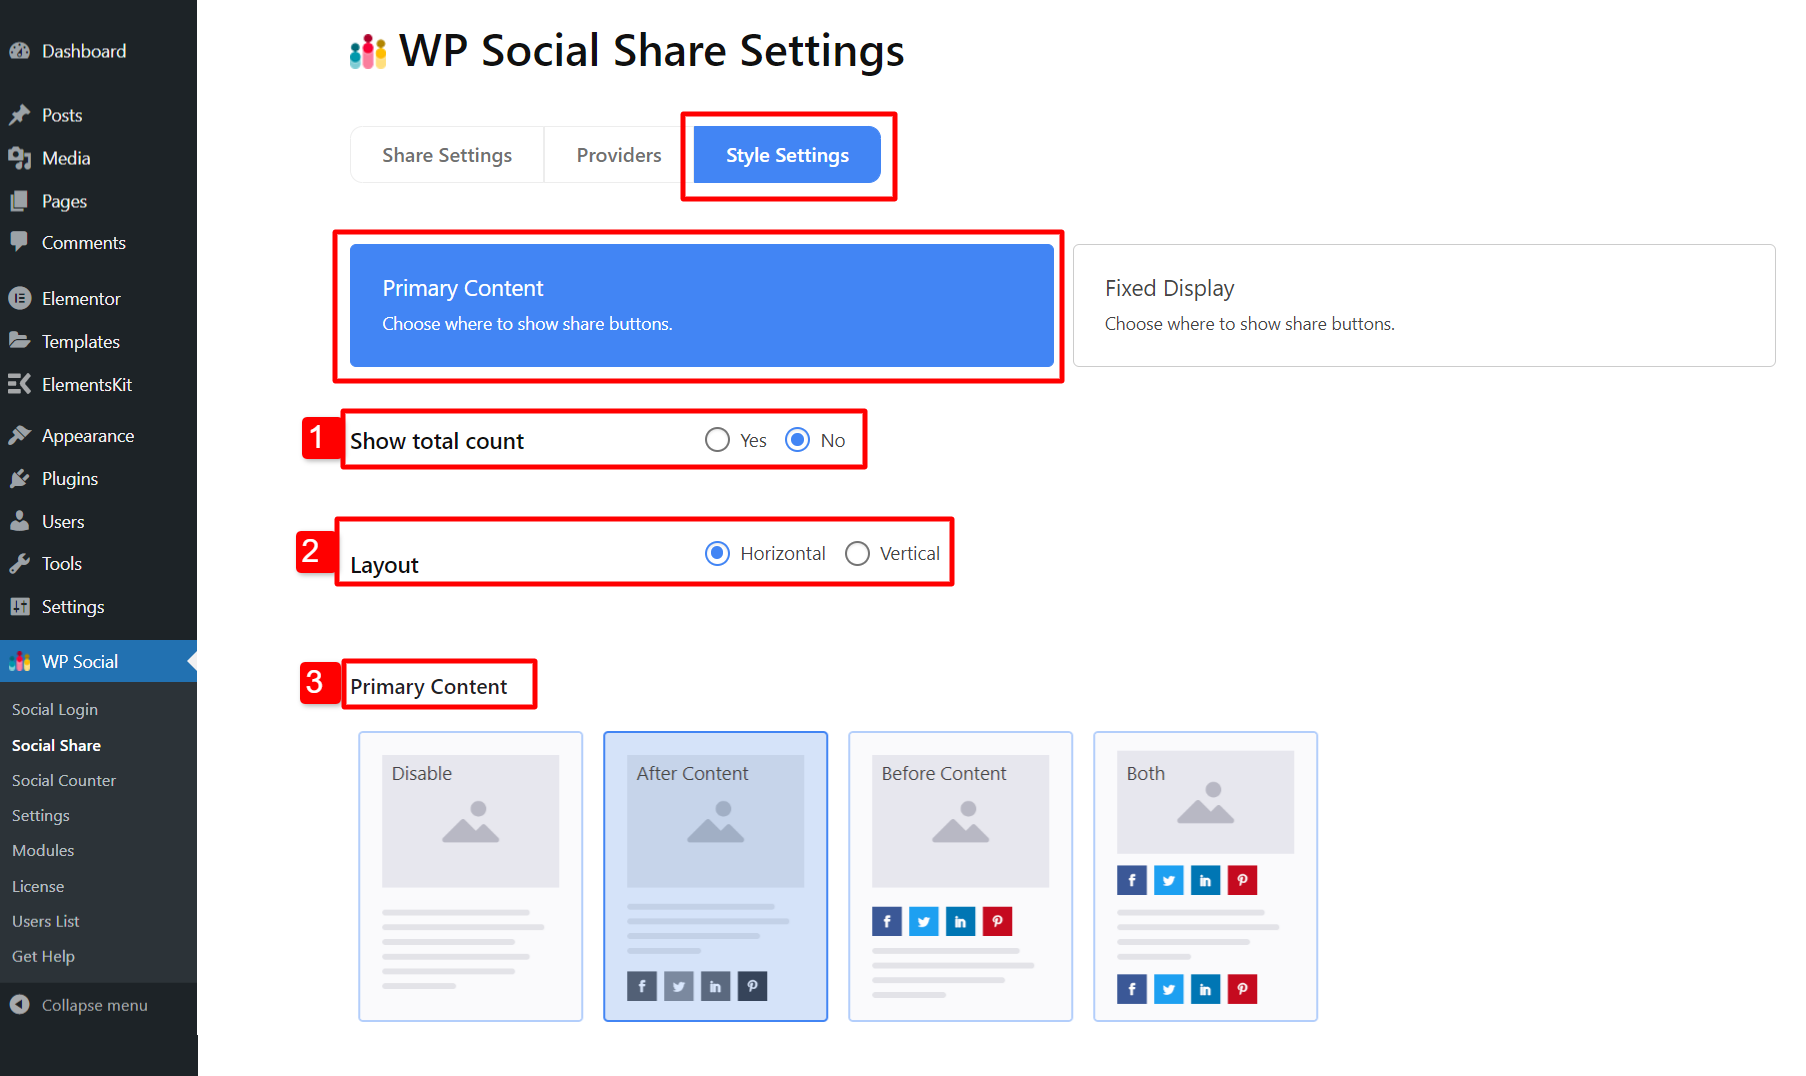
- Select Hover Effects: Choose how the tooltip will appear when users hover the mouse pointer on the button. 10 different styles are available with WPSocial.
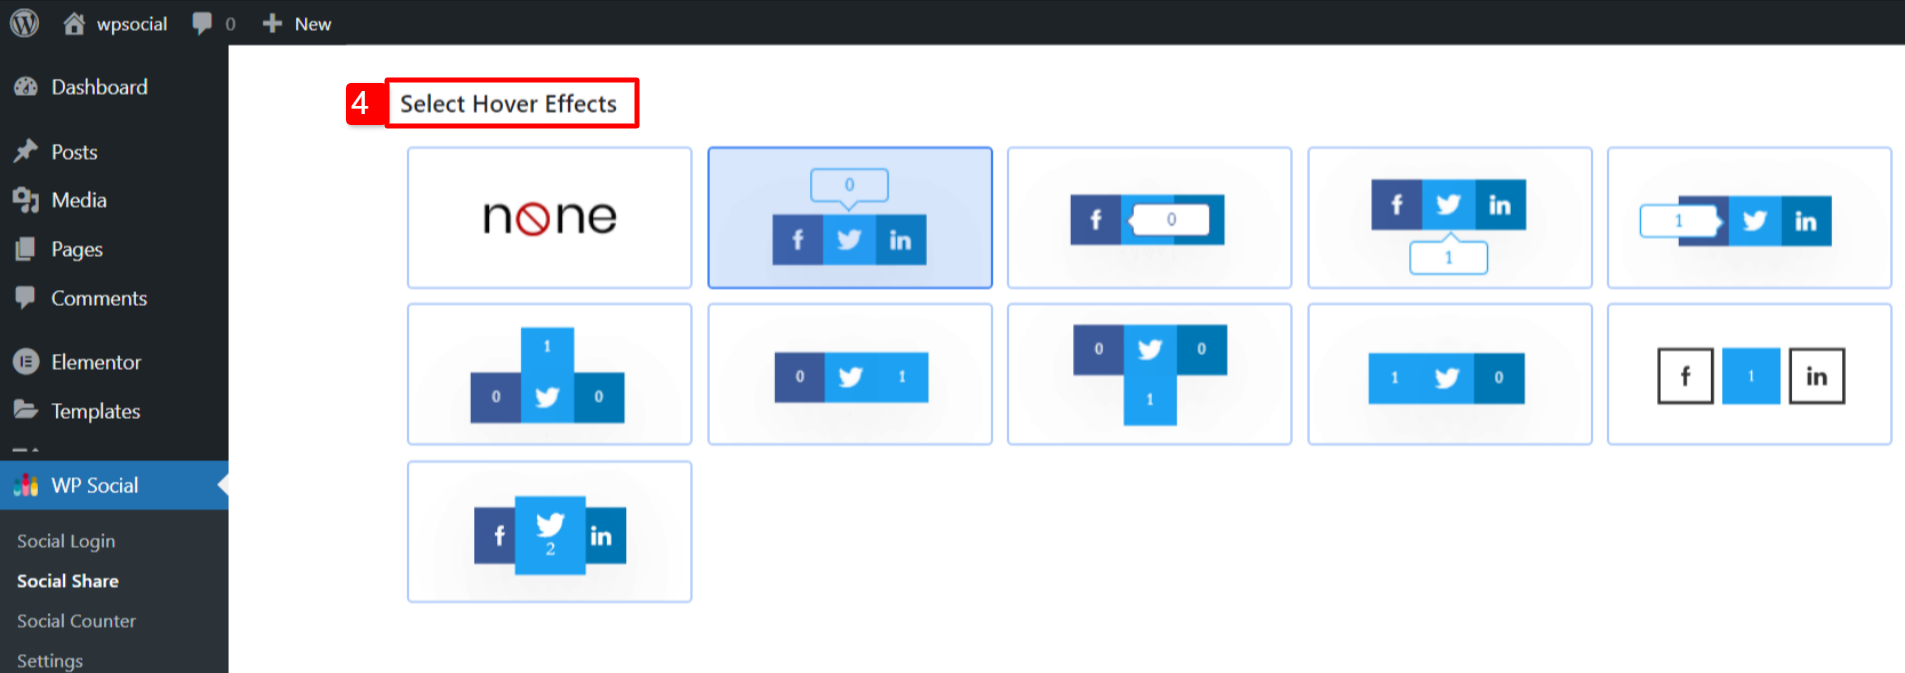
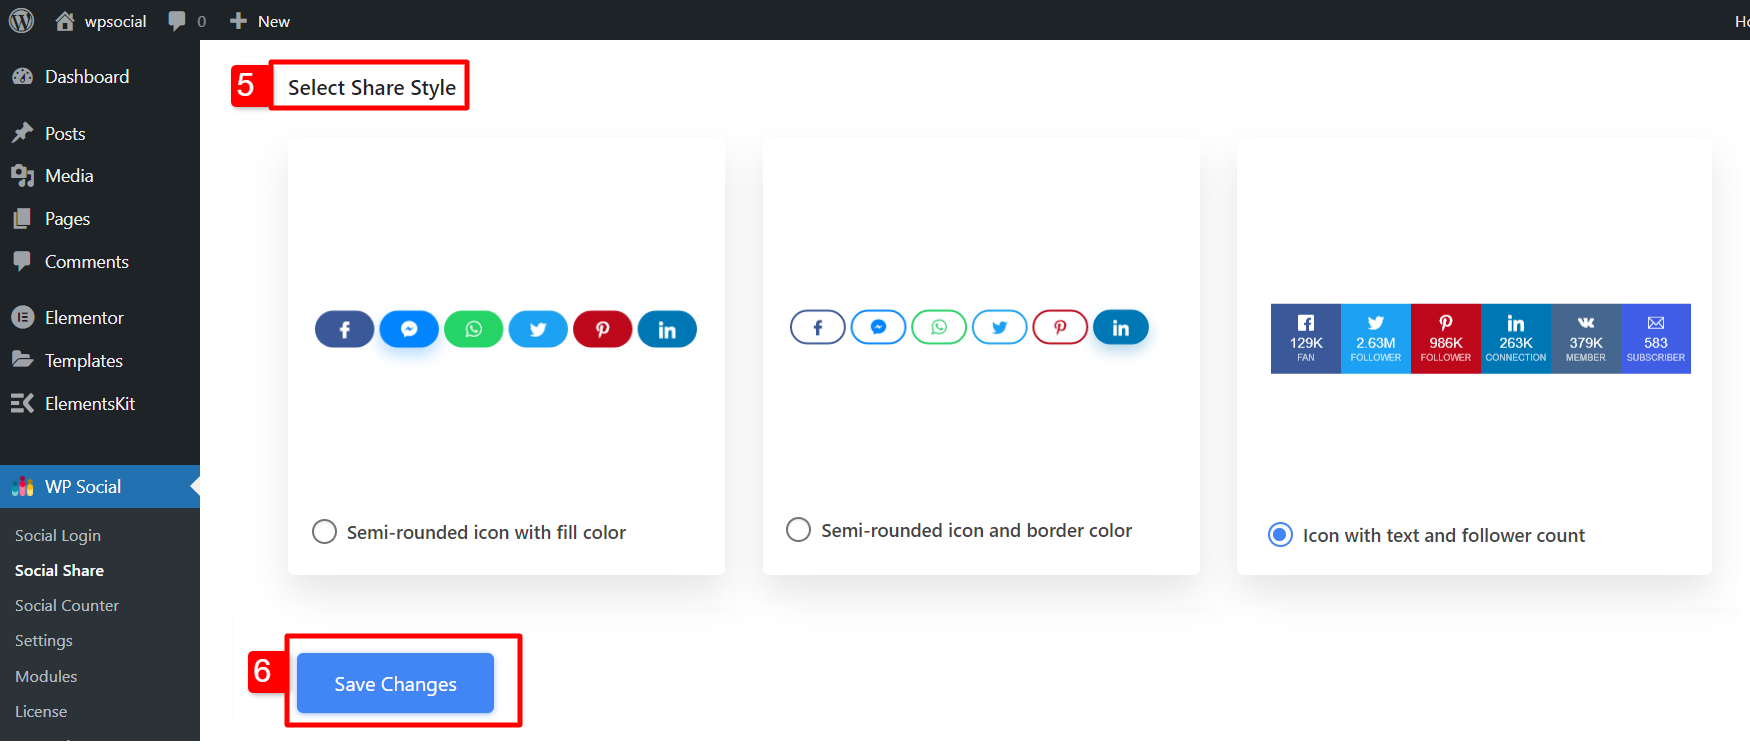
- Select Share Style: You can choose a button style from the 17+ styles available.
Fixed Display #
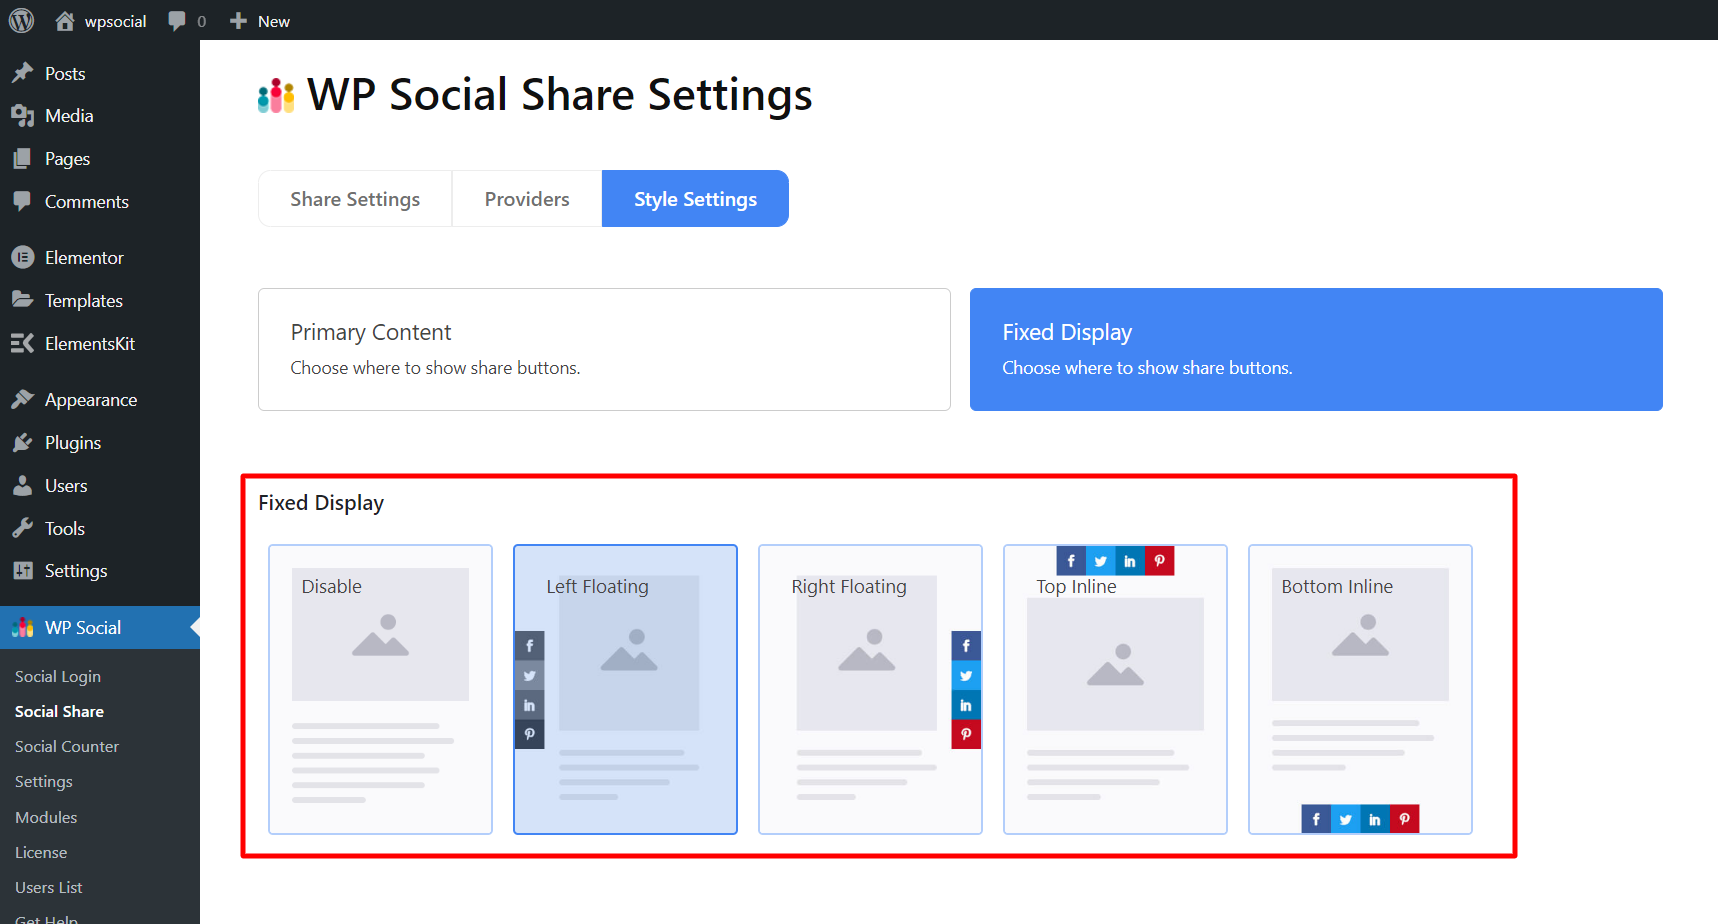
Select where share buttons will appear when they are fixed on the screen.
- Left Floating: The buttons are stick to the left side of the screen.
- Right Floating: The buttons are stick to the right side of the screen.
- Top Inline: The buttons are stick on the top of the screen.
- Bottom Inline: The buttons are stick on the top of the screen.
Finally, you’ll be able to add social share buttons to WordPress and let the users share your content on social media.
