


Want to create a landing page on your WordPress website with Elementor?
Do you think that it’s hard to create a mind-blowing landing page that skyrockets the conversion?
Well, after reading this post you’ll realize that building a highly converting Elementor landing page is not as hard as you think. You can easily build a landing page with templates for any occasion or campaign following just 7 simple steps.
In this how-to guide, I’m going to walk you through the easiest process of creating landing pages with Elementor. You will learn how to create a landing page in WordPress with Elementor landing page templates from scratch.
Seems like you were looking for it? Go ahead then.
What is a Landing Page?
Though there are many controversies regarding the definition of a landing page, Wikipedia describes it quite elaborately:
In online marketing, a landing page, sometimes known as a “lead capture page“, “single property page“, “static page“, “squeeze page” or a “destination page“, is a single web page that appears in response to clicking on a search engine optimized search result, marketing promotion, marketing email or an online advertisement.
Wikipedia
Unlike, homepage or any other page of your website, a landing page is a standalone page. Still, it usually generates more conversions than that of a blog page or other pages of your website.
In short, it is a page where you lead people to reach. The objective of leading people to a landing page varies from campaign to campaign.
If you create a WordPress landing page for your business, here are some things you might want the visitors to do on your landing page:
- Reach out to you via call
- Make a purchase
- Register for an event
- Contact you via chat
- Subscribe to newsletters
- Become a lead by filling a form up, etc.
Based on the goal and nature of your campaign, your landing page can either be a click-through landing page or a lead-generation landing page.
Initial Setup
To make your Elementor landing page, you’ll need:
- WordPress installed on your website
- Elementor (free version), and
- ElementsKit Pro.
Remember, it is up to you to make your landing page live or store it locally on your computer with tools such as Local by Flywheel.
Common Sections of a Landing Page
Frankly speaking, there are no hard and fast rules regarding the sections a landing page should have.
What sections you should include on your landing page depends a lot on the occasion and purpose of creating your WordPress landing page.
For the time being, let me just mention some of the common elements a landing page may contain:
1. Hero Section— As the hero section becomes visible as soon as the visitors land on the page, this is the most vital part of a landing page. This section may contain a headline, subheadline, text, and a CTA (call-to-action) button.
2. Navigation Menu— Navigation menu section is immensely helpful for your visitors to explore any part of the landing page.
3. About— Leverage the about section of your landing page to let them know a bit more about your business and service.
4. Features— List the features of the product or service you are offering with mind-boggling images and convincing texts.
5. Gallery— This is the section where you can put all your creativity by using a bunch of widgets. You can create a gallery of images, text, video, social icons, and anything that works best.
6. Form Section— If you want the visitors to contact you, include a simple but effective contact form. You can use MetForm form builder to embed any type of form on your landing page.
7. Testimonial— To gather the trust of your visitors and give them an idea about how amazing you can serve, adding a testimonial to your landing page can be a great idea.
8. Footer— Though the footer is not an essential part, you can add the footer part to your landing page to reinforce the call to action or encourage them to “act now”.
By the way, you may also put your privacy policy, terms of service, and FAQ page links at the end of the footer.
7 Steps to Create an Elementor Landing Page
Now that you have a good deal of information regarding what a landing page is and the common elements a landing page should have, it is time to put that knowledge into practice. Follow the steps below for how to create a highly converting WordPress landing page using the Elementor plugin.
Step 1: Set up the Layout, Global Fonts, and Colors
Before you start to build a landing page with the Elementor template, make sure to set up the visual editor properly.
◉ Go to Pages >> Add New
◉ Click on “Edit with Elementor”
◉ Go to Elementor Settings at the bottom left of the page
◉ Set the Page Layout as “Elementor Canvas” and publish the page.

When it comes to choosing the global colors and fonts, you can set the primary, secondary, text, and accent color from site settings.
The global settings will be applied automatically when you add any new widget to the Elementor area.
Step 2: Build the Hero Section of Elementor Landing Page
There are two ways to build a hero section of your landing page with Elementor.
1. Build the hero section manually by dragging and dropping the Elementor widgets.
2. Choose the pre-made hero section from the list of available blocks on Elementor.
Build the Hero Section from Scratch
If you are an expert and looking for the highest level of customization, you can manually build the hero section with Elementor widgets.
To begin with, click on the “+” icon of the Elementor area and choose a single column or two-column section (preferable). A two column-section will help you to show your heading, subheading, and image/video side-by-side.
Add Headings: Drag and drop two ‘heading’ widgets (one below another) from the Elementor block area.
Use the H1 HTML tag to the first heading and the H2 or H3 HTML tag for the subheading.
While the heading should describe what you are offering in one sentence, the subheading will expand the idea within two sentences.

Add CTA: Add an eye-catching CTA button to encourage your visitors to take action right away. To do this:
- Click on the “ElementsKit icon” from the Elementor content area.
- Choose “Call to Action” from the ready section categories.
- Choose any of the call to action buttons from the list and click on “Insert”
- Make any changes you like in the content, style, and layout, and you’re done!

Use the Ready-made Elementor Hero Section
If it’s the first time you’re building a landing page with Elementor, you can choose the hero section from the list of Elementor ready-made blocks. Here’s how:
- Click on “Add Template” from the Elementor content area.
- Go to “Blocks”
- Choose “Hero”
- Find the hero block you like and click on “INSERT”
- Make any changes you want.

There are different ways to build the navigation area with Elementor. Let me show you the easiest way of how to build the navigation area of your Elementor landing page for easy scrolling.
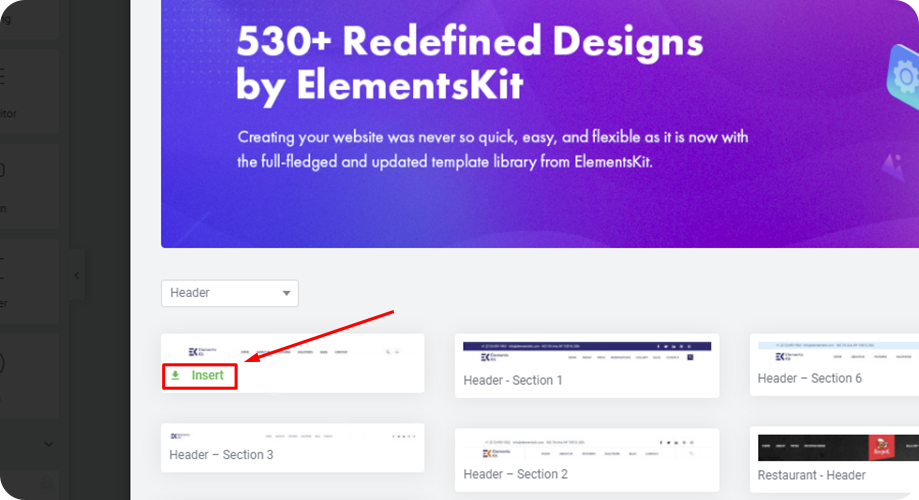
- Click on “Add Template” from the Elementor content area.

- Go to “Blocks”

- Choose “Header”

- Find the header block you like (all the headers in Elementor are for PRO users only) and click on “INSERT”.
- Make required changes.
- Click on the “ElementsKit icon” from the Elementor content area.

- Go to “Sections”. From the category, choose the “Header”

- Choose any of the headers from the list and click on “Insert”
- Make any changes you like to build the Elementor navigation menu you need to make.
Step 4: About Area of WordPress landing page
When it comes to building the about section of your WordPress landing page, you don’t have to abide by any hard and fast rules. This section may take either one column or more. You can add an icon, heading, and some texts as per your need.
Here’s how to build the About Area of the landing page in WordPress with Elementor:
- Click on “Add Template” from the Elementor content area.

- Go to “Blocks”. Choose “About”
- Find the about block you like and click on “INSERT”
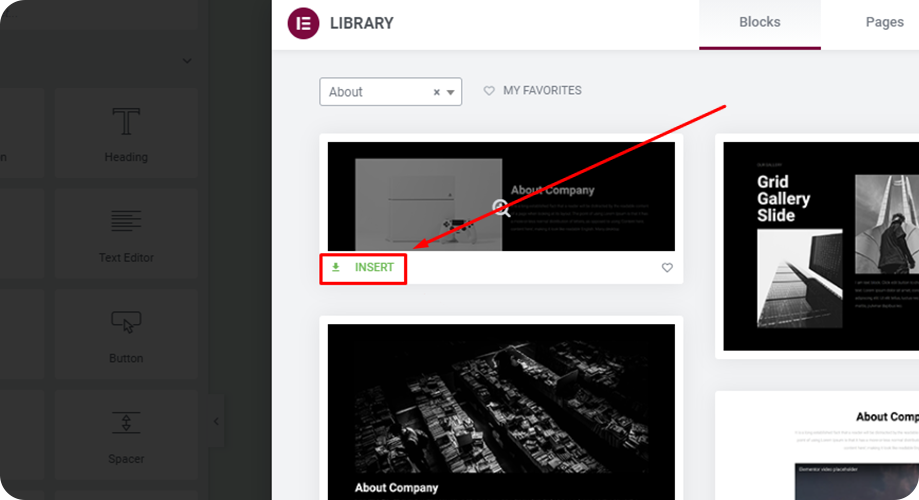
- Make necessary changes to the content and style.
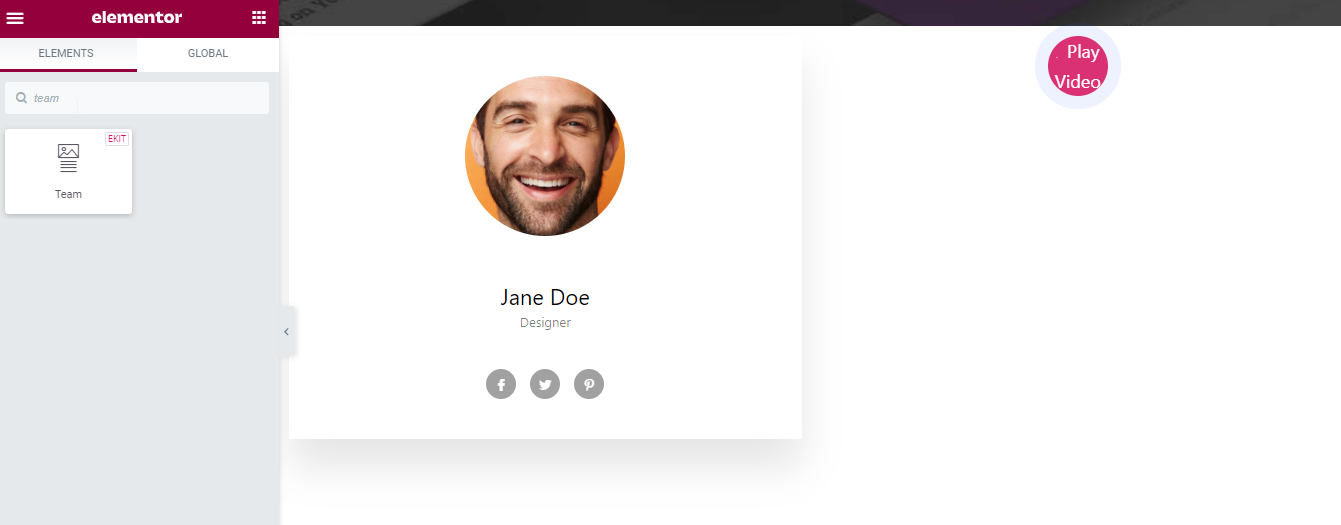
By the way, adding team photos and a relevant video to this area is also a good idea. In that case, leverage the “team” and “video” sections from ElementsKit’s list of sections.
Step 5: Designing a Features Area
It is important to let the visitors know the key features of the product or services you’re offering on your landing page. Educating the visitors with amazing features will help them to act as per your expectations. Let us know how you can design the feature section of your Elementor landing page.
- Click on “Add Template” from the Elementor content area.
- Go to “Blocks”
- Choose “Features” from the category
- Find the features block you like and click on “INSERT”
- Make any changes to suit your needs.
Step 6: Gallery Area
Put a gallery area on your landing page to make the page visually appealing to the visitors. You can easily make a gallery area with the Elementor page builder using ElementsKit. Let me show you how.
- Go to Elements>> Search Widgets
- Search for “Gallery” and press Enter
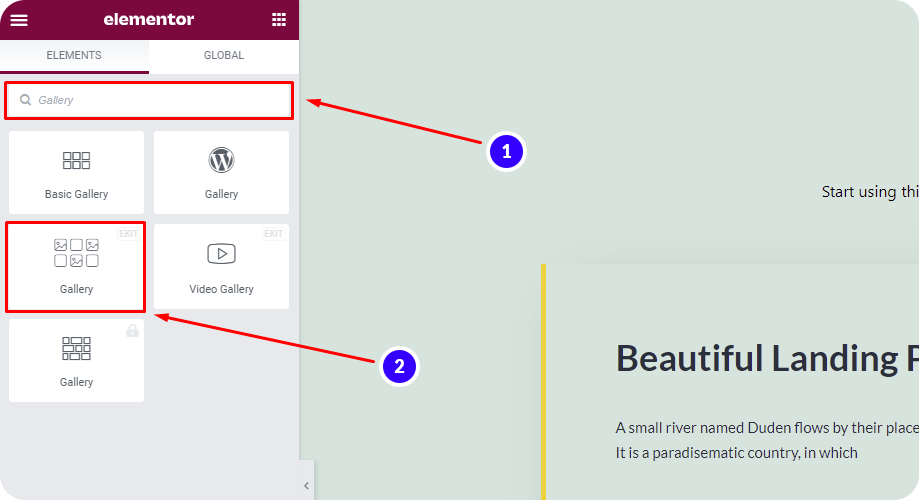
- Find the “Gallery” widget with “EKIT” on the top-right
- Drag and drop the widget to the Elementor content area
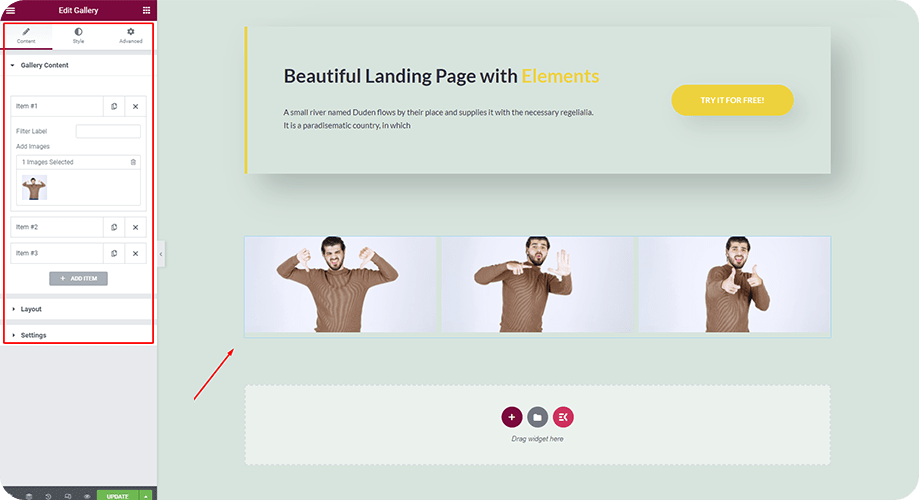
- Add content, set layout, and make other settings as per your preference.
Note that, if you’re going to make a video gallery, you can also drag and drop the video gallery widget of ElementsKit.
Step 7: Contact Area & Contact Form
If you want the landing page visitors to contact you, it is a must to add a contact form there. Though there are many contact forms out there, very few of them are customizable with Elementor.
Out of those very few, MetForm is the best of them for any Elementor WordPress website. It will help you create single-step or multi-step forms in minutes with Elementor.
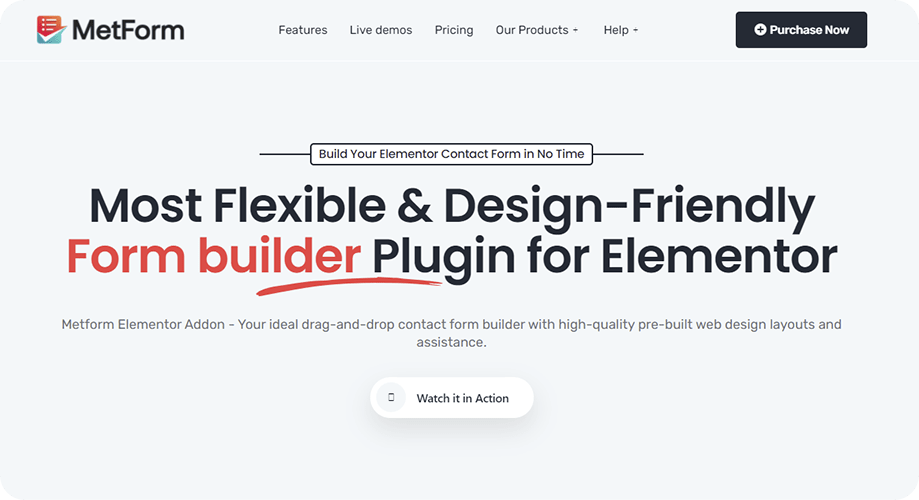
To help beginners create forms, MetForm features 30+ pre-defined ready templates that you can start using instantly. By the way, if you want to make the contact form from scratch, it also lets you do so with 25+ drag-and-drop form fields.
Here’s how to create a contact form with MetForm for your WordPress landing page
Integrating payment methods and CRM was never as easy as it is now with MetForm.

Using MetForm, visitors can easily upload files and submit forms without getting the page reloaded.
In case of need, you can also collect the user’s browser data with forms created by MetForm.
Interested in using MetForm to build all your contact forms?
Explore the features and demos of MetForm from here
Tweaks You May Want on Your Landing Page
Now that you know the common elements that make a landing page, that’s not everything you can do with Elementor. There is still enough room to add more twists and variations to your landing page.
Let me talk about some tweaks you can apply or at least run an A/B test on your landing page.
Using Elementor Landing Page Templates Instead of Building From Scratch
If you want to build your entire landing page within a few minutes, it is best to use the ready-made landing page templates offered by Elementor page builder. There are many examples of stunning Elementor landing pages that are built with these templates.
Since Elementor has both free and pro landing page templates, you can choose as your budget. Besides, these free and pro Elementor landing page templates are highly optimized for the device, SEO.
Here’s how to insert the Elementor landing page templates:
- Click on the “Add Template” icon from the Elementor content area.

- Go to “Pages”
- Search “Landing Page” and press Enter
- or proFind the landing page you want to use and click on “INSERT”
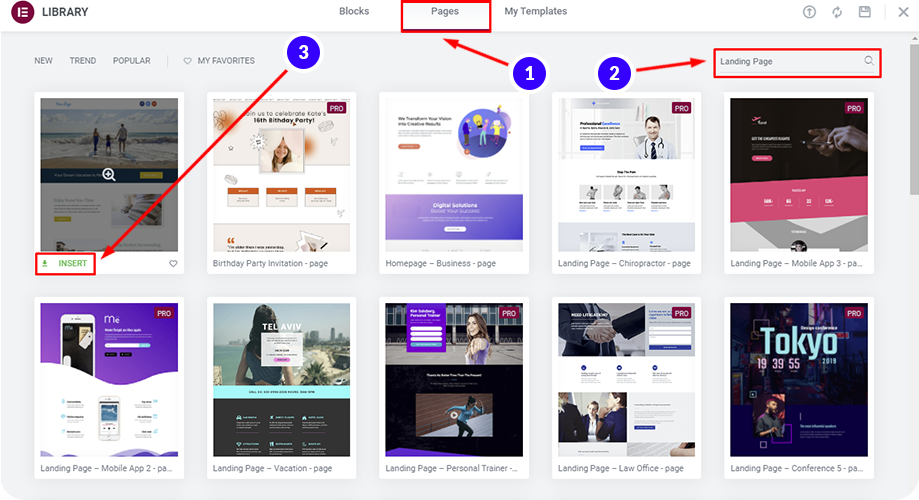
- Make any changes to the layout, text, and whatever you like.
Adding Sticky Menu and Anchor
If you want to set your menu as sticky and keep it always on top, you should leverage the sticky menu feature on your landing page.
Learn: How to create a transparent sticky header with Elementor
To enable the visitors to navigate swiftly throughout the pages, use the anchor widget from Elementor for all sections.
If you are bored of seeing the navigation area throughout the site and want a break, hiding the navigation on your landing page can be a good idea.
In that case, the best way is to hide the nav area when users scroll past a certain point of your landing page.
Adding Testimonials
Testimonials from your users are great social proof that you can use on your landing page for WordPress. You can add testimonials by either Elementor or ElementsKit’s widgets and ready blocks:
Use Testimonial Widget
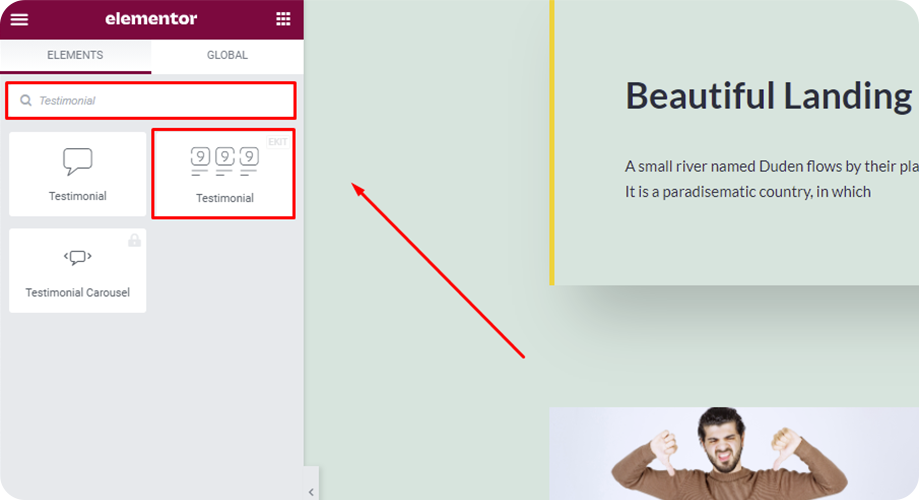
- Go to Elements >> Search Widget
- Search for “Testimonial” and press Enter
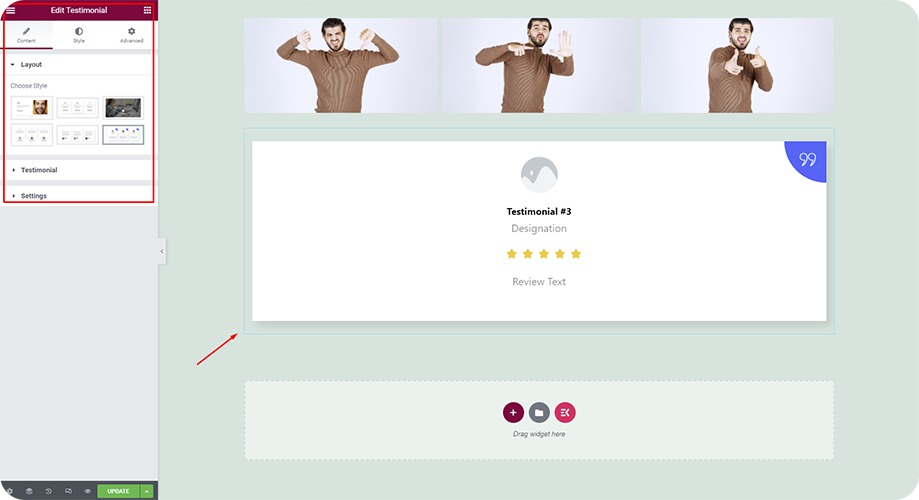
- Choose the testimonial widget by Elementor or ElementsKit
- Add content, choose a style, and make any changes from the advanced tab settings.
Use Readymade Testimonial Block from Elementor
- Click on the “Add Template” icon from the Elementor content area.
- Go to “Blocks”
- Choose “Testimonials” from the category
- Find the testimonial block you like and click on “INSERT”
- Make necessary changes.
Or
Use Readymade Testimonial Section from ElementsKit
- Click on the “ElementsKit icon” from the Elementor content area.
- Go to “Sections”.
- From the category, choose the “Testimonial” block.
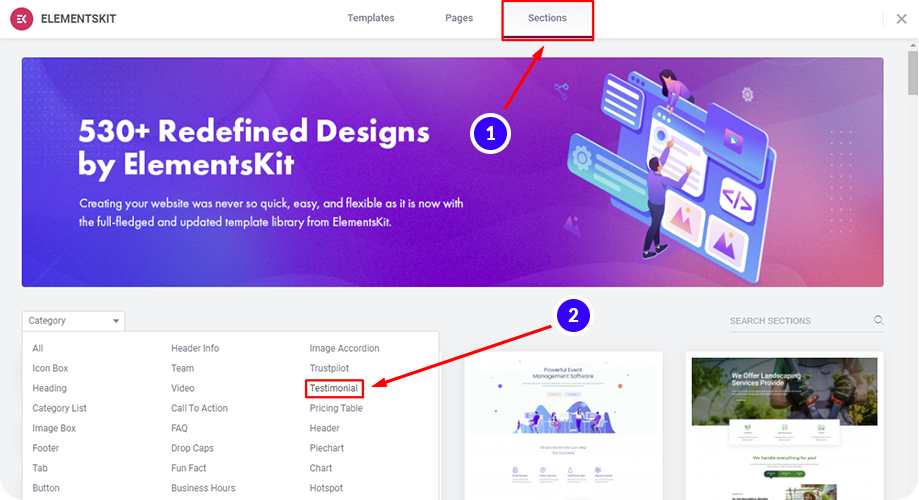
- Choose any of the testimonial styles from the list and click on “Insert”
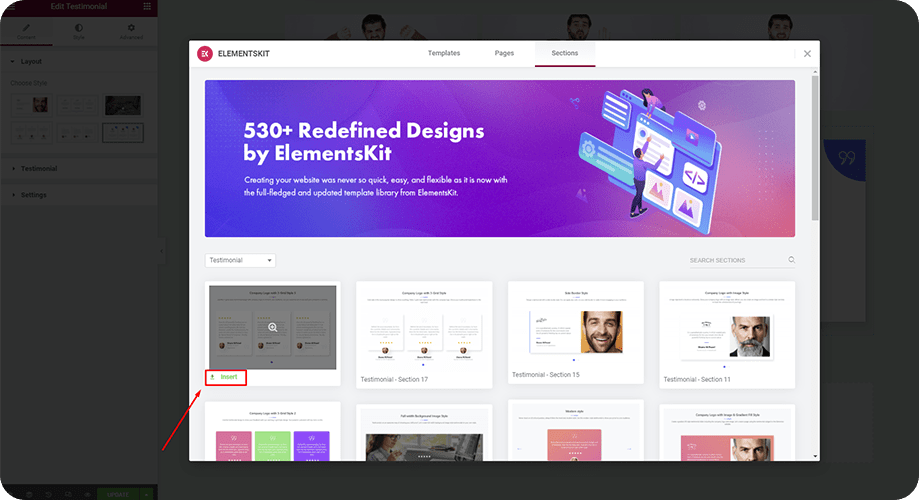
- Edit the section as required. Besides, you can also show testimonials in WordPress and customize them according to your desire using ElementsKit.
✨ Check how to import and export Elementor templates.
Frequently Asked Questions (FAQs)
Are the homepage and landing page similar?
No, the landing page and homepage are not similar. Some major differences set apart these two pages. The homepage is the front page of your website. On the other hand, a landing page refers to any page where a visitor lands. Besides, a homepage includes more links and information than a landing page that is needed to completely describe a brand or product. Simply put, a homepage conveys all information necessary for a brand or product and a landing page focuses on a certain feature or topic.
What elements should I add to a landing page for Halloween offers with Elementor?
For creating a WordPress landing page to promote Halloween offers, you can consider using the following materials:
- ➜ A spooky background
- ➜ Mysterious animation
- ➜ Spiritual icons
- ➜ Special typography
- ➜ Traditional Halloween symbols, etc.
Read this blog, to know the entire process of creating an Elementor landing page with templates for Halloween: How to Create a Landing Page for Halloween
How to add an FAQ section to the Elementor landing page?
Use an FAQ section to add frequently asked questions to your landing page. Let me show you the steps you have to follow.
Use Readymade FAQ Block from Elementor
- Click on the “Add Template” icon from the Elementor to open the template library
- Go to “Blocks”
- Choose “Faq” from the category
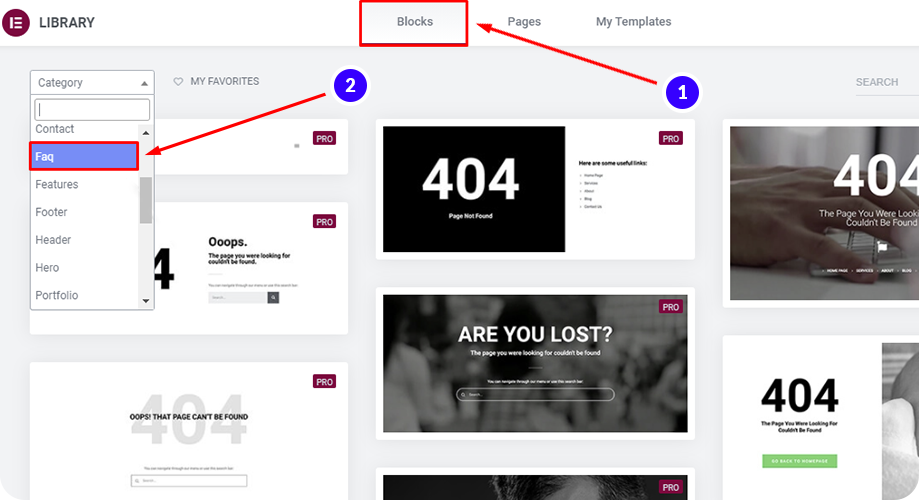
- Find the FAQ block you like and click on “INSERT”
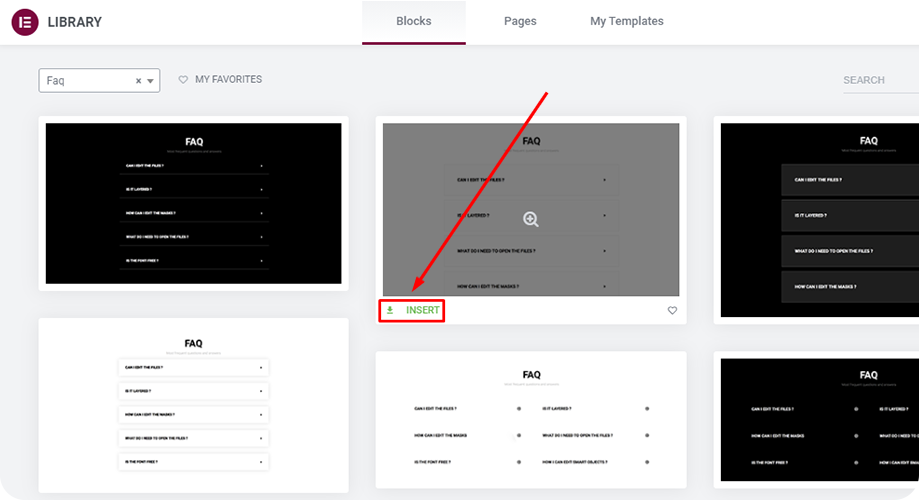
- Make necessary changes.
Or
Use Readymade FAQ Section from ElementsKit
- Click on the “ElementsKit icon” from the Elementor content area.
- Go to “Sections”
- From the category, choose the “FAQ” block
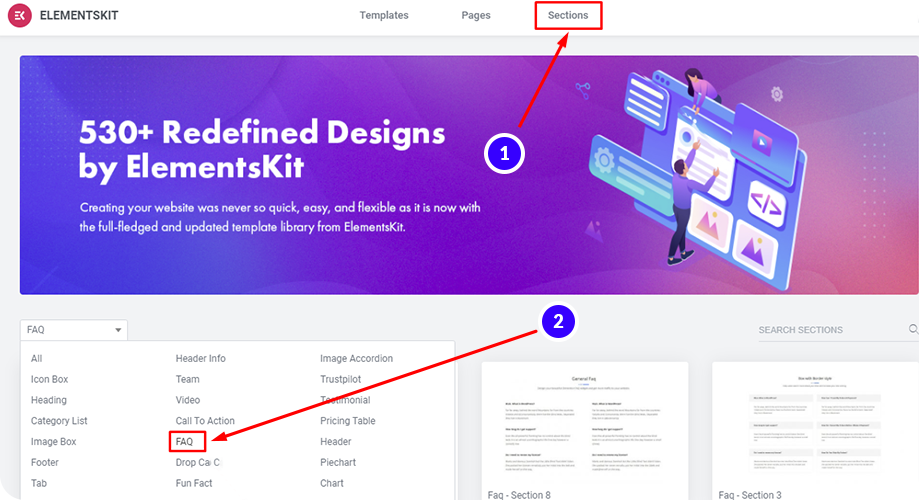
- Choose any of the FAQ styles from the list and click on “Insert”
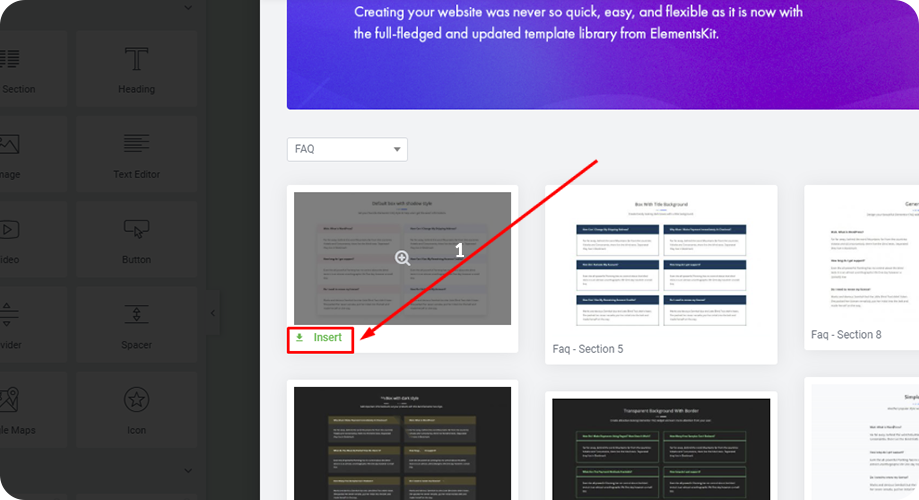
- Edit the section as required.
How to create an Elementor landing page in WordPress for a Black Friday campaign?
If you are planning to initiate a Black Friday campaign, creating a dedicated landing page to offer Black Friday deals will help you get more sales. We’ve written a blog on how to create a landing page to promote Black Friday deals. Just follow the steps to make a great Black Friday landing page with Elementor.
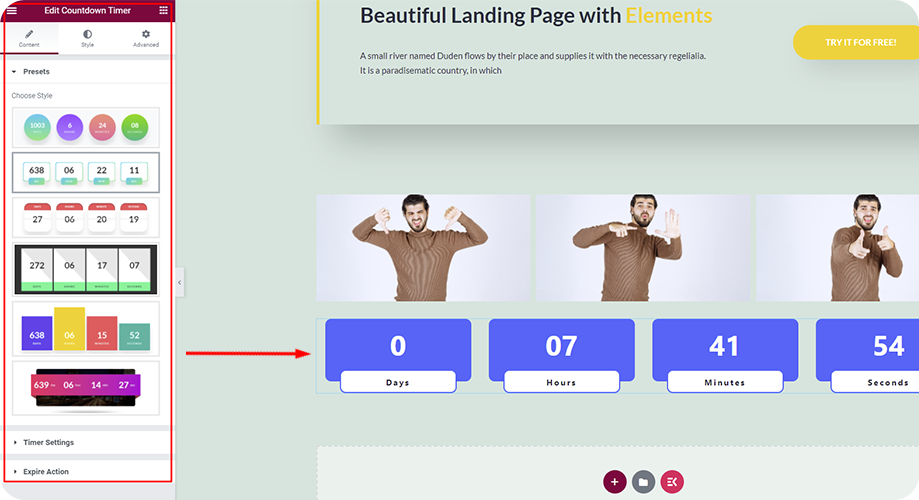
How can I add a countdown timer to the landing page?
Adding a countdown timer on your landing page is a great marketing strategy that creates FOMO (fear of missing out) in visitors and inspires them to take prompt action.
Here’s how you can add a countdown timer on Elementor:
- Go to Elements >> Search Widget
- Search for “Countdown Timer” and press Enter
- Drag and drop the countdown timer widget (with EKIT on the top right) by ElementsKit
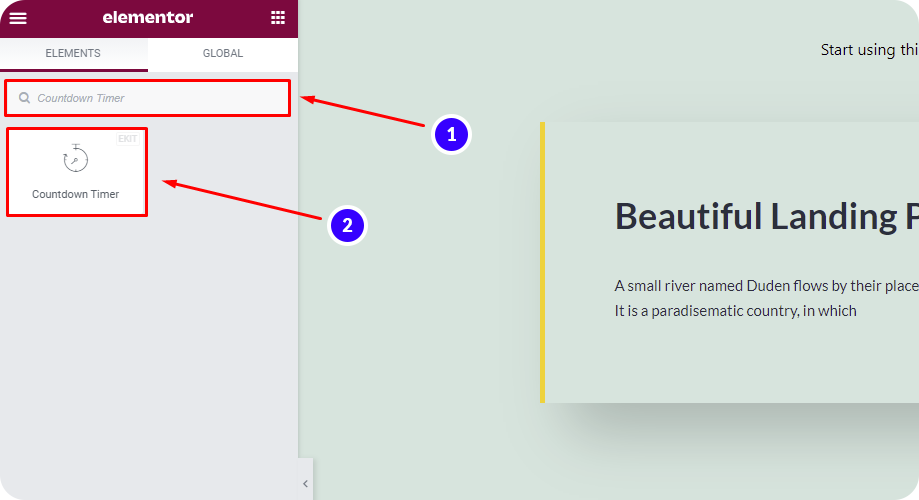
- Choose your favorite countdown timer style and make the required changes from the settings.
How to create an Elementor landing page for year-end and new-year sales campaigns?
Year-end and new year sales campaigns can help you grow your yearly revenue to a great extent. To help you build an attractive Elementor landing page for the deals you are offering, we’ve crafted a step-by-step guide for you.
Check it out here: How to Create a Landing Page for New Year Campaign
Though the majority of the WordPress themes work with Elementor page builder without any conflict, some of them work best. If you are looking for great free themes, you can pick any of the following:
- Astra
- GeneratePress
- Neve
- OceanWP
But, choosing Astra is highly preferable as it offers the best popular WordPress themes.
Related: Explore 15 best free and pro themes for Elementor along with their features, pros, and cons.
Conclusion
Congratulations! You now know how to create an Elementor landing page with and without templates in WordPress for any occasion and marketing campaign. If you have any confusion or questions, feel free to let us know in the comment box.

Leave a Reply