Did you know an ad specific landing page can outperform a generic web page by 115%!
Yes, that’s the beauty of using specific landing pages on different festivals.
You know, festive days are hectic for every business. It’s the time when most of the business owners expect the highest web traffic as well as gaining the highest conversion rate.
Today, we will design a landing page for the upcoming Christmas and New Year campaign with ElementsKit!
Go, now!
What Is A Landing Page, Actually?
In a simple sentence, landing pages is the place where your visitors will “land”. In digital marketing, a landing page refers to a specific web page that is created especially for a marketing campaign.
Typically, the landing pages are designed to encourage the users to take an action such as purchasing a product, filling out a form, signing in for a newsletter, etc.
And, a landing page will be successful only when the visitors perform those specific tasks after visiting the page.
Do I Need A Landing Page for Christmas and New Year Campaign?
Oh yes!
You’ll definitely need a specific landing page for the Christmas and New Year campaign. If you are planning to sell a product or service on this festival campaign, it’s high time to design a specific landing page.
Why?
Because of the “paradox of choice”.
It means the more options you give to the people, the more problematic it becomes to make a decision let alone act.
Let me demonstrate a simple example for better understanding.
Suppose, you have planned to sell a product on your upcoming campaign. But, the landing page design isn’t directing the users to buy the product. It may ask the visitors to visit the blogs, check out the social media channels, or something else.
With each action, you are moving the visitor’s intention from your primary objective. And, I don’t think that’s a wise thing to do!
Okay, What Should I Include On A Landing Page?
So you’ve decided to include a landing page for your Christmas and Landing page on your website. In that case, you must know the core features of a landing page.
Let me share those core features of a landing page with you.
- An eye-catchy headline
- An influential subheading
- An attractive hero image
- A clear explanation of your offer
- An effective FAQ section
- A Powerful Call to Action
- Easiest contact method
These are the core features of a landing page. Make sure that all of these elements are present on your landing page.
So, Let’s Start Designing A Landing Page for Christmas and New Year Campaign
Designing a landing page is quite easier only if you are equipped with the appropriate tools. We will also use a few tools to ease our Christmas landing page design. These are –
- Elementor page builder and
- ElementsKit Elementor addon
That’s it!
Let’s proceed to the step-by-step process of designing an eye-catchy landing page for Christmas and New Year.
Step #1: Get Ready With Your Tools
We have already mentioned that you’ll need Elementor page builder and ElementsKit addon to design your landing page. Just install and activate these plugins on your WordPress website and you are good to go.
Step #2: Open A Blank Page
To open a new page, hover on Pages > Add New. It will create a blank page for your website. Now, you’ll notice a bold button saying “Edit with Elementor”. Click on that button and it will proceed your post to the Elementor page editor.
Opening a new page
When you’ll get the Elementor page, it means your canvas is ready to use.
Step #3: Add A Hero Image Of Video
The hero image is a large image banner that is located on the top of your webpage. This image represents an overview or vibe of your campaign offer.
Few people may want to include a video in the hero section. If you are also decided to add a video on the landing page, make sure that it’s shorter and clearly describes your offer.
Remember, visual contents are important for the landing pages. So, make it as perfect as you can.
To add an element to the hero section, drag and drop the Image widget on the canvas and upload your chosen image on the landing page.
After the uploading, set the width of your image 100. You will find the Width section on the style tab of the Elementor widget panel.
Adding a hero image
Pro tips: Make sure that the hero image looks vibrant, creates a Christmas vibe, and is able to catch the visitor’s attention within a blink of an eye.
The human brain can process the information of images 60,000 times faster than text-based information.
Step #4: Add Description of Your Product or Service
After adding the hero image, it’s time to add a detailed description of the product or service you are offering to your potential customers.
Suppose you are offering discounts on two products. So, create a dual structure on the new section.
Now, add a heading, text description via Text Editor widget, and a call to action button. To make the section more appealing, you may add a relevant background color to it.
Let’s have a look at the step-by-step process of doing it.
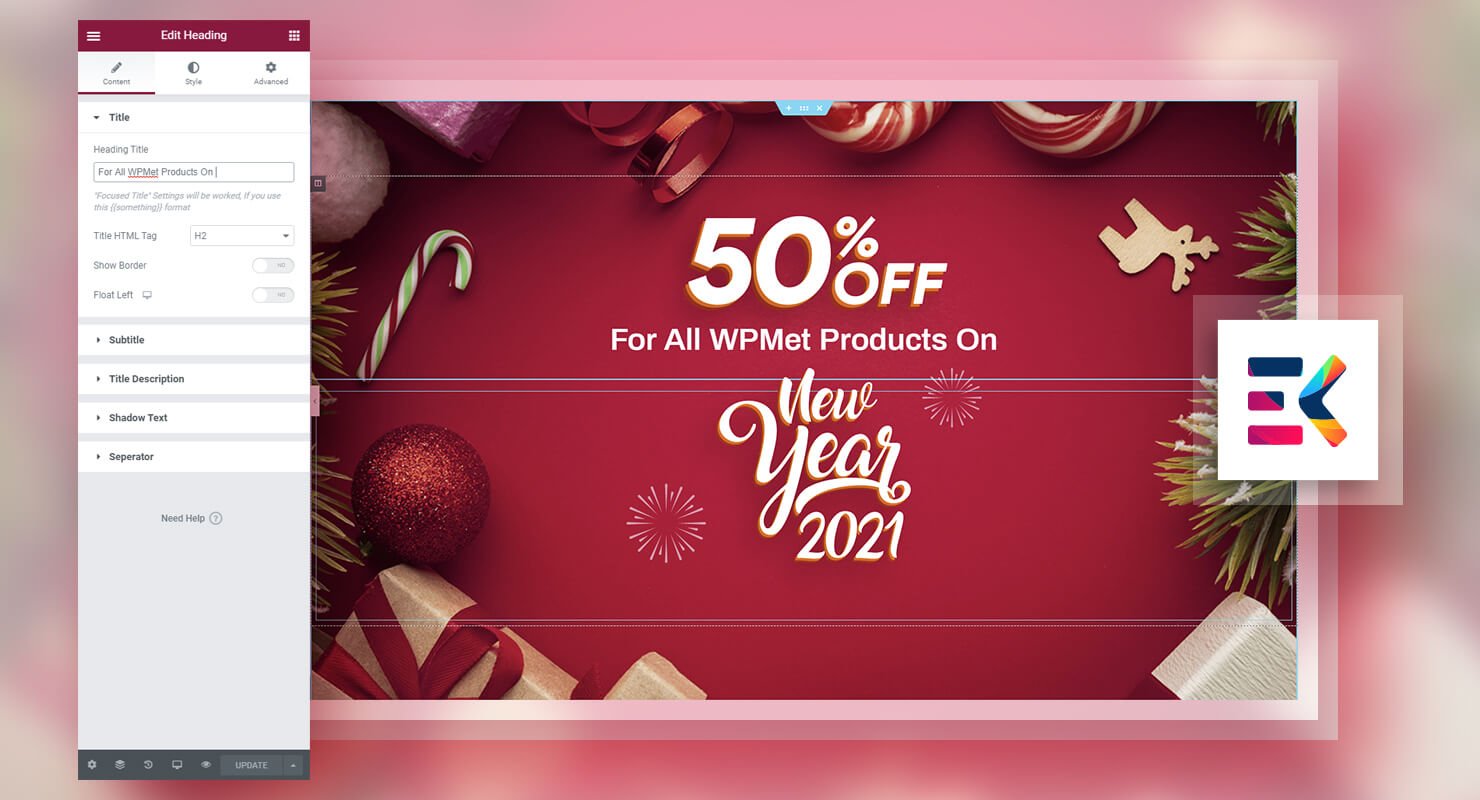
- Add an appropriate heading
First, we will add a new section with a dual-column structure on it. Following that, we will add the title via using the Heading widget.
Adding the product headline
If can also add a relevant link to your product heading, if needed.
2. Add body text
The body text is the place where you’ll add the description of your offer. Make sure that the description presents a complete overview of your product or service.
Adding description
3. Include a CTA button
A compelling CTA button increases the possibility of converting visitors into customers. So, try to add an eye-catchy CTA button that grabs the visitor’s attention properly.
Adding a CTA button
4. Add background-color
Adding a contrasty background color increases the possibility of user conversion. Before choosing a color for your product, make sure that it blends properly with your product’s color.
To add the background color, select the page section, and go to the Style tab. Now, click on the Background option and choose one of the background types. The available background types are Classic, Gradient, Video, and Slideshow.
By the way, I’ve chosen the classic version for designing the page. However, you can also modify the same thing for the hover section too.
Adding background color
You can design as many product descriptions as you want by following the same steps. But, try to include an eye-catchy header and subheader on this section.
However, you may also add a pricing table by comparing multiple packages or your products. It provides a clear idea about your products to the potential audiences and increases the possibility of purchasing.
Step #5: Add A KnowledgeBase Section
The knowledge base aka FAQ section is the place where you have to add the frequently asked questions regarding your product or campaign. Try to add about 4/5 questions and answers to this section.
Adding knowledgebase
While designing the knowledge base, make sure that you include a contact method on there. It ensures easier communication among visitors and webmasters.
Step #6: Add Footer
As the last step, we will add a footer on the landing page. The footer will include the copyright section, refund policy, terms and conditions, privacy policy, etc. However, I’ll suggest you use a different background color on the footer than the landing page.
And, that’s all about designing the landing page for the Christmas and New Year campaign.
Well, How’s the Final Look of Our Landing Page?
Yeah! We just completed designing our landing page for the Christmas and New Year campaign. So, how’s the overall final output?
Ok. Have a look –
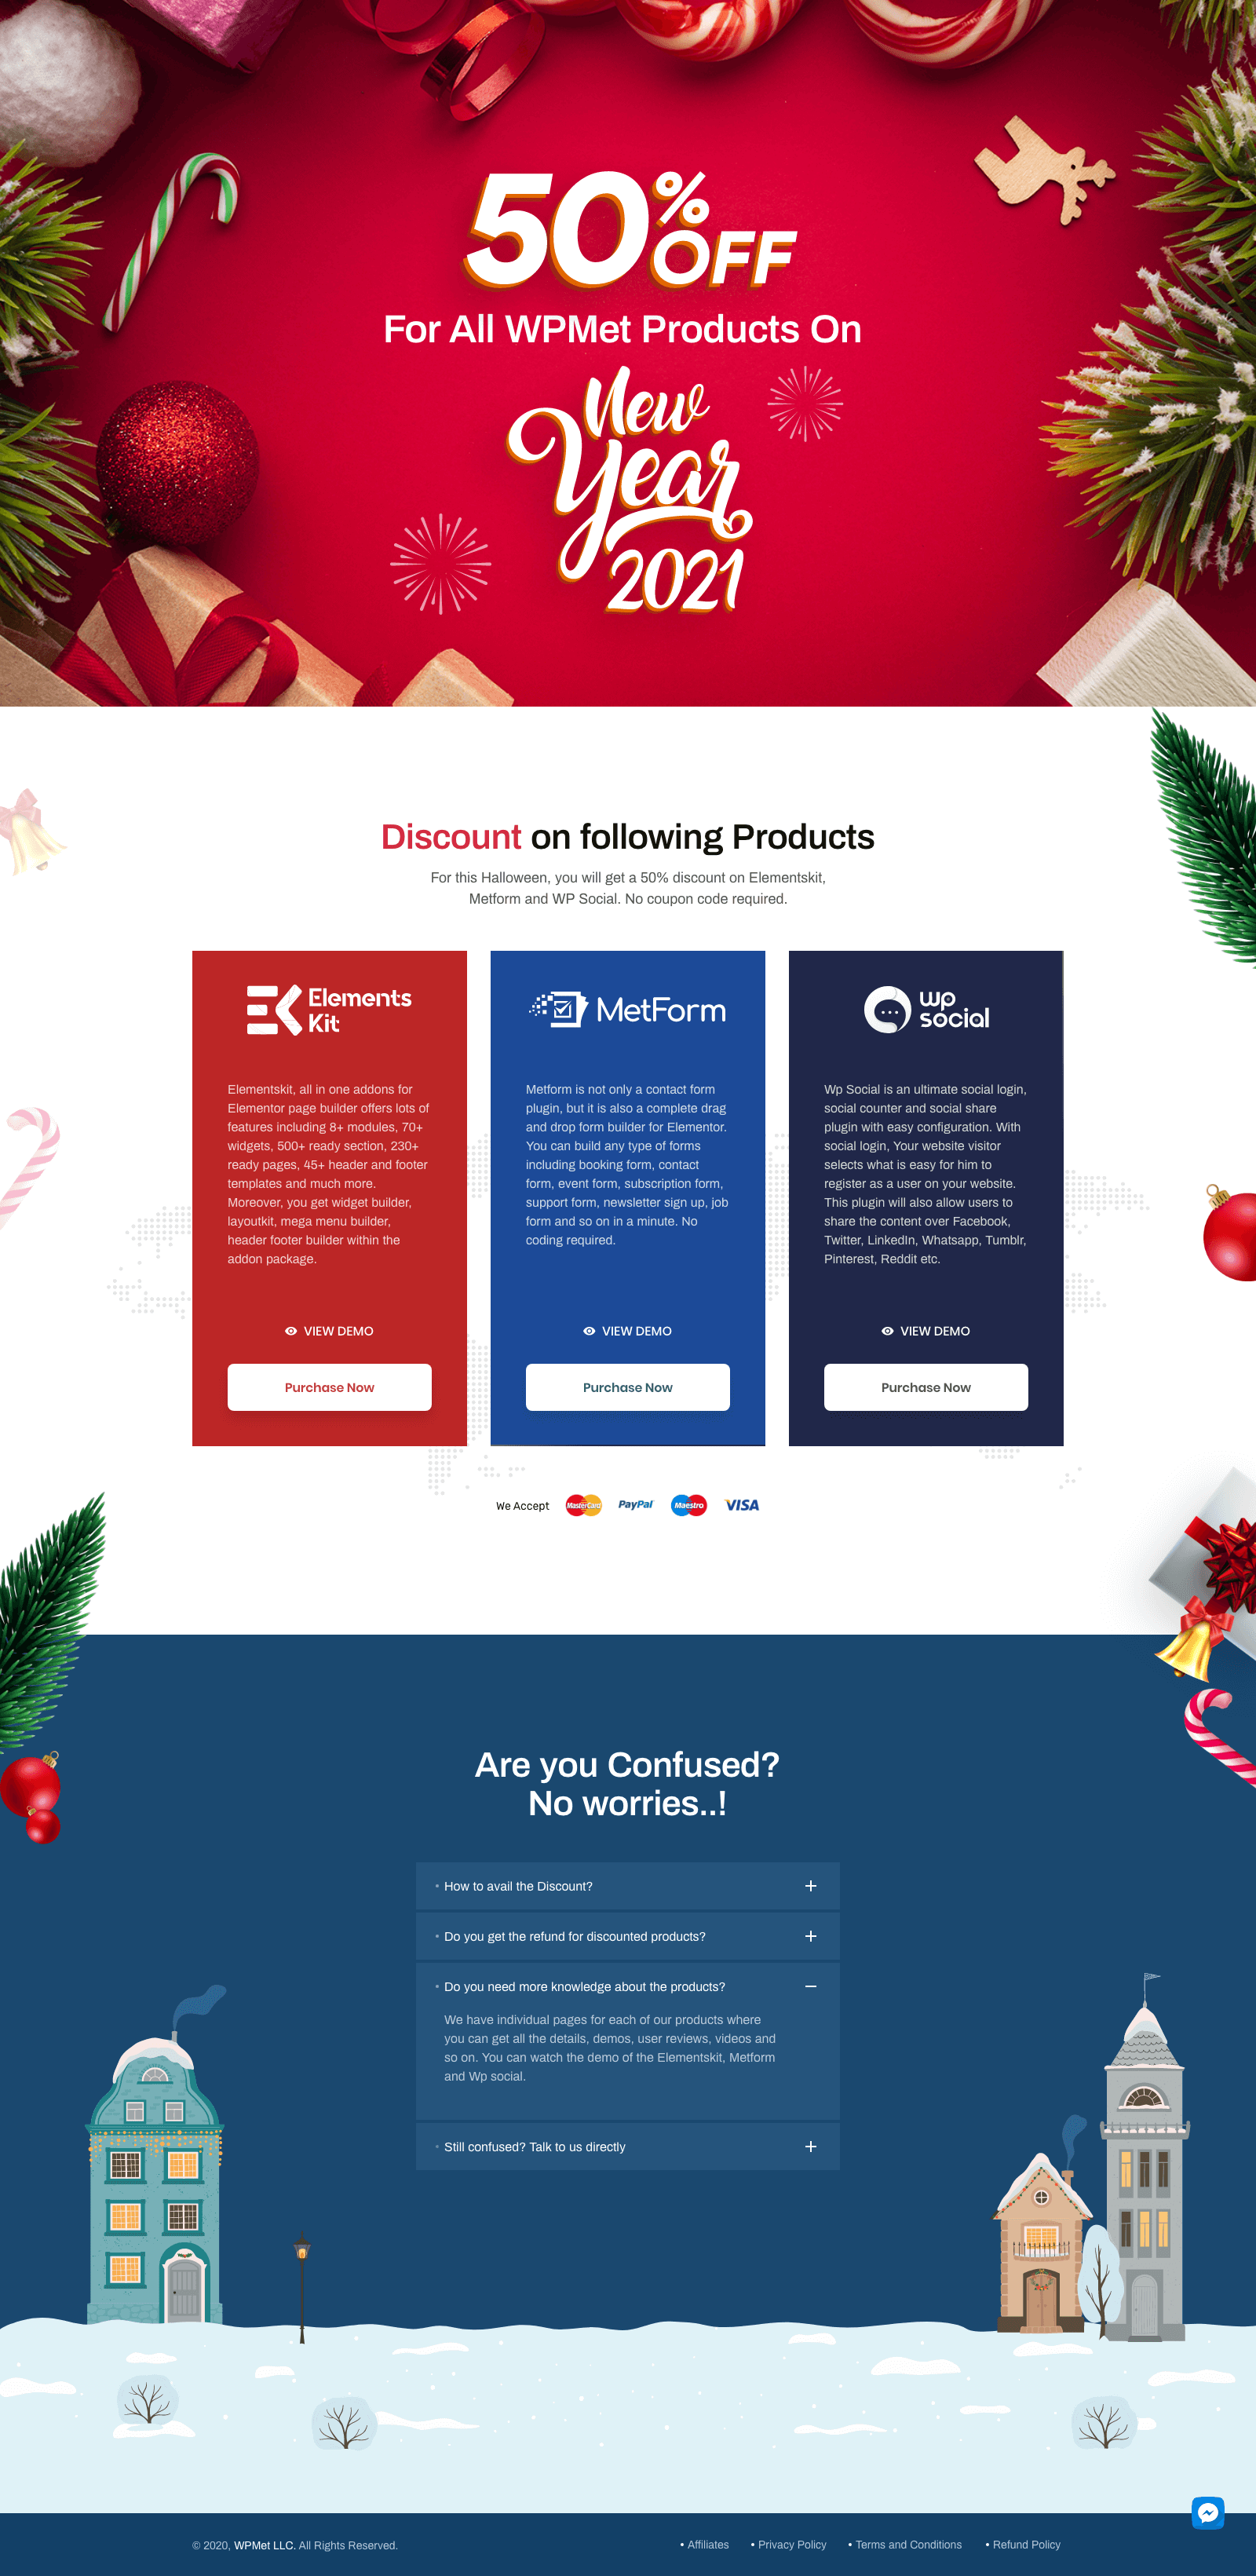
Isn’t it mesmerizing?
Yes, it is!
To get a better view, check out the live version of our landing page.
Do you feel like using our template as your landing page?
You can do this within seconds! Simply download our json file, import it into the Elementor template library and it’s done! Let’s have a look at the total process.
Firstly, Download the json file from the download button below.
Secondly, create a new post or page from the WordPress dashboard panel. By default it will be opened on the Gutenberg editor. But, you have to open the page on Elementor page builder to import the json file.
Opening a new page via Elementor
Thirdly, click on the ‘Add Template’ button and import your downloaded json file via the Import Template button.
Importing the template
Now, click on the Insert button and it will insert the template along with the designs and texts on your page.
Template insertion
Caution: Inserting the template might take a little bit of time. The time mostly depends on the resource amount and memory limit of your server.
Lastly, customize the text and design for your offer and publish on your website.
10 Deadly Landing Page Mistakes You Should Avoid at Any Cost
We all know that landing pages are designed with one action in mind: to convert a visitor into a paying customer or lead. But, driving your valuable traffic into an unoptimized landing page is nothing but a waste of time.
In this section, I’m going to focus on 10 deadly landing page mistakes everyone should avoid.
1. Using too many CTA buttons
The CTA aka Call To Action button is a critical component of anything you built online. The sole purpose of the CTA button is to convert the visitors into paying customers. It’s the only place to convince your customer to get converted.
So why bother the visitors by presenting too many CTA buttons? It does nothing but reduces the chances of reaching your goal.
Besides reducing the button amount, you should consider the button text too. You may be surprised to know that most people use only traditional button texts such as ‘click here’, ‘download’, or ‘submit’ button.
It may seem like a minor detail to you, but it really impacts the user behavior. Instead of using the generic button texts, try to write something different. For example –
- ● Grab the deal
- ● Take me there
- ● Claim your free copy
- ● Experience the program
- ● Get your guide
Try to give a variation on your button text instead of using those traditional texts.
2. Beating around the bush
Though visitors are converted via the CTA button, you should consider the written copy too. Make sure that your landing page copy is clear, concise, and easily understandable by the users.
Study shows that people make up their mind about taking action on a website “in the blink of an eye”. To be more precise, it takes roughly 50 milliseconds to take that decision.
So, you have this tiny portion of time to convince your website visitors to purchase your product or service. If you just beat around the bush without focusing on your copy, then it will be nothing but wasting your time.
It means you have to convince the users to get right to the point within a moment. Present your offer in such a way, where the visitors will find something valuable for them.
3. Cluttered page layout
We know it’s important to include valuable information on the landing page.
But, it doesn’t mean to clutter the landing page with information. Try to include only the most important ones while designing a page. Don’t overwhelm the users with information.
If the landing page looks like an endless wall of text, the users will definitely leave your webpage instead of converting.
I know, it’s important to inform the users about your offer. But, try to keep it short and precise. If you clutter the landing page with lots of unnecessary information, the chances of converting the users will reduce drastically.
Remember, you have 5 seconds (max) to convert a customer. So, make sure that the customer can have an overview of this time. Otherwise, your potential customers will be ended on your competitors’ website.
Do you want that?
4. Not enough information
In the previous section, we have talked about decluttering your landing page copy. But, don’t declutter in such a way that it fails to deliver the actual message to the visitors.
If your product or service offer copy is too vague or doesn’t express the deal properly, most of the visitors won’t convert into customers.
Simply put an attention-grabbing headline, followed by a subheader and a few contextual texts. You must put your offer related information within these places.
Make sure that the visitors get a clear concept about your product and don’t need to worry about anything to do the purchasing decision.
5. Bad typography
After designing a great landing page copy, make sure that the copy is easily understandable by the visitors. To make the landing page copy easy to read and understandable, you have to use appropriate fonts, font size, color, design, etc on your design.
All of this typography has a huge effect on the readability and user experience. Further, using too thick or too light fonts make the texts difficult to read. Using legit typography increases the chances of visitor conversion.
6. Using no image / low-quality image
Whenever a visitor lands on a webpage, try to hook the visitor with something unique. And, the best way to do it is using a compelling image. You know, a text-only landing page looks quite dull and uninspiring.
But, it doesn’t mean that you might use any image on the landing page. Whenever you design a landing page, make sure that you have added the best image on there.
Approximately 65% of people are basically visual learners
If you are offering a product or service, then you should consider adding a smiling person along with the product. Research shows that only a smiling person can increase the conversion rate by 102.5%.
The smiling face represents that users are happy with the product or service you are offering. It positively impacts conversion.
7. Check the colors
Another major issue with using images is choosing the colors. Try to make the image as attractive as you can by using a unique color combination.
Another major issue is the color of the CTA button. While designing a CTA button, make sure that it stands out from the background.
If the CTA button blends with your background like camouflage, it won’t be noticed while a user goes through your landing page.
Suppose the background of your landing page is mostly white. In this case, try to use the button in black.
The design will be successful only if the color can grab the attention of your visitors. Otherwise, change the colors asap.
8. Using longer forms
Designing a web form is definitely important to increase the number of leads. Most of the time, web forms are being used to get important information from users.
But, a landing page form shouldn’t feel like filling up the tax form. It means you shouldn’t put too many input boxes on the form. Try to keep it as simple as you can.
Asking too many questions from the visitors might annoy the users. Research shows that using three input boxes maximizes the possibility of getting leads. The more input boxes you have, the less response you’ll get from that landing page.
Well, you may need various data from the users. So, what do you do then?
In this case, you may utilize the multi-step forms. At first, collect only the required information from the users. Then, follow up for more information.
That’s how you can collect information from your leads.
9. Poor mobile experience
About 48% of people browse the internet via their smartphone. So if your website isn’t mobile responsive, you are automatically losing half of your potential customers.
If a smartphone visitor cannot view the landing page properly how can you expect that he will convert? So, make sure that your website is completely mobile optimized and loads smoothly on smartphones and tablets.
Remember, your visitors aren’t as patient as you are thinking they are. So, optimize your landing page for mobile devices and get your visitors.
10. Slow loading speed
47% of people expect that a web page will load within 2 seconds. And, if the page doesn’t load even after 5 seconds, then the users will leave your landing page.
Removing every single second will cause you a 7% loss on your overall revenue. So, try to reduce the loading page by any means.
For example, get rid of the sliders or unnecessary JS files to speed up the loading process. However, you may also use CDN aka Content Delivery Network to speed up your website.
Last Words
That’s all about the detailed steps, tools, and processing of the landing page design. Using a campaign specific landing page design is an essential part of digital marketing.
Design a perfect landing page today and watch your conversion rate soar!
Leave a Reply