
Countdown timer is a term we are pretty much familiar with, don’t we? It’s a handy and effective item that you can inject to your WordPress site. When a company runs any offer campaign, it’s a common practice nowadays to take advantage of a countdown timer. So, why not you add countdown timer to your WordPress site?
You may be wondering what benefit does a countdown timer serve to a business? Obviously, a website countdown timer packs a punch when it comes to prompting visitors to take actions or selling a product or service. I can name a number of companies that nudged their site visitors to take actions deploying countdown timers.
Addison Lee, a private hire company, for example, did a trick by leveraging a countdown timer to their daily deals email. They mainly targeted the customers who abandoned their booking form. What they actually did was, showed the timeline of the deal with a countdown timer in emails showing a sense of urgency of the deal.
You know what the result was? The clicks in the emails shot up by 28% compared to the standard abandonment mails. This is amazing, right? With a simple and hassle-free trick, if you get such a mind-blowing result, it’s worth trying!!!
Kennedy Blue, an online store scaled up its sales by 50% after adding a sales countdown timer on their website.
Before I walk you through how to add countdown timer plugin to your WordPress site, let me shed a bit of light on the WordPress countdown timer plugin. This will provide you with a better idea of the item.
Wanna know how to add a search bar in your WordPress site? Click the link below and get to know the process-
👉 How to add search bar to your WordPress site?
Countdown Timer Plugin and its Types:
WordPress countdown timer widget or plugin can be defined easily with the term itself. It’s a piece of software that lets you showcase a timer in your website counting down from a specific date or time. You can add the plugin to your WordPress site to display the beginning or end of an event or maybe the end of an offer.
There are basically 2 types of countdown timers for WordPress you can have at your disposal. Standard or normal counter timer and evergreen counter timer.
Standard Countdown Timer:
Standard counter timer is the most common between the 2 types of counter timers. It’s a static countdown timer that counts down to a particular point. The specialty of this type of timer is it shows up identically to all the visitors whenever they visit the website.
For example, if 100 visitors visit a particular website at once showing up a standard countdown timer for an offer, all of them will view the same timeline, maybe 3 hours left of the offer.
Evergreen Countdown Timer:
Evergreen countdown timer, on the other hand, is a dynamic countdown timer and varies from one visitor to another. The timer begins counting down once a visitor lands into the website. Depending on the settings, the timer will show up and display a particular time or date to the visitor.
For example, it can show 2 hours left of a discount offer to one visitor whereas 4 hours left of the same offer to another visitor.
Why and When Add Countdown Timer to your WordPress Site?
After knowing all the details about the countdown timer, you must be itching to know the need of deploying countdown timers, right? Well, a countdown timer plugin can serve you multiple benefits. What are they? Let’s check them out-
- Builds excitement and anticipation in the mind of visitors.
- Produces FOMO effect in the visitors’ mind with a limited time display.
- Spices up your website layout.
- Finally, scales up conversion and sales if the countdown timer is meant for any offer.
So, you came to know why you need a countdown timer. Now, it’s time to know when you can make use of the countdown timer-
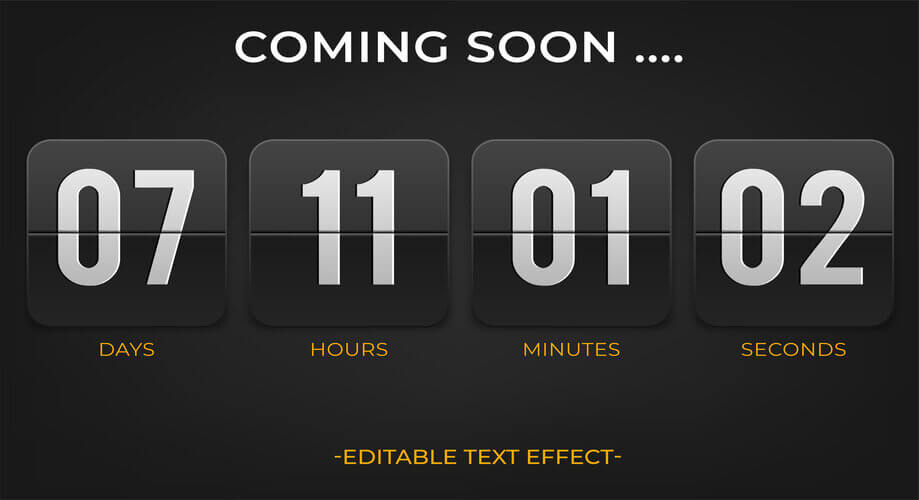
- In the “coming soon” page prior to launching a website.
- To acknowledge your clients and visitors about your upcoming new products.
- On the occasion of different festivals when you want to offer discounts to your clients.
- To notify about the dates of your upcoming grand events and conferences.
- In order to inform the birthday or anniversary of your business.
- Regarding your coming back when your website is under maintenance, you can use the countdown timer.
How to Add Countdown Timer to your WordPress Site?
Now, I will show how you can add a countdown timer to your WordPress site taking advantage of the ElementsKit’s “Countdown Timer widget”. Without further ado, let’s cut to the chase-
Install and Activate ElementsKit:
First up, you need to log into the admin panel of your WordPress site. Then, install and activate ElementsKit on your site. Make sure you have Elementor already installed on your site. If not, install Elementor first to make ElementsKit work.
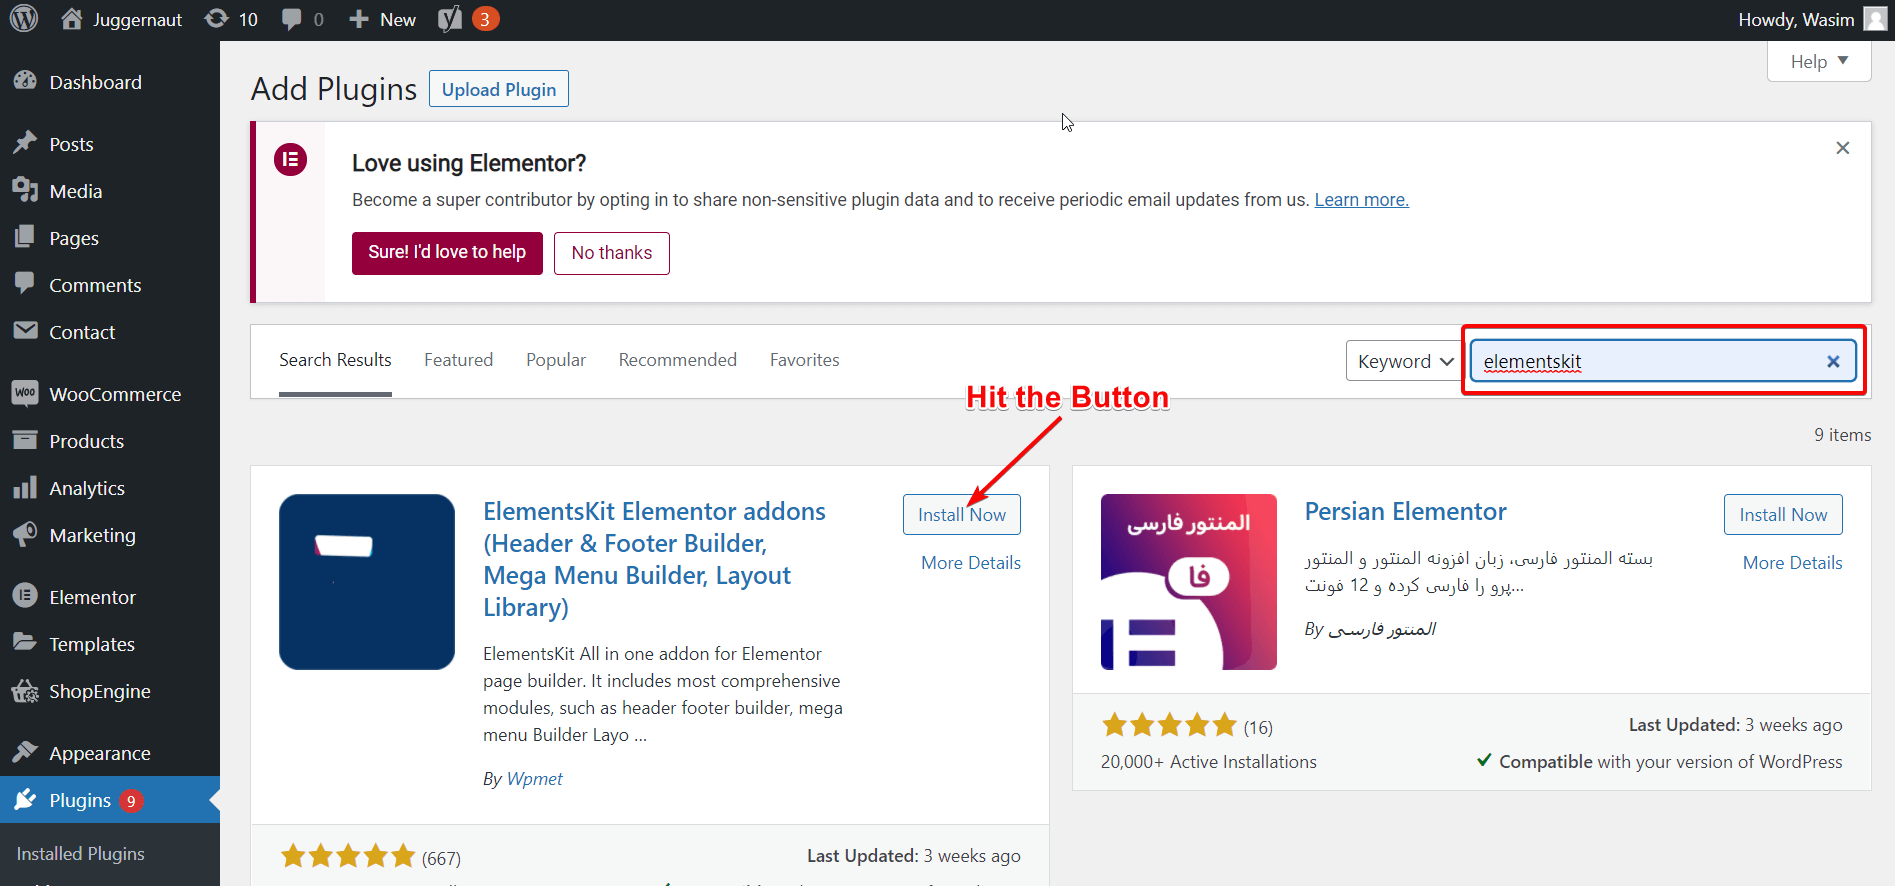
To install ElementsKit, navigate to Plugins in your dashboard and select “Add new” as shown in the screenshot below
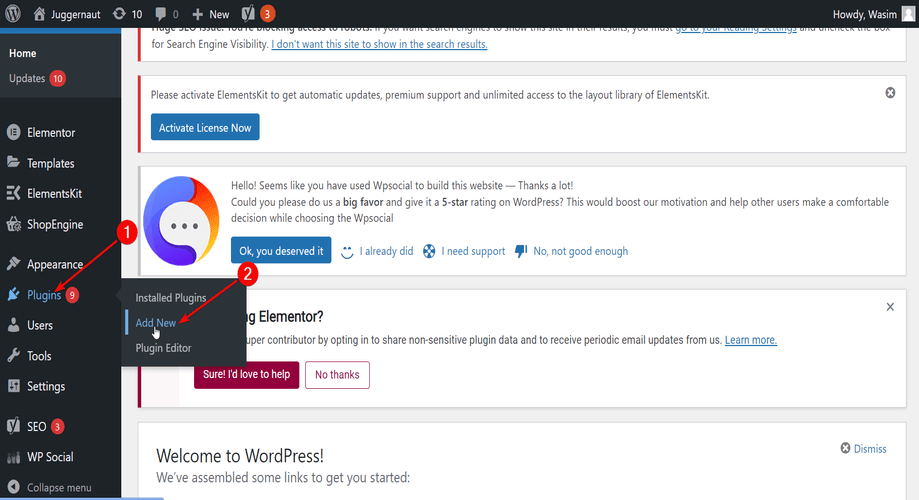
Write down ElementsKit on the search field and smash the “Install now” button. After the installation is complete, activate the plugin.
Do you know you can embed your Instagram feed to your WordPress site? How? Check it out-
👉 How to embed Instagram feed to your WordPress site?
Create and Publish a New Page or a Post to your Site:
Now, it’s time to create a new page to your site and publish it so that you can add a WordPress countdown timer widget on the page.
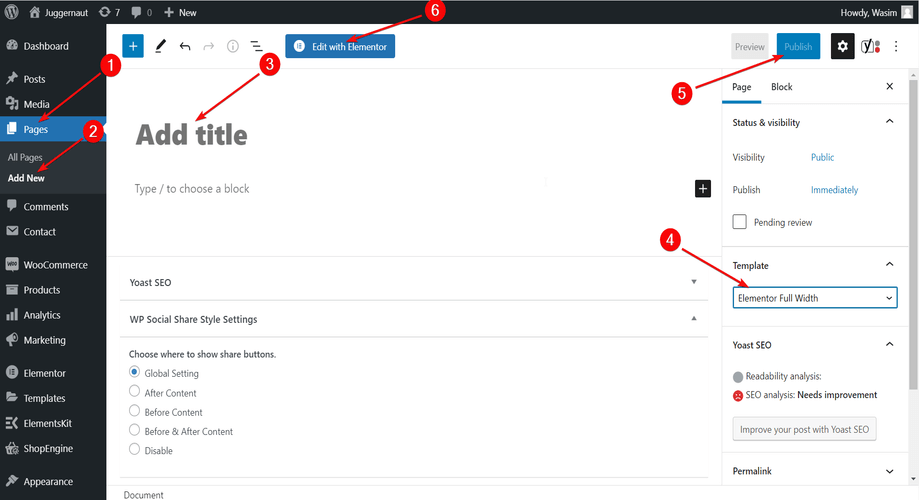
Next, find Pages or Posts in your dashboard to add a new page or a post. I will add a new page to my site to display the countdown timer. Follow the steps below to create and publish your new page.
- Go to Pages and click Add New
- Add a Title for the page
- Set the Template to “Elementor Full Width”
- Finally, publish the page
- Don’t forget to click the “Edit with Elementor” button
However, if you wish to add the countdown timer to any of your existing pages, you can do that as well.
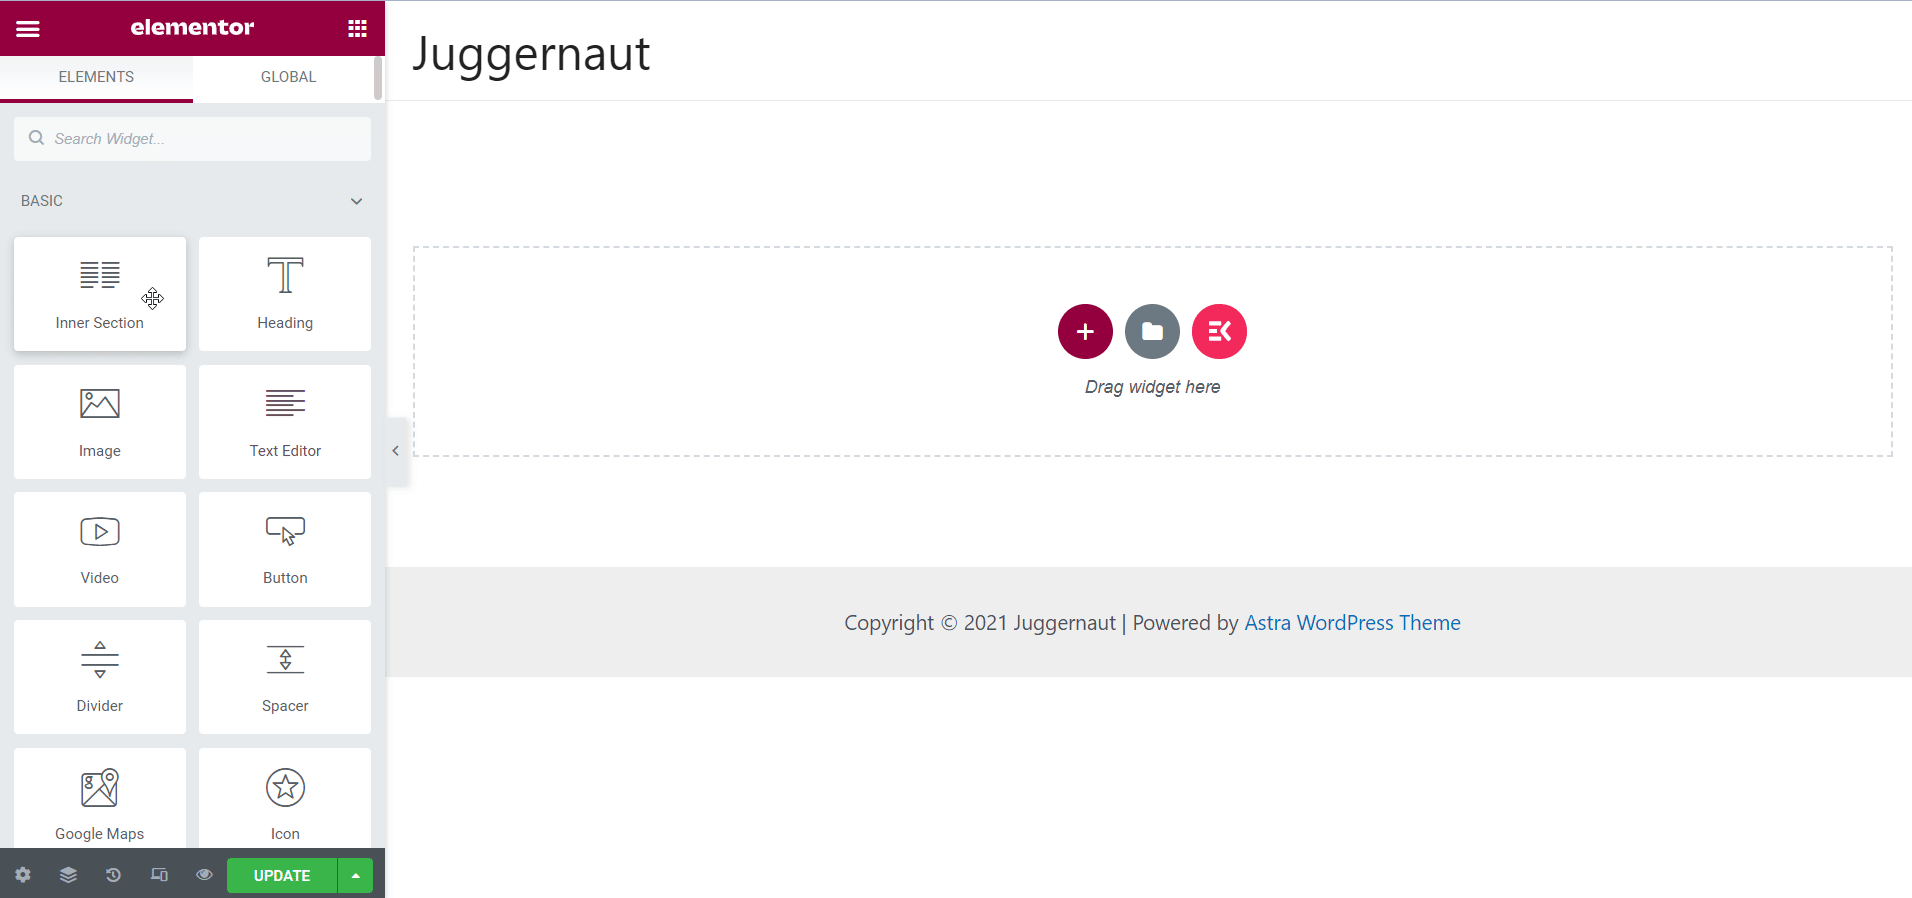
Drag and Drop the Countdown Timer Widget:
Once you switch to the Elementor window, you can view a number of Elementor and ElementsKit widgets. All you have to do is search for the countdown timer widget on the search field and drag and drop it to the designated area.
You can scroll down and find the widget as well. Immediately after you drop the widget, the default countdown timer will show up on the page. Follow the gif below to get a better idea of what you have to do in this step.
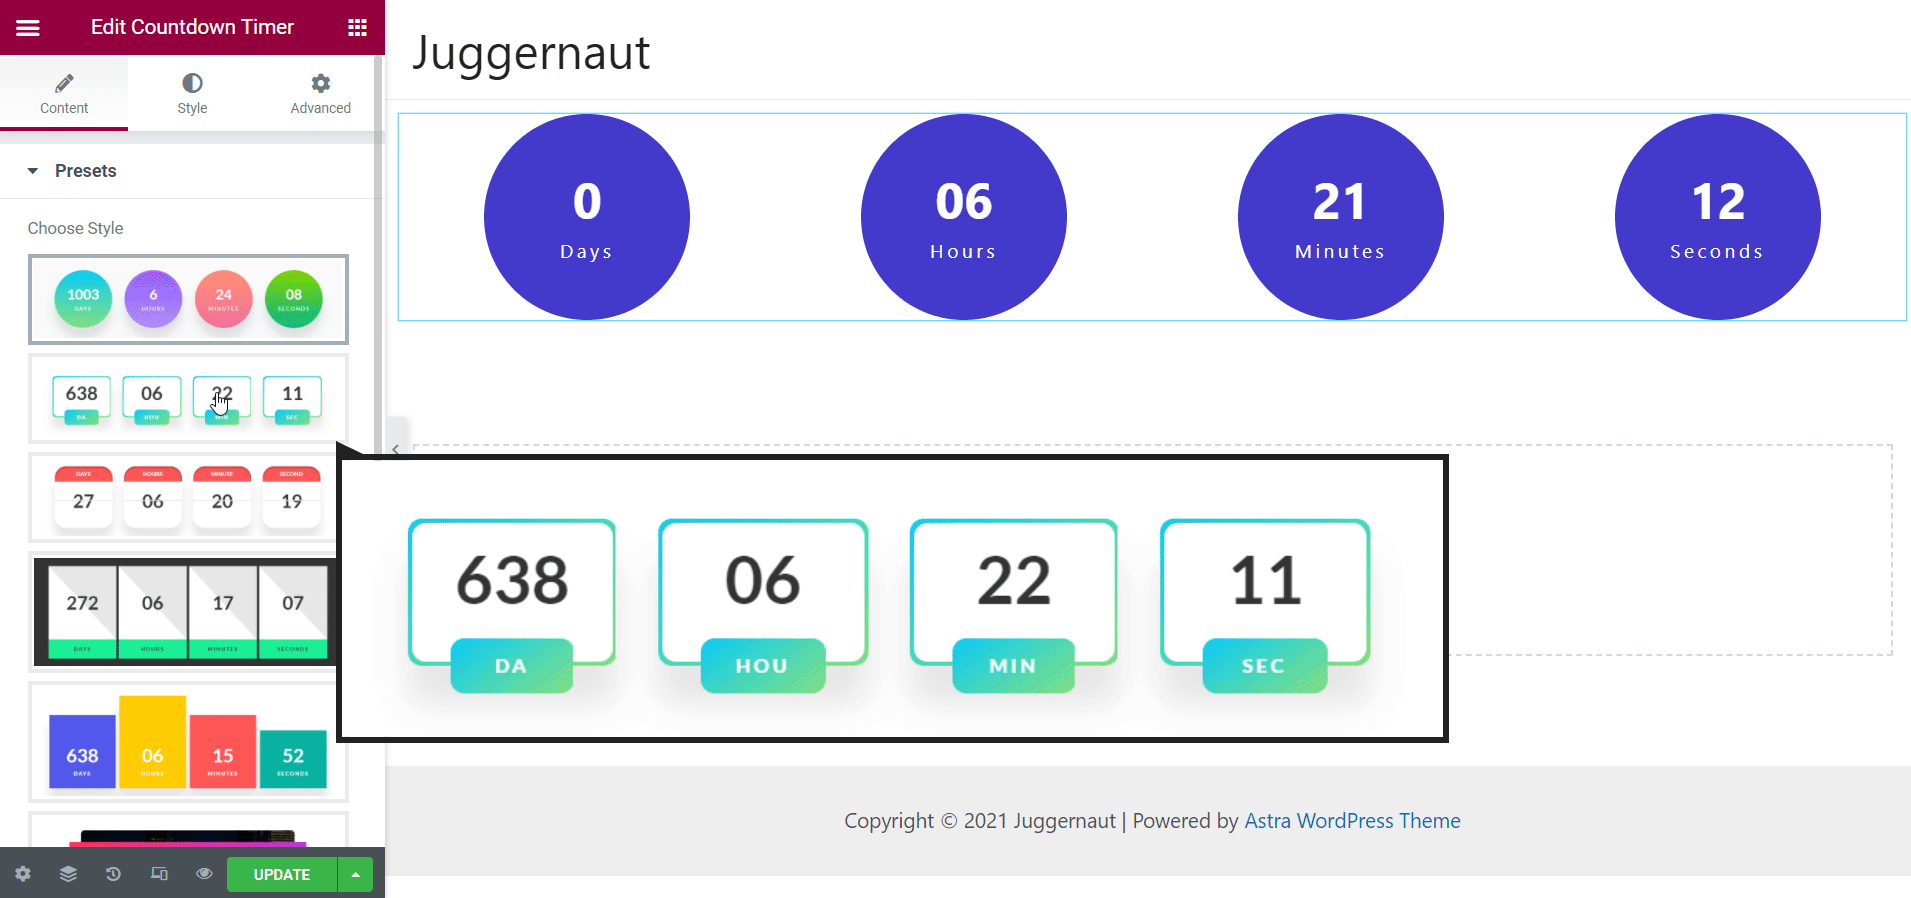
Customize the Countdown Timer Content:
Now, you have got the default countdown timer on your screen. But you may not like the default countdown timer design, so there are additional timer designs you can choose from the “Presets” item. Pick the suitable design for your site.
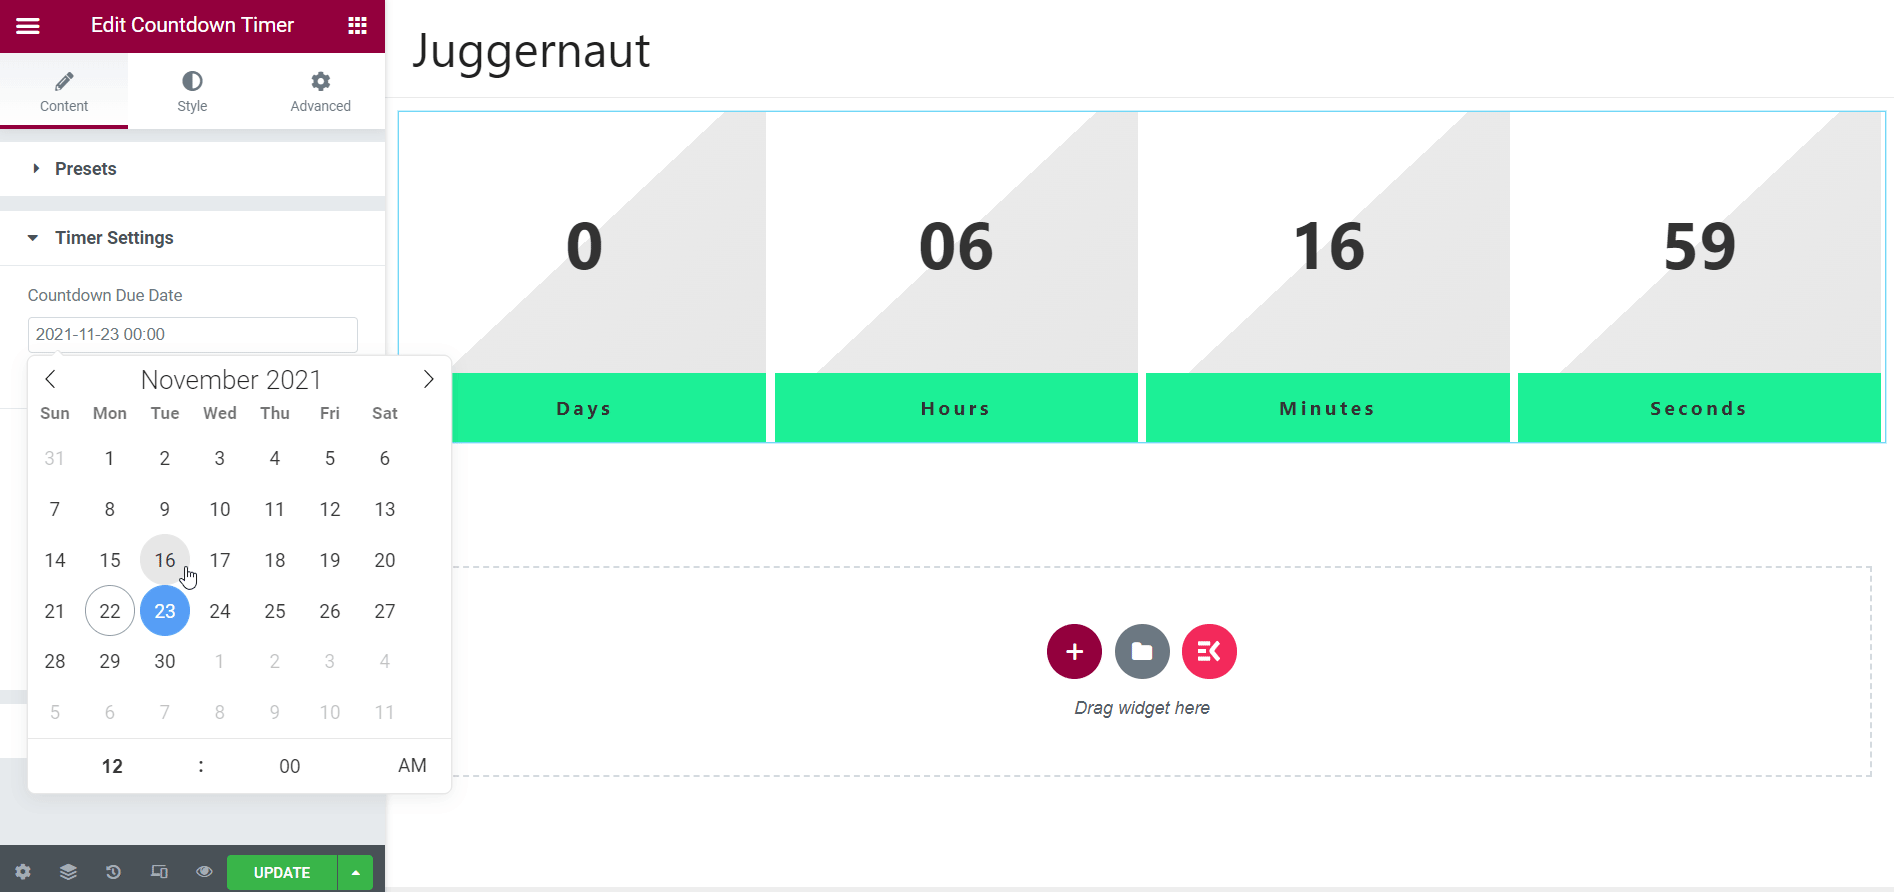
From the Timer Settings item, you can set your necessary parameters including countdown due date and custom labels.
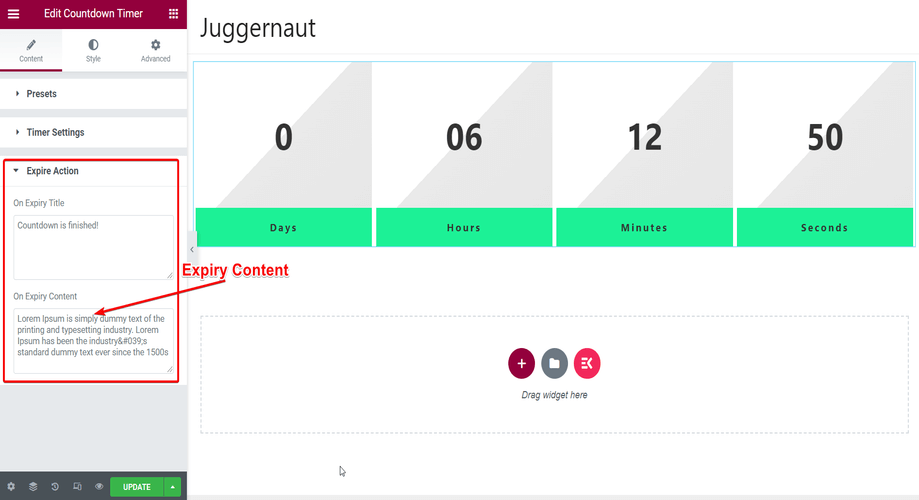
From the Expire Action item, you can set the display content after the expiry of countdown. However, there is a default content already set on the item that you have to tweak to set your own content.
Stylize the Countdown Timer:
There are multiple styling options available in the ElementsKit countdown timer widget. You can alter and adjust the content width, height, line height, bottom margin, etc.
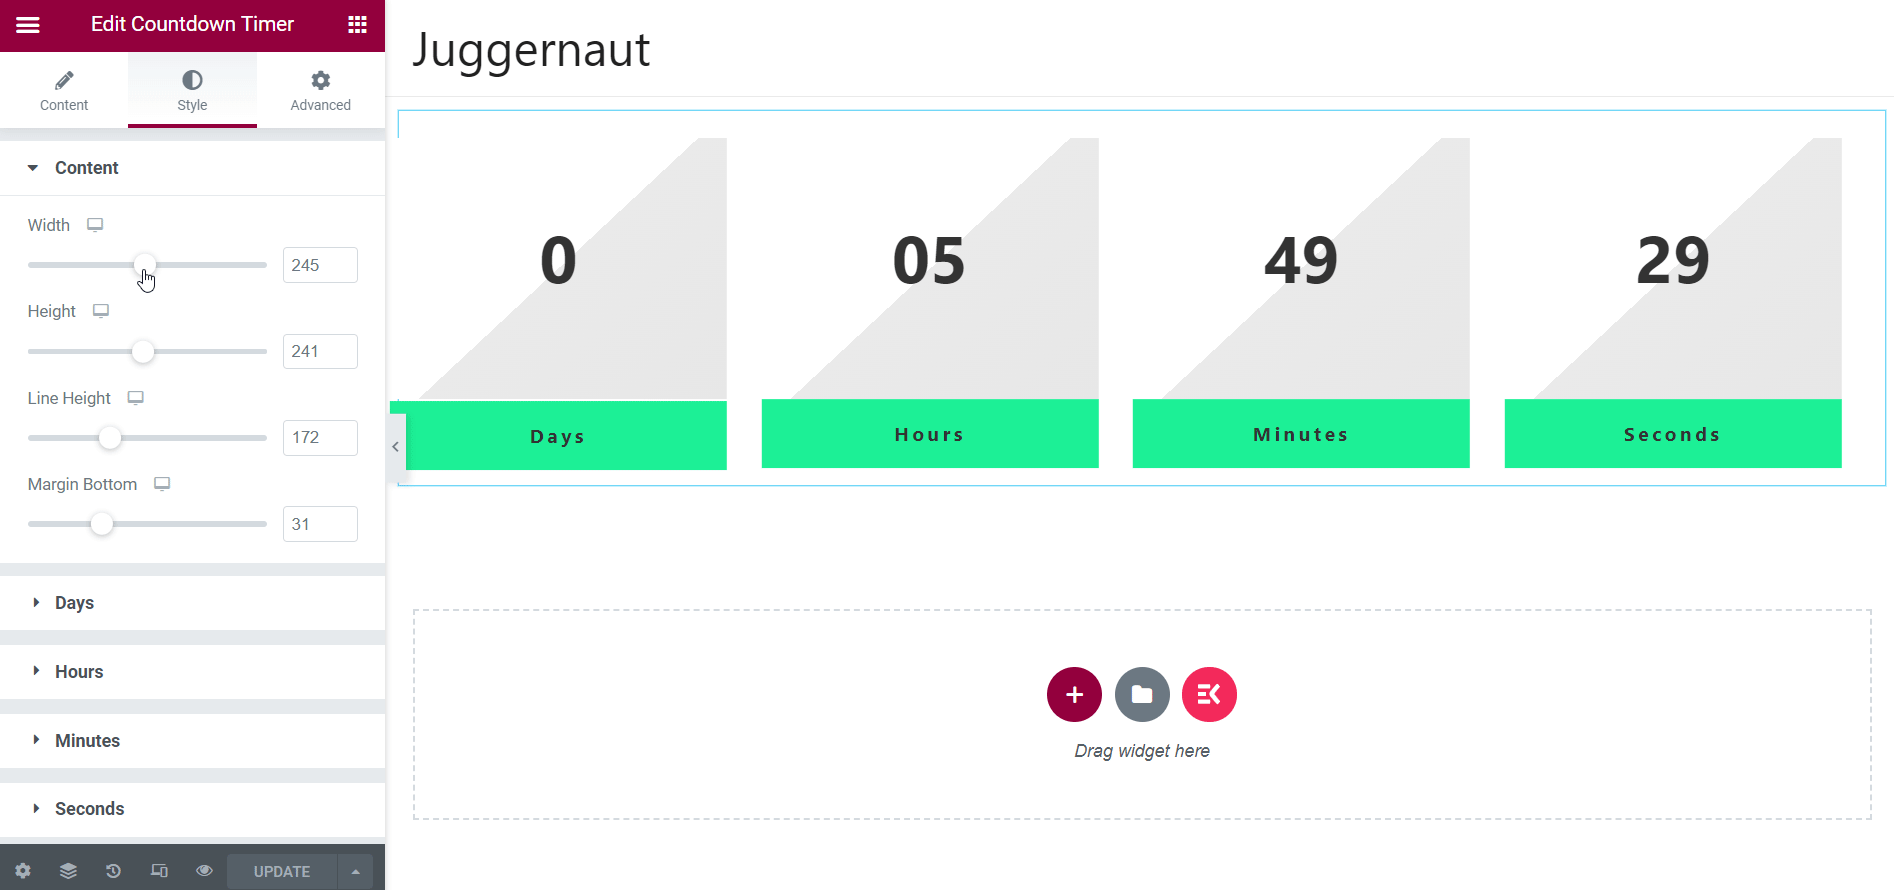
Besides, you can even stylize the timer segment-wise, meaning you can select days, hours, minutes, and seconds individually to style. Below, I have shown the styling of the “Days” segment. The other segment can be stylized in the similar fashion too.

There are plenty of options in each segment like digit color and typography, label color, typography, background type, etc. All these parameters you can select and adjust to portray the look that you prefer of the countdown timer.
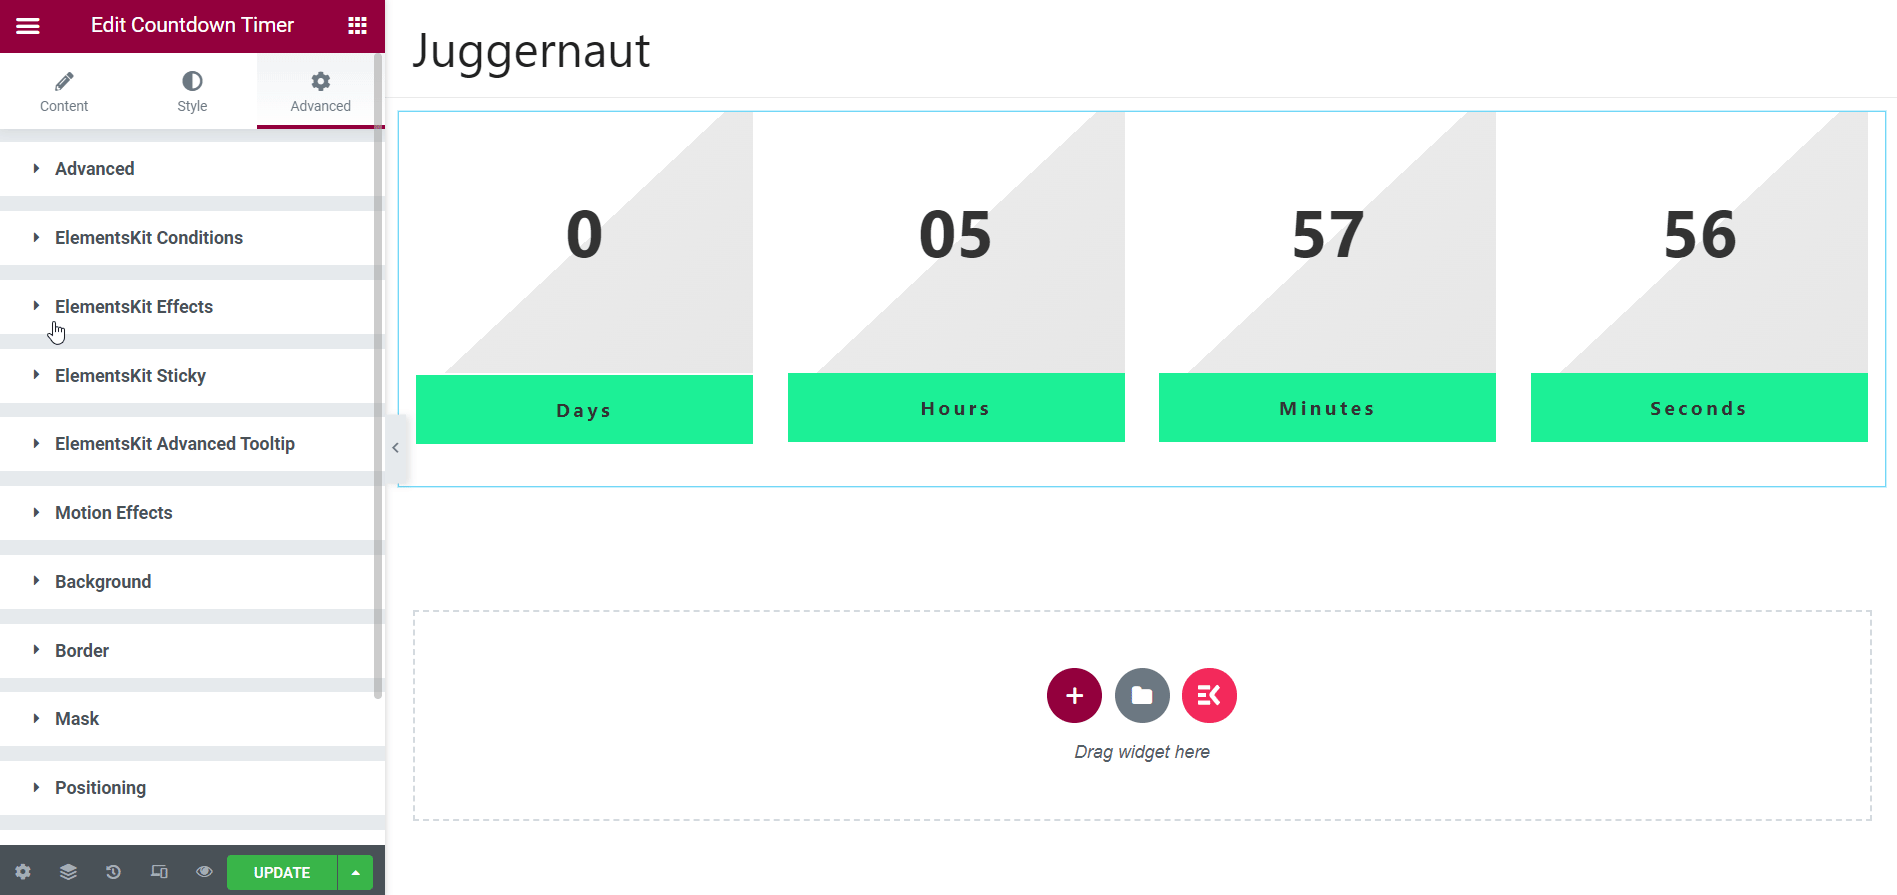
Avail of the Advanced Tab:
Apart from that, you can also jazz up the countdown timer making use of the Advanced tab. There are plenty of items in the Advanced tab like ElementsKit Effects, ElementsKit Sticky, ElementsKit Advanced Tooltip, etc. These items you can leverage to add effects, info, features, and so on.
For example, if you utilize the ElementsKit Effects item, you can add effects like on-scroll, on-mouse move, tilt, etc. This is how you can spice up the countdown timer taking advantage of the Advanced tab.
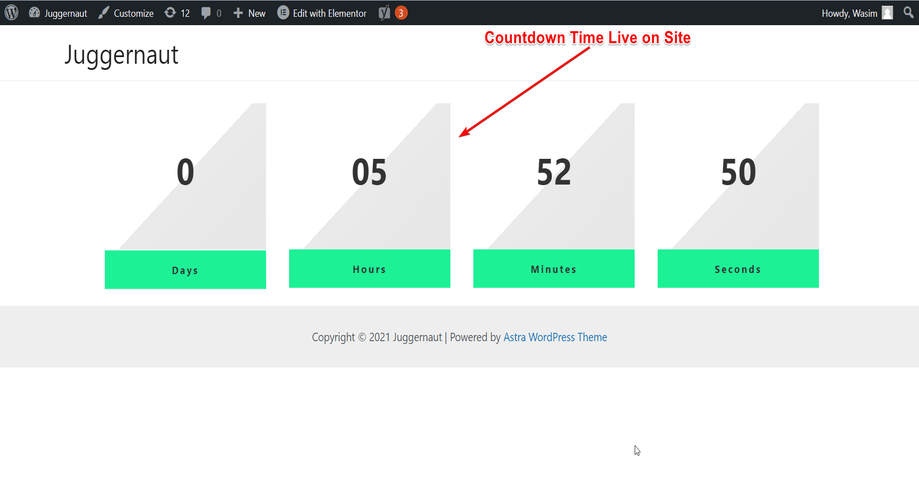
Final Output in the Live Site:
Once you are done with all the tweaks and adjustments, you are all set to preview the countdown timer on your site live. But before you view it, don’t forget to update the page. Now, click the preview icon at the bottom-left of the editor page.
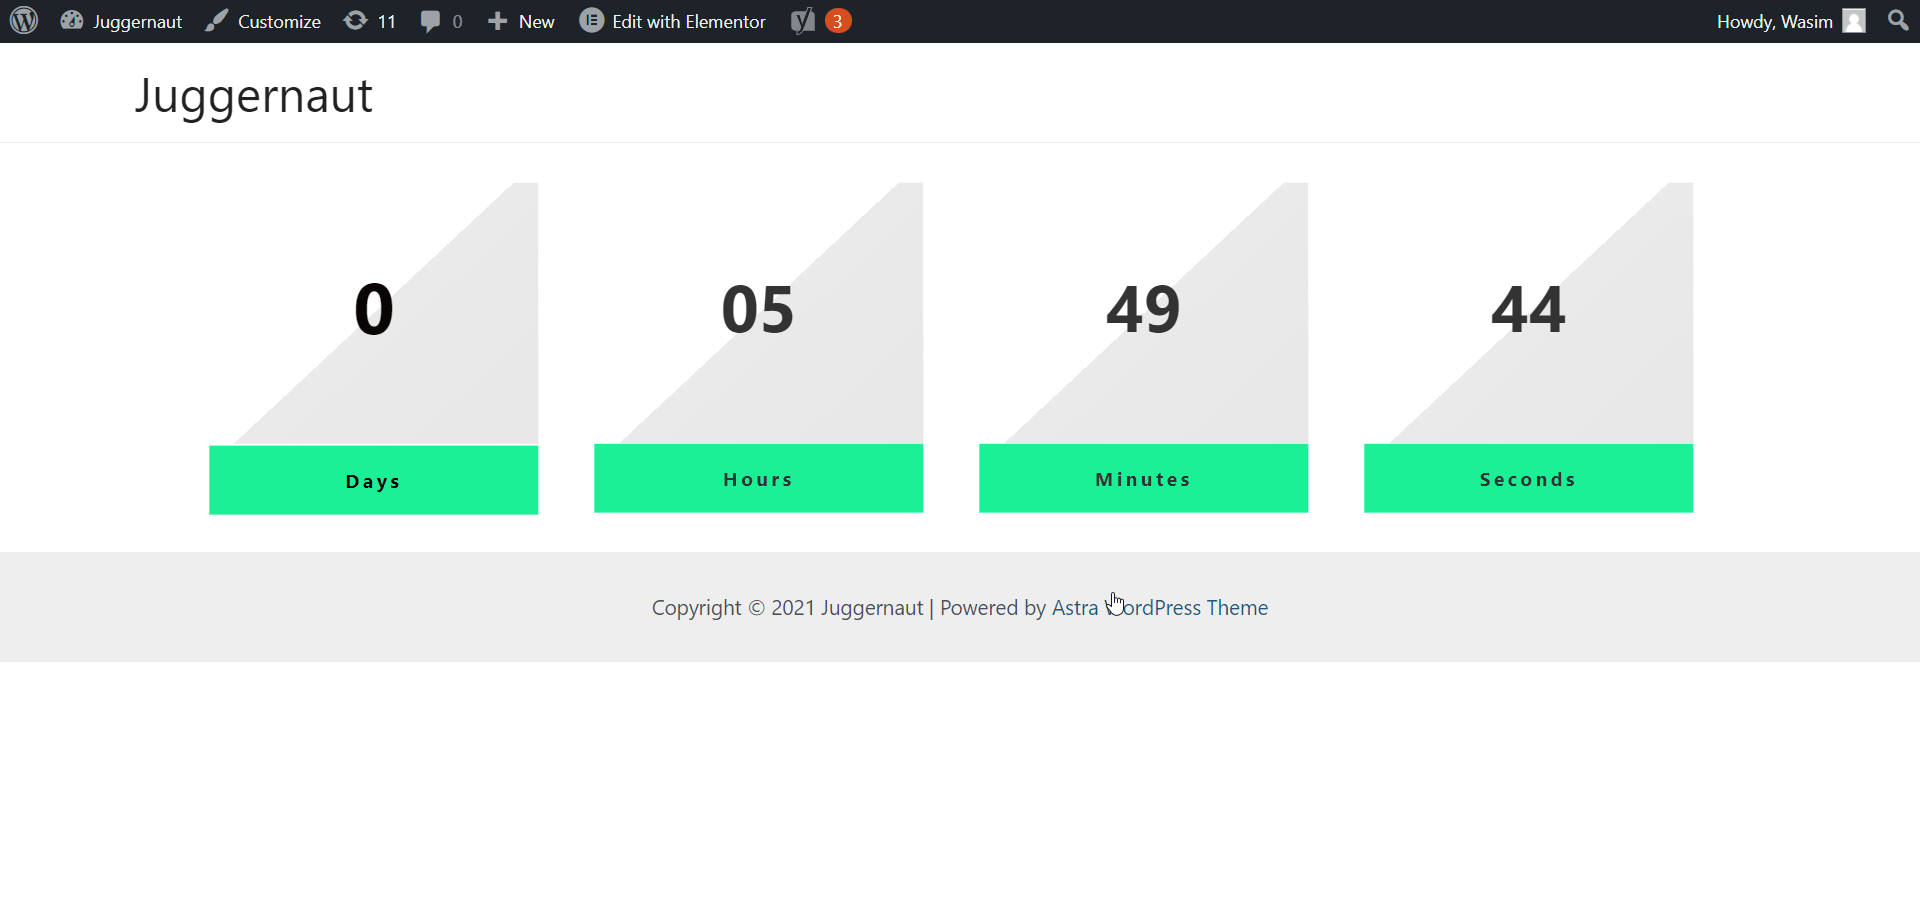
This will take you to the live site and here it is!!! The countdown timer is on display. If you aren’t happy with any area of the countdown timer, you can go back to the editor and make necessary changes.
Summing up:
So, it’s too easy to add countdown timer to a site deploying the ElementsKit plugin, right? Yeah, ElementsKit is an easy-peasy plugin and you can use all of its modules, widgets, and features pretty simply. More importantly, you can add its countdown timer anywhere in your website including landing page, product page, and checkout page.
If you are looking to grab your visitors’ attention and drum up your business, ElementsKit’s countdown timer is the right choice for you. Its unique and gorgeous designs can glamorize your website layout to the core, making you stand out from others.
That’s all I had in this tutorial for you. Hopefully, you found it super easy to add countdown timer to your WordPress with ElementsKit. If so, don’t hold back to take advantage of this marvelous plugin and let your sales and conversions tick up!!!
Get to know about the process of creating image hotspot to your WordPress site if you are curious!!!
👉 How to create and use image hotspot in your WordPress Site?
Leave a Reply