

WordPress offers a default footer containing different types of content but editing it perfectly isn’t a cakewalk. You must know the right process to edit your WordPress website footer suit your needs.
This write-up has put together an in-depth guide to let you know how to edit footer in WordPress without any coding hassle. Also, this blog will shed light on the importance of customizing/editing footers and elements to include in them.
So, let’s drill down to learn how to do WordPress footer edit and customization!
A footer in WordPress refers to a section that appears at the bottom of your web pages, including information like copyright notices, contact details, social media handles, privacy policies, etc.
The WordPress footer area is fully customizable which allows you to utilize widgets, modules, or codes to display content the way you want.
The default WordPress footer is unlikely to align with your brand image thoroughly. By making edits in the footer, you can make your WordPress website’s footer compatible with your brand. The following benefits make it necessary to edit WordPress footer before your site goes live:
- Regular WordPress footer lacks unique and better UX for your visitors.
- Promotion or branding opportunities tank due to using non-customized footers.
- Your footer is likely to look similar to many of your competitors.
- Default one may not provide the flexibility to include important links and details.
- Navigation won’t be that effective using the default footer.

The content and elements to include in your footer varies depending on your website’s purpose, industry, and legal requirements. However, there are a few things that need to be included in every footer. Let’s check out what you should consider adding in the footer:
- Copyright notice
- Privacy policies
- Terms and conditions
- Contact details
- Social media icons with links
- Subscription form
- Testimonials
- Navigation menu
- Services or products
- Affiliate area
- Refund policy
- Register/Login
- Awards or certificates
- Company logo
In this guide, we’ll put together 3 different methods for editing footers in WordPress. All these three options will provide you with the flexibility to customize the footers of your website.
Let’s get started with all the methods of how to edit footer in WordPress one by one:
Themes in WordPress have a special customizer to experience real-time editing while customizing the site. However, these settings vary from theme to theme. To access these theme customization, you have to first navigate to Appearance >> Customize.
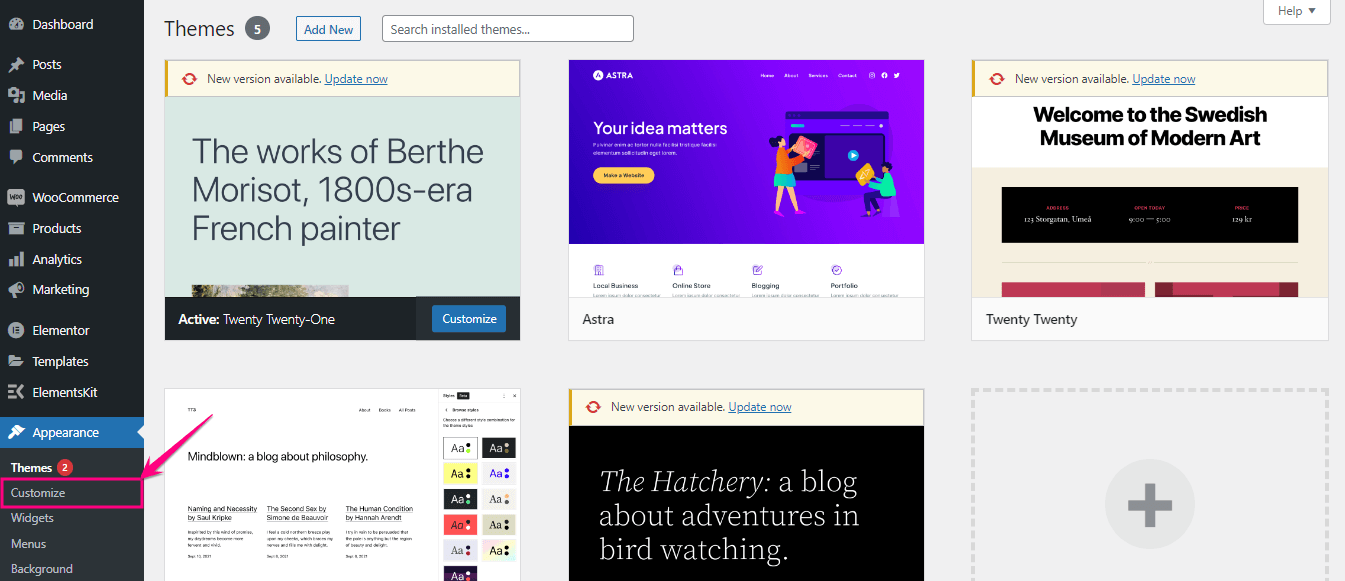
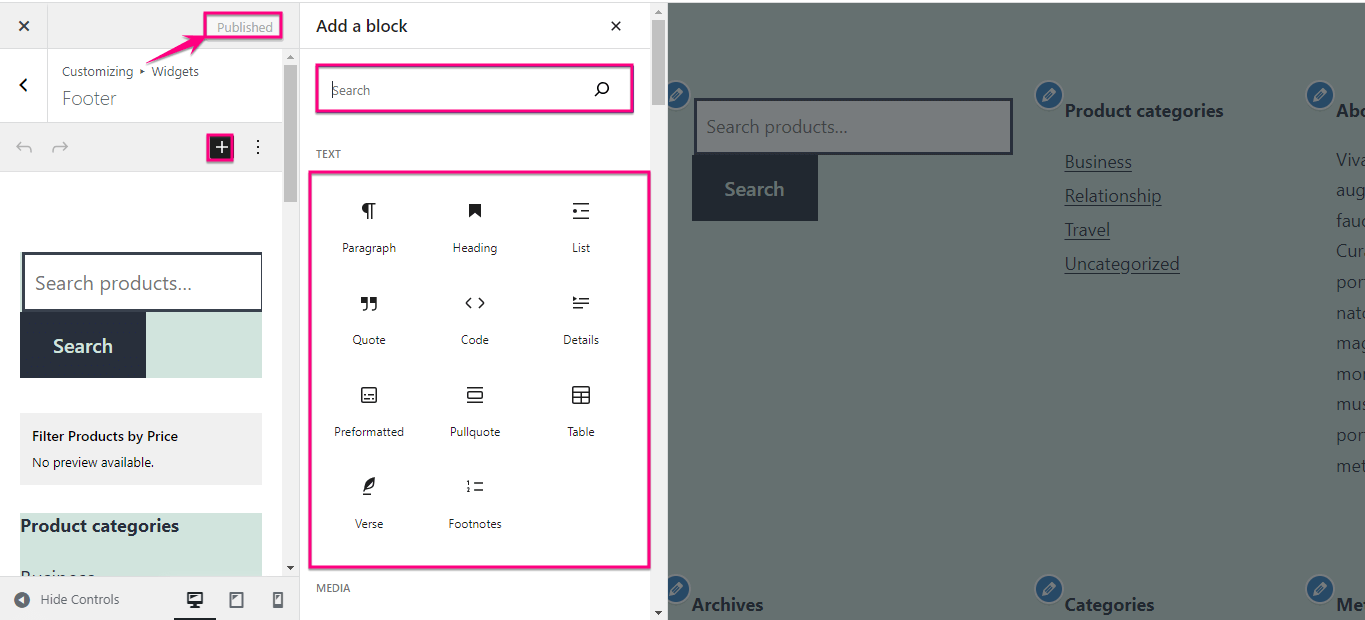
After selecting “Customize” from the Appearance tab, you will be redirected to Theme Customizer from where you have to click Widgets. Then click Footer to change WordPress footer.
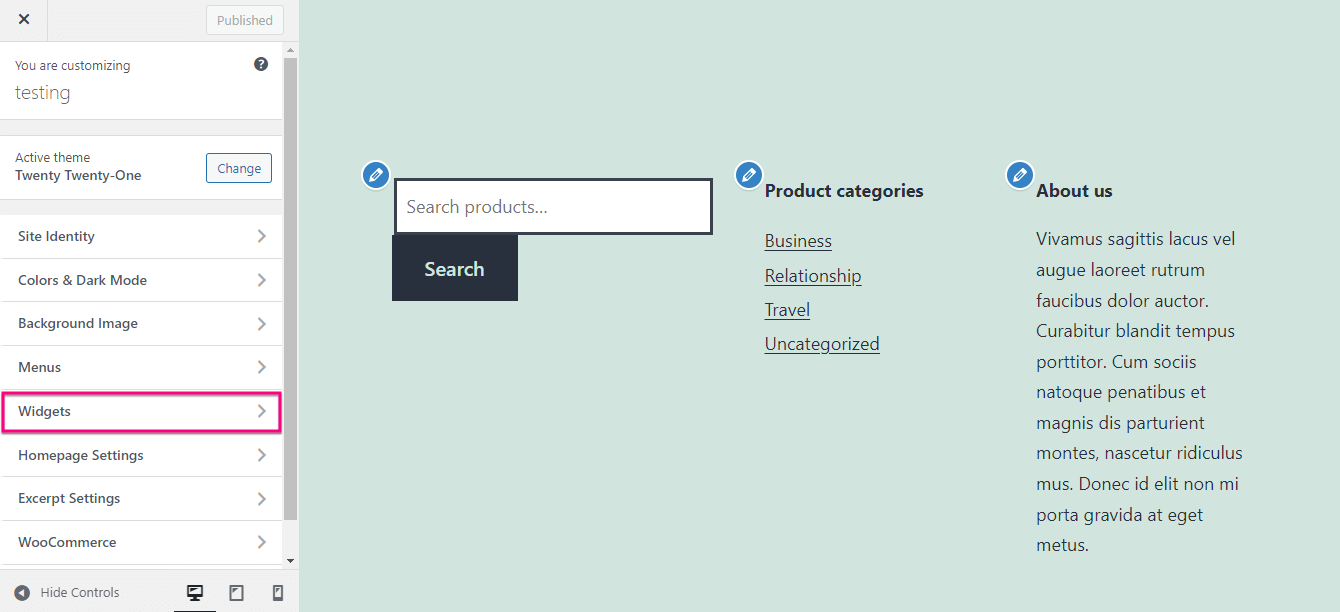
Here, you can customize each section with the options that appear on the left side.
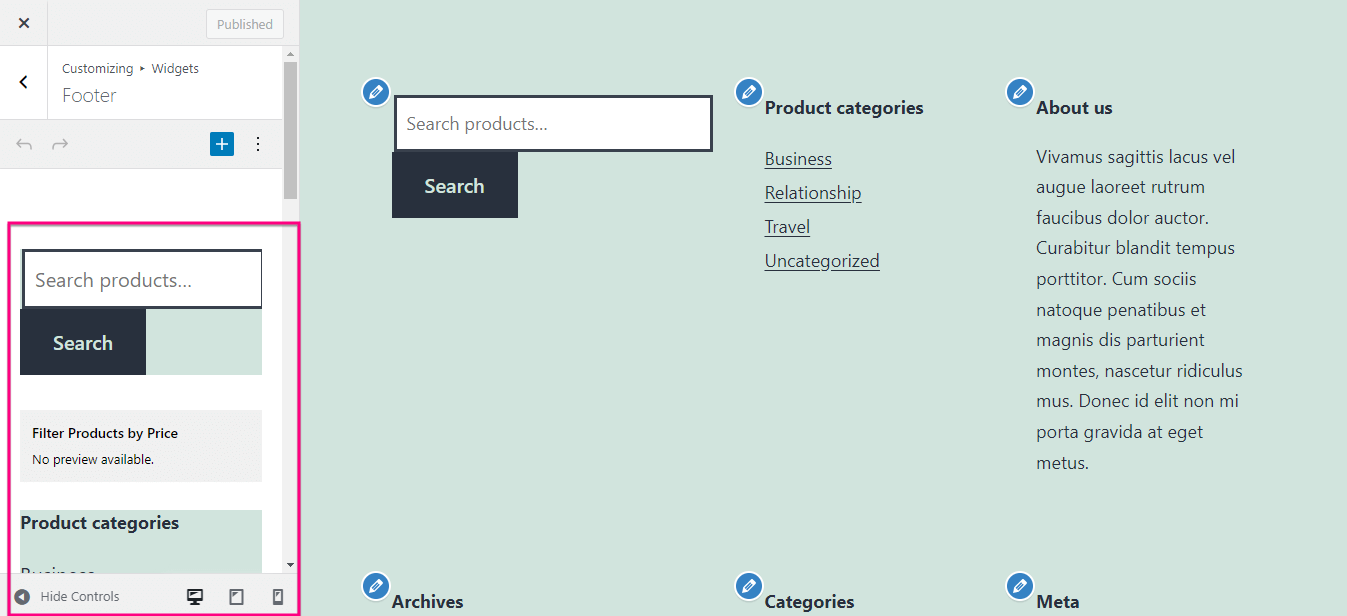
Moreover, you can also add new blocks by clicking the “+” icon. Now, search for the block and press it to include in your footer. Here you can customize and preview edits at the same time. Finally, after making all the edits, hit the Publish button.
To create a custom footer using a template, you have to first pick a WordPress footer builder plugin. Here we will use ElementsKit, the all-in-one Elementor addon that not only works as a footer builder but also includes all the necessary elements such as showing testimonials, adding custom tabs, etc.
It has a Header Footer builder which comes with a library of built-in templates. Besides, these templates are fully customizable and 100% codeless.
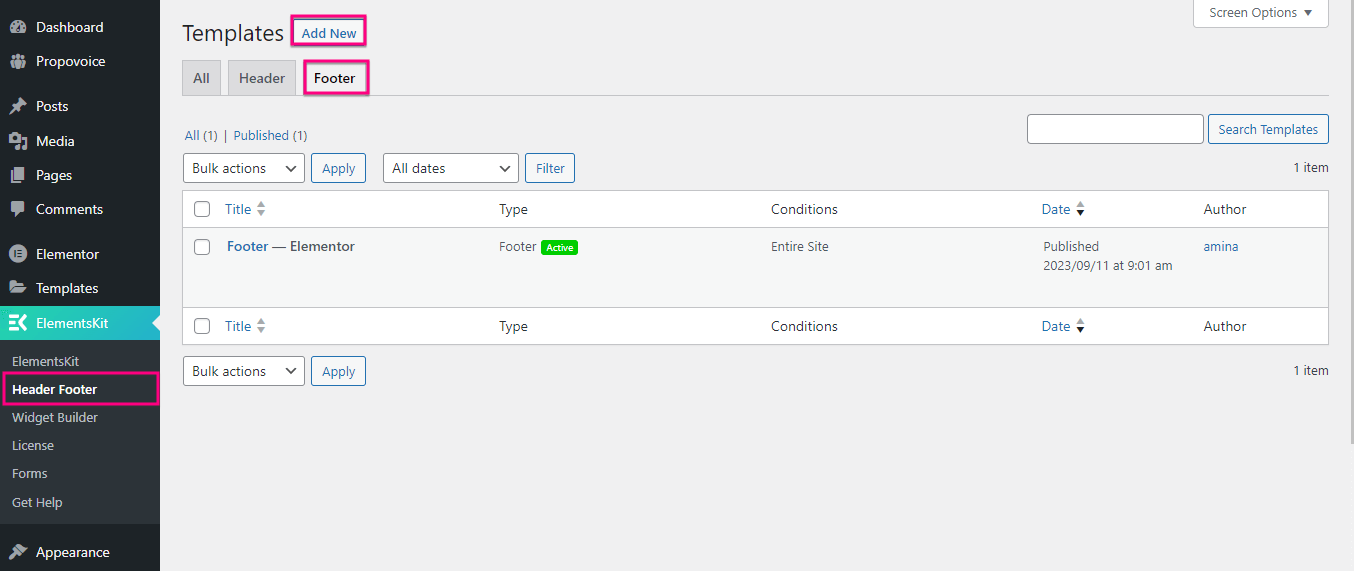
Now, to create a custom WordPress footer using ElementsKit’s built-in template, install and activate this plugin first. After that, visit your WordPress dashboard and navigate to ElementsKit >> Header Footer. Then, click the Footer tab and hit the “Add New” button.
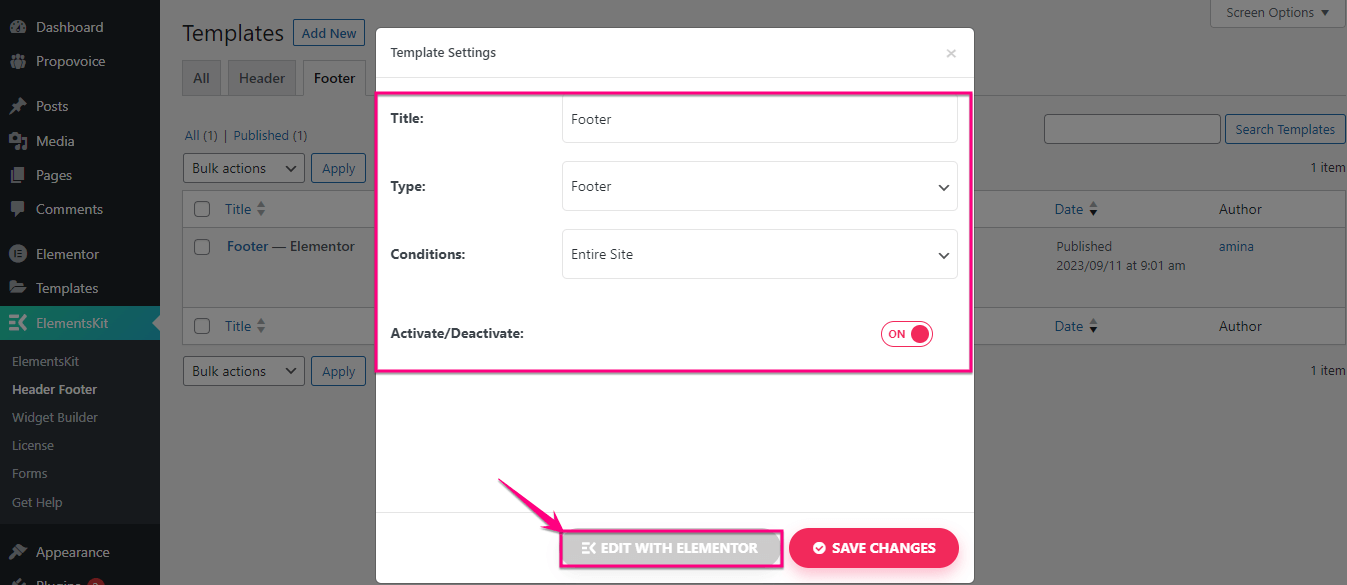
This will open up a new tab from where you have to fill the fields of Title, Type, and Conditions. Then enable the “Activate/Deactivate” toggle and hit the “Edit with Elementor” button.
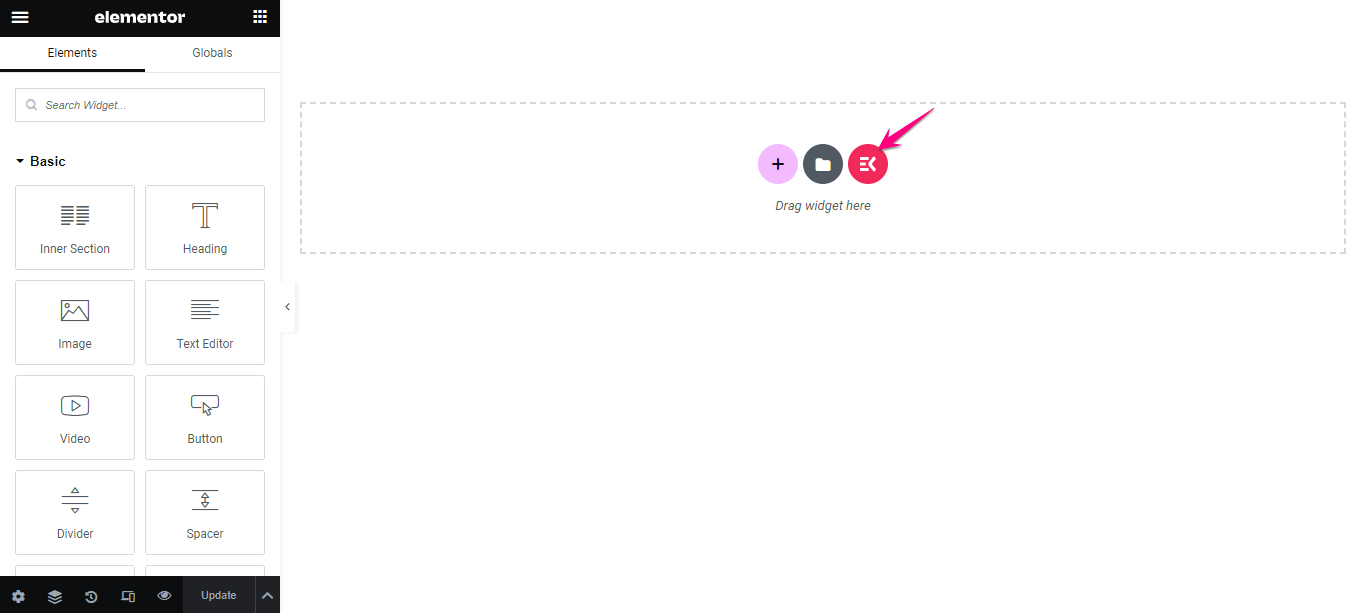
Thus, you will be redirected to the Elementor editor where you have to press the ElementsKit icon to change the WordPress footer using built-in templates.
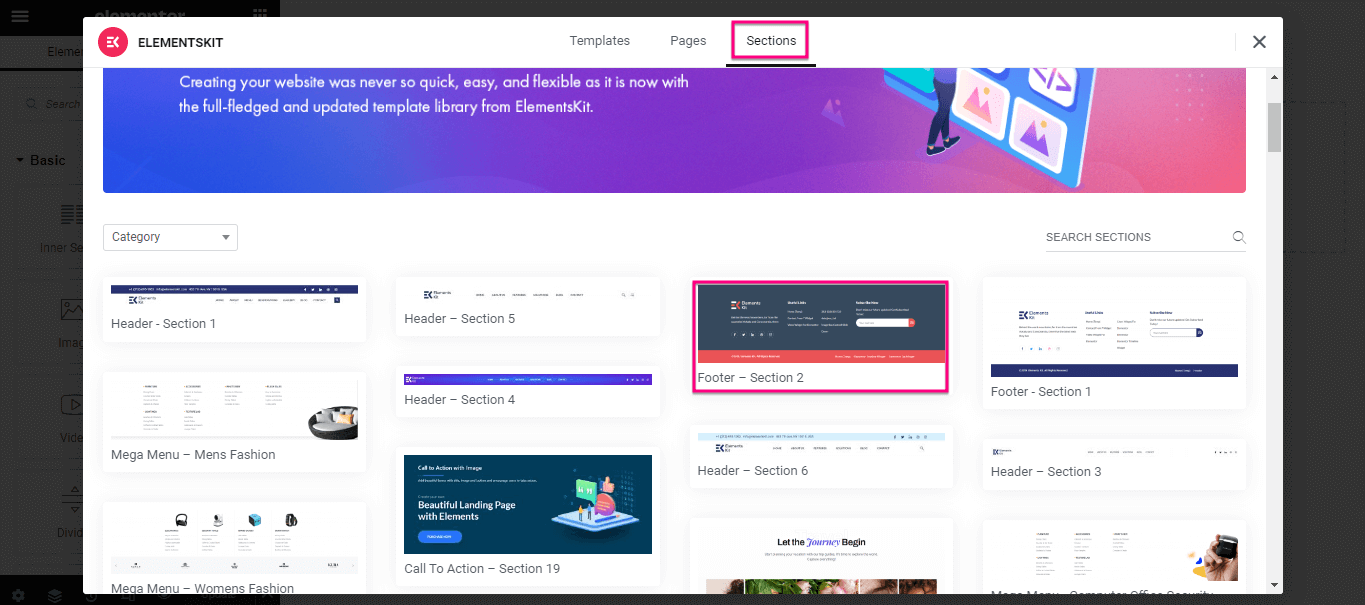
After hitting the ElementsKit icon, a new tab will pop up called Template Library. Here, you have to click the “Sections” tab and select a footer that fits like a glove with your brand.
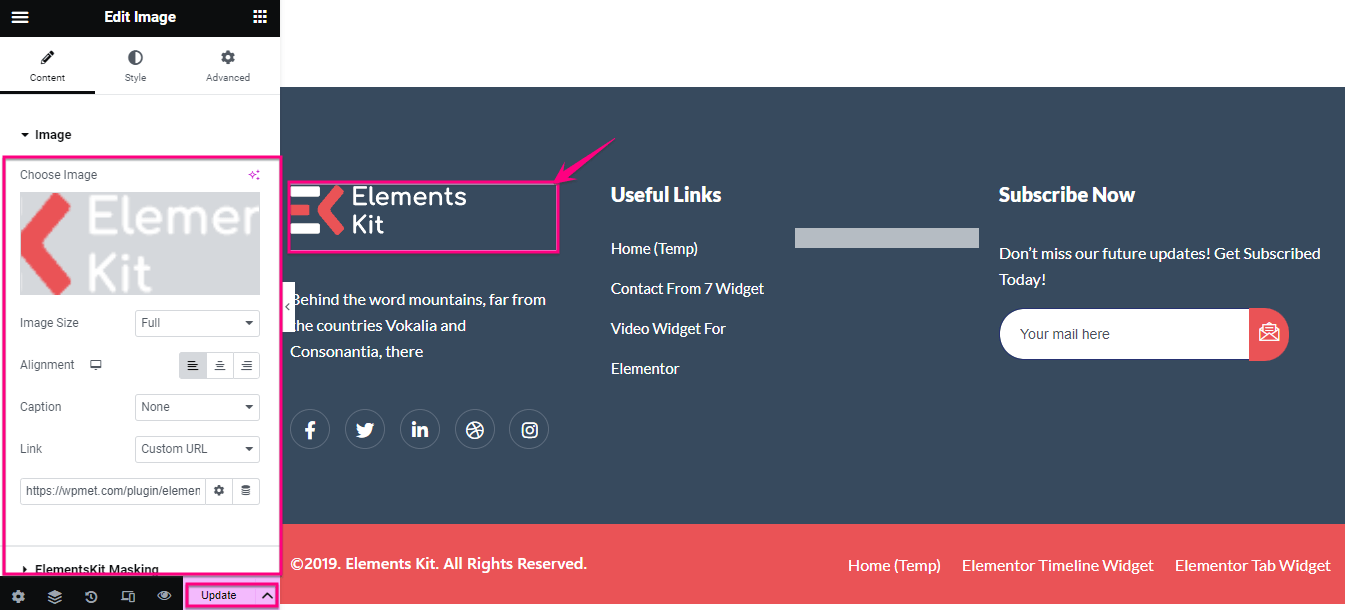
Now, you have to edit this footer by clicking each section. For instance, click the image and customize it from the options available on the left side. Similar to this, edit all the sections of this WordPress footer template. Finally, hit the Update button to make your custom footer live.
Need more assistance to get started with a custom footer? Check out this video tutorial to customize footers in WordPress:
You can also customize the footer by leveraging the block editor, introduced in WordPress 5.9. But, you have to use a block-based theme for it. Here, we’re using the Twenty Twenty-Three theme to demonstrate how to change footer in WordPress using blocks.
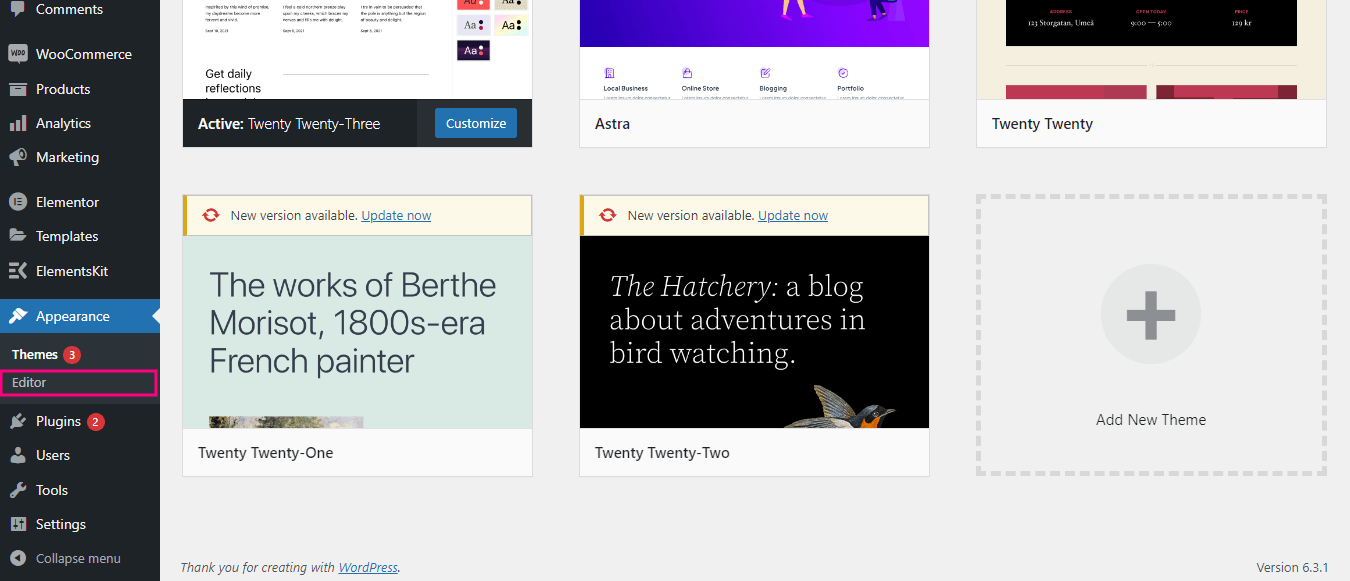
First, you have to visit your admin dashboard and go to Appearance >> Editor from the dashboard.
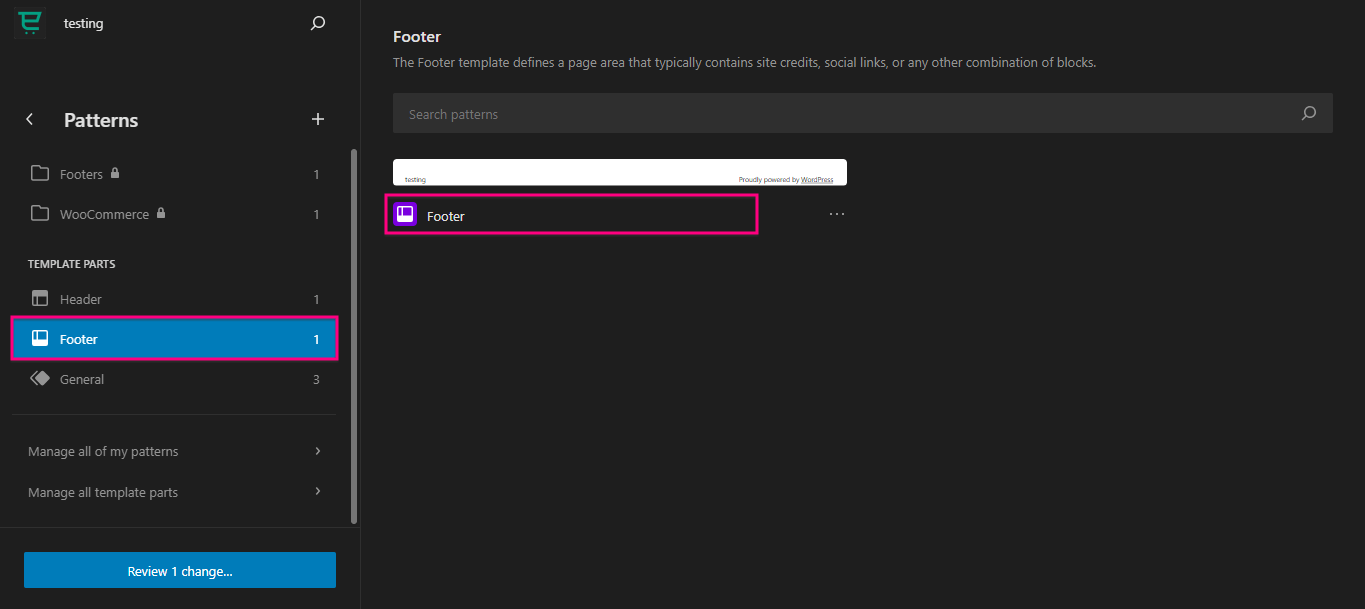
This will take you to the block-based editor from where you have to hit the Patterns tab under Designs.
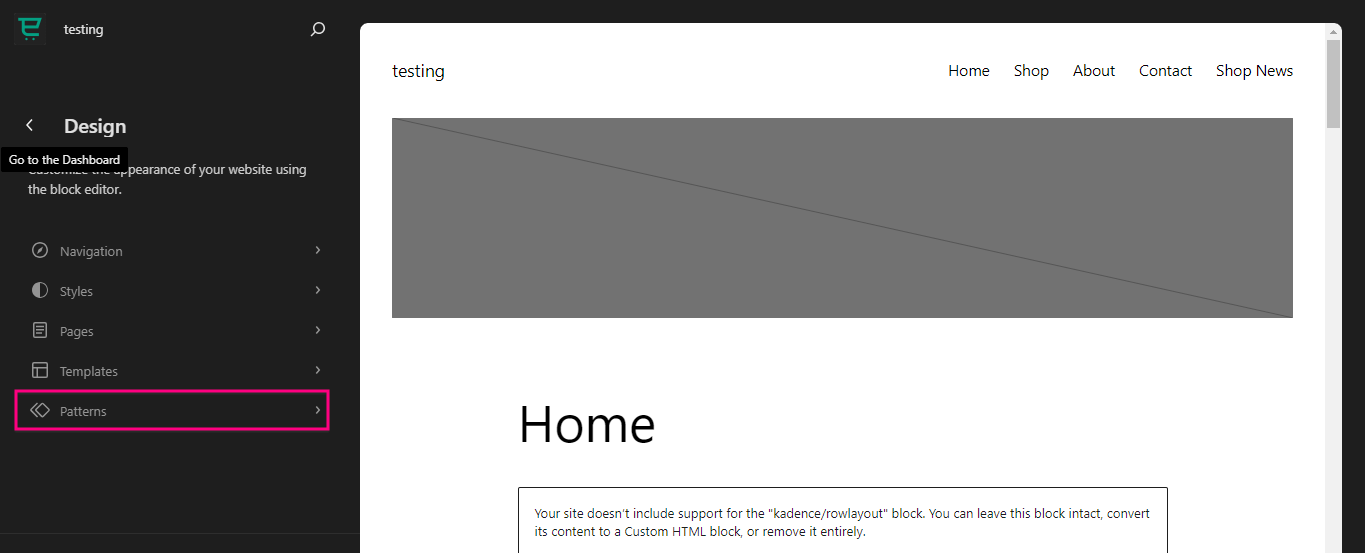
From here, scroll down until you see the Footer. After finding the Footer, click it. Then, press again after adding it to the block editor.
Now, hit the edit icon to customize your WordPress footer.
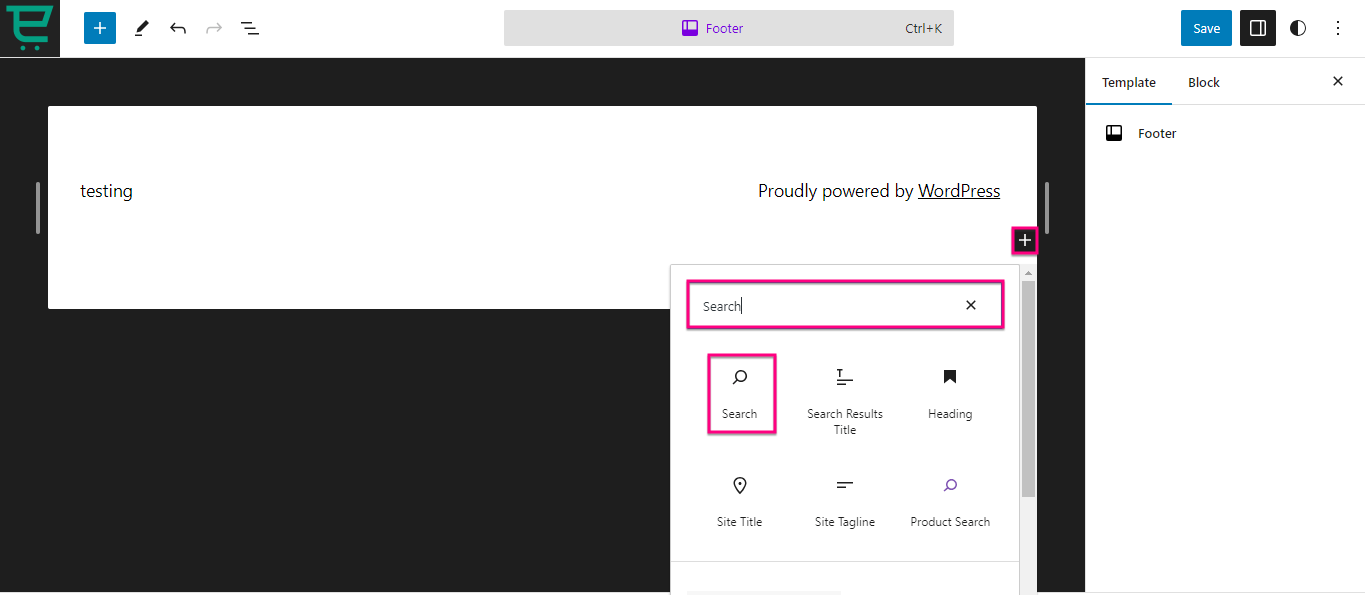
Here you can select different blocks to build a customized WordPress footer by clicking the “+” icon and searching it on the Search tab.
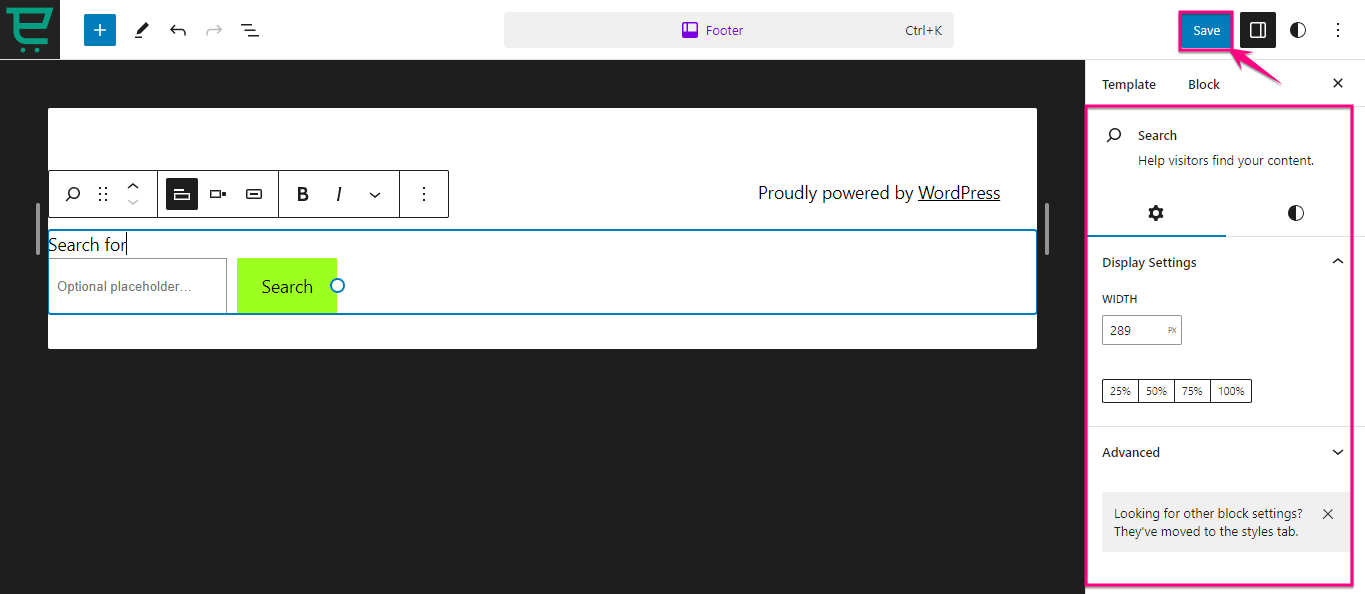
Also, you will find settings for display, color, and typography on the right side for each block. After customizing your WordPress footer with Block Editor, hit the “Save” button. This will make your WordPress footer built with blocks live.
Summing up
WordPress footer holds immense opportunities for better user engagement, performance, and branding. It ensures your website footer not only perfectly aligns with your brand but also offers a better user experience to your audience.
Thankfully, there are different methods for custom footer creation. Above we have already put together three different methods that require zero coding skills. So, adopt any of these three methods and power your WordPress footer with custom editing.
Leave a Reply