


What’s the very first thing you notice while visiting a website?
The header, right?
Yes! We’re all the same!
The header is the very first thing that catches the visitors’ eyes on your site. You can consider the header as the backbone of any website.
It doesn’t matter whether you own an e-commerce site, blog site, social media, forum, or a personal portfolio site, you must add a simple and easy-to-navigate Elementor transparent menu.
However, adding a simple header with the menu isn’t enough now! You must customize the header to provide the best user experience to your audience. And you can do that by making Elementor transparent header background and sticky!
In this article, I’m going to show you the most advanced but time-saving method of how to add a transparent sticky header in WordPress with Elementor!
Let’s create an Elementor sticky header that makes the visitors love your website at first sight.
Did you know that with Elementskit you can create a custom Elementor transparent header for Elementor within minutes? Let’s try out Elementskit for Free
What is a Sticky Transparent Header in WordPress?

A sticky transparent header defines a header that remains fixed and see-through when someone scrolls down or up. This header allows you to seamlessly view the background of your site when you scroll it.
Things You’ll Need
To follow this tutorial blog, you will need –
- A WordPress site
- Elementor page builder
- ElementsKit
- 5-10 minutes of your time.
Got everything? Great, you’re ready to go.
Let’s Design an Elementor Transparent Header Background!
You can create a header via a new header template or a new page. But, I always prefer to create a new page to design a transparent sticky header using Elementor.
Once you’re done with the header design, you can just copy-paste the template into the header template. Easy-peasy, right?
Let’s jump into the guide on how to create a sticky transparent header in WordPress with Elementor.
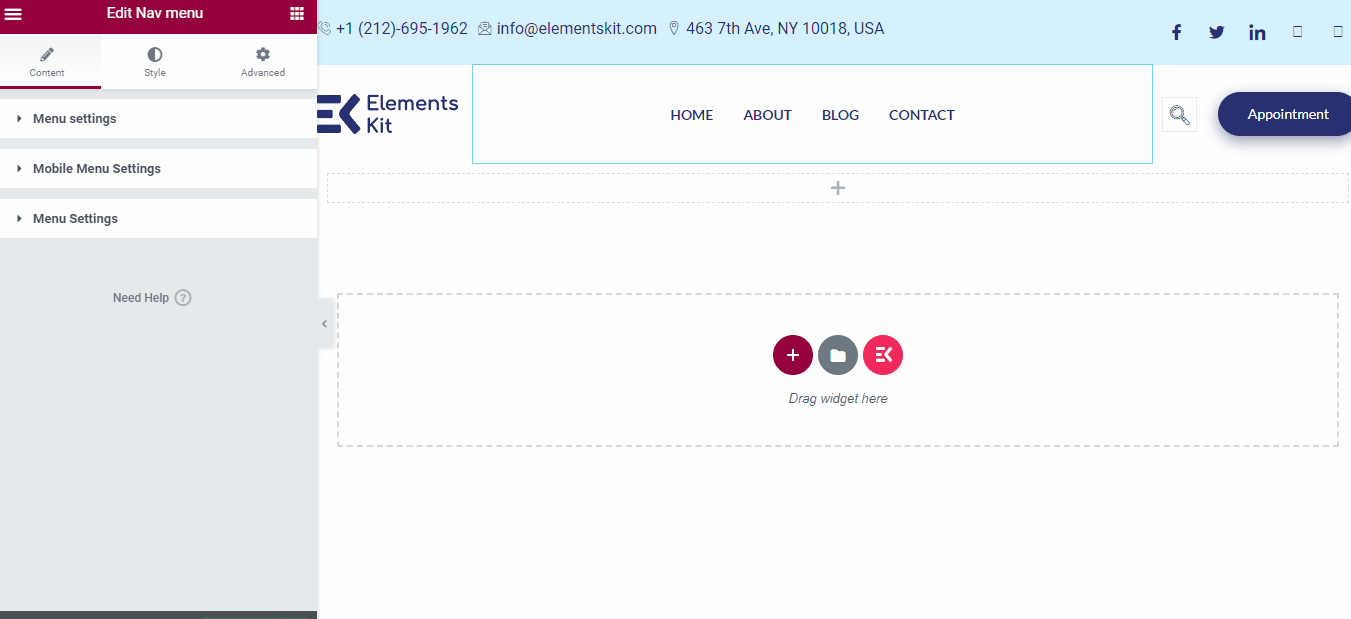
Step #1: Create a Menu First
To add an Elementor sticky header, you must start by creating a menu first. To create a new menu, go to wp-admin > Appearance > Menus.
Once you’re done creating the menu, give the menu name “Primary” and click on “Save Menu”. If you’ve created a menu already, It will look somewhat like this –
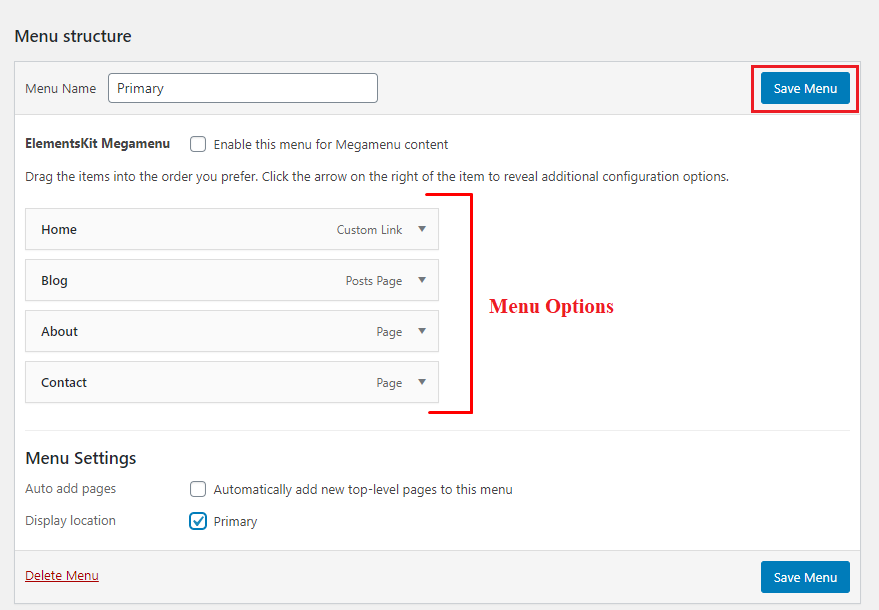
You might notice the “Megamenu” section above. Basically, it’s one of the most useful features of ElementsKit. If you want to add lots of categories or options in the menu section, you can use this Megamenu feature.
⭐ ⭐ check out a detailed guide on how to create megamenu in Elementor.
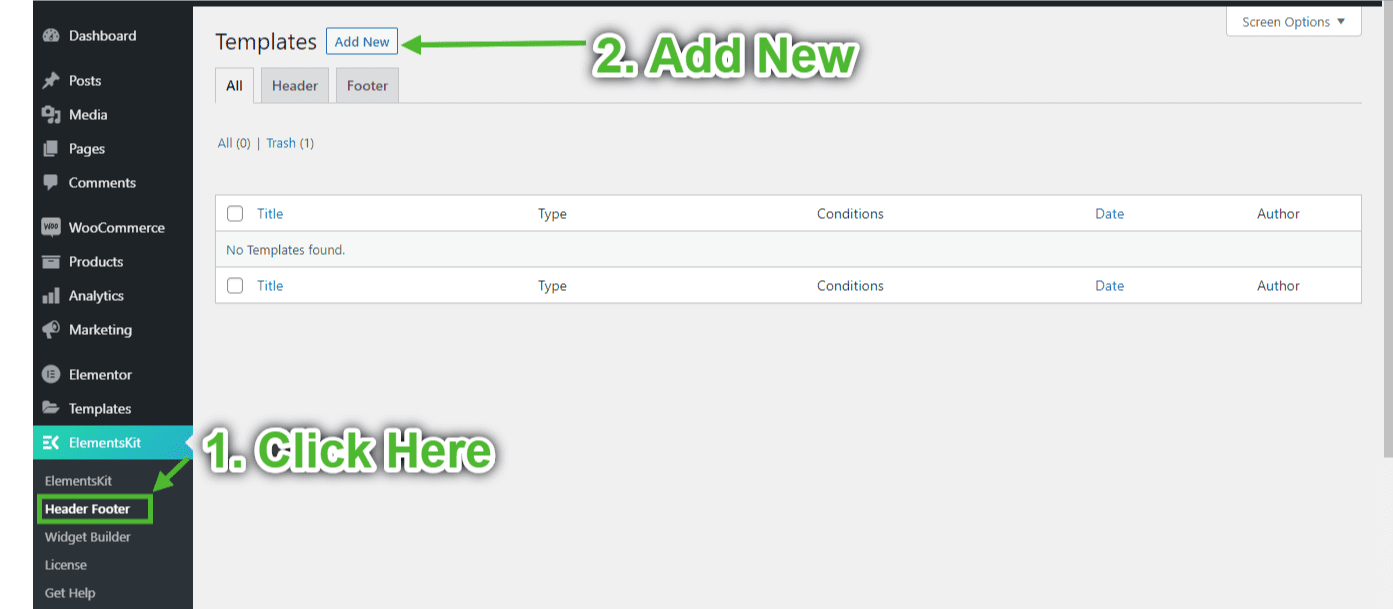
Step#2: Create a Header Template
Go to the “Header Footer” section of your ElementsKit. Add a New Header Template by clicking on “Add New”.
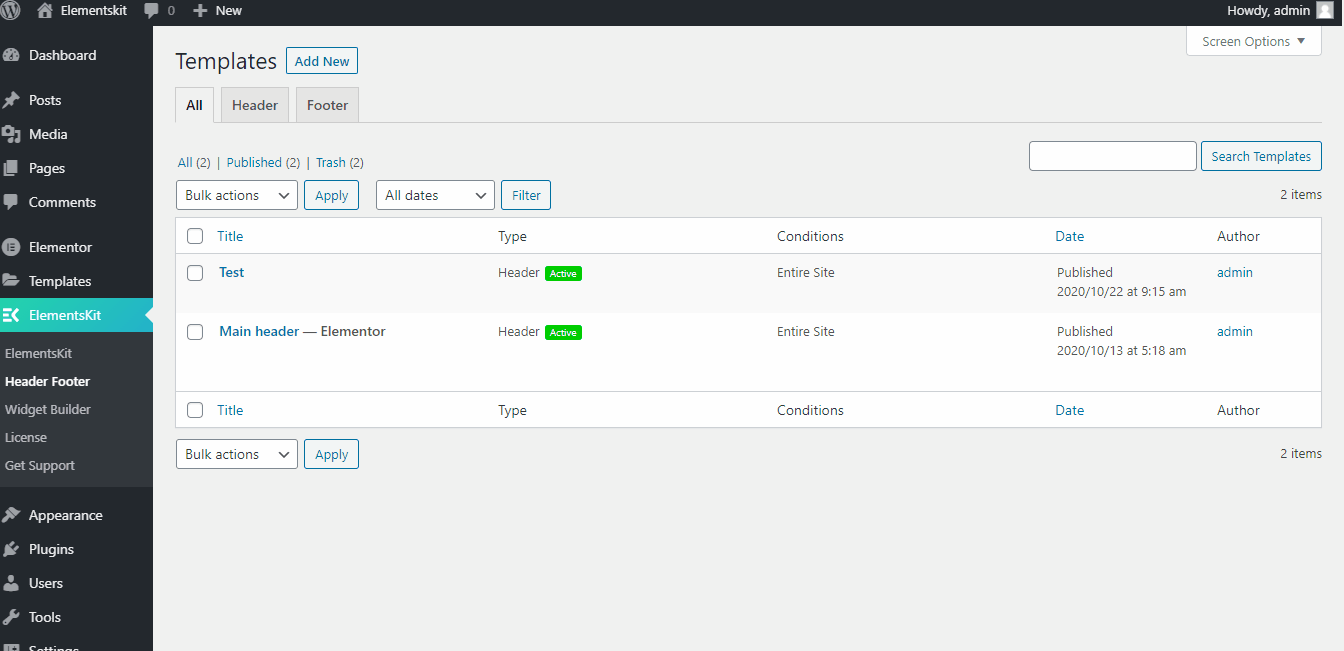
Now the template settings will appear. Here you’ve to do the following tasks:
- Give a title to the header.
- From the “Type” setting dropdown, choose “Header”
- Choose the condition you prefer. I’ve chosen “Entire Site” from the dropdown.
- Activate the header template by toggling the switch on.
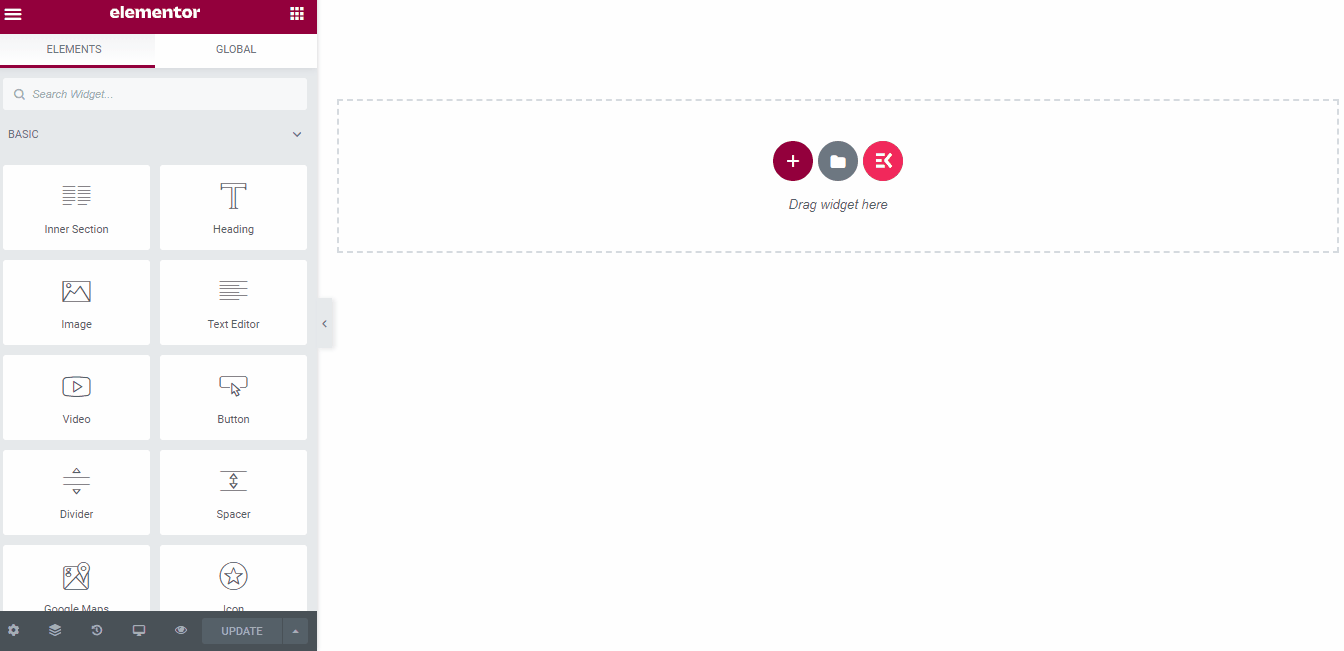
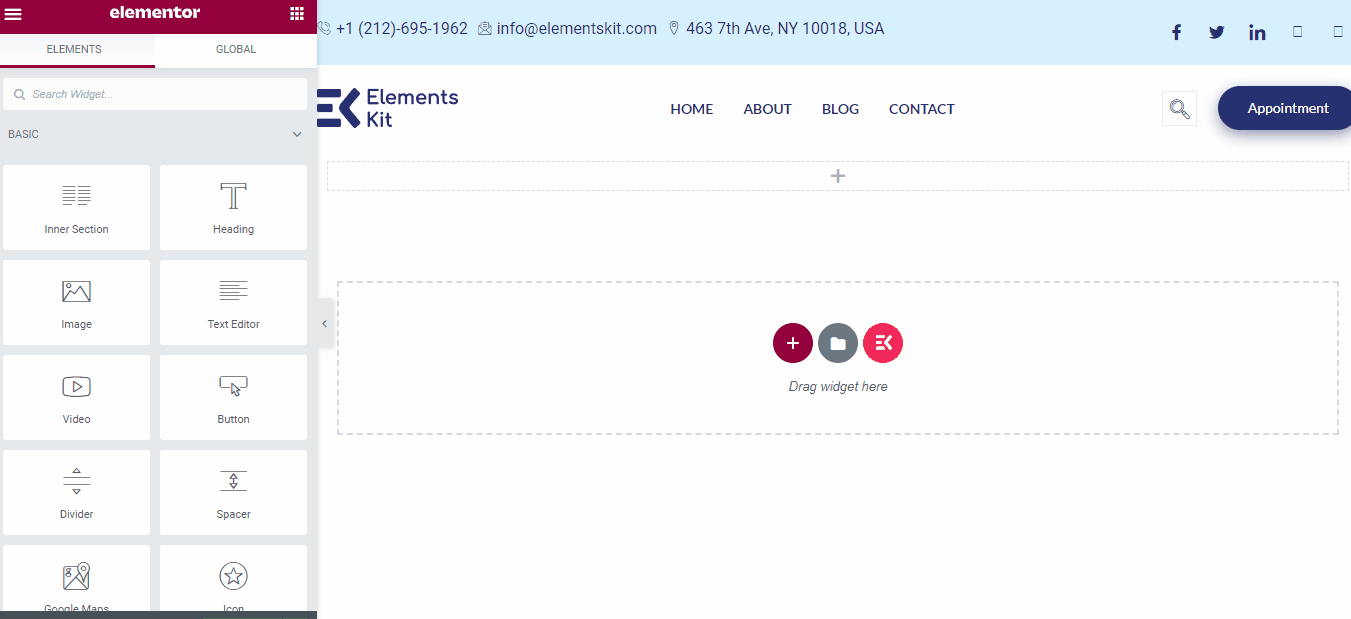
Step #3: Edit with Elementor
When you are done with all the tasks mentioned above, click on the “Edit with Elementor” button from the down-left.
Step #4: Choose a Header Design
In this section, you can choose a header design from ElementsKit’s built-in header library.
To proceed, click on the ElementsKit icon, choose a beautiful design, and click the ‘Insert’ button to import the header in Elementor.
Step #5: Stick the Elementor transparent Menu
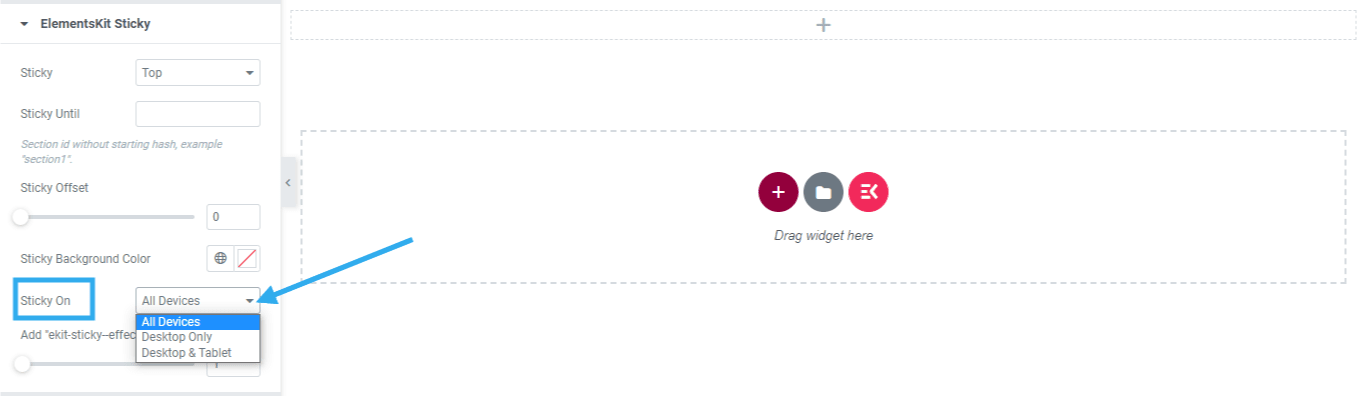
We’ve already selected our header design. Now, it’s time to stick the header on the top position. Browse the ‘Advanced’ tab of Elementor for this task. From the advanced tab, find “ElementsKit Sticky”. Make the menu Sticky at the Top from the dropdown.
Note that you can choose to make the header sticky until a certain section. In that case, define the Sticky Until. You can also apply Sticky Offset to the header ranging from 0 to 100.
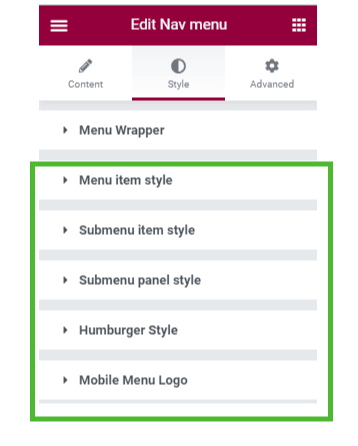
Step #6: Make the Elementor Transparent header over content
Now, hop into the ‘Style’ tab. From the “Menu Wrapper” section, set the Elementor transparent menu height of your choice.
Choose the menu wrapper background type ‘Classic’ and remove color by using the slider to the left end. You can also put the color code manually. In that case, enter #00000000 to get a transparent background. Moreover, you can also adjust the Elementor header over content from the content tab.
To make the header more refined and attractive, you can leverage any of the following settings as well:
Step #7: Testing the Elementor Transparent Header
Well, we’ve designed this transparent header using Elementor and another Elementor transparent header addon plugin called ElementsKit. Now, it’s time to check the result.
You may add a few more sections under the header to have a better understanding of the transparency. In this tutorial, I’ve added two images under the header section. Here’s the final output.
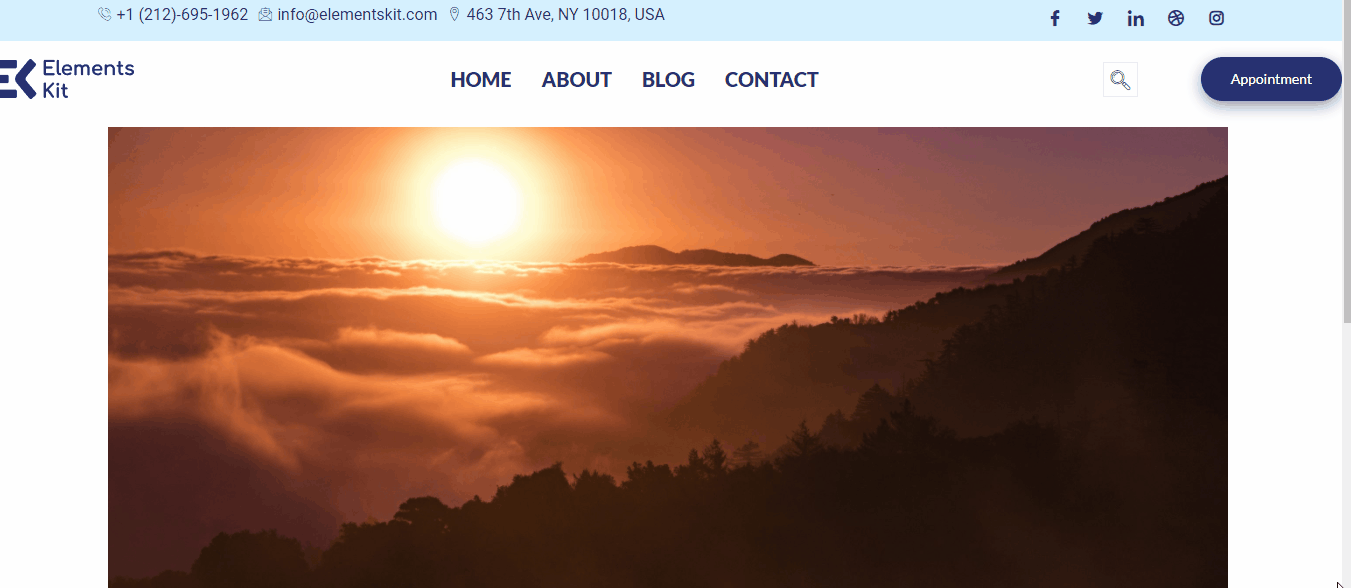
That’s it! We have successfully created an Elementor transparent header background. Now, you can copy this header and apply it to any page of your website.
Still, confused? Check out this tutorial video:
Different Header Designs for ElementsKit Users
ElementsKit comes with numerous built-in header designs out of the box. All of these are stylish, unique and help the user to navigate throughout your entire website.
Have a look at a few header designs of ElementsKit.

Illustration 1 – Elementor sticky header

Illustration 2 – Elementor sticky header

Illustration 3 – Elementor sticky header

Illustration 4 – Elementor sticky header

Illustration 5 – Elementor sticky header
Aren’t these designs awesome? Yes, you can access a huge list of premium designs like this by using ElementsKit.
Why Should You Use a Transparent Elementor Sticky Header?
Whether you like these sticky transparent headers for Elementor or not, you must give it a try. These gorgeous-looking, trendy headers add great value to your website. Here I’ve listed the top four reasons behind using a transparent sticky header for your website.
Better Branding
Thousands of companies have put their logo on the primary header. Do you think it’s just a coincidence?
Nope!
A report of Lucidpress shows that consistent presentation of a brand logo increases revenue by around 33 percent. It means you can increase your company’s revenue only by displaying the brand logo to the audience.
If you put the logo on a sticky header for Elementor, it will be visible throughout the entire website. Thus, people will notice your logo for a longer time. It will make your brand familiar to more people and boost up the revenue.
Better User Experience
A sticky header allows users to browse your website faster. They can find their desired information with minimal effort.
On the other hand, using a fixed header requires more time for users to find information. No one wants to scroll to the top all the time to use your primary header. As a result, the users leave your website.
Well, you might stick the header on the top. But, it’s not the end of your duty. Nowadays, most people browse websites via a mobile device. If you stick the header on the top, it kills space and shows less content. It’s not user-friendly.
To solve this problem, you should use the Elementor transparent header. Thus, you can keep the header visible and also show more content to the visitors. It’s just a win-win situation for both, isn’t it?
Improves Search Engine Ranking
Being a webmaster, you might probably know that search engines also care a lot about user experience. It’s one of the most important ranking factors of Google. It means only a sticky header will help you improve the ranking of your website on Google as well as bring more potential customers.
Do you want to lose your customers? I don’t think so!
Do you ever face trouble navigating a website?
Well, I’ve faced it a lot!
Always scrolling to the top is the most tiresome or tremendously boring thing to do while visiting a website. If you don’t want to create an extra hassle for your audiences, you should throw the standard header away right now.
Instead of that, design an Elementor custom transparent header and offer a smoother browsing experience to your customers. Besides, you can also make navigation super-friendly with one-page navigation WordPress.
Final Words
By now, you must have understood how much you will benefit only by using an Elementor transparent header background. Add a transparent sticky header to your website today and get the most out of your website.
Hopefully, you can design lots of customized transparent sticky headers with ElementsKit Elementor Addon and Elementor by following this guideline.
If you have any further inquiries regarding the sticky transparent header for Elementor, let us know in the comment section. We’re eagerly waiting to solve your issues.
Have a good day!
Frequently Asked Questions (FAQ)
What are the Elements of an Ideal Header?
A good header needs to include some essential elements that make navigation smooth and flexible. Here are the necessary elements of an ideal header:
- Logo
- Search bar
- Contact details
- Language toggle
- Navigation menu
- Social media icons
- CTA
- Shopping cart icon
How can You Make the Transparent Header Sticky for Different Types of Devices?
Luckily, you can choose the type of device where you want to keep the sticky header on. You have the absolute freedom to set whether you want to set the transparent sticky header for mobile, tablet, or desktop users. If you want to set the transparent header sticky for all types of devices, make sure you’ve set the sticky on for all devices.
What Makes a Good Header?
A good header has to be easy to read and include all the essential pages of your site. Besides, color contrast and fonts also play a significant role in making it visible. You need to make it expandable rather than including too many items in the header. Including essential elements also makes a good header that successfully holds brand identity and establishes effortless navigation.
Do You Need to Use Custom CSS for Setting the Elementor Sticky Header?
No. If you use ElementsKit pro, you’ll get almost everything you want from the ElementsKit Sticky settings. You are not required to use any custom CSS to build a transparent sticky header for Elementor. However, if you still want to add custom CSS, just leverage “Add kit-sticky-effects Class Offset” and a functional theme to get your work done with CSS code.
Can You Use an Elementor Header That is Sticky But not Transparent?
Yes, you can do so. if you want to make the header sticky without making it transparent, just set the sticky header for ‘top’ and then change the background color with your desired one from the “Sticky background color” settings.
Do You Require Elementor Pro to Use Elementor Sticky Header?
No, if you have the free version of Elementor with ElementsKit Pro, you are all set to make your Elementor header both transparent and sticky.
So, hurry up and create a sticky header for Elementor in your WordPress site with ElementsKit. When you can make your header both sticky and transparent at once, why miss the chance?

Leave a Reply