The Elementor menu anchor links are a very basic element that lets you add a menu anchor name (anchor id) to any location on your website. People can click on the anchor link and be taken directly to the section through the hook id. Just by adding up a name/id and then set an anchor link somewhere else on the menu.
In other words, Menu Anchors are a navigation process that helps you to navigate you from one side of the page to another.
Now, are you thinking of ranking your website higher on top search engine pages such as Google, Bing, and others? 🙄
If yes, then you came to the right place!
The menu anchor widget is a wonderful page builder tool that will not only improve your visitors’ experience but also help them with scrolling navigation sections. It can also be a resourceful way to get on top of the Google search pages too.
And who doesn’t want a free advantage in Google, right? 😉
What is a Menu Anchor Widget?
Well, menu anchor links are also known as ‘jump menu’. Popularly, Elementor anchor menus are also referred to as a ‘table of content’. Links instantly take you to a specific part of an article, a page, an external page, or a pricing section.
Elementor menu anchors are usually used as bullet points that will take you to a different part of the content.
it is usually listed either with the A element (header with the name attribute) or some other element (naming with menu anchor ID).
If you’re confused about understanding what a menu anchor widget is, and how it works on a web page. Well, here is an example for you:

Take a look at the picture above, each of these bulleted lists is an anchor section, and each of the sections is connected with the other part of the page. So, when you click on them, you’ll be taken straight to another header section, which contains the content.
In this article, we will be showing you that menu navigation can be found in a variety of places, including text, buttons, images, and of course H1-H6 headers.
Advantages & Disadvantages of Using a Menu Anchor Link:
It’s not always the case that just because people are doing something, you should do it too. When using menu anchor sections on your WordPress blog, there are a few advantages and disadvantages that you need to keep in mind.
👍🏼 Advantages:
- One of the most significant benefits of an elementor menu anchor link is that it can improve the user experience when visitors explore your web page. More precisely in the case of long-form articles.
- You may share direct links to various sections within an article by using the menu anchor widget for Elementor on the header height. This is fantastic for social media and even customer service.
- When it comes to search engine results pages (SERPs), the outcomes are often subjected to change depending on what appears. However, since you’ll start using link anchors (jump menus) in your articles, there are high chances that you’ll see them appear on the SERP listing.
- These menu item pointer events are fantastic because they provide you with an additional line of text for your organic page. They may also help to increase CTR because the user might notice something relevant to their question that you didn’t mention in the meta description or title.
- Anchor navigation can also be used for other purposes too, such as “return to top” link, which is used in conjunction with citations ^ and footnotes [1].
👎🏼 Disadvantages:
- A table of contents or menu anchor could help visitors spend less time on your site. What is the reason for this? Since they are skipping to the section they are interested in, as a result, it would deprive them to read the whole page.
- Page menu which is directly linked to the problem discussed above can affect your ad revenue. The number of impressions and clicks may be reduced if readers skip straight to a specific link field.
Two Simple Methods of adding Anchor Link Menu in Elementor:
Here are the two methods available for adding elementor menu anchor links in Elementor. So let’s dive into it:
Number 1: Add External Link using the Elementor Menu Anchor Widget
If you’re the Elementor Menu Anchor element user, then it will be hidden from the user’s perspective, and you can use it anywhere, including in your WordPress menu. Here’s what you need to do to get started:
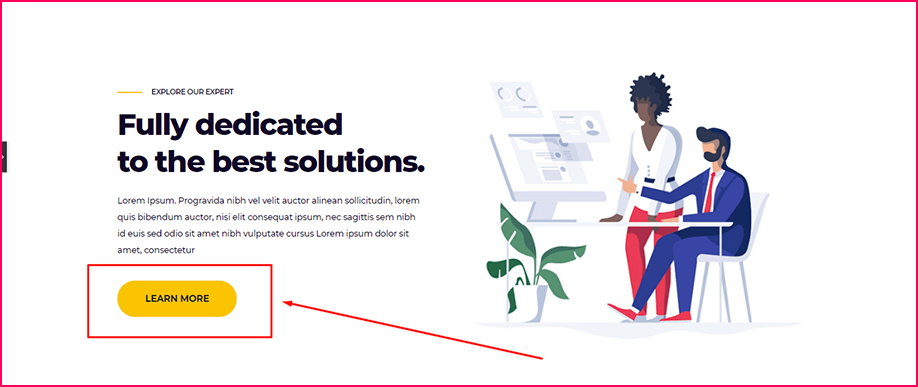
Adding up external links is pretty simple, all you need to do is just click on the CTA button in which you want to add the link. Then Add the name or link in the URL section.

Now just click on the preview eye button. Then click on the Learn More CTA button. And there it takes you to your desired address.

Number 2: Add Internal links using the Elementor Menu Anchor Widget
Firstly, search ‘anchor’ on the elementor search bar. Then drag and drop the Menu Anchor widget just above the section where you want a connection to appear. Don’t forget to create a link id.
Now just scroll on the other section in which you want your readers to pay attention. We would like to add our anchor section to our ‘Learn More’ button in this example. And to do so, you need to select the Button element in Elementor Editor.
Then, using the ‘#’ symbol, copy and paste the ID of your Elementor Menu Anchor into your desired call-to-action button connection.
When a user clicks the ‘Learn More’ button, they will be immediately redirected to the Menu Anchor we generated earlier. The outcome picture is shown below to help you understand it better.
Take a look around! 😮
Now if you click on this ‘Learn More’ button here, it will take you at the top ↑ of the page.
🔔 Do you want to get more exposure out of your WordPress site? Then do check out our latest blog on 👉🏻 How to Embed Instagram Feed on WordPress Website
Summary
Menu items navigation has been a very important section in WordPress. Especially for those who tend to the long-form version of contents (4,000 words or more), in which scrolling can be a chore. Menu item widgets enable users to quickly navigate from section to section they’re interested in.
Allow your users to find what they’re looking for more quickly. In other words, the menu item widget could save your readers time, and prompt them to go through your site frequently.
However, if you make your guest happy right away, they can sign up for your newsletter or conduct more research into what you’re selling. It can also assist you to lead generation if they subscribe to your site through their email address.
If you liked this article, you will surely find some more helpful tips and blogs by joining our WPmet community As well, don’t forget to subscribe to our channel on YouTube for useful tutorials.
Leave a Reply