

Do you know the failure rate of eCommerce business is 80%? In some research, the percentage is 90%. There are many reasons for eCommerce business failure. One of the biggest reasons is owners are unable to find tools that will let them easily build eCommerce website from scratch.
The reason behind their incapability can be choosing the wrong cms, and tools for an eCommerce website. Or else, choosing the totally wrong method that will limit contribution to your business. Yeah, you are getting me right. I am talking about coding. Besides, an eCommerce website holds another customization part that needs to be done properly.
That’s why I have decided to present here the ultimate checklist for building an eCommerce website from scratch with the most user-friendly CMS and tools.
Checklist to build eCommerce website from scratch
During building your eCommerce website, you need to make sure all your eCommerce pages are working smoothly. Because having issues on one page can break down your whole eCommerce business. Here success mainly depends on the smooth function of pages. Generally, an eCommerce website has six pages for flawless functionality. These pages are:
- Shop page.
- Archive page.
- Cart page.
- Checkout page.
- My Account page.
- Thank you page.
Now need a complete guide to building these shop pages?
No Worries, you will get head to bottom guide on how to build an eCommerce website from scratch. Keep reading to launch your eCommerce store.
1. Pick the appropriate hosting service provider and domain name.

A hosting service provider will offer you digital space for your eCommerce store. You can choose any hosting service provider by checking their service and packages. Check Bluehost, Hostinger, HostGator, etc for providing your digital space. After picking a provider, now select a domain name for your online store. It’s the name by that your eCommerce store will get known among your customers.
Do you know what mistakes will prevent you to reach more customers? If not, then here are the mistakes that you must not do during picking your domain name:
- Choosing difficult words that are less memorizable.
- Using hyphens, and numbers.
- A domain name that doesn’t go with your brand.
These mistakes you must avoid.
2. Use the right CMS for your online store.
Pick WordPress as your CMS. Because at present WordPress is the most renowned and used content management system. This cms has spread this much that 43% of websites are now powered by WordPress. Because the free version of WordPress provides most of the handy plugins and themes for websites. There is also a paid version that is WordPress.com. But, it is not as useful as the free version.
📌 Best eCommerce plugins for your WordPress website 📌
3. Include eCommerce features in your website.
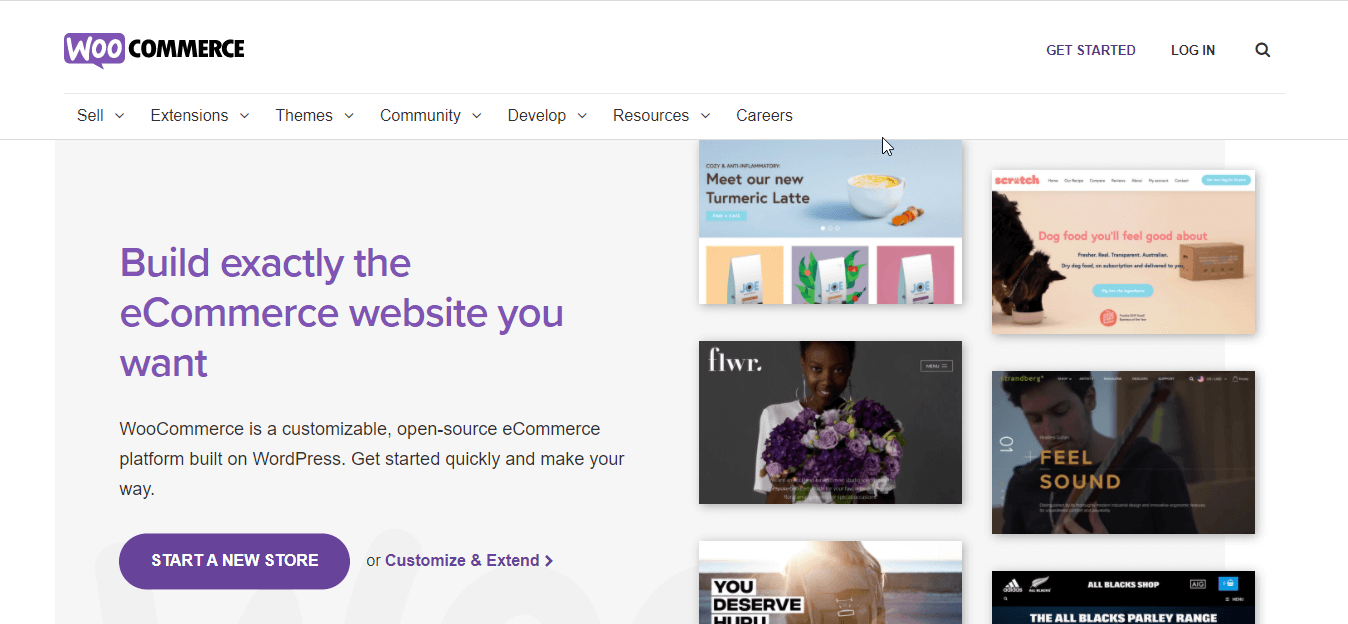
After choosing the CMS for your store, now install WooCommerce that will transfer your normal website into an eCommerce site. This will let you add products, categories, store locations, etc for your virtual shop. After installing it you need to set this up. Read how to set up WooCommerce in WordPress blog for it.
4. Add products to your store.
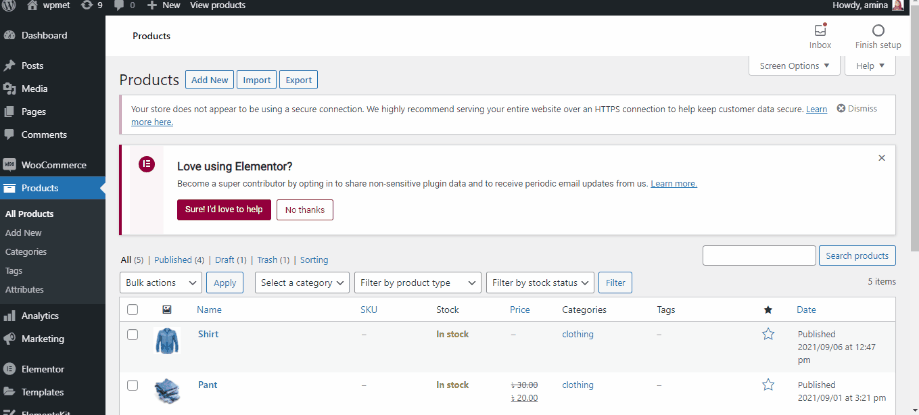
In this step, you need to add products to your store. Without adding products, you can’t build your websites. Add all products that you want to add to your virtual store. WooCommerce has converted your normal websites to an eCommerce site. So, you can add products, categories and start to build your online shop.
Now don’t know how to add products to WooCommerce? Check out how to add and manage products on WooCommerce.
5. Install Elementor for easy drag and drop website building.

After installing WooCommerce now you need an easy website builder. Elementor provides the easiest drag-and-drop website building facilities. Besides, there are lots of WooCommerce builders that need Elementor to customize WooCommerce pages.
6. Add WooCommerce builder to your eCommerce website.
It’s time to choose an eCommerce website builder for getting up to the bottom website building and customization options. You can undoubtedly depend on ShopEngine for that. ShopEngine is the most compatible Woocommerce builder that provides a to z options for your website customizations. Besides, you can include all must-have features in your online store. Don’t get yourself into trouble by using different plugins for different features. Because it will slow down your site.
ShopEngine will offer you all. Variation swatches, preorder, backorder, quick view, quick checkout, everything is possible with ShopEngine as it is the ultimate WooCommerce builder. Besides, its free version is also available. So, install ShopEngine to build eCommerce websites from scratch and customize it the way you like.
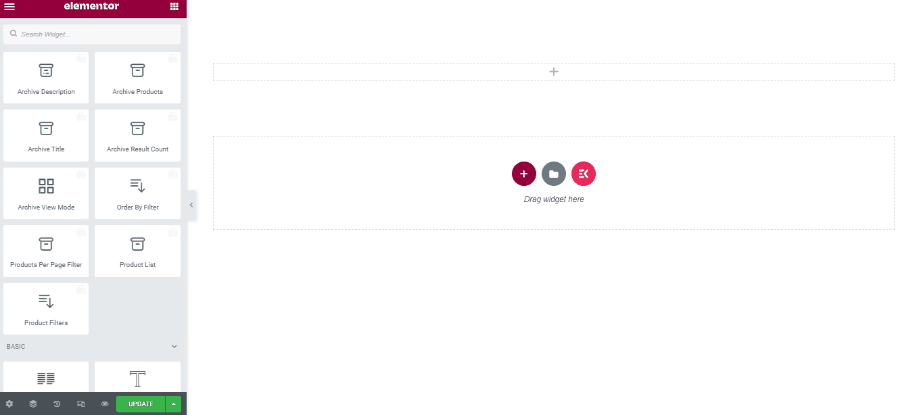
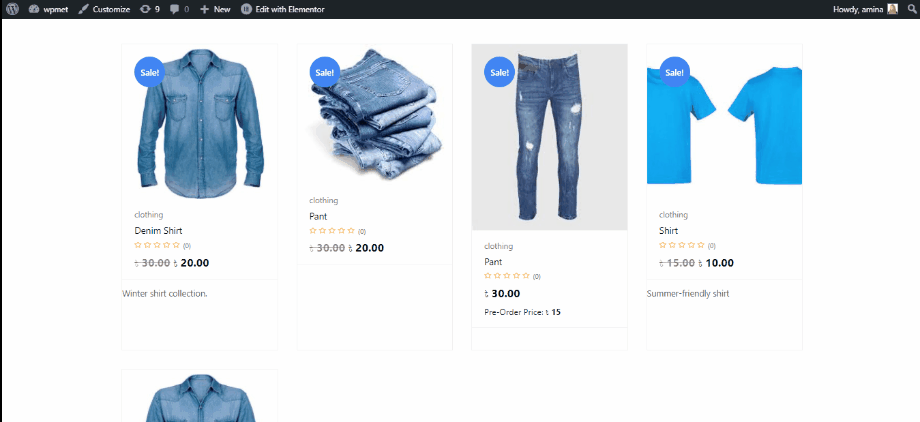
7. Guide to build and customize your shop page:
The shop page is one of the most important pages of your website where you will show all your products to your customers. That’s why this page needs to be simple, attractive and well organized. ShopEngine is the most suitable tool for building well-organized WooCommerce pages. It provides ready-made templates for your eCommerce pages.
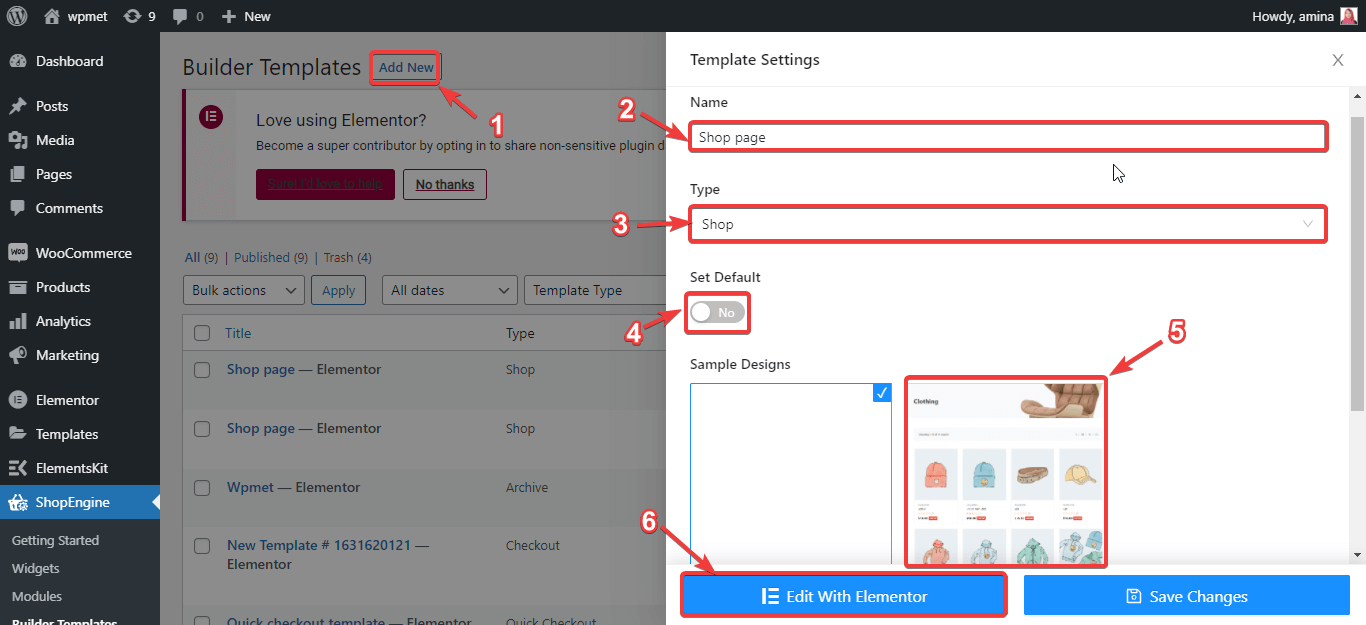
To build your shop page with ShopEngine, you need to create a shop page template. For that, visit your dashboard and go to ShopEngine >> builder templates. After that, click on the add new button then put your shop page name. Then choose shop type and enable default if you want to use default design. Finally, choose sample designs and press the edit with Elementor button.
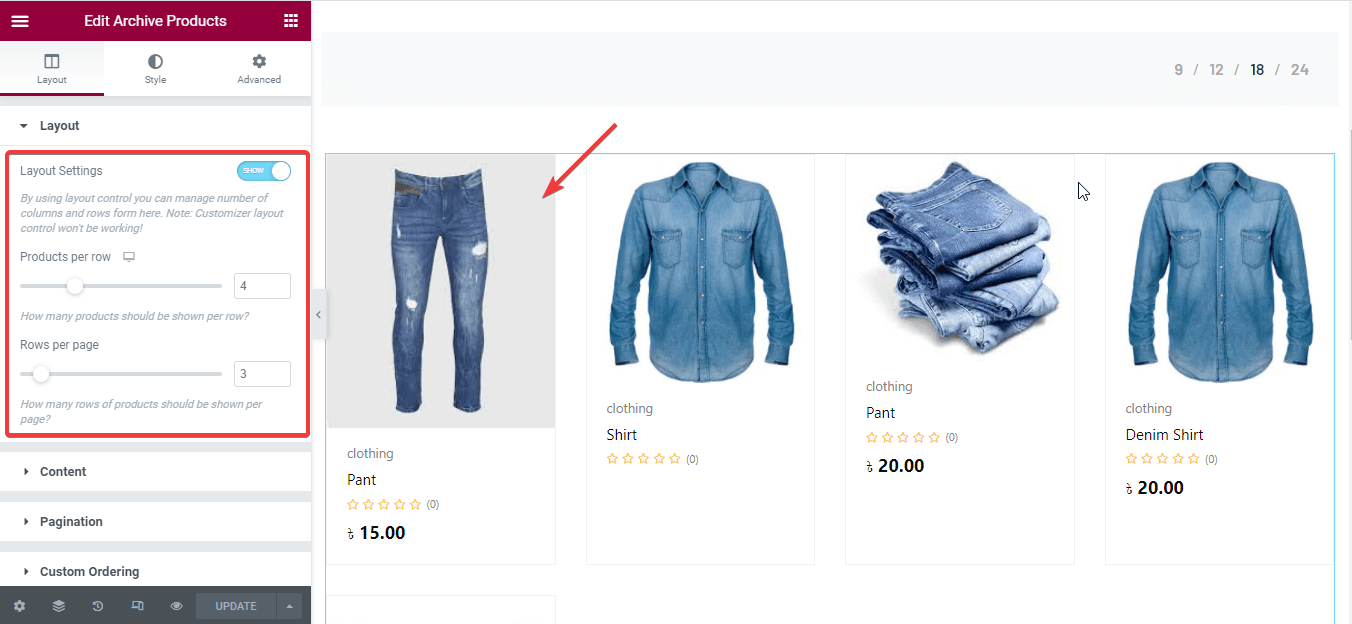
This Edit with the Elementor button will redirect you to another page that is your default shop page. Here you can make all customization by simply clicking on the items. For example, click on the products then you will see customization options on the left side. From here, you can reset:
- Products per row.
- Rows per page.
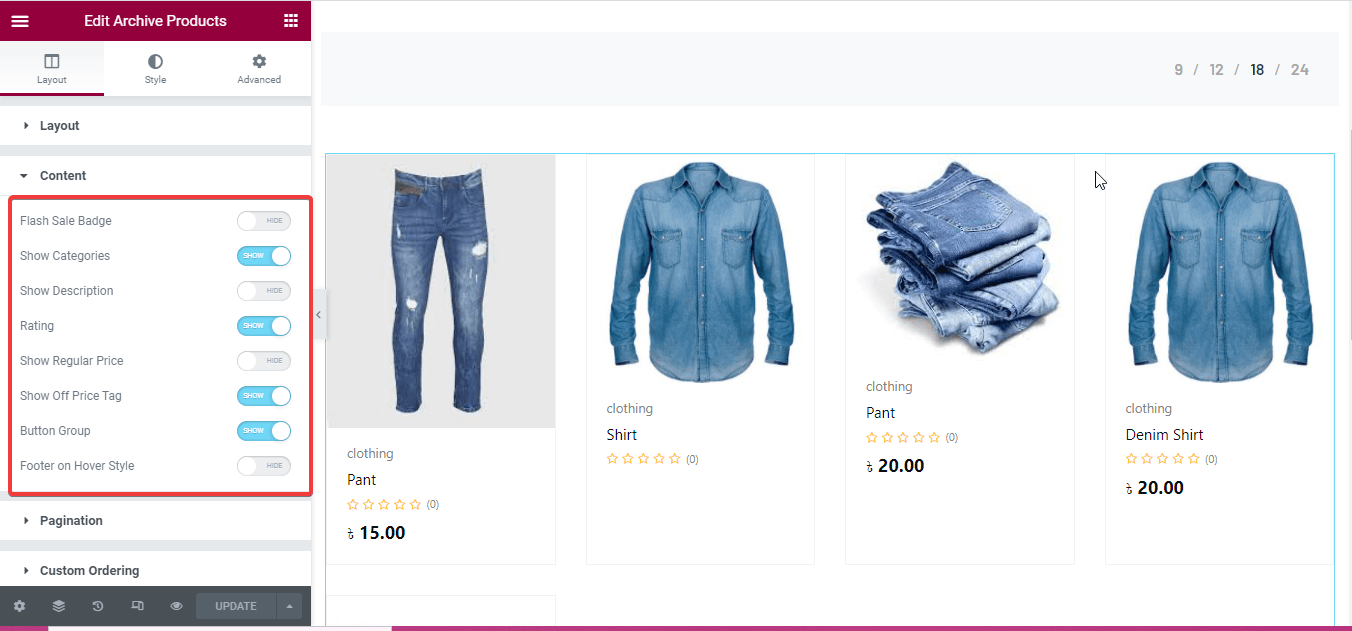
You can also show or hide flash sale badges, categories, descriptions, ratings, regular prices, off-tag prices, button group, etc.
After that, customize your shop page products more by making changes to the following fields:
- Product container.
- image.
- categories.
- Titles.
- Price.
- Off tag.
- Add to cart button.
- Rating.
- Button group.
- Pagination.
- Global font.
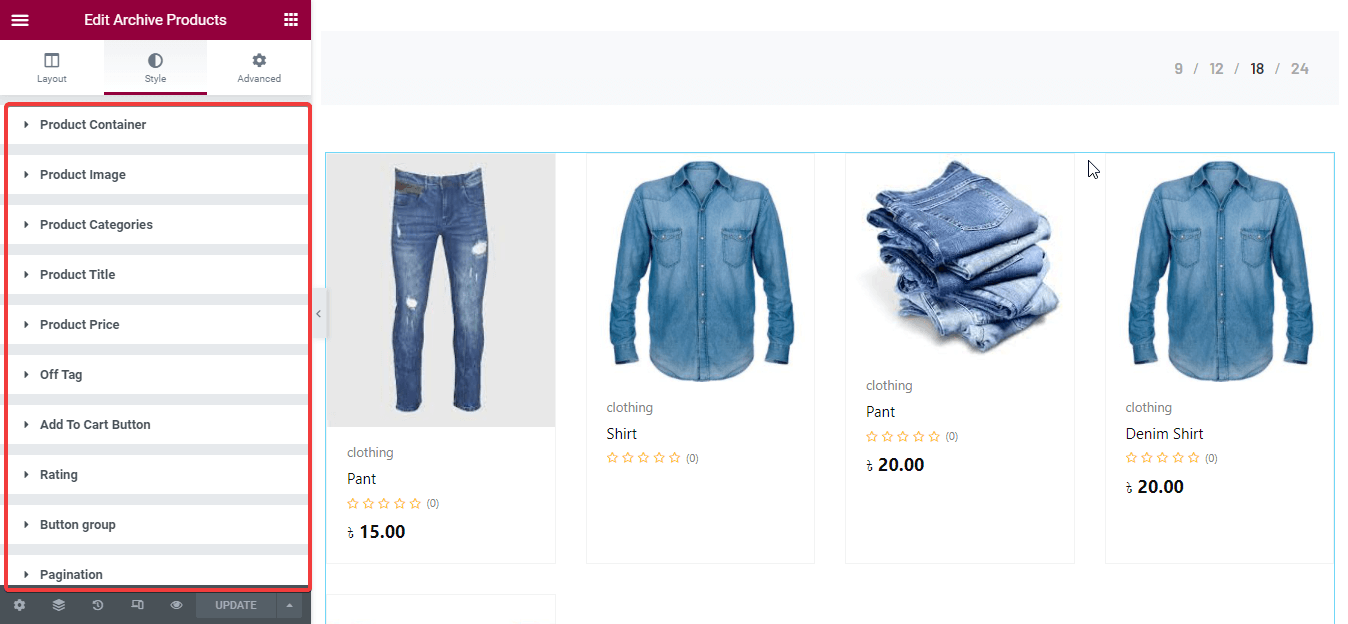
Like this, you can customize every element of your shop page with widgets of ShopEngine. After making all changes, finally press the update button on the left side. Then your shop page will become live.
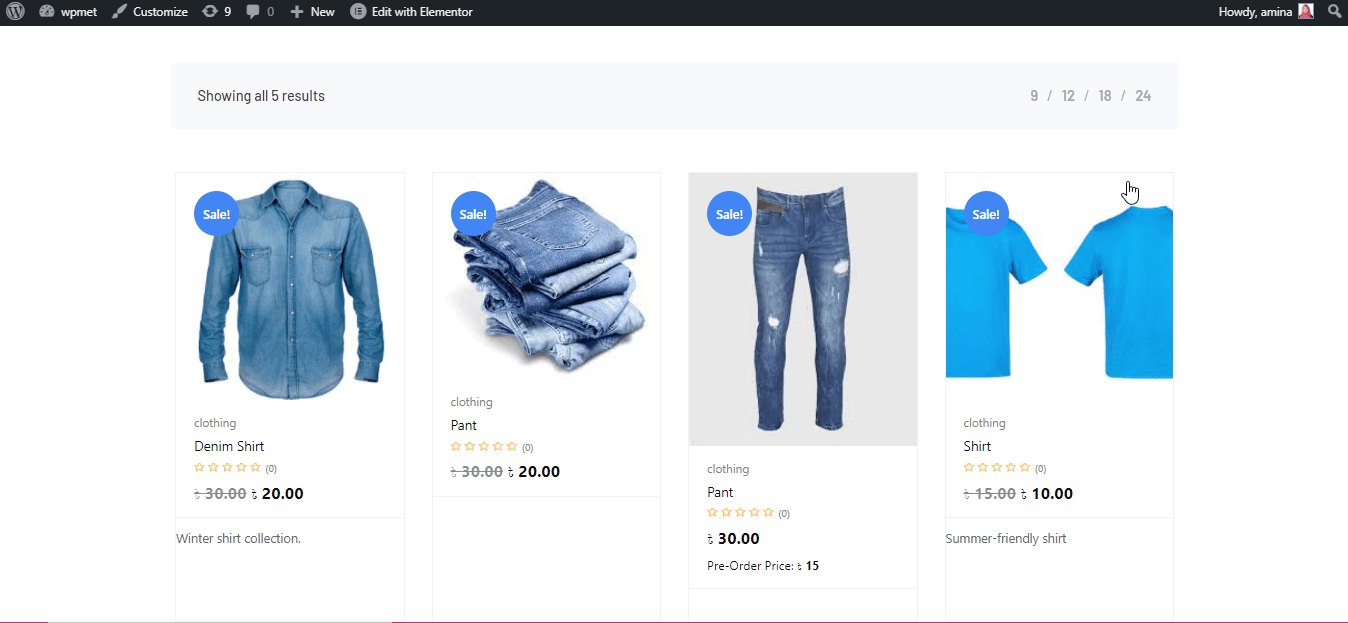
Customized shop page with ShopEngine’s ready-made template
Need more help to build your shop page. You can check how to customize the WooCommerce shop page blog for more detailed guidelines.
8. Build and customize your archive page.
In WordPress, the least used template is the archive page template. What can be the reason behind this? It’s because people still didn’t understand the benefit of using this page. The archive page will help your customers to easily navigate your website. They can find previous posts without spending lots of time. ShopEngine provides a template for your archive page as well. With this template, you can easily build your archive page by dragging and dropping your archive page widgets to your archive template.
For using this, you need to create an archive page template like you have created the previous shop page template. Read this archive template creating documentation for a complete guide. After creating your archive page template, now click the edit with Elementor button. This will redirect you to another page where you need to drag and drop the required archive widgets that you want to use in your archive page. Drag and drop your archive page widgets like the gif. You can also customize these widgets like you have customized your shop page.
Customized archive page with ShopEngine’s readymade template
Check your archive page by going to the product categories like below.
Check how to create an eCommerce website for a more detailed guide.
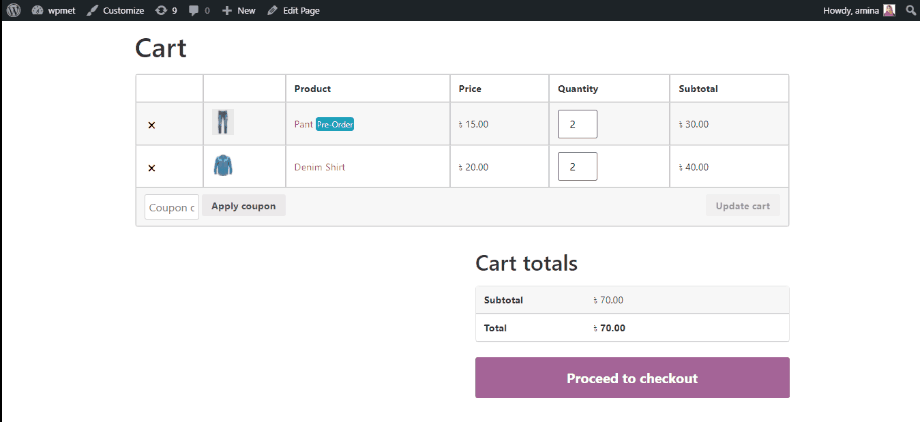
9. Create your cart page.
Cart page is an essential page of your website where customers gather stuff they want to buy. After gathering their stuff here they proceed to checkout. It contains great importance. Also, your cart page needs to work smoothly. Now creating, customizing, and managing a website is not hard work to do because of ShopEngine’s ready-made cart page template. Like other WooCommerce pages, you need to create a cart page template before starting to build your cart page. Check cart page template creating documentation for guide.
After that make sure you have enabled all cart page widgets and save the changes.

After that, edit your cart page template with Elementor like below and finally, update the changes.
You can also customize your cart page more by dragging and dropping cart page widgets.
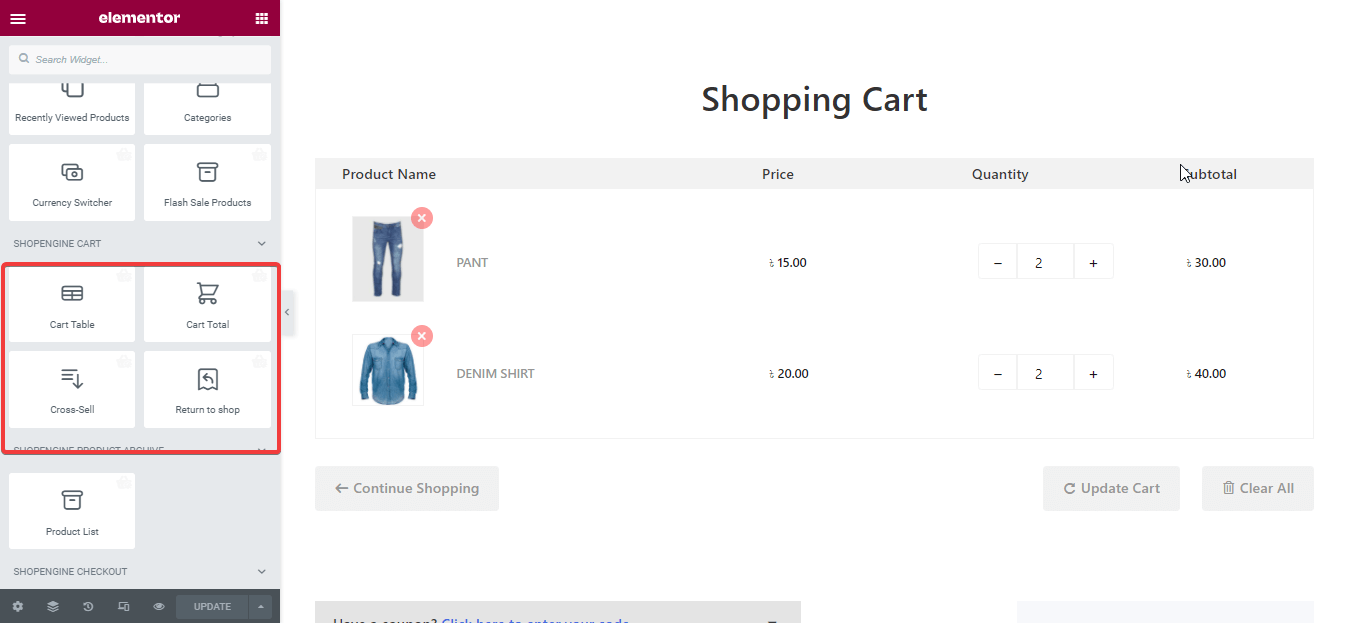
Customized cart page with ShopEngine’s cart page template
Note: Want more descriptive cart page creation and customization options? Check how to create and customize a cart page blog.
10. Build and customize your checkout page.
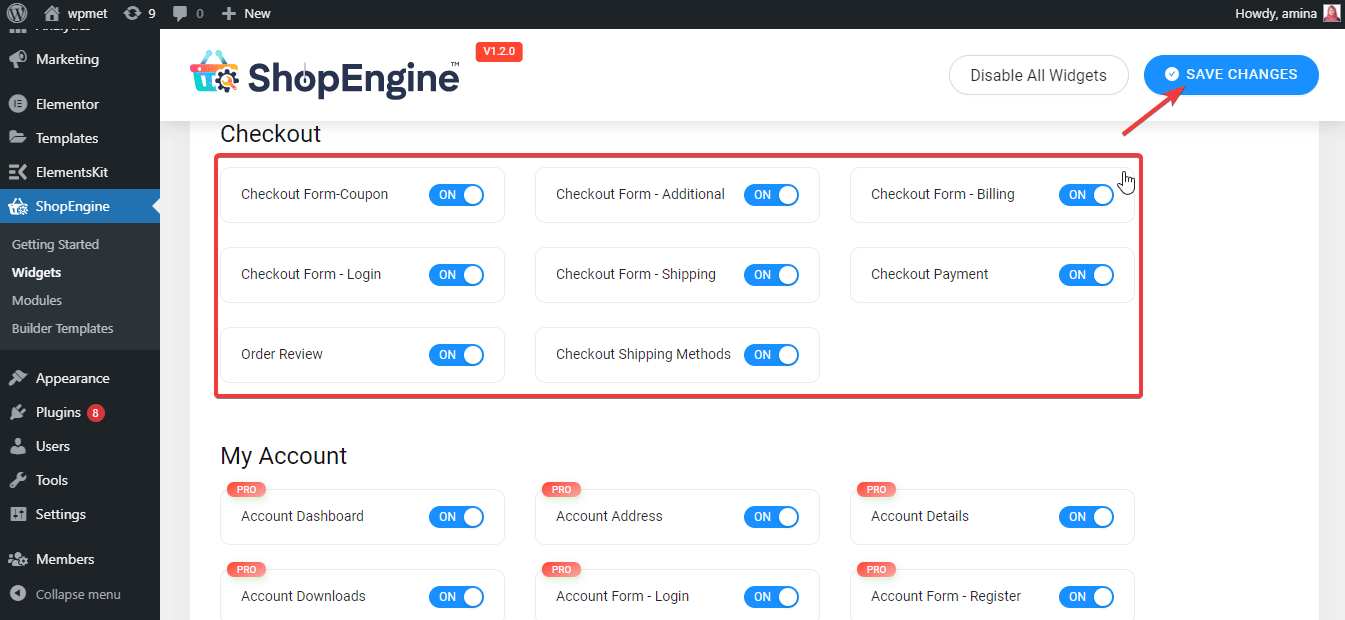
Now you need to build your checkout page for your online store. A checkout page is a page where your customers mainly add billing details and place orders. Without a smooth checkout system, your customers will be unable to place orders. This will ruin all your business efforts. At the time of building a checkout page with ShopEngine, you need to ensure all your checkout widgets are enabled. To check it visit ShopEngine >> widgets then enable your checkout widgets and press the save changes button.
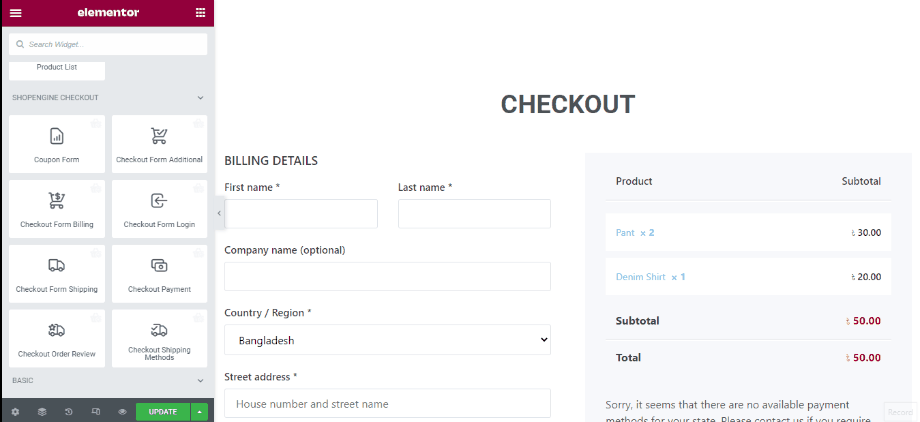
Now you need to create a checkout template for creating a checkout page same as you have created the shop page template. You can also read the checkout page template creating documentation for more info. Click the edit with the Elementor button of the template. This will redirect you to another page where you can customize your checkout page template like below. Finally, click on the green update button.
With available checkout widgets, you can customize your checkout page even more. For example, you can add a coupon system to your checkout page. Finally, update it.
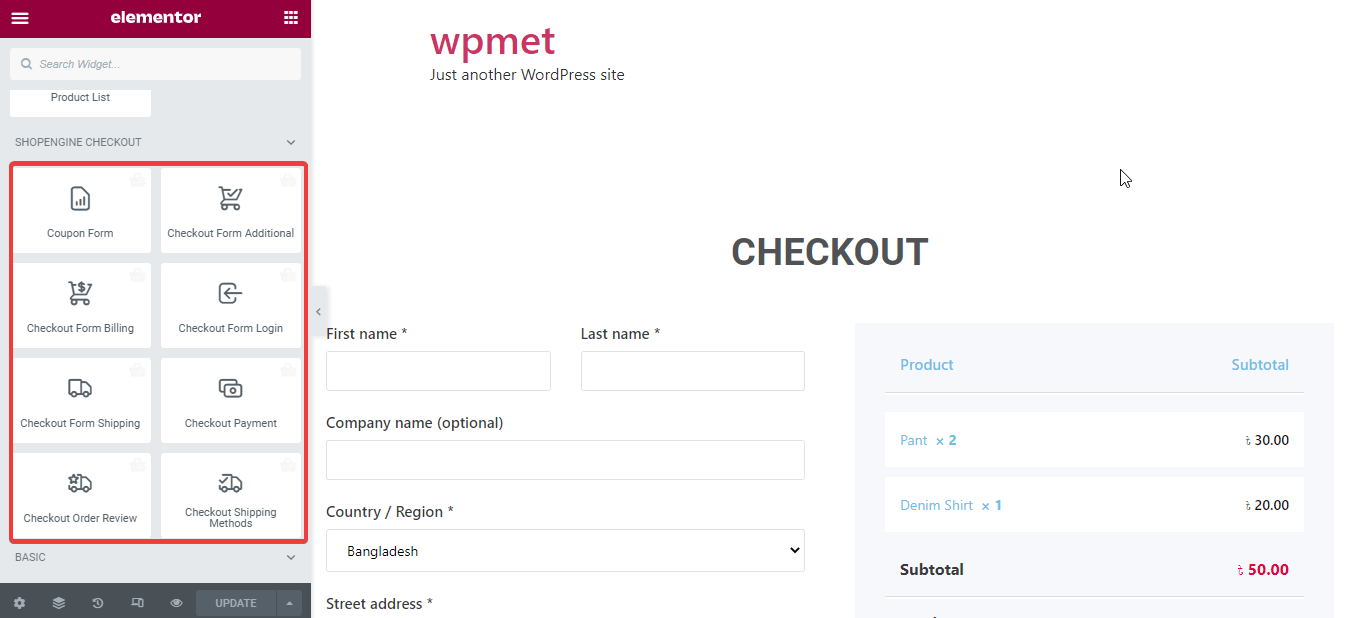
Customized checkout page with ShopEngine’s checkout widgets
Here is the outlook of your checkout page:
Need more help for building up your checkout page? Read how to customize the checkout page blog.
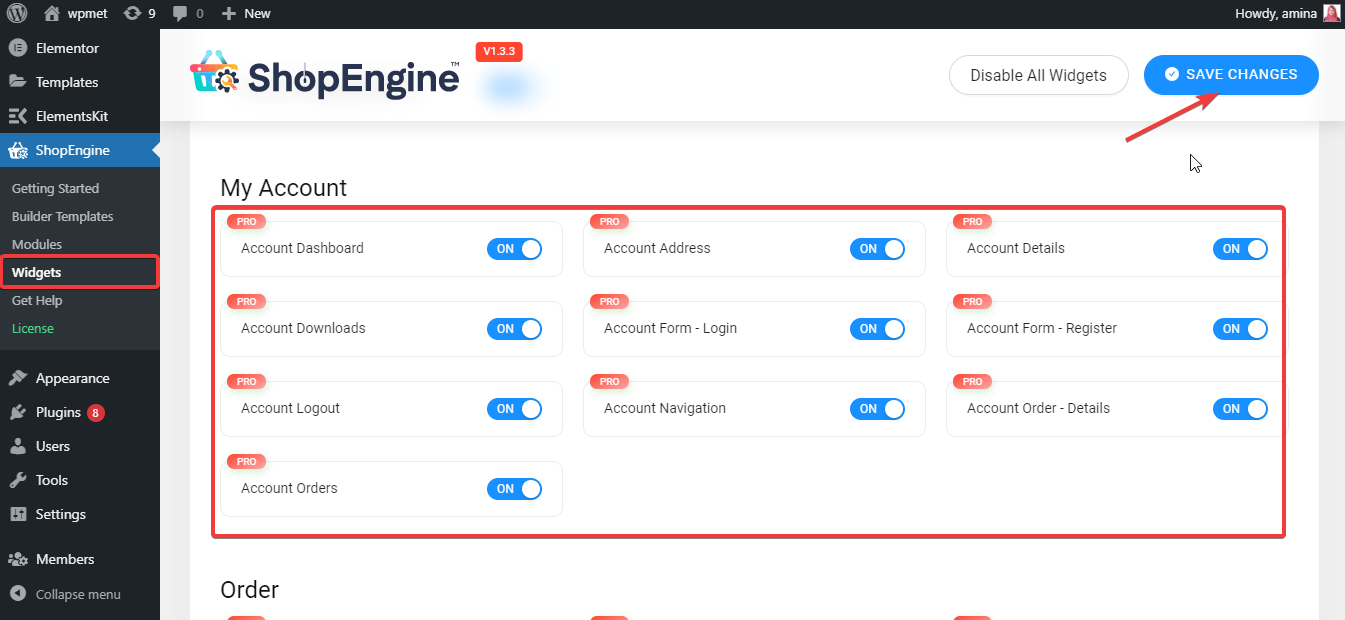
11. Create a customized my account page.
My account page lets customers edit their profiles and customers also log in to your sites by using their email and password. ShopEngine also provides templates for creating my account page. Before using this template to add my account page, enable all account widgets, then press the save changes button.
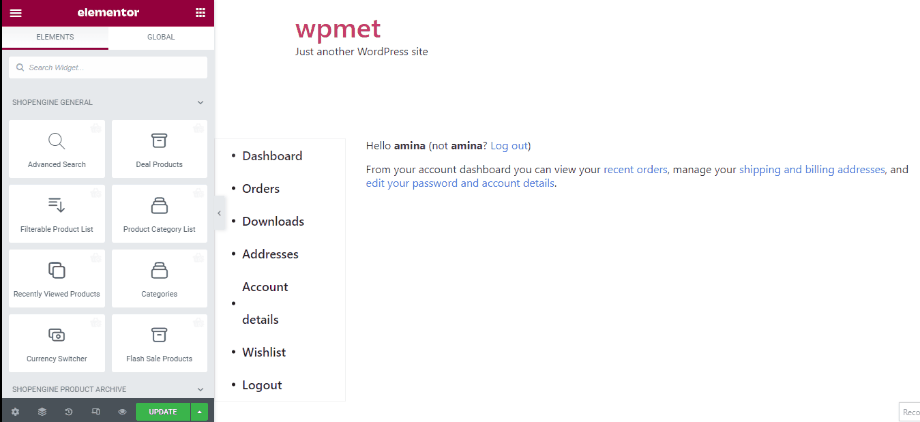
Now you need to create an account dashboard template like shop, checkout, and other page templates. For more info, you can check my account template creating documentation. After that, click on the edit with Elementor button and it will redirect you to another page. On this page, you can customize your account dashboard as your desire. After customization click on the green update button.
Customized my account dashboard with ShopEngine’s pre-built template
Here your customized account dashboard is all set. Have a look at your account dashboard page:
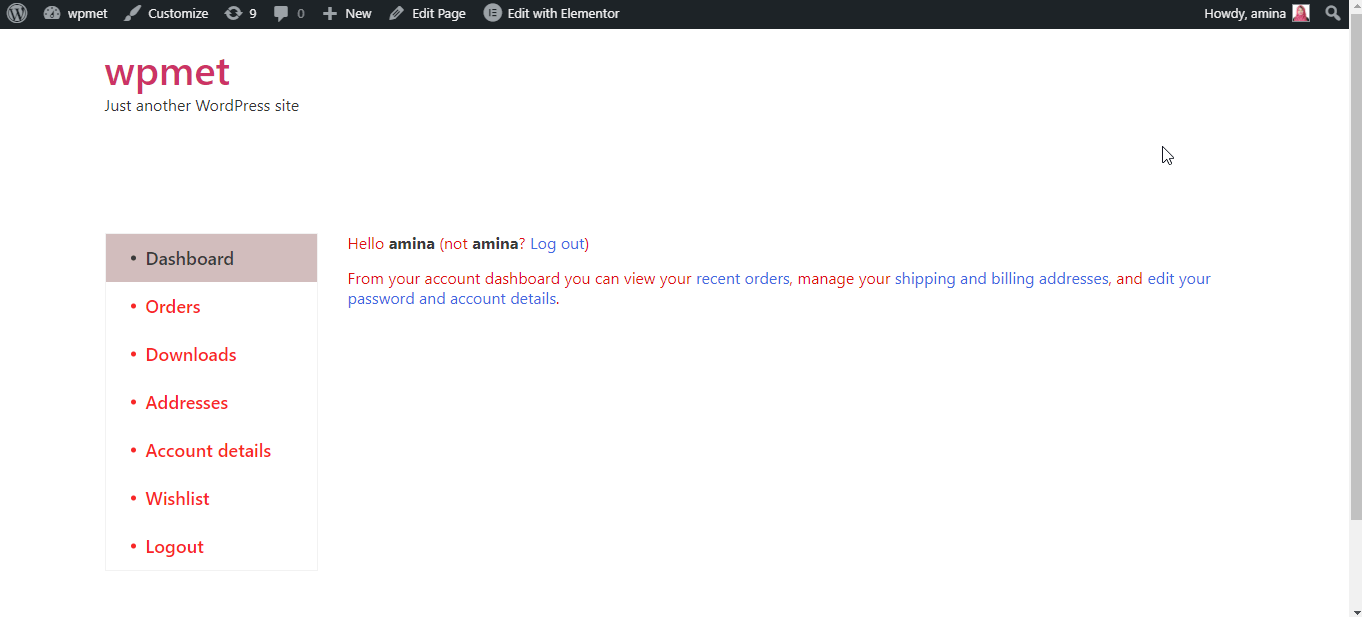
Like the account dashboard, you can also create my account orders, my account details, my account login, my account downloads, my account order details, my account address pages. For more detailed guide you can check how to customize WooCommerce my account page.
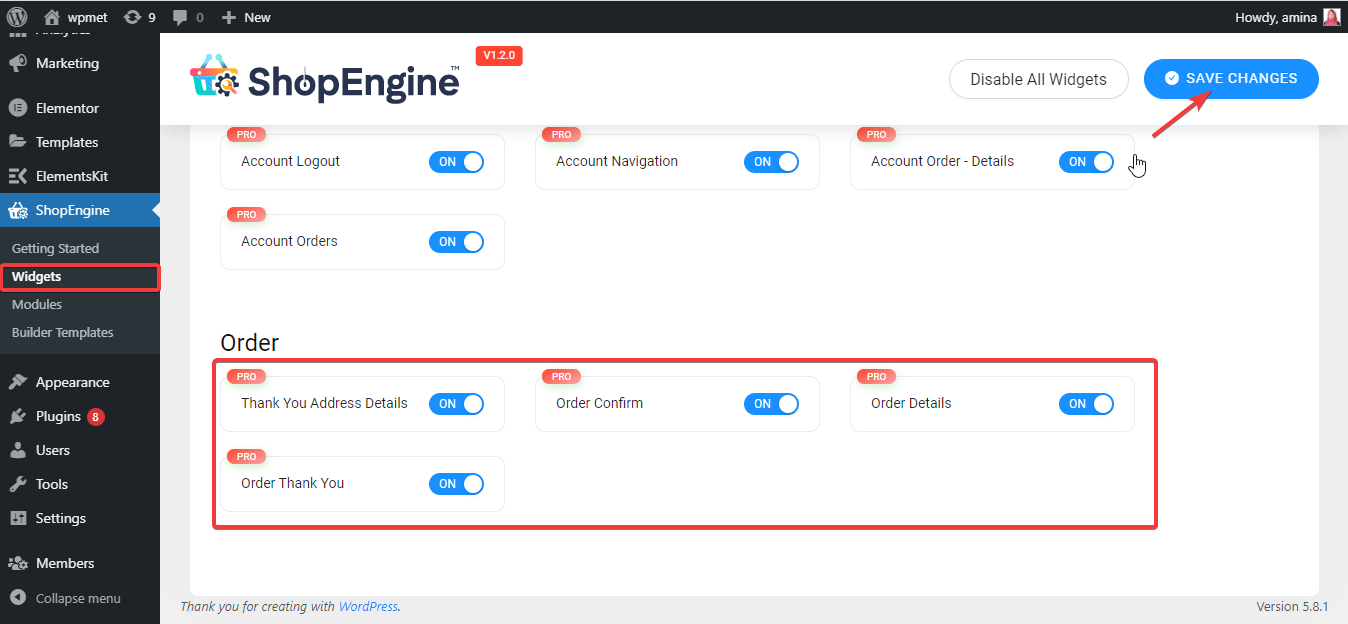
12. Build Thank you page for your eCommerce store.
Thank you page will help your customers to get a better user experience. When your customers know that you value their purchase, email submission, or other actions then their satisfaction will also increase. Basically, a thank you page is a gratitude page that was sent to customers after purchasing, email submission, or other actions. Before creating this thank you page, you need to ensure the below-marked widgets are active. If not then enable those widgets and press the save changes button.
After that, you need to create a thank you page template. Add a thank you page template like other templates. If you are confused then you can check thank you page template creating documentation. After creating a thank you page template, click on the edit with Elementor button. It will redirect you to another page where you can customize all the elements like below. Then, click on the update button to make all your customizations live.
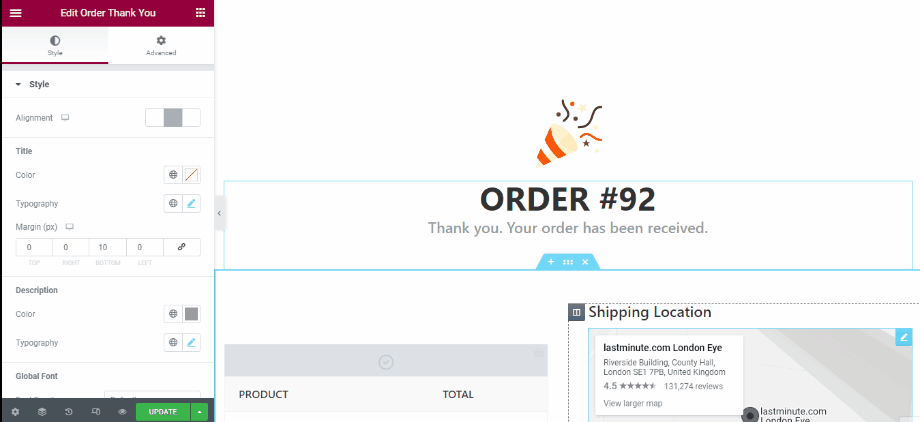
Customized thank you page with Shopengine’s thank you page template
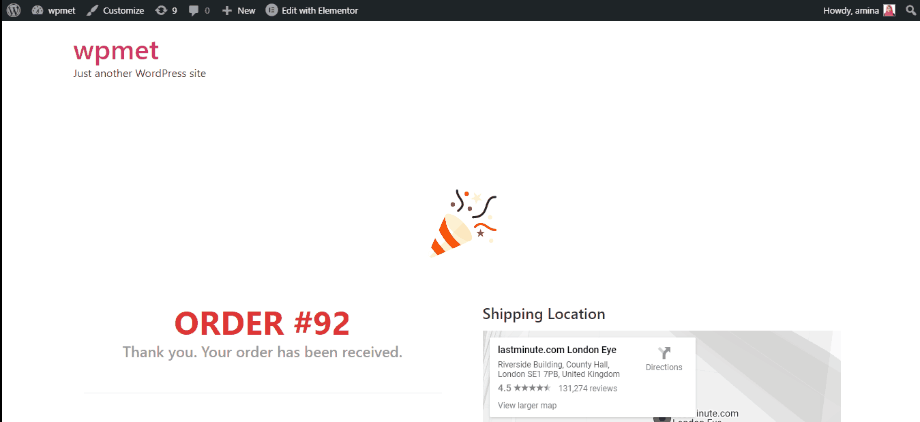
Here is the thank you page that you have built with ShopEngine:
Start your eCommerce website
Building an eCommerce website from scratch is a challenging task. But, it is not impossible. You can even build one within a few hours if you just find the right CMS and tools. Here in this blog, I have shown you the right cms and tools that will help you to build any eCommerce site such as a t-shirt business website, cleaning site, etc. within a few hours and with less effort. Because WordPress is the most recognized and user-friendly CMS and WooCommerce, Elementor, and ShopEngine are the best tools to create your eCommerce website.
You can always use another option but make sure that option actually helps your business to function and grow properly. Besides, don’t stop if you face barriers while running your business. Because sticking to a business will also help you to create a successful eCommerce website.

Leave a Reply