Are you looking for an easier way to add data to your WordPress table than manual entry?
If yes, you should opt for CSV import or Google Sheet Integration because it will make the job easy.
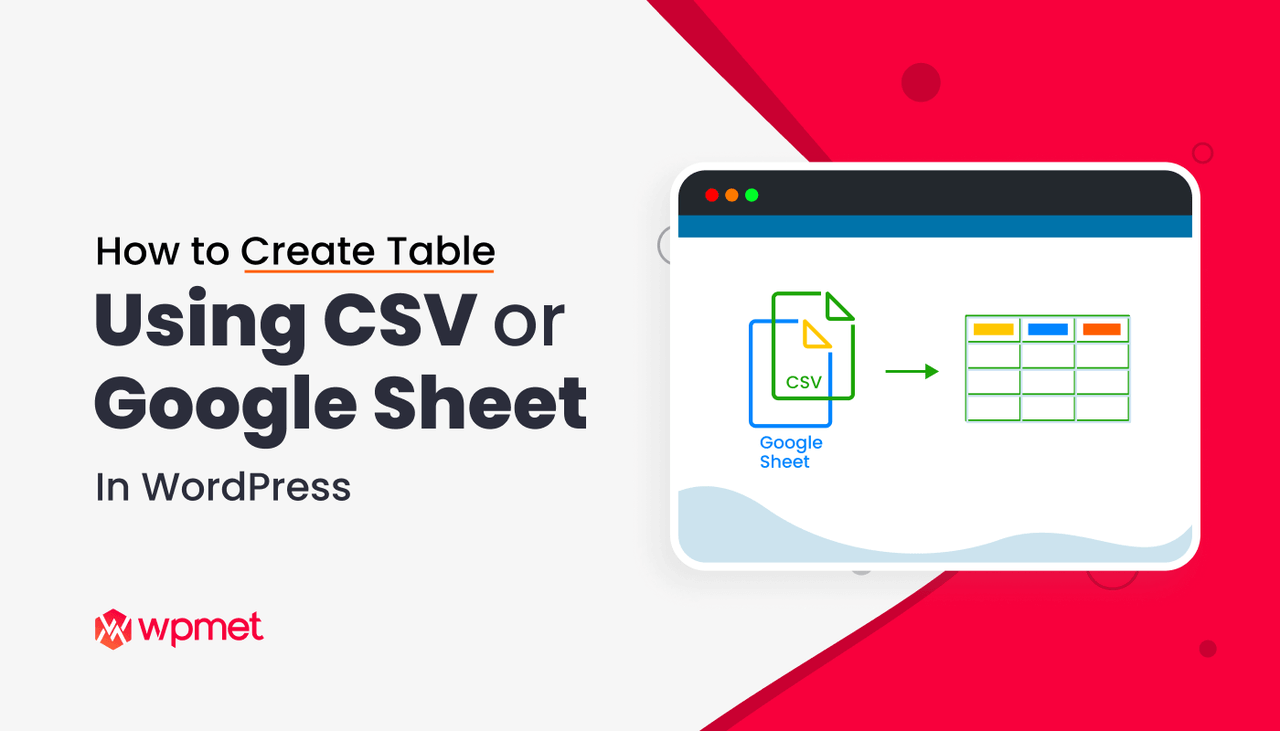
But how to create a table using CSV or Google Sheets in WordPress? Well, Since it’s WordPress you can easily do this using a plugin.
In this article, I will show you how you can easily create tables using both CSV data and Google Sheets with the same WordPress plugin.
So, let’s dive in…
What are the Required WordPress Plugins?
To follow along with this tutorial, you will need WordPress plugins mentioned below:
Once you have downloaded and activated the required plugins, move on to the next section.

How to create a table using CSV or Google Sheet in WordPress: Step by Step
Go through the steps to learn how to import data to your WordPress table using both CSV and Google sheet. It’s a 7 steps guide.
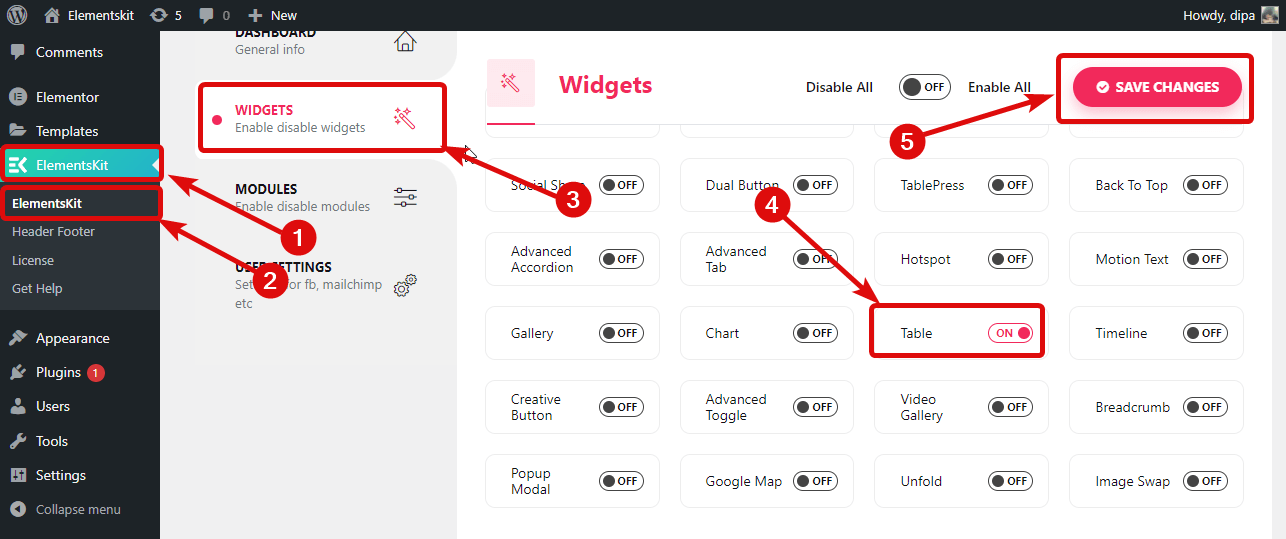
Step 1: Enable the Table Widget
To use the table widget by ElementsKit, you need to enable it from the WordPress dashboard. Navigate to ElementsKit ⇒ ElementsKit ⇒ Widgets ⇒ Table Widget, then turn on the option and click on Save Changes to update.
👉👉 You can also checkout our blog on How to add modal popup in WordPress in just 3 steps.
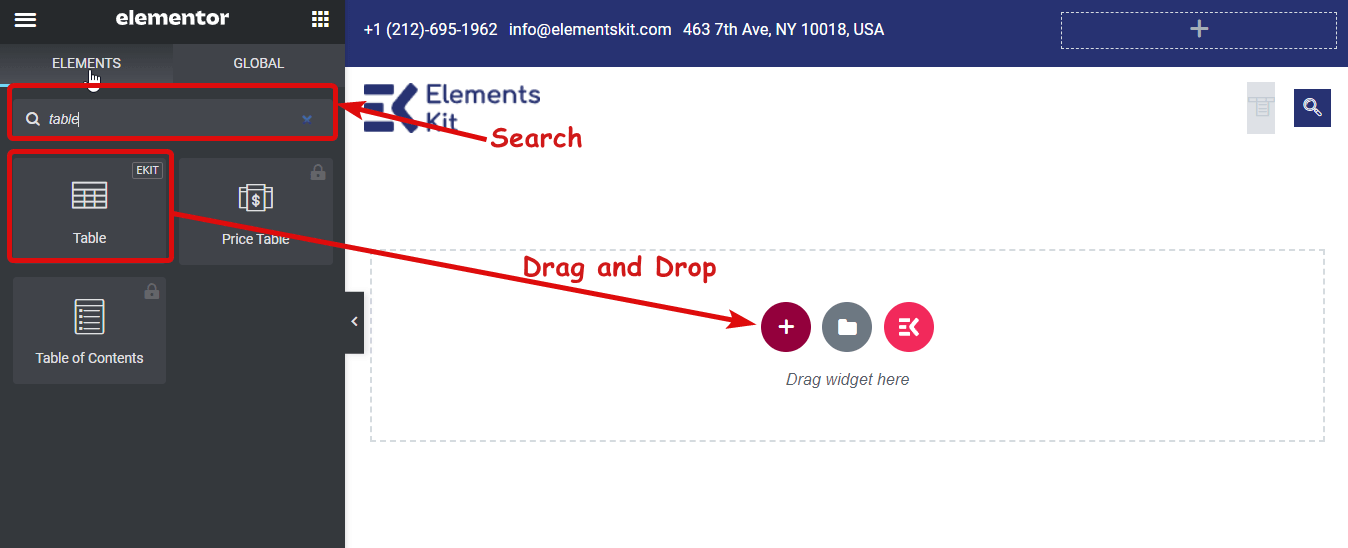
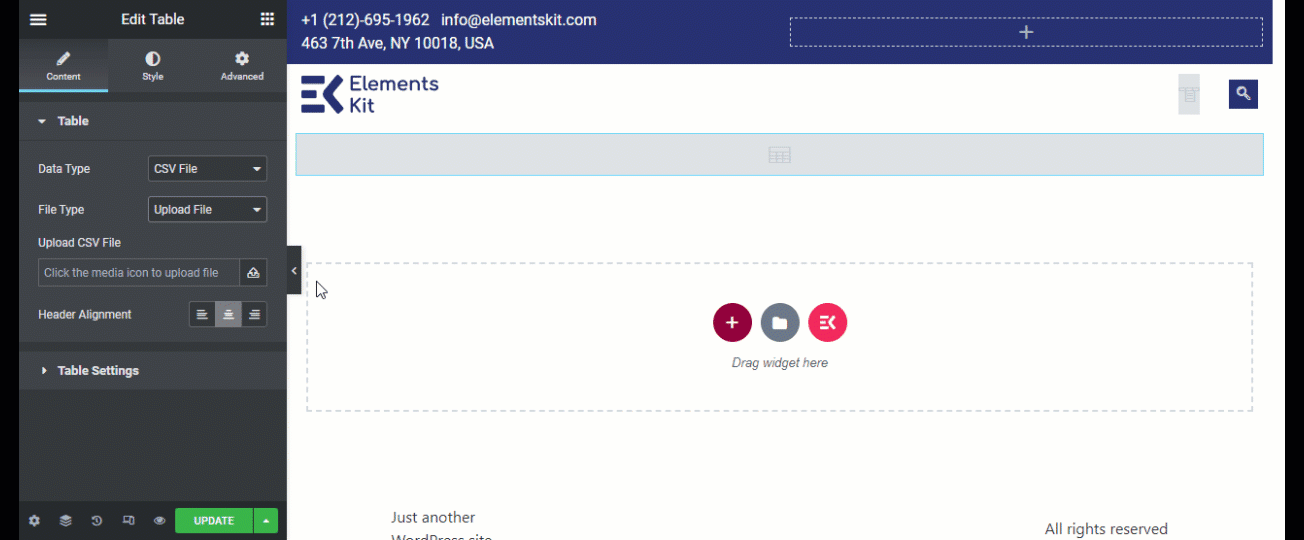
Step 2: Drag and drop Table widget of ElementsKit
Now, Navigate to All Pages ⇒ Pages and Click on Edit With Elementor.

On the left bar, Search for Table. Once you find the Table widget with the Ekit icon on the top right, drag and drop to the main page.
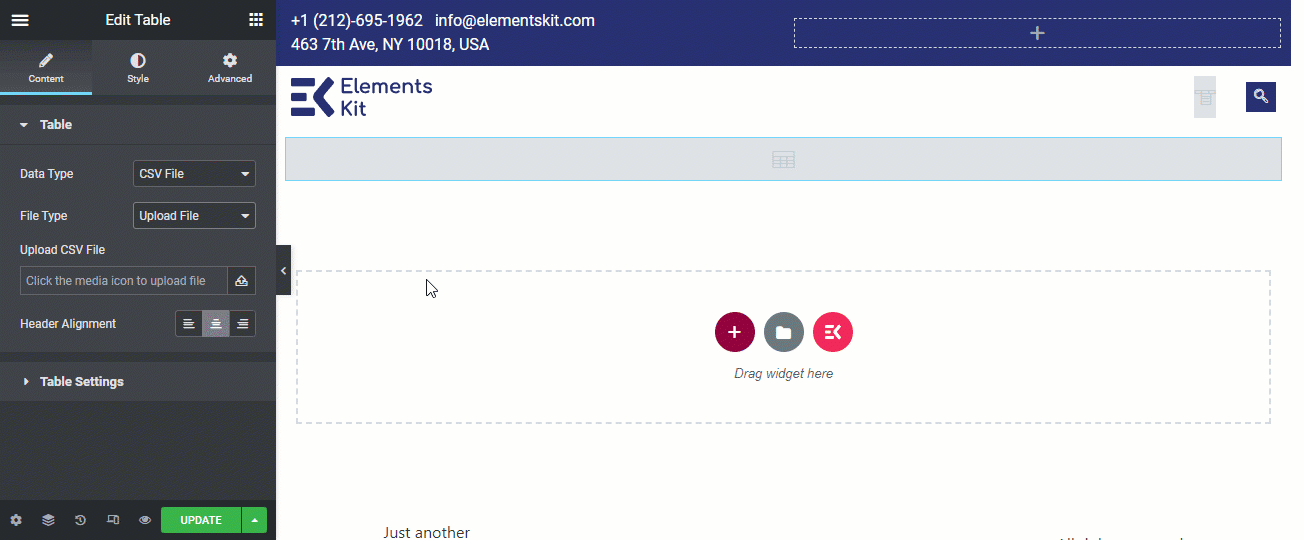
Step 3: Choose Data Type as CSV from settings
Now from the Content Settings Tab, choose data type as CSV file. You can choose three file types; Upload File, Remote File URL, and Google Sheet Viewer URL.
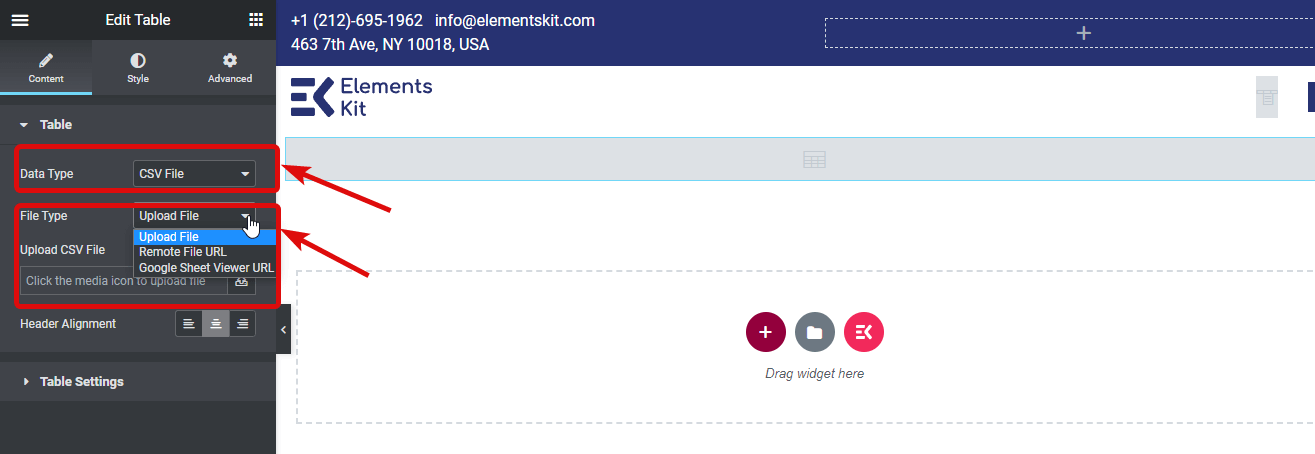
Step 4: Upload CSV/Google Sheet
Have a look at three processes of uploading or selecting a CSV file. You can use the option you prefer.
✅ Upload CSV file:
To upload a CSV file, click on the upload icon, upload the file and click on insert. If you already have a file uploaded to the server, then find the file and click on insert.

✅ Upload CSV file located in remote server:
You don’t have to upload a CSV file to the server as your website is hosted at. Using the table widget of ElementsKit, you can also display data using a CSV file that’s located on a different server. For that, choose the File Type as remote file URL and On the Enter a CSV File URL input field provide the location of your CSV file.
✅ Upload data via Google Sheet:
To use a Google sheet data in your WordPress table, choose the File Type as Google Sheet Viewer URL and enter the Google Sheet URL.
🔔 Note: The google sheet URL should have Anyone on the internet with this link can view access.
🔥 Great thing about using Google Sheets on the table widget is if you update information on the Google sheet file, your table data will get automatically updated.
After you upload data using your preferred data, choose the Header Alignment. Header alignment can be left, right, or center.
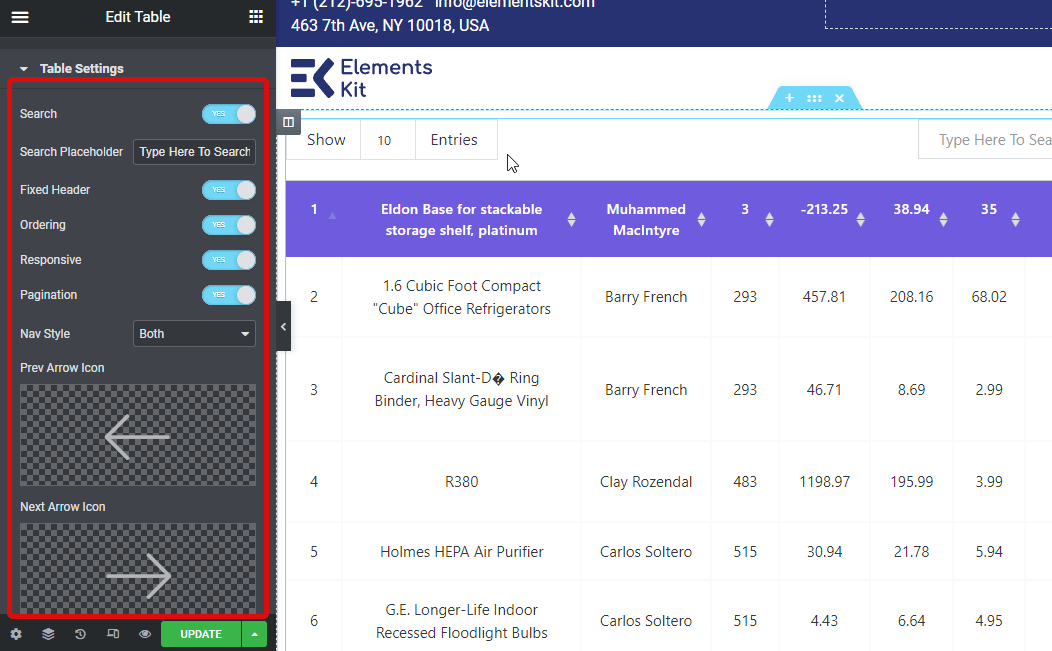
Step 5: Customize table settings
Now that you have your data, it’s time to customize the table settings: As part of the table settings you get the following options:
- Search: You can enable or disable the search bar option.
- Search Placeholder: Customize the text of the search placeholder using this option.
- Fixed Header: You can set the header fixed by enabling this option.
- Ordering: Turning on this option will enable the viewer to change the order of each column.
- Responsive: This option will make the table responsive.
- Pagination: Enable in order to add a pagination option to your WordPress table.
- Nav Style: You can choose the nav style as Arrow, Text, or both. Depending on the choice you can set the arrow icon and texts.
- Info: This option will add an info section on the bottom left portion of your table.
- Entries: Turn this option to make the entries visible.
- Entries Text: You can change the entries text here but it’s not recommended.
- Show item per page: Choose how many rows of data you want to display per page.
👉👉 Looking for a cool review plugin to add reviews to your website? Checkout the Best WordPress Review Plugins (Ratings and Schema)
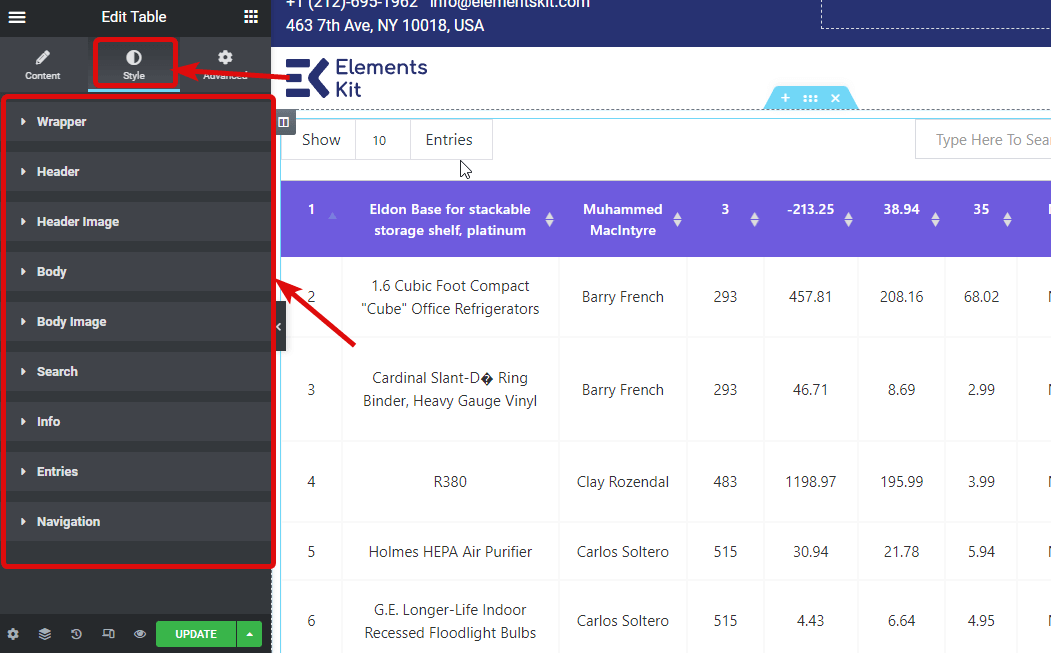
Step 6: Customize Style Settings
If you want to change the styles of the table, move to the Style tab and you will find various options to change the style of Wrapper, Header, Header Image, Body, Body Image, Search, Info, Entries and Navigation .
Step 7: Update and preview
After making all the changes click on update and click on the preview icon to see the final table with CSV data.
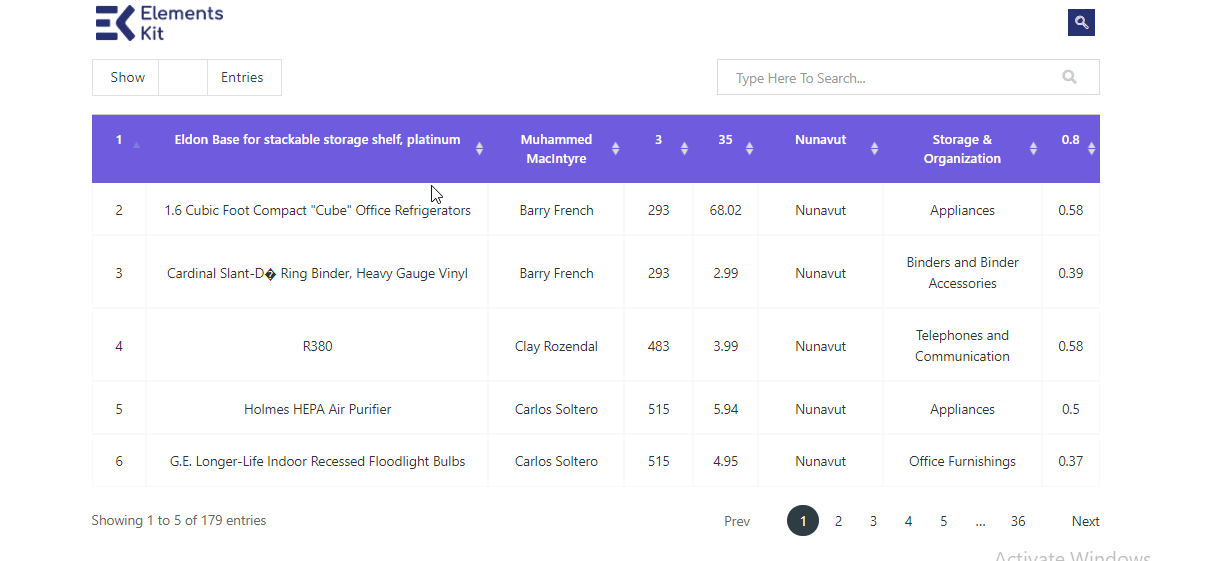
Here is a sample of how the table will look like
👉👉 You can also checkout our blog on How to Create Tables in WordPress with TablePress
Final Words
Now you know how to create a table using CSV or Google Sheets in WordPress and display tons of data in just a few steps. The best part about ElementsKit is along with the easy CSV import option, it also provides a lot of customization. So, use the customization options to change the look and feel of your WordPress table to your taste.
Leave a Reply