

Are you contemplating whether you should edit the WooCommerce product category page in Elementor?
Well, if you are, then I would strongly recommend you should. Customizing the WooCommerce Archive page and optimizing it can boost your sales.
But the question is how to customize WooCommerce product category page in WordPress?
Well, you sure don’t have to do any coding to customize WooCommerce category page if you follow the process shown in this blog.
In this article, you will learn how to customize WooCommerce category page without any coding. In addition, you also get to know how you can create different custom archive templates for each category individually. And also ways you can optimize your archive page to boost conversion rate.
So, keep reading….
Why customize WooCommerce category pages
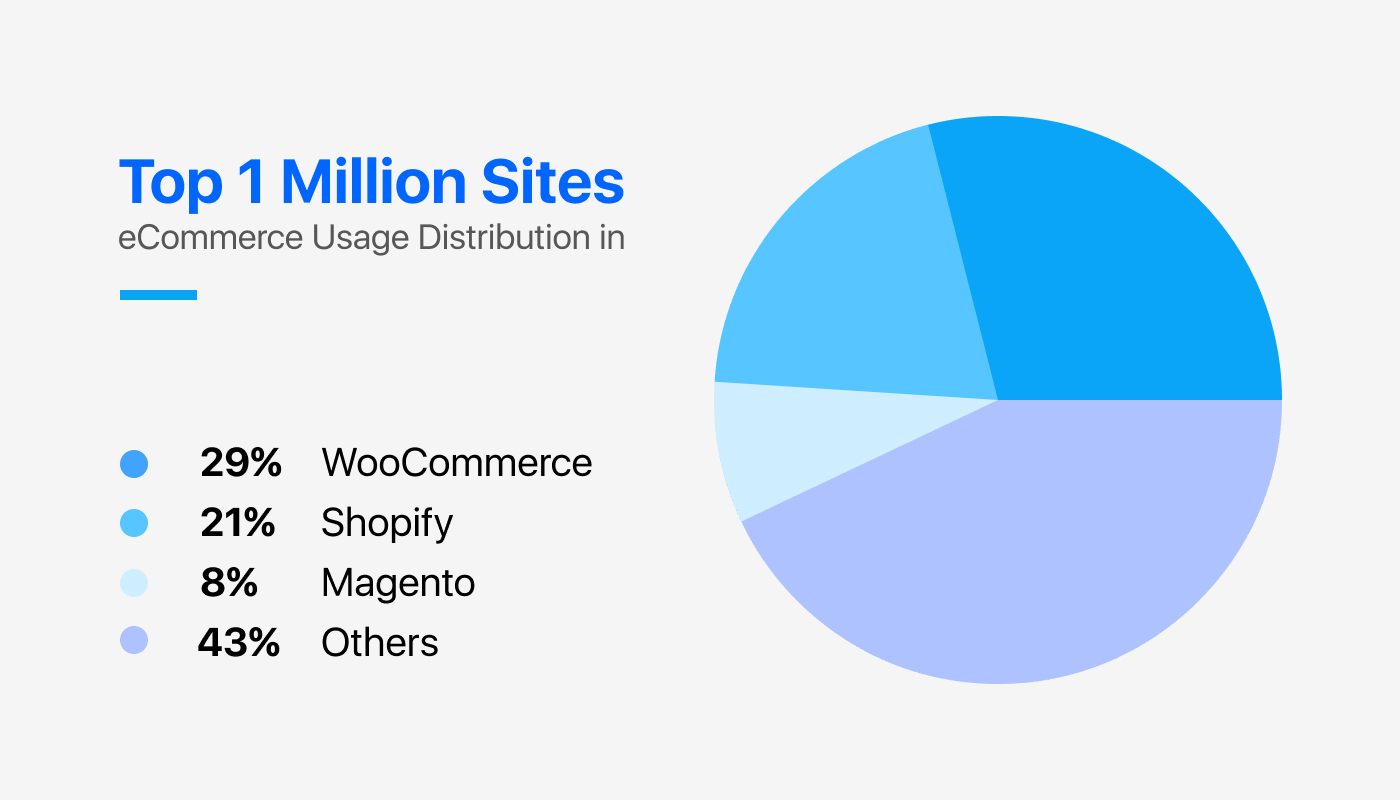
According to builtWith, WooCommerce is used by over 29% percent of the top 1 million websites. While this popularity indicates the credibility of WooCommerce as an eCommerce tool, it also reflects that thousands and thousands of websites use the same default layout WooCommerce has to offer.
And if you think using the default WooCommerce page will only minimize your website’s chance to stand out in the crowd, then you are wrong. There are other reasons that you need to consider as well. To know about these other reasons, let’s have a look at the WooCommerce default category page with the WordPress Twenty Twenty-Two theme activated.
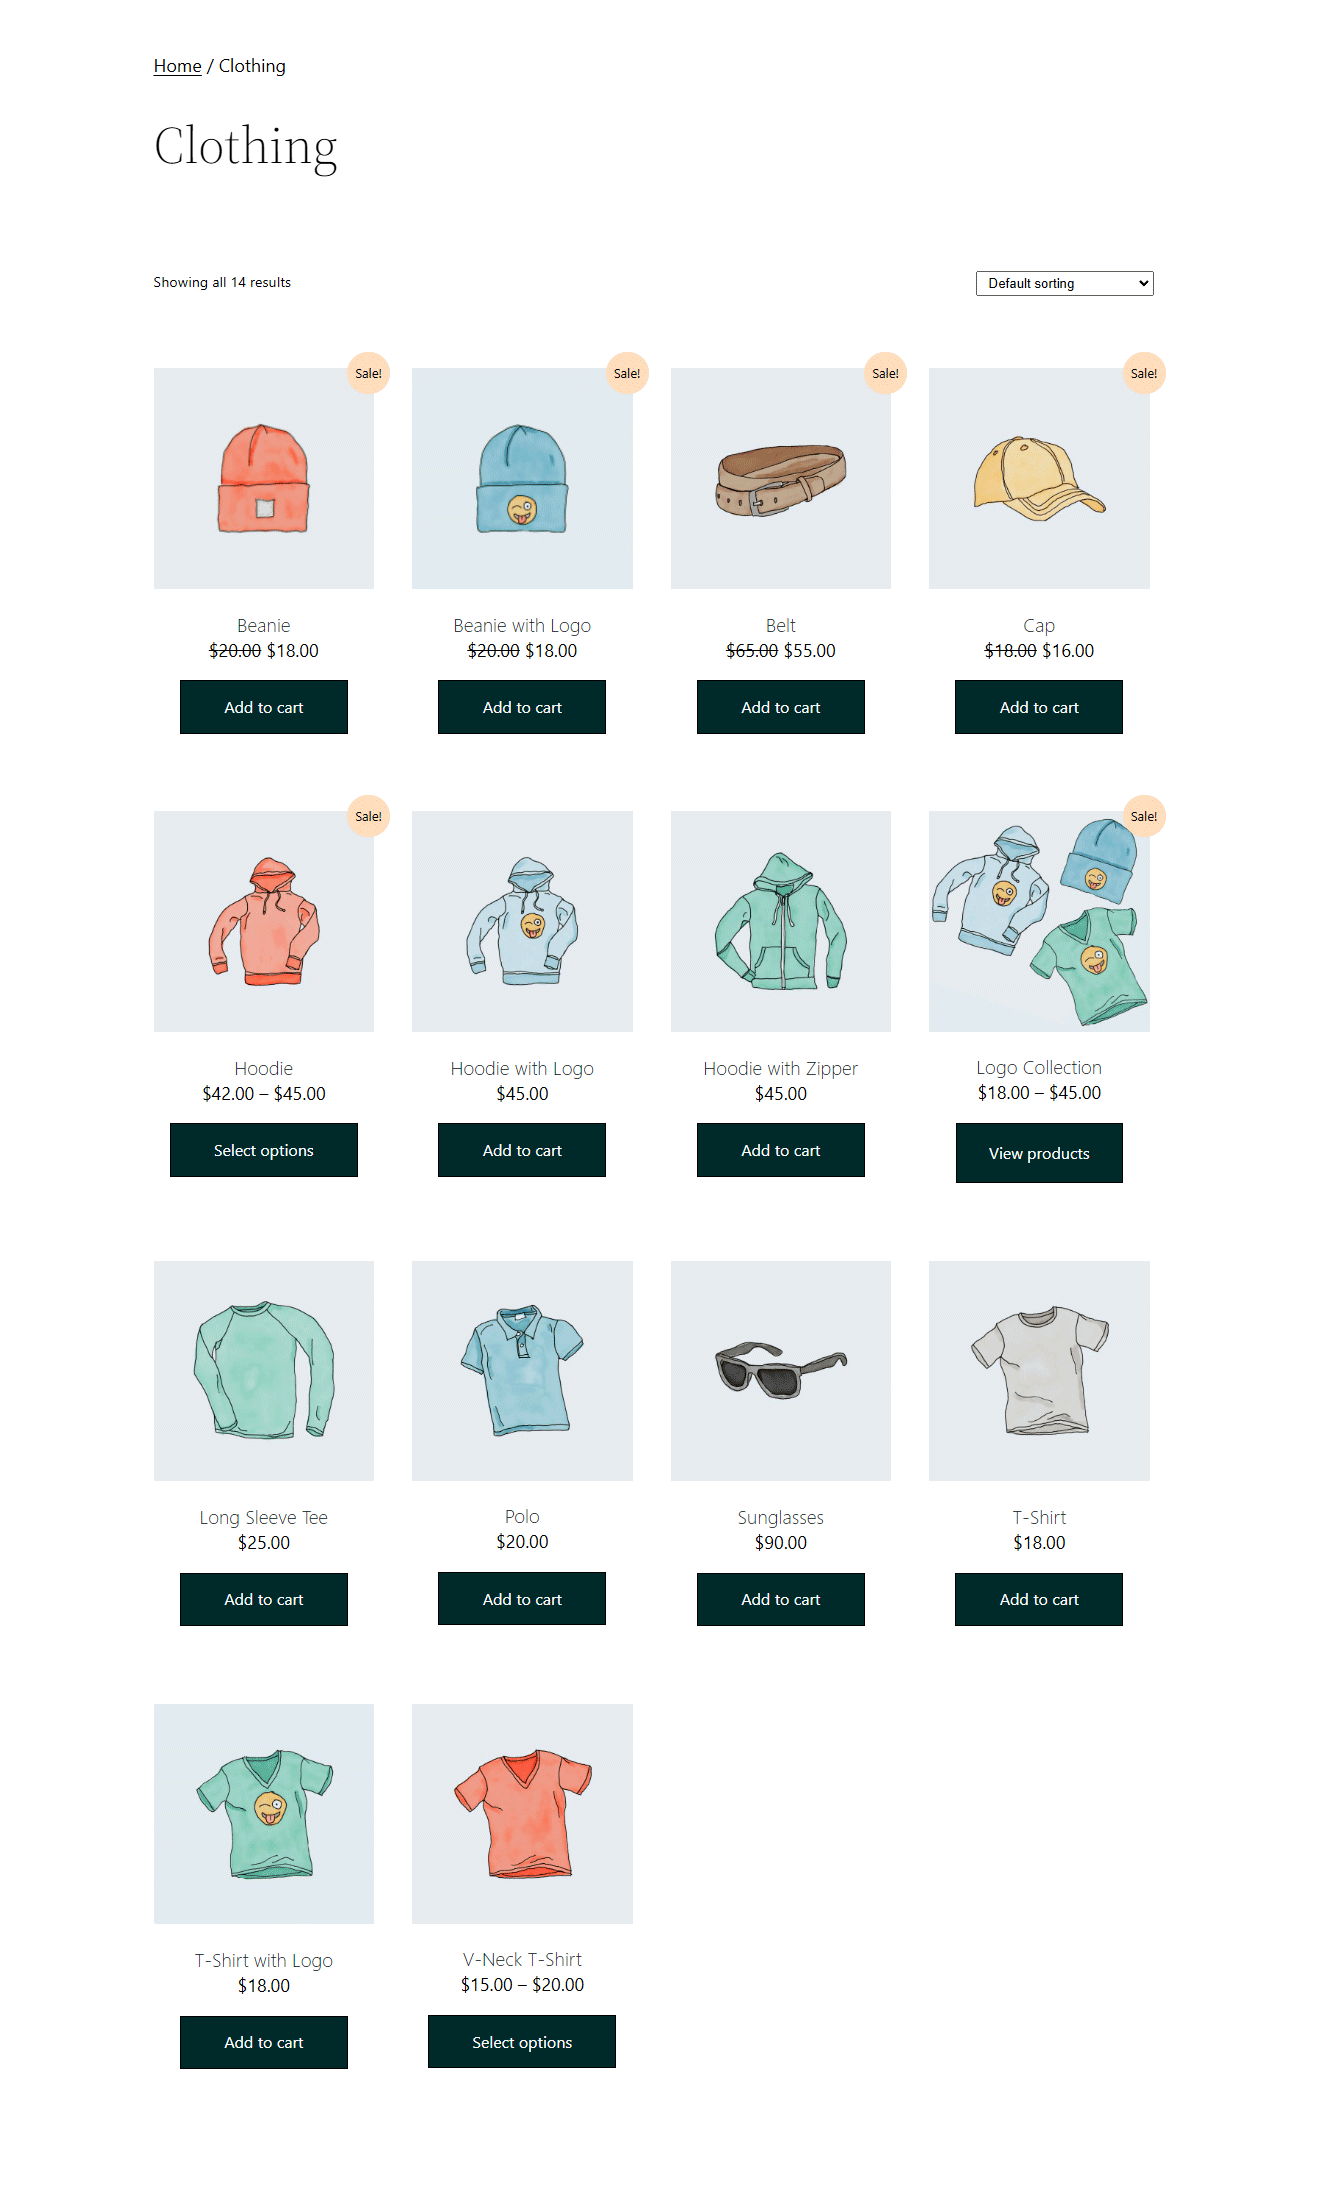
If you see, the WooCommerce default category page has a basic look that’s not very appealing. Besides, it doesn’t have any advanced options like search products using names, filter products based on different attributes, etc. All these are important to ensure a good user experience on your online store.
Besides, who doesn’t like a good-looking site that is soothing to the eyes and easy to navigate?
Well, the answer is everyone! And let’s move to the next section where you will learn how to customize WooCommerce product category page templates without any coding.

How to customize WooCommerce product category page in 6 steps
This is an easy-to-follow tutorial on how to customize WooCommerce category pages in WordPress without any coding. By following this process, you can choose the layout as well as the design of your WooCommerce archive page in no time. So, let’s get started…
Step #1: Install Elementor page builder and ShopEngine
To edit product category page of WooCommerce in Elementor using the process shown in this blog, you will need two WordPress plugins:
ShopEngine is the Ultimate WooCommerce builder for drag and drop page builder- Elementor. It’s an add-on for Elementor that comes with an enormous number of widgets and modules to make WooCommerce customization effortless.
Note: You can use the coupon community20 to get 20% OFF on ShopEngine Pro. Install Elementor first as ShopEngine is dependent on this page builder. If you need help activating ShopEngine Pro, check the documentation.
Step #2: Create a custom WooCommerce category page template
Once you have installed and activated all the required plugins, you need to create a Category Template. To create a WooCommerce custom category page template,
- Navigate to: ShopEngine ⇒ Builders Template
- Click on Add new
- Provide a Template name
- Choose Type as Archive from the dropdown
- Leave the Applicable Category field as it is to create a common template for all category
- Turn on the Set Default option to override any existing Category/ Archive Page template
- Select the blank option under Sample Design
- Click on Edit with Elementor to start building the template
Alternatively, you can also create a single WooCommerce page and then add the sections from the ready widget library of Shopengine.
Note: I chose the blank option cause in this blog, I am going to show how to create a custom category page from scratch. ShopEngine offers multiple pre-built WooCommerce category page template. If you want to use a pre-built template, choose the one you like then jump to step 5. (step 3 and 4 are mandatory if you want to build from scratch)
Step #3: Choose a layout/structure for the custom WooCommerce category page
Once you are in the editor mode, you need to choose a structure for your custom WooCommerce category page.
I am going to use 3 different types of layouts for three different sections to build a custom archive page. You can do the same as shown in the blog or choose the layout you like.
To choose a structure, click on the “+” icon, then hover on the layout you like, then just click on it.
Note: You can repeat the same process to choose different layouts.
Related: How to customize WooCommerce Product Page
Step #4: Drag and drop ShopEngine widgets and customize the settings
ShopEngine provides 8+ dedicated widgets to build custom WooCommerce archive pages. These category page widgets are
- Archive Description
- Archive Products
- Archive Title
- Archive Result count
- Archive View Mode
- Order By Filter
- Products per page filter
- Product list
- Product filters
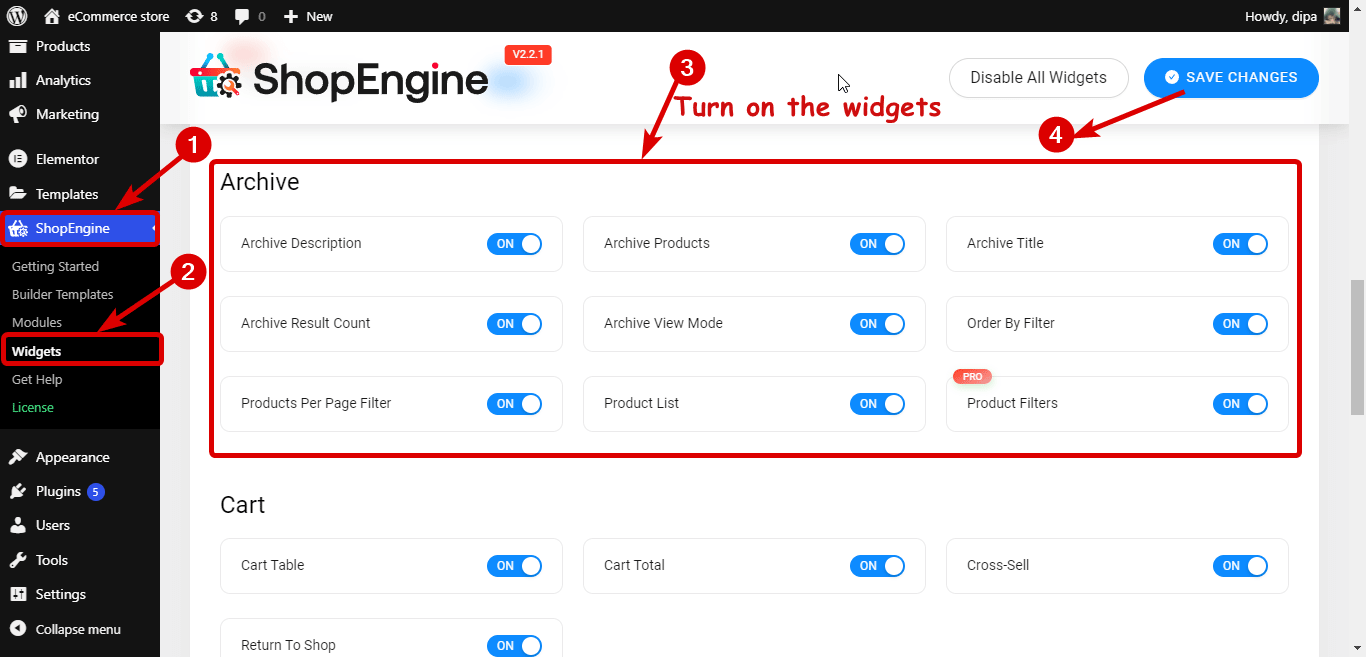
I am going to use some of these. You can choose to use all of them to edit the Elementor WooCommerce product category page. But before that, you need to ensure all the widgets are activated and available for use.
You can activate/enable the widgets from ShopEngine ⇒ Widgets. Here turn on all the widgets or the ones you are going to use and finally click on the “Save Changes” Button to update the status.
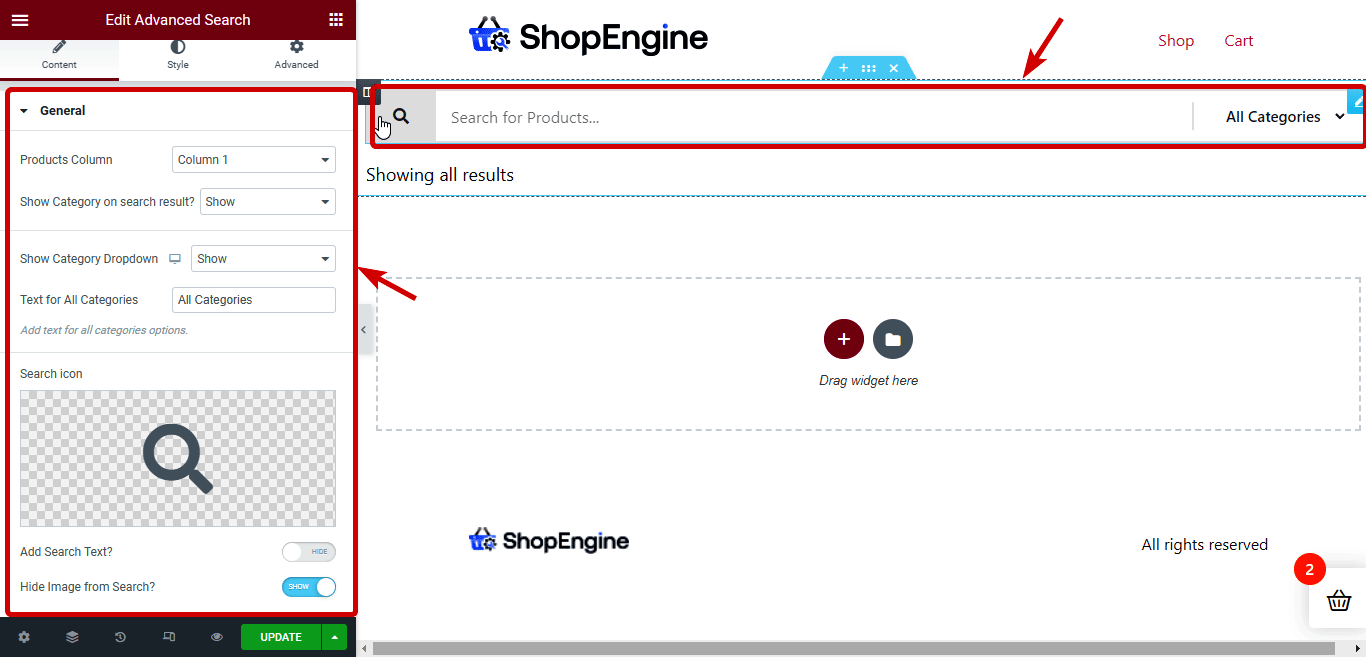
I am going to choose a one-column layout and drag and drop Advanced Search and Archive Result Count widgets.
You can select the widget and customize related settings. For example, if you click on the Advanced Search widget, on the left panel, you get options such as Products Column, Show Category on the search result, Show Category Dropdown, Text for All Categories, Search icon, etc.
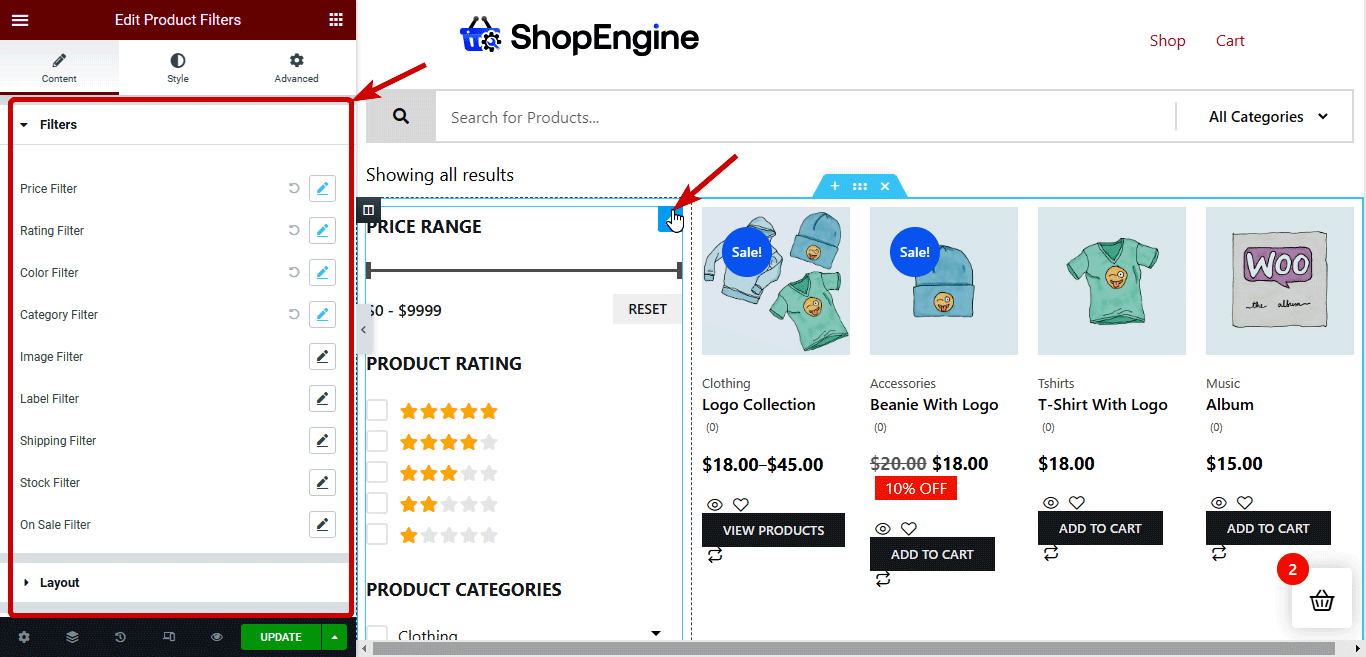
Now, for the next section, I am going to use the steps described in step 3 to insert a new layout of two columns. Then drag and drop the Product Filters and Archive Products widgets.
Note: The product filter widget is only available with ShopEngine Pro. So, make sure you have installed and activated ShopEngine Pro.
You can customize filter-related options such as Price Filter, Rating Filter, Color Filter, Category Filter, etc. In addition, you can customize layout-related options like Filter View Mode, Enable Container Toggle Button, Columns (per row), etc. You can also add a custom attribute list if you want.
You can change the Archive products layout settings from the WooCommerce layout option. For more details about how to change the layout option, you can check this doc. Moreover, you can personalize content settings such as Flash Sale Badge, Show Categories, Show Description Rating, etc. You can also choose a custom pagination icon and custom ordering of the CTA button like Add to Cart, Add to wishlist, Quick view, etc.
Or, you can also add a floating cart option to encourage the users buy more from you. Adding a mini cart can be a good option too.

Related: How to Customize WooCommerce My Account Page
Step #5: Customize WooCommerce Archive page’s style settings
Once you are set with your customized layouts and personalized widgets, it’s time to change the look of it by changing the style settings of these widgets. To change the style settings you need to click on the widget and on the panel go to the Style tab to access all the style settings. Let’s have a look at the style option for the widgets used in this tutorial:
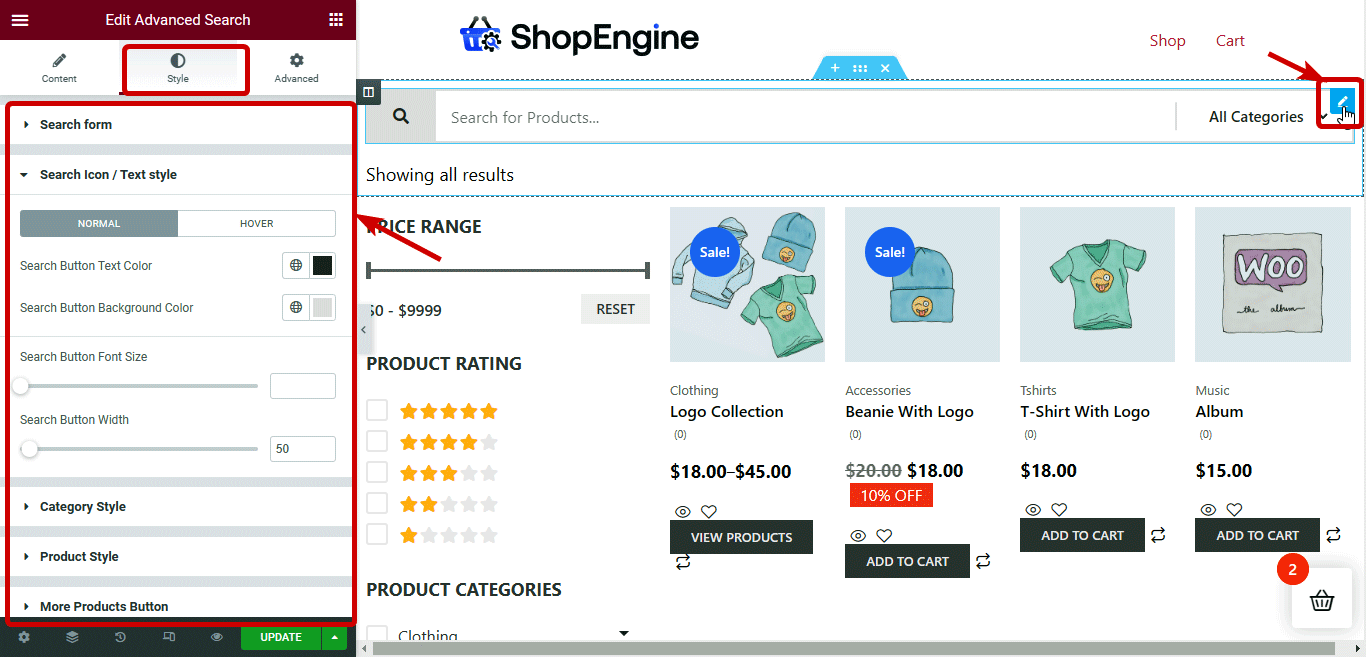
Advanced Search: You can customize various options of the Search form, Search Icon / Text style, Category Style, Product Style, More Products Button, and Global Font.
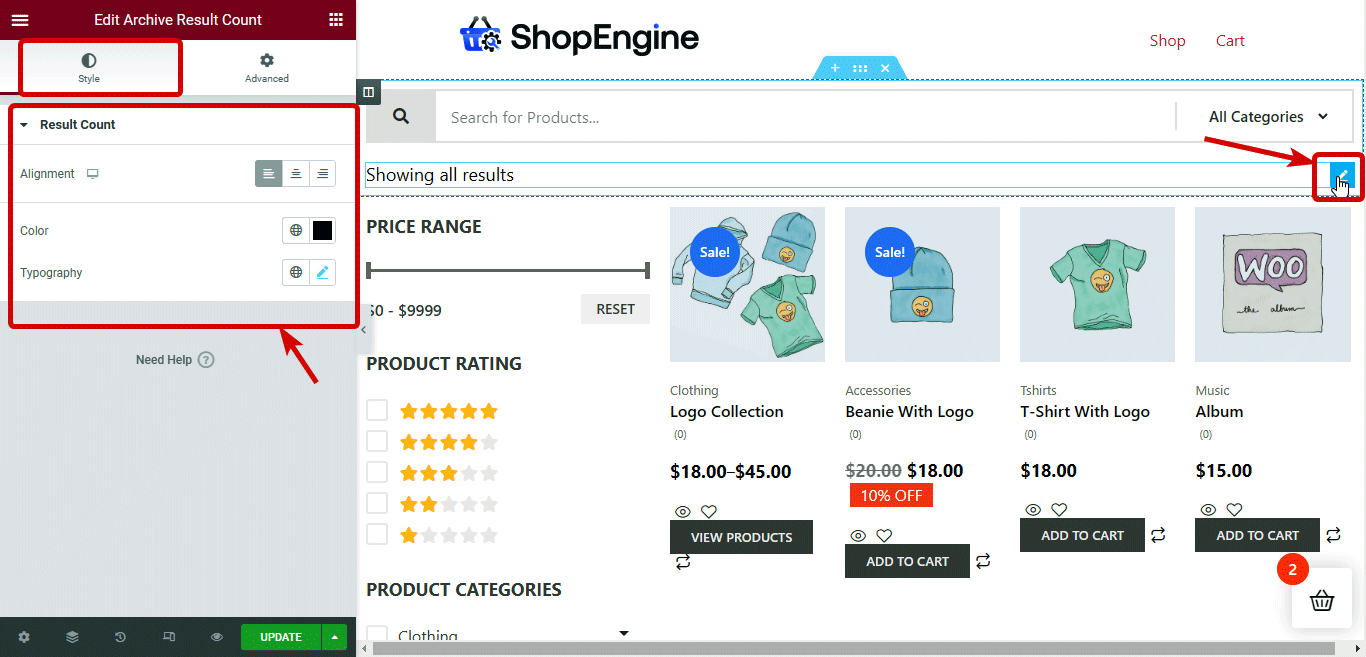
Archive Result Count: You can customize the alignment, color and typography options.
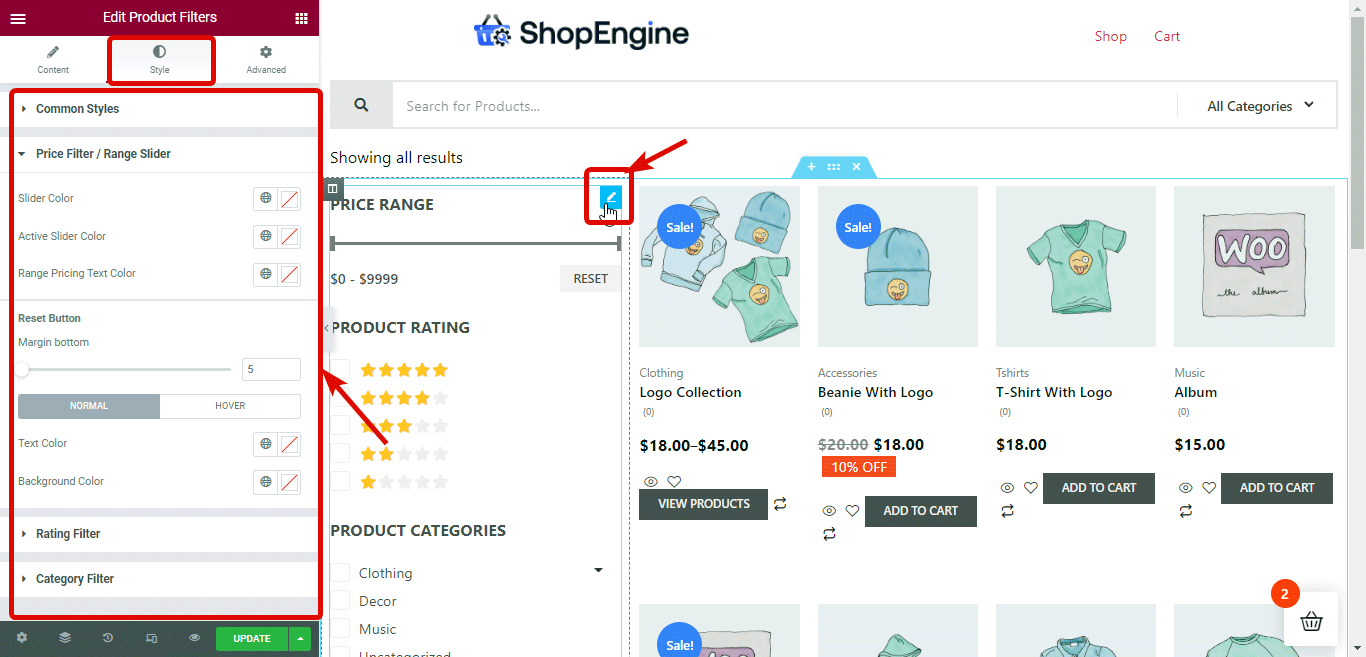
Product Filters: You can find options to style the product filters section under different categories such as Common Styles, Price Filter / Range Slider, Rating Filter, and Category Filter.
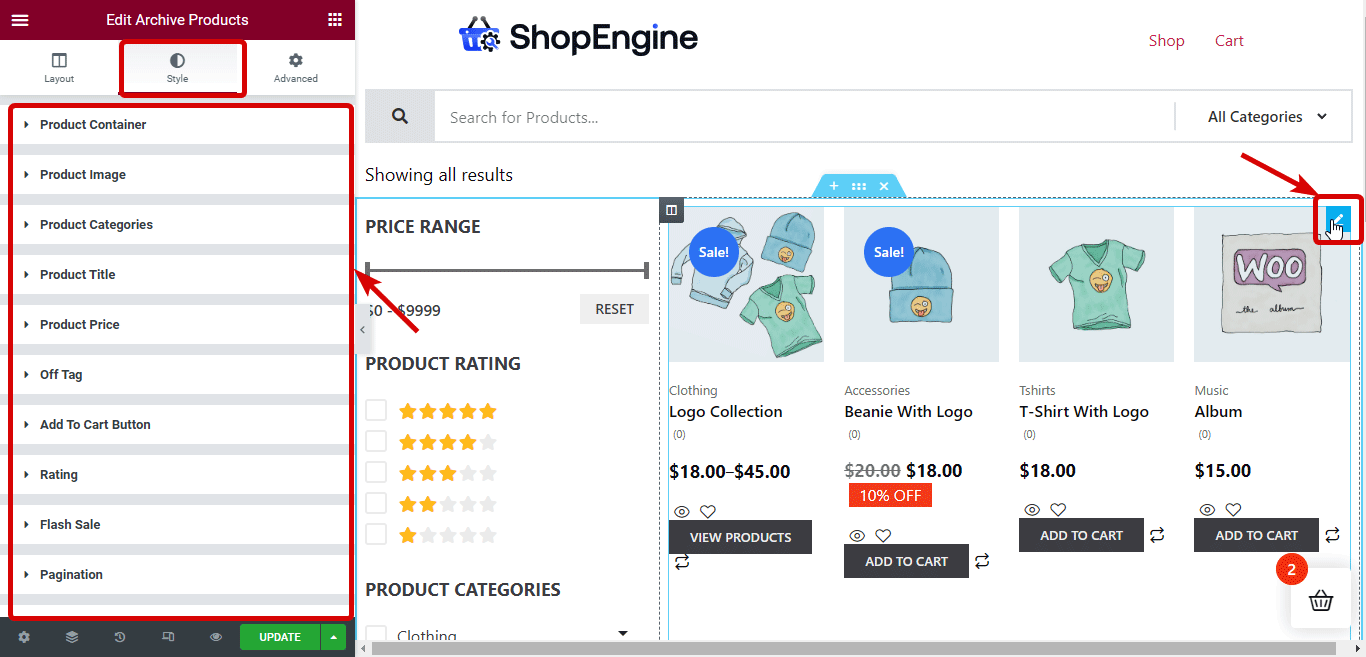
Archive Products: You can personalize the archive product style settings by customizing the options provided in sections like Product Container, Product Image, Product Categories, Product Title, Product Price, Off Tag, Add To Cart Button, Rating, Flash Sale, and Pagination.
Related: How to Customize WooCommerce Cart Page
Step #6: Update and Preview the WooCommerce custom category page template
After finishing the style customization, click on the Update button to save. Now you can either click on the preview button to see the preview or visit any category page manually and you should see the new template is activated like the preview below:
Now, this was the process of creating a customized category page for your WooCommerce store. But how about creating a different design for each category of your store? Well, you can do that as well with ShopEngine. To learn more details, move to the next section.
How to build custom WooCommerce Archive page for each category separately?
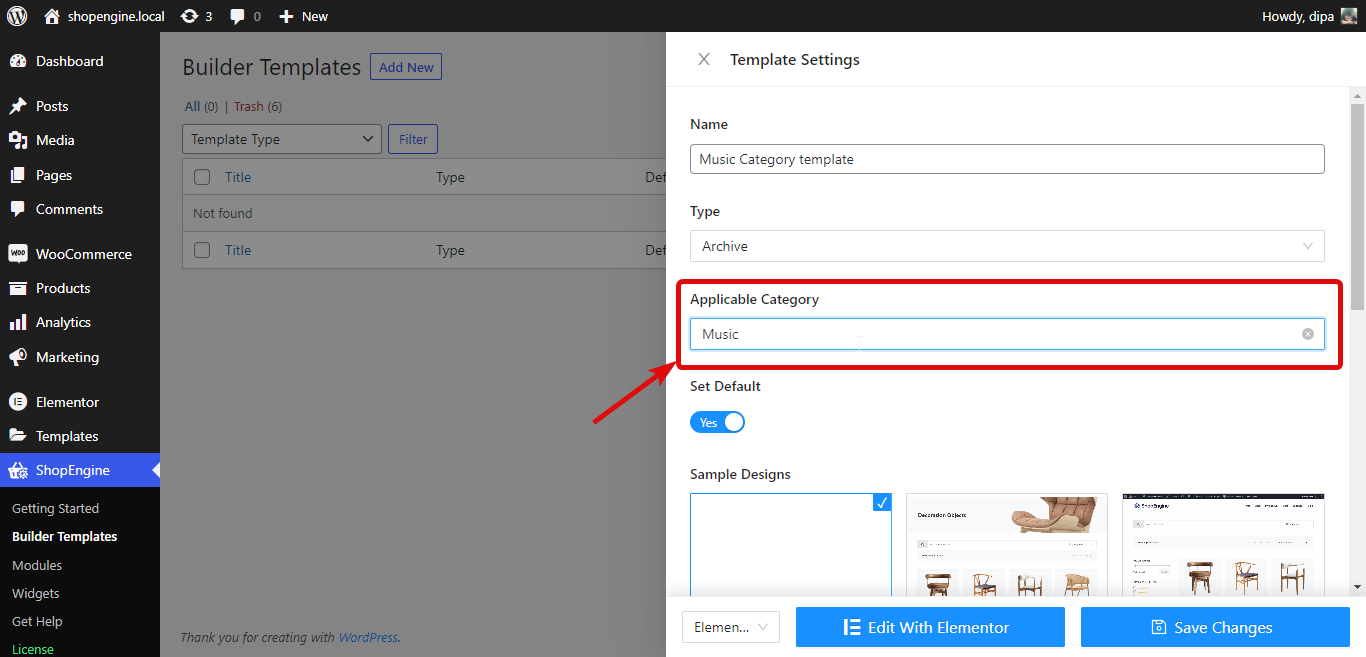
You can build a totally different design for each category or a specific category only of your WooCommerce store. For that, the process remains pretty much the same as shown above. But in step 2, Create a category page template, you can not leave the Applicable Category field blank.
You need to select the category in the Applicable Category field for which you want to apply the design template you are building. For example, if you want to create a design that should only be applicable to the Music category, then in the Applicable Category field choose Music.
The rest of the steps will be the same as building a general category template design shown in the section above.
Note: When you create an archive template for a specific category, it will only apply to that category page and not the rest of the category pages.
For the rest of the categories you need to create a different category template with the “Applicable Category” field blank for all categories or a different one for each of them. Otherwise, the rest of the categories will have the default WooCommerce archive template or the template your activated theme offers.
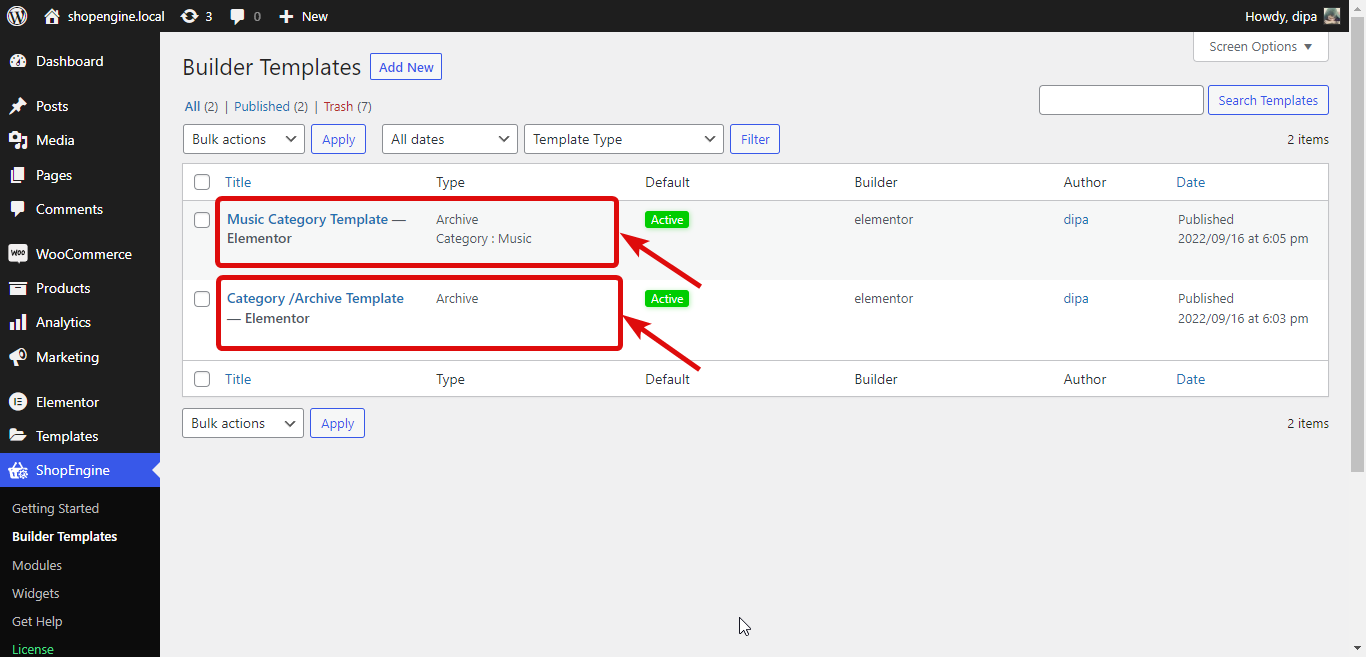
Here is a preview of different WooCommerce category page with different design built with ShopEngine:
Note: The option to create different template/design for different category of your WooCommerce site is only available in the Pro version of ShopEngine.
Bonus: 5 Ways to optimize the WooCommerce category page to increase the conversion rate
Here are some useful tips that you can follow to optimize your WooCommerce archive page to boost conversion rate:
Provide product filter option
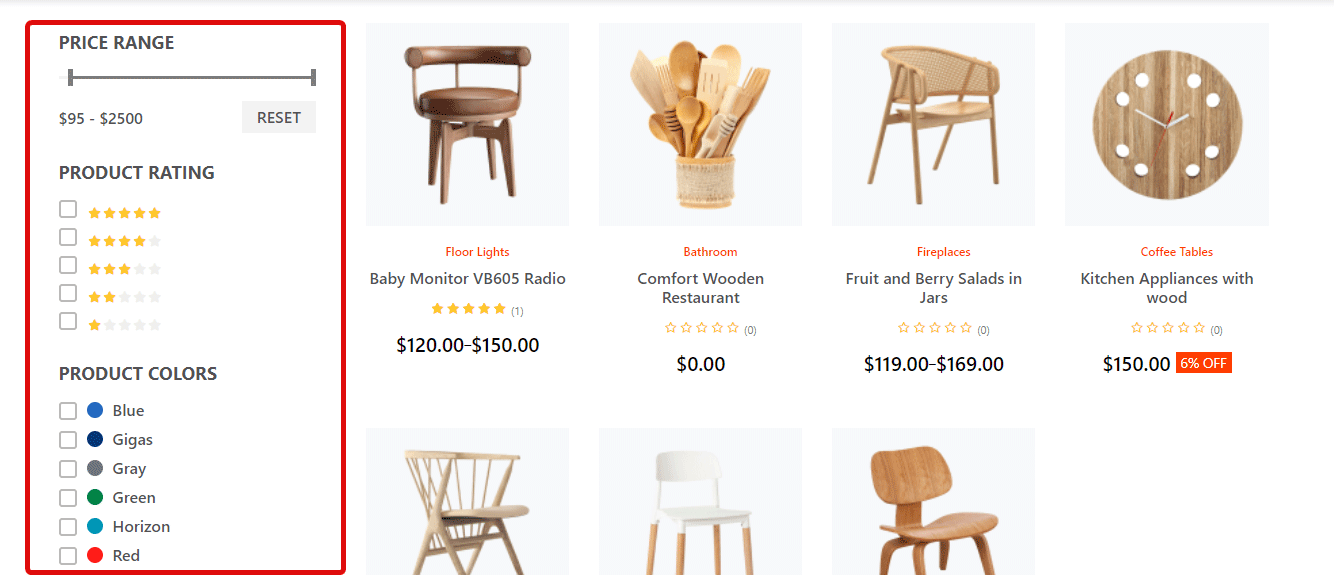
Your category page by default shows all the products of that category. But usually, people are looking for a product of a certain color or size or any other attribute.
So, you should provide the options to filter and narrow down the number of products of a category according to their preferred attribute. This way, people can easily find their products and this will help you to boost your sales.
Also Check How to Add Currency Switcher to WooCommerce Website in 5 Steps
Add product comparison option
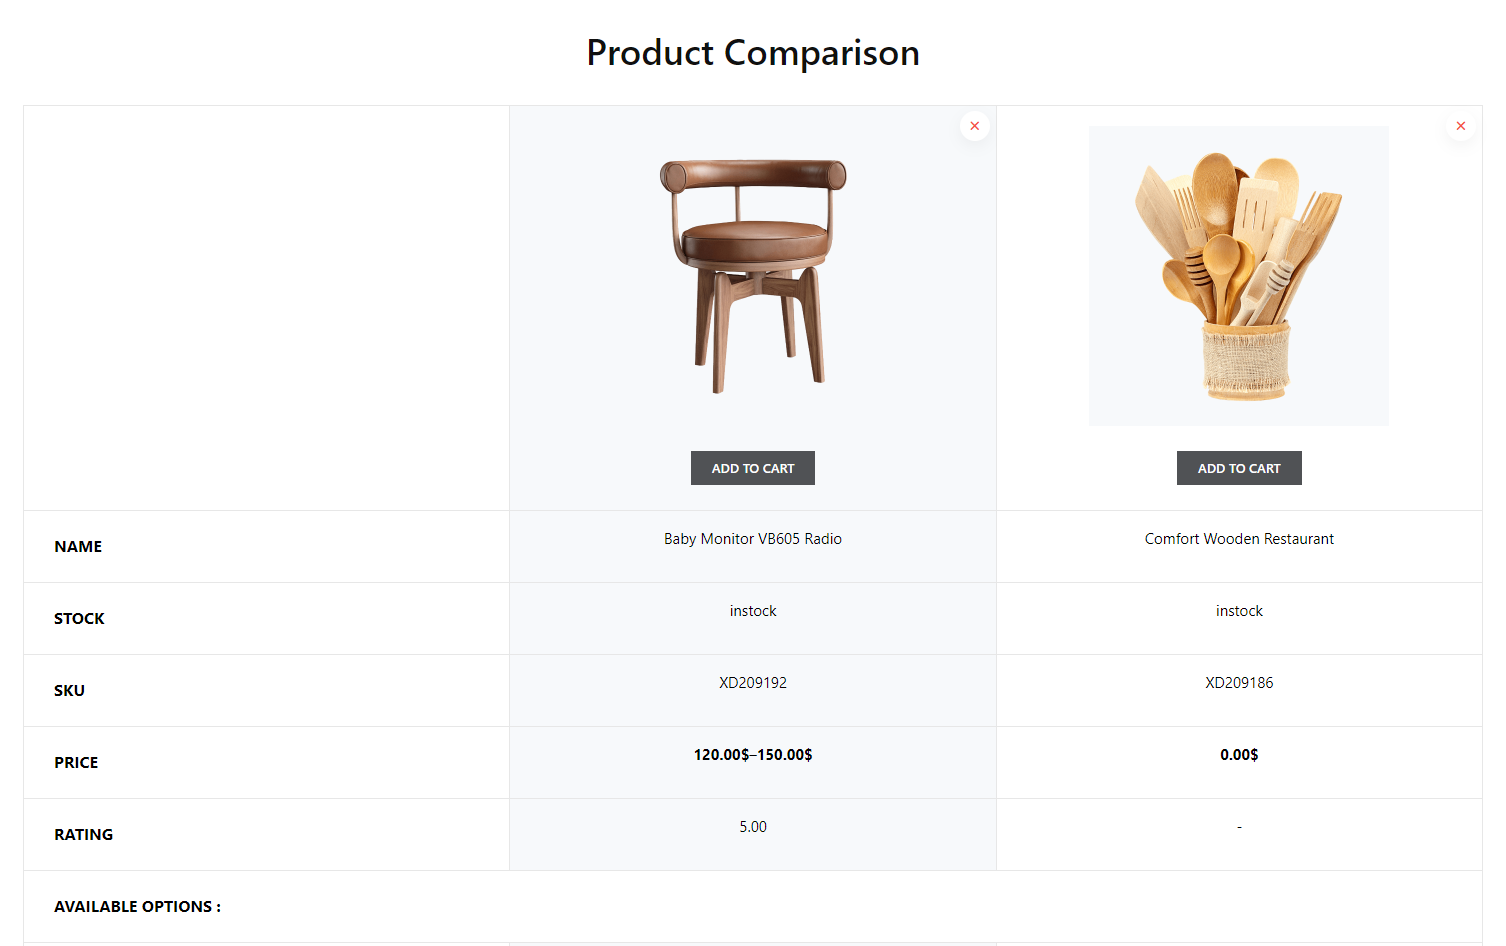
Adding a product comparison option to your WooCommerce will help consumers to compare products of a similar kind. This option is needed especially if you offer digital products like mobiles, watches, etc.
The product comparison option will help customers to make a decision faster. And this will help you to achieve your goal of higher sales fast.
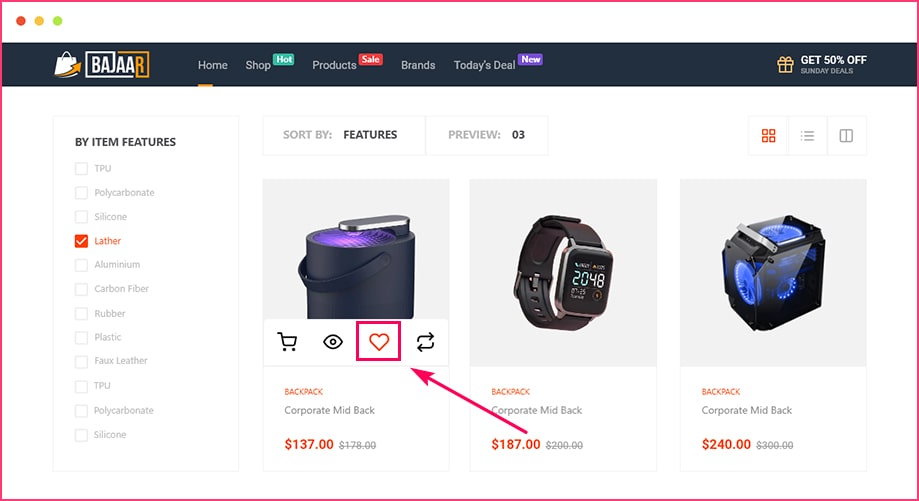
Wishlist provides the option to add products to the cart for later purchase. Some people don’t find Wishlist to be that effective when it comes to conversion. But honestly, it’s highly effective.
Because people usually add products to their wishlist when they really like the product but for some reason can’t purchase it right away. But it doesn’t mean, that person will not buy the products later.
In most cases, people do tend to buy products they have added to their wishlist. So, do add a wishlist option on your WooCommerce Category page.
Quick View option
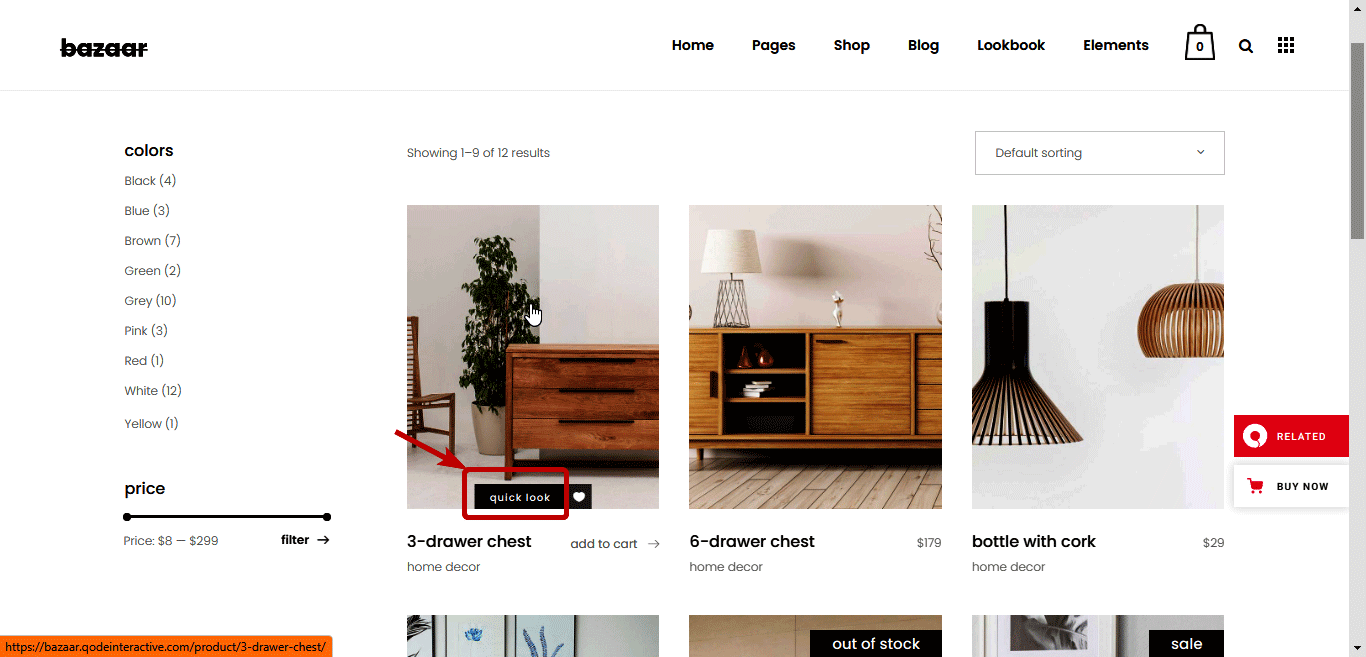
Adding a quick view button ensures a great user experience as people don’t have to visit separate pages to know about a product. Using this Quick view option, your customer can stay on the category page and get to know details about products with just one click.
If people have to go to a product page to view it, then they can leave your site without purchasing the product in case they don’t like it. However, if you provide the quick view option so customers can check out multiple products while staying on the same page, it will elevate the shopping experience. And as a result, will help you to increase your store’s sales.
On-page SEO optimization
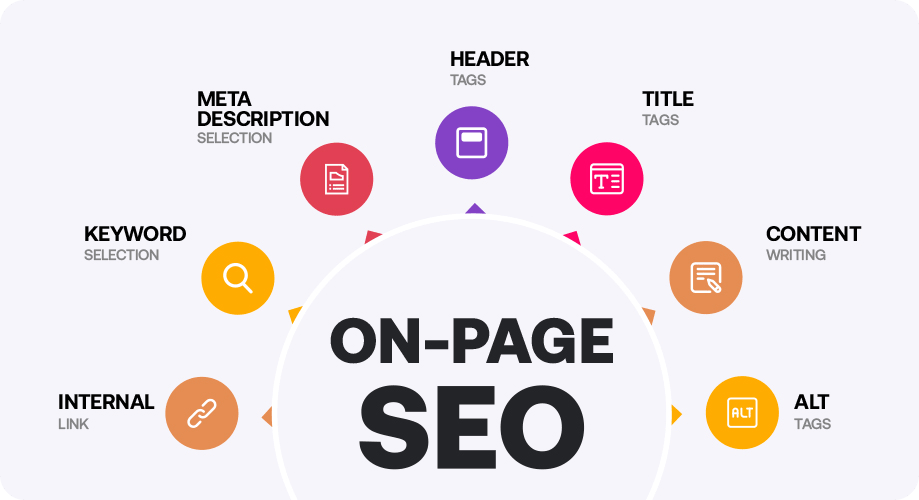
Category pages are the indicator of page hierarchy on your website. So, optimizing your category page for search engines should never be neglected. Because, while you want your home and product page to rank, your category page if ranked can also bring you a lot of traffic.
The more traffic you get on your website will increase your chance that you will get more conversions. So, make sure you add proper SEO metadata, optimize internal and external linking, optimize the URL, etc. You can take help from AI SEO plugins like GetGenie.
For better conversion, try to create a custom checkout page for your WooCommerce store.
Are you thinking all the points seem valid, but will I need multiple plugins to add these options to my site to increase conversion?
Well, you have nothing to worry about. Because ShopEngine apart from being a fabulous WooCommerce customizer with abundance of WooCommerce widgets, it also provides 13+ modules like Wishlist, Quick checkout, Product Comparison, etc.
Morever, you can customize your complete WooCommerce store with this plugin. using this category editor, you can edit all your WooCommerce pages; from the shop page to thank you page. Watch the video to get to know about the vast features ShopEngine has to offer.
Other WooCommerce related blogs:
👉 How to add advanced WooCommerce custom checkout field
👉 Best Shopping Cart Plugins for WooCoomerce
👉 How to Solve WooCommerce Empty Cart Error
👉 How to Add WooCommerce Multi Step Checkout
Final Words on custom WooCommerce category page
A category page is an essential page for both your customers and Search Engines. Customizing and optimizing your category pages can only help you gain more success in your eCommerce business.
The good thing is now you know how to customize WooCommerce category page in WordPress and how to optimize the page to double your conversion rate. On top of that now you know how to create custom WooCommerce Category pages for each category separately.
You can leverage the most complete WooCommerce builder available in the market named ShopEngine to optimize your eStore’s category page. And you can get his all-rounder WooCommerce plugin at 20% OFF now!
🔔 🔔 To purchase ShopEngine Pro at 20% less price use the coupon code community20.
So, let’s hurry and join the community of WooCommerce lovers now!
Leave a Reply